![]() GM3000C Electric Meter
GM3000C Electric Meter
Quick Installation Guide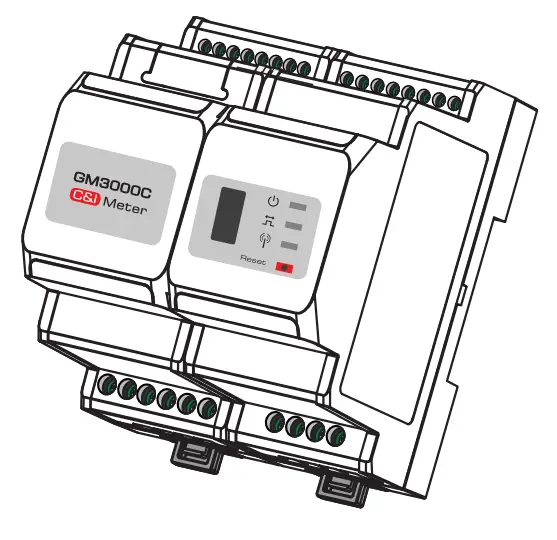 V1.0
V1.0
2022-01-30
Items Supplied
1 x GM3000C Meter
1 x Screwdriver
1 x Quick Installation Instructions
18 x Wiring Terminals
Technical Data
| Model | GM3000C |
| Reference voltage | 230 Vac |
| Reference frequency | 50/60 Hz |
| Input current | 1 A (5 A) |
| Overall power consumption | <3 W |
| Electrical measurements | Current, Voltage, Active Power, Reactive Power, Pow |
| Energy metering | Active Energy, Reactive Energy |
| Voltage/Current accuracy class | Class 1 |
| Active energy accuracy class | Class 1 |
| Reactive energy accuracy class | Class 2 |
| Communication method | RS485 (9600 bps) |
| Interface | LED Indicator, USB Interface, Reset Button |
| Operating temperature | -25 – +60°C |
| Storage temperature | -30 – +70°C |
| Humidity | <95%, Non-condensing |
| Altitude | <2000 m |
| Degree of protection | IP20 |
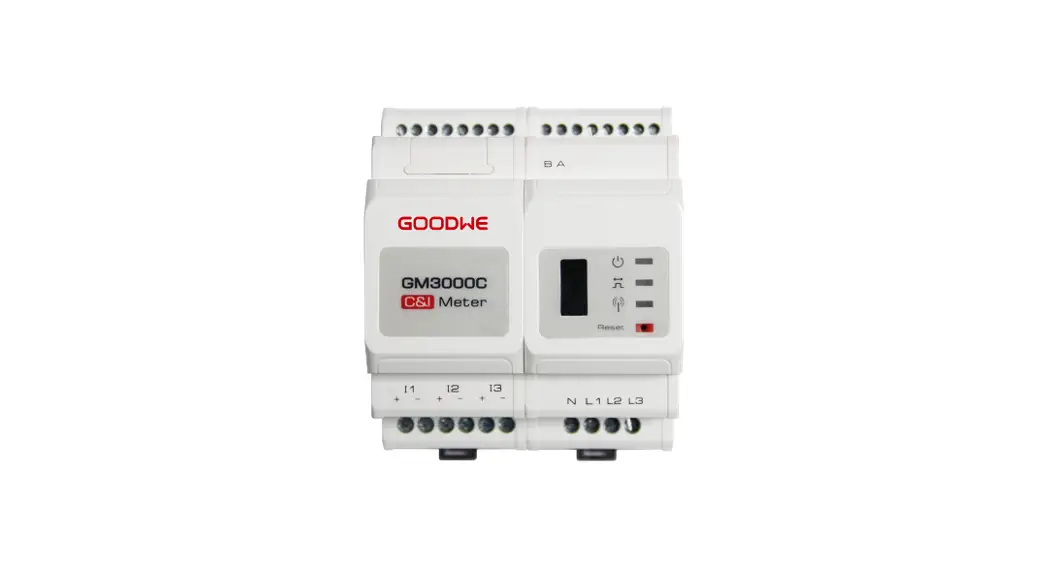
Product Overview
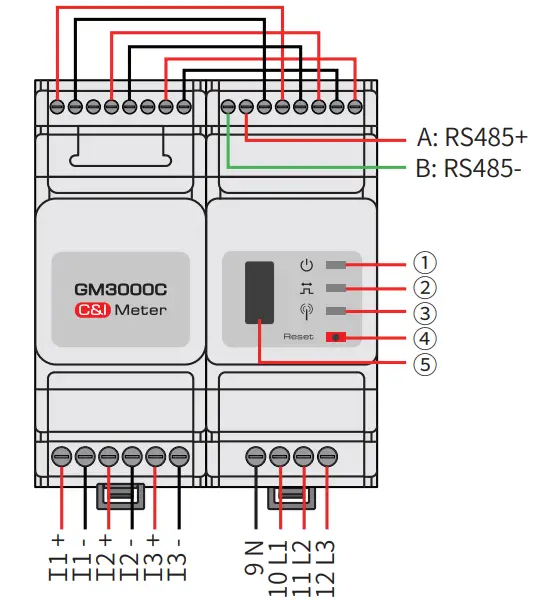
| NO. | Component | Description |
| 1 | Power LED | Normal status: ON |
| 2 | Energy consumption LED | Consuming: ON |
| Generating: Blinking | ||
| 3 | Communication LED | Blink once detecting data transfering |
| Blink 5 times as Reset succeeds | ||
| 4 | Reset button | Press less than 3 s: Meter Reset |
| Press 5s more or less:Meter Settings Initialization | ||
| Press more than 10 s: Meter Initialize settings and Clear Energy Data | ||
| 5 | For after-sales maintenance. |
Equipment Installation
![]() NOTE
NOTE
- The meter is installed on a rail, and should not be installed outdoors.
- When operating the meter, use insulation tools and wear personal protective equipment to ensure personal safety.
Dimensions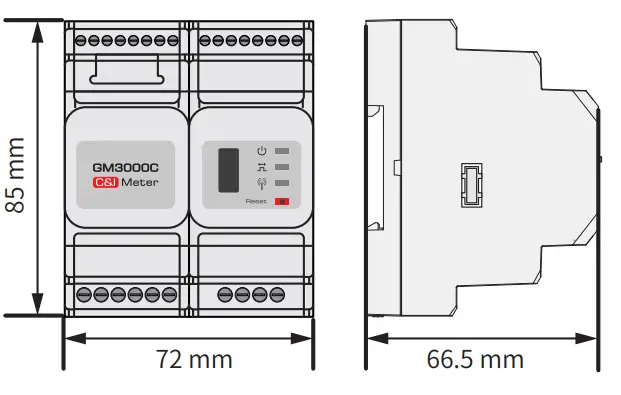
Installation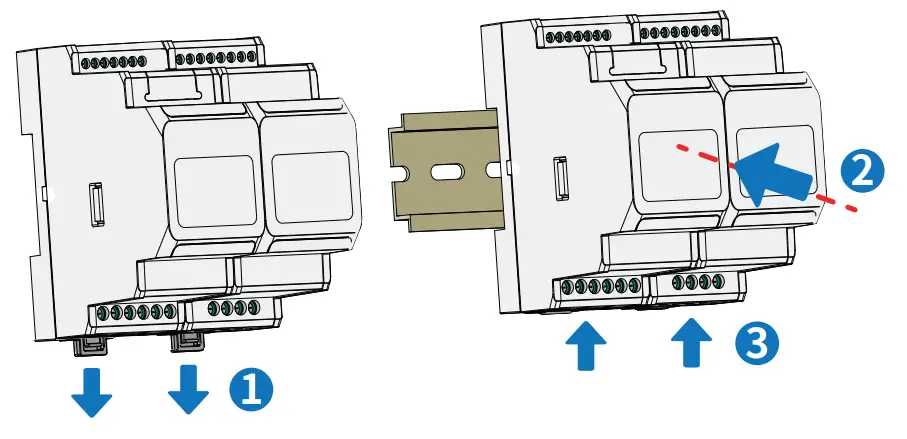
Cable Connections
System comprised of a single three-phase unit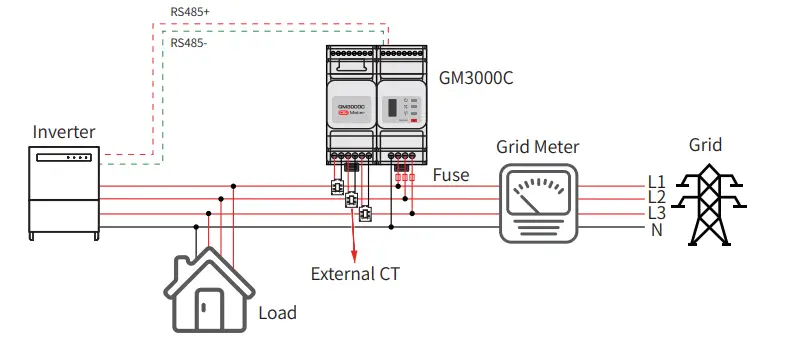 System comprised of multiple three-phase units
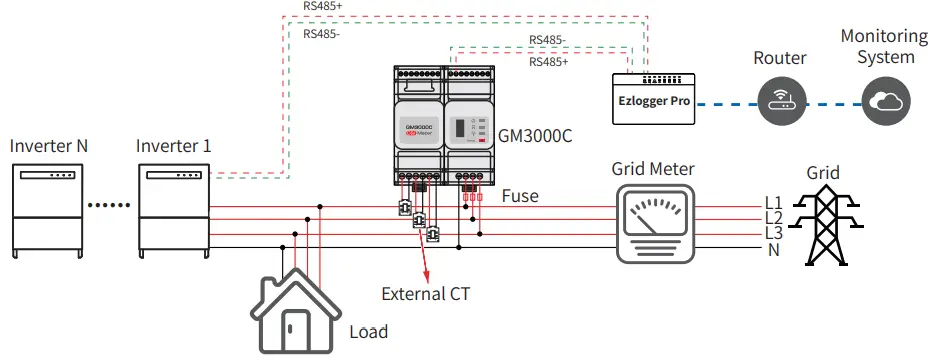
![]() NOTE
NOTE
- Requirements for the external CT specifications:
(1) Choose nA/5A for the current transformation ratio of the external CT. (n: CT primary input current value between 200 – 5000, which is chosen by the user according to the actual conditions. 5A: CT secondary output current.)
(2) Sampling error for the CT current ≤1%(0.5、0.5s、0.2、0.2s is recommended).
(3) CT bore size must be greater than the outer diameter of AC power line to make sure the AC power line can be inserted through CT.
(4) It is recommended to choose the CT with 16AWG cable.
(5) See the instructions provided by the respective manufacturer for specific CT wirings to ensure that the direction of the connections is correct and that they are functioning properly. - An incorrect inlet or direction from the external CT to the meter cable can cause damage to the device or incorrect acquisition of data.
- Do not tamper with the cables that are pre-installed with the meter.
- The direction of the external CT is from P1 end to P2 end, and the corresponding AC power line direction is from inverter side to grid side.
- It is recommended to add an overcurrent protection device (rated current 0.5A) to the voltage input terminal (L1/L2/L3) of the meter.
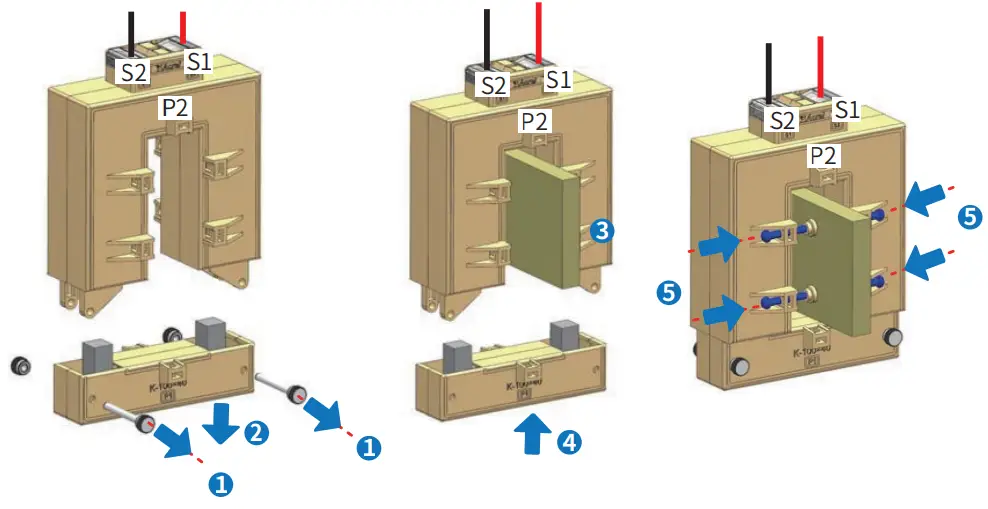
Connect CT cables
Parameter Setup
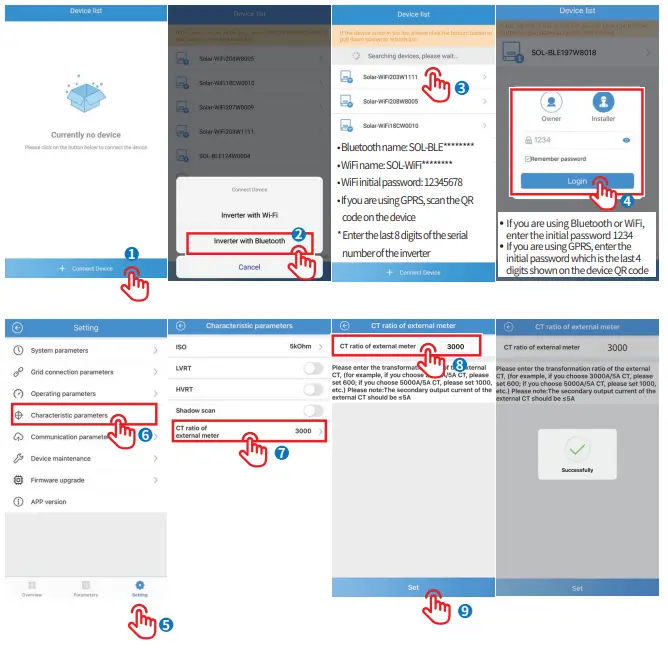
Set the CT parameters using the SolarGo APP (system comprised of a single three-phase unit,with the Export function enabled)
When the GM3000C is used with the Inverter such as BTC series or ETC series etc.,please refer to the corresponding user manual for CT-related parameter settings.![]() NOTE
NOTE
Before setting the parameters, make sure that:
- The inverter is powered up on the DC side.
- The SolarGo APP has been downloaded from Google Play or App Store.
- Communication is functioning properly between SolarGo APP and inverter.
- Please use the initial password when logging in for the first time, and change it as soon as possible to one that is memorable for you. To keep your account secure, it is recommended to change your password regularly.
 http://www.sems.com.cn/home/solargo
Set the CT parameters using ProMate (system comprised of multiple inverters)![]() NOTE
NOTE
Before setting the parameters, make sure that:
- Both EzloggerPro and GM3000C is powered up.
- GM3000C is correctly connected to COM4 of EzloggerPro via RS485.
- The Ezlogger Pro Promate software has been downloaded from GOODWE’s official website and installed on the computer.
- ProMate is connected to EzLogger Pro successfully. For detailed procedures, refer to the EzLogger Pro Series User Manual.
Descriptions of the Export Function
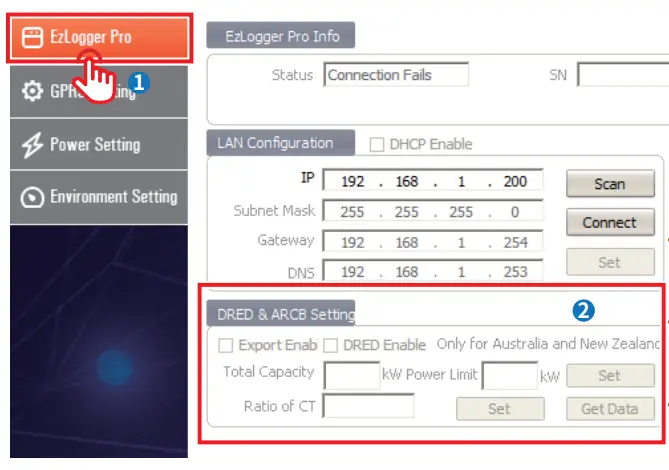
- Total Capacity: Set according to the total capacity of the PV station.
- Power Limit: Set according to the target power that needs to be fed into the grid.
- Ratio of CT: Set according to the CT transformation ratio.
Descriptions of the Reactive Compensation Function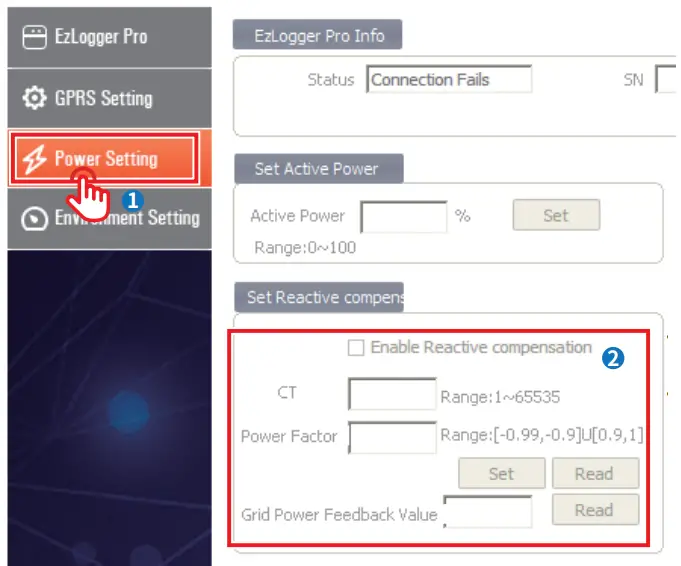
- CT: Set according to the external CT ratio.
- Power Factor: Set the target power factor as required.
- Grid Power Feedback Value: Check the maximum power factor allowed for the system.
GoodWe Technologies Co., Ltd.
No. 90 Zijin Rd., New District, Suzhou, China
www.goodwe.com
[email protected]


