HARVIA Ventura Wall and Ceiling Elements
Instructions for Installation of Ventura-sauna interior
- Read also general instructions for the installation
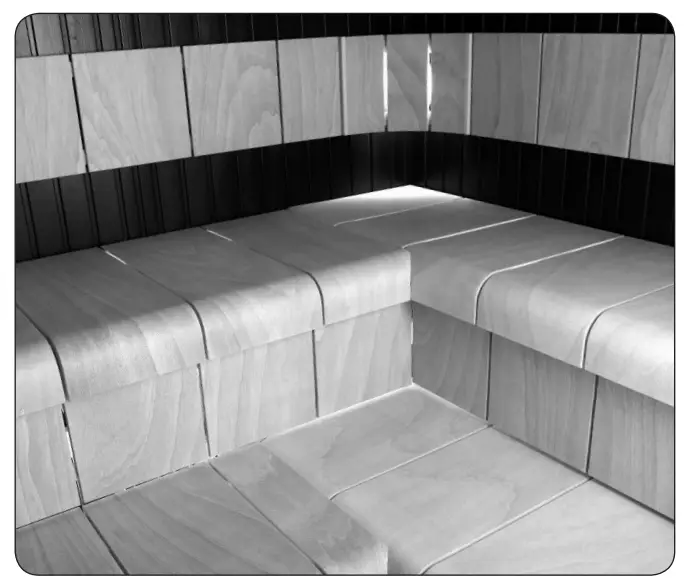
- Verify bench height from your sauna plan. Regular bench heights have been used in this manual.
VENTURA
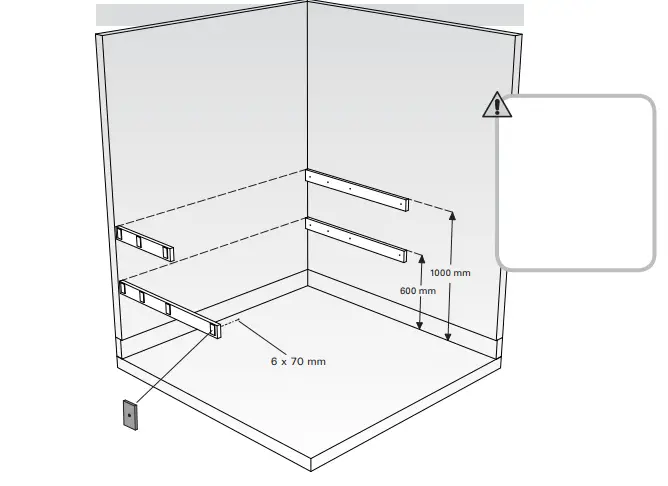
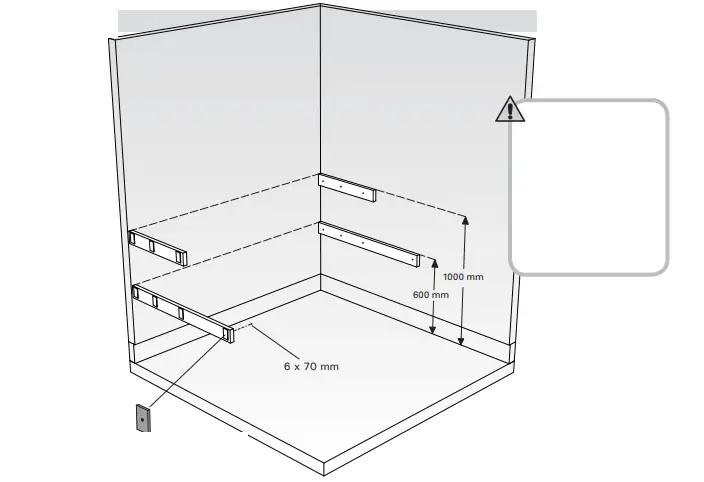
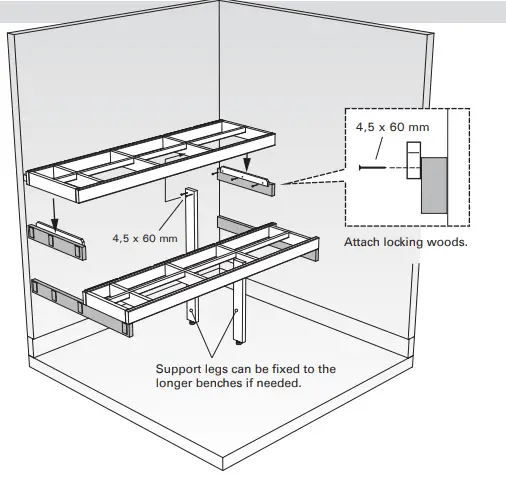
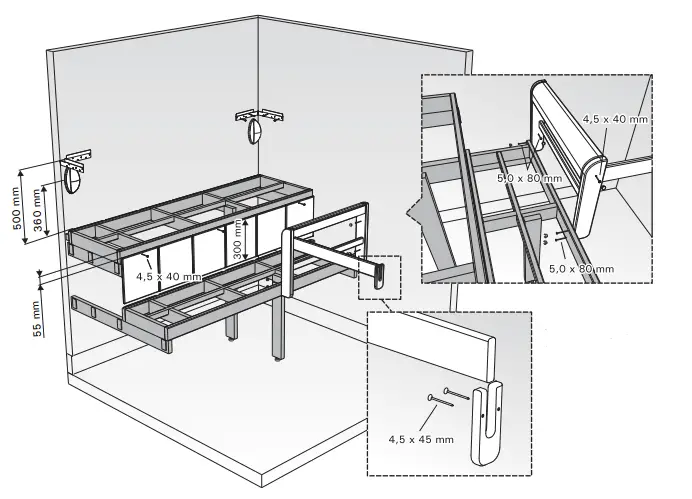
Installation of straight benches
- Verify bench height from your sauna plan. Regular bench heights have been used in this manual.
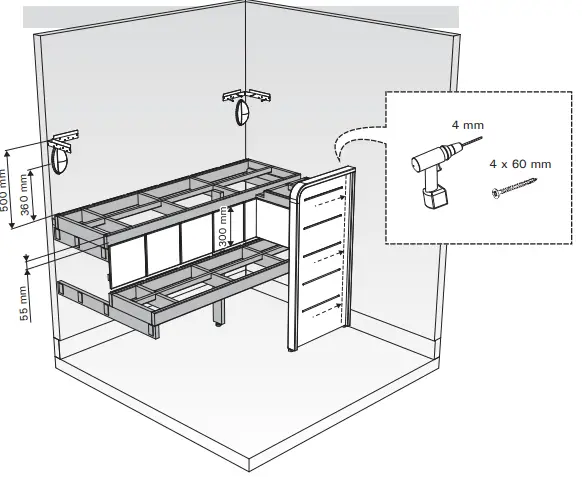
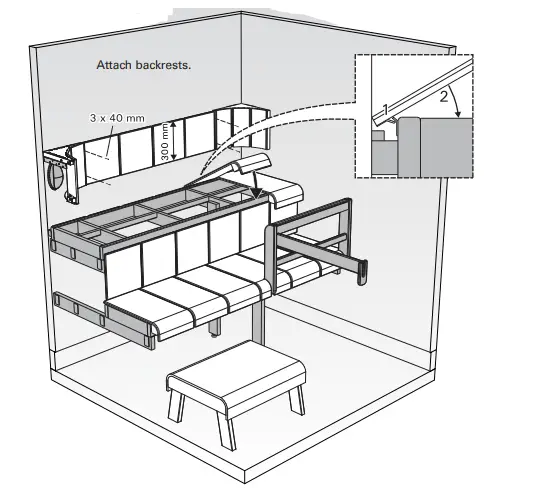
- Attach plywood pieces and bench supports.


- Attach sheet metal brackets for the lamp shades.
- Attach footrest to the bench frame.
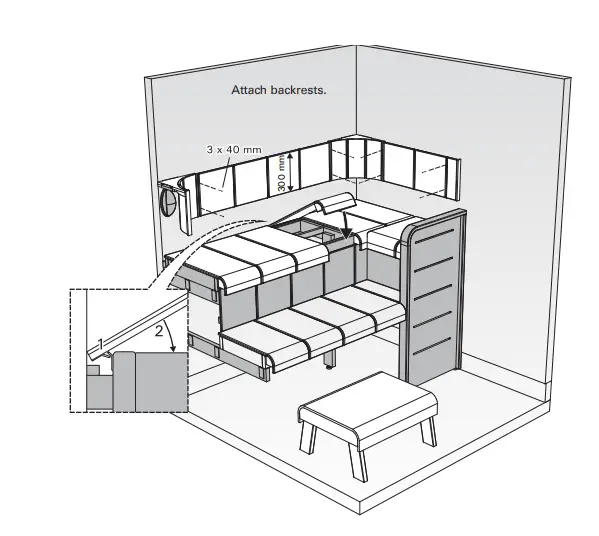
- Attach safety railing to the wall with the U-piece.

- Lift shades to the sheet metal brackets

Installation of the end support benches
- Verify bench height from your sauna plan. Regular bench heights have been used in this manual.

- Attach plywood pieces and bench supports.

- Attach sheet metal brackets for the lamp shades
- Lift shades to the sheet metal brackets.

- Harvia Sauna
- PL38
- 40951 Muuramne
- Finland
- www.harviasauna.com