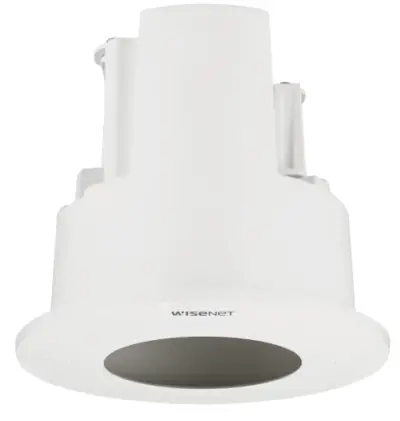
Hanwha Techwin SHD-1128FPW In-Ceiling Housing
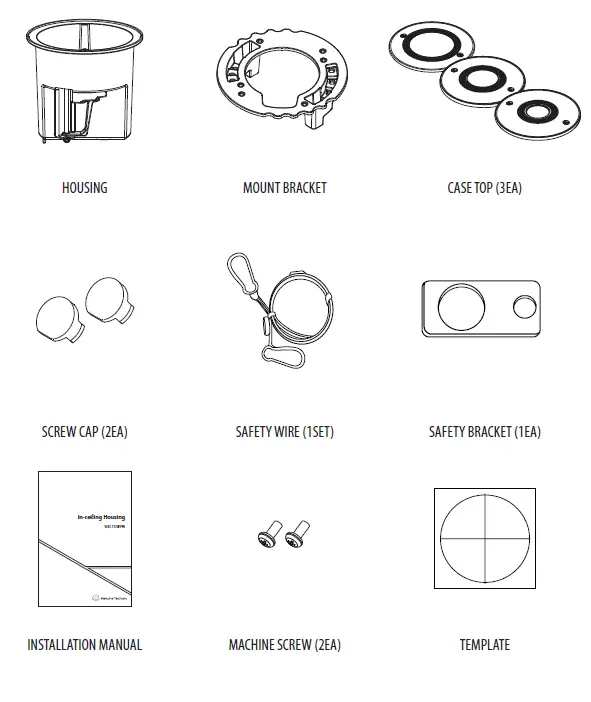
Package
Product Features
This In-Ceiling Housing is a mounting adaptor that is designed to mount the dome camera in built-in style on a double-layer ceiling. (For compatible models, please visit our website.)
Installation Precautions
- Select an installation position or place that can endure more than 4 times of the total weight of the installation structure.
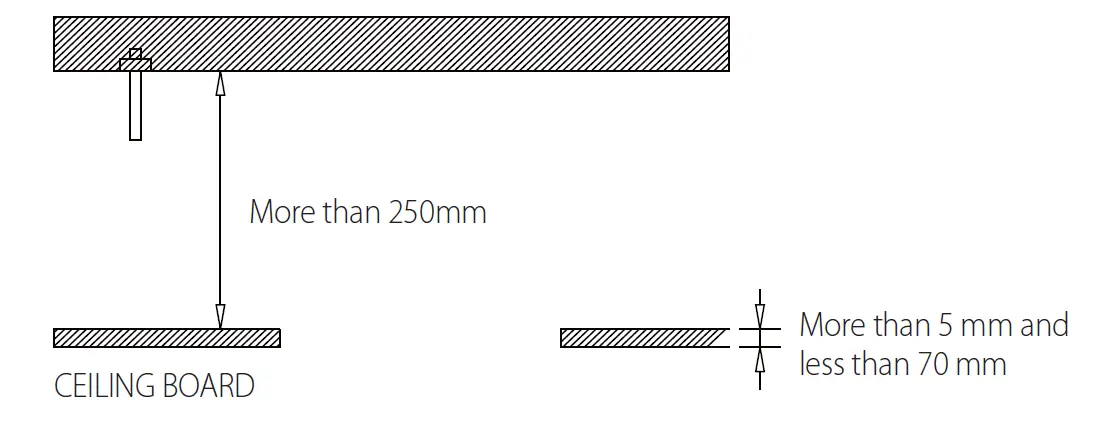
- At least 250mm or more of spare height is required above the CEILING BOARD. ` Be sure to secure the SAFETY WIRE to avoid a product fall.
- Use the provided screws to install the mount bracket and camera.
- CEILING BOARD must be able to sustain the weight of at least 10 kg.
Installation
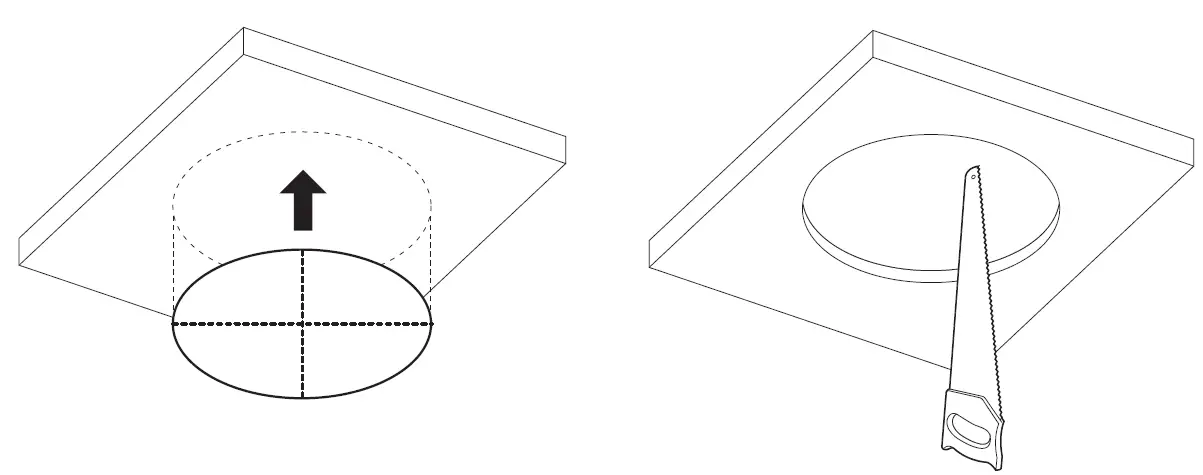
- Attach the TEMPLATE on the CEILING BOARD and drill a guided hole.
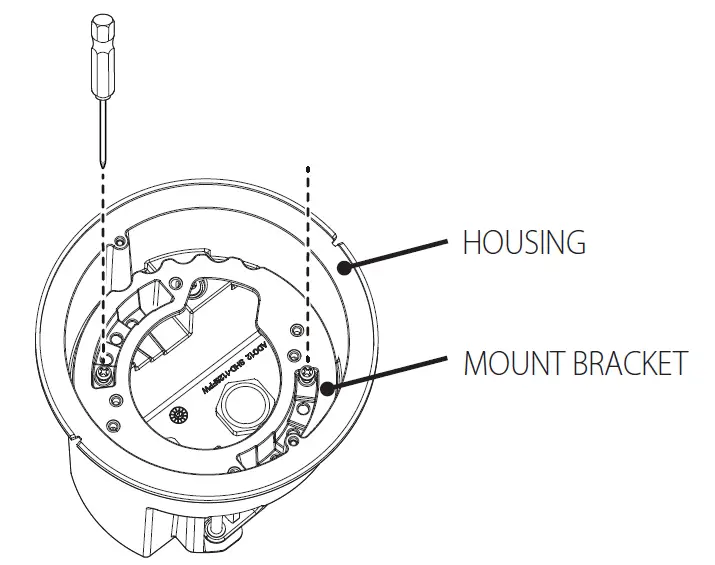
- Use a Phillips head screwdriver to detach the mount bracket from the housing.
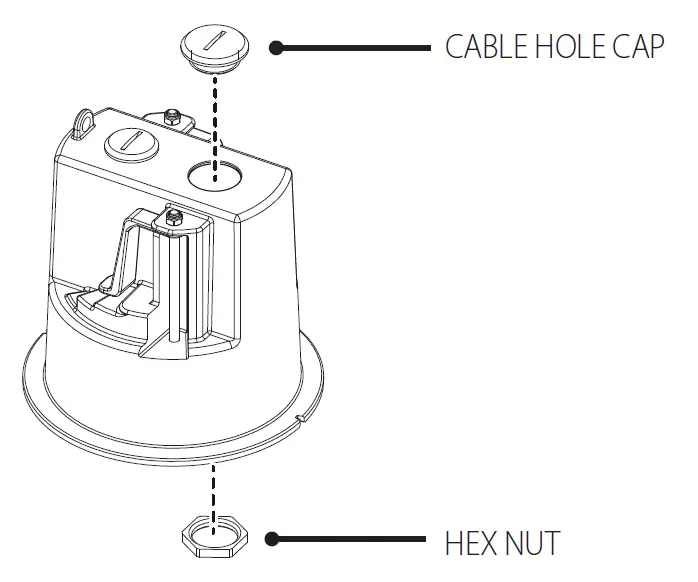
- After checking the hole size to use, remove the cap and the hex nut.
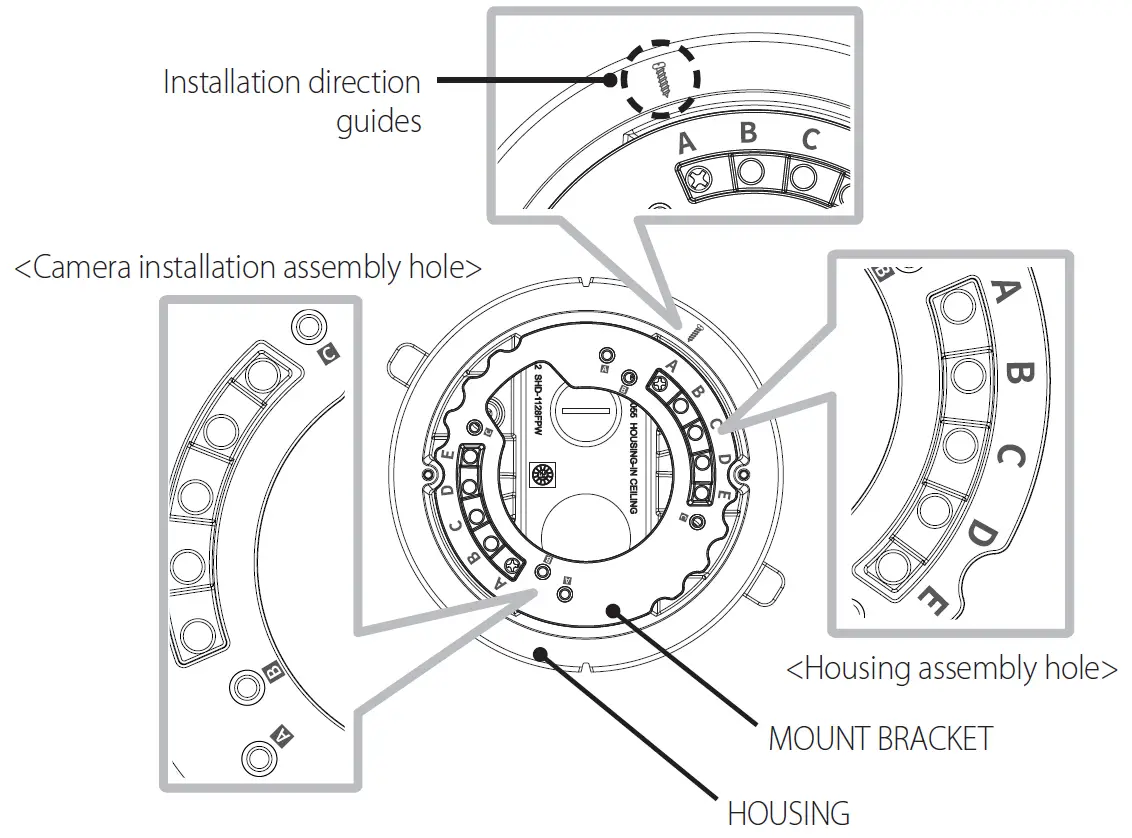
 Mounting combination table When mounting camera to the housing, refer to the mounting combination table shown below: A/B/C/D/E : housing assembly hole
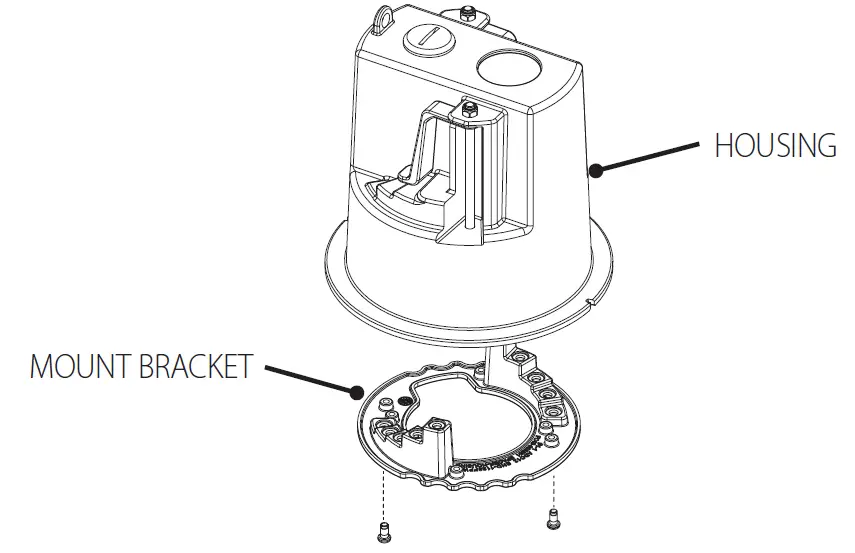
E- – 2 B – – 1 B – – 1 A- – 1 B- – 1 A- – 1 D – – 2 C- – 3 QND-6011 HCD-6010 LND-6010R XND-6010 HCD-7010R QND-8010R XNV-6011 QNF-8010 QND-6021 HCD-6020R LND-6012R XND-6020R HCD-7010RA QND-8020R QNF-9010 QND-8011 LND-6011R LND-6020R XND-8020R HCD-7020R QND-8030R QND-8021 LND-6021R LND-6022R XND-8030R HCD-7020RA LND-6031R LND-6030R XND-8040R HCD-7030R QND-6010R LND-6032R HCD-7030RA QND-6020R QND-6012R QND-6030R QND-6022R QND-7010R QND-6032R QND-7020R QND-7030R - Use a Phillips head screwdriver to join the mount bracket to the housing.
- Make sure to check the mount bracket’s camera installation assembly hole and mount
- When installing the mount bracket, align the alphabet letter to the installation direction guides of the housing before installing it.
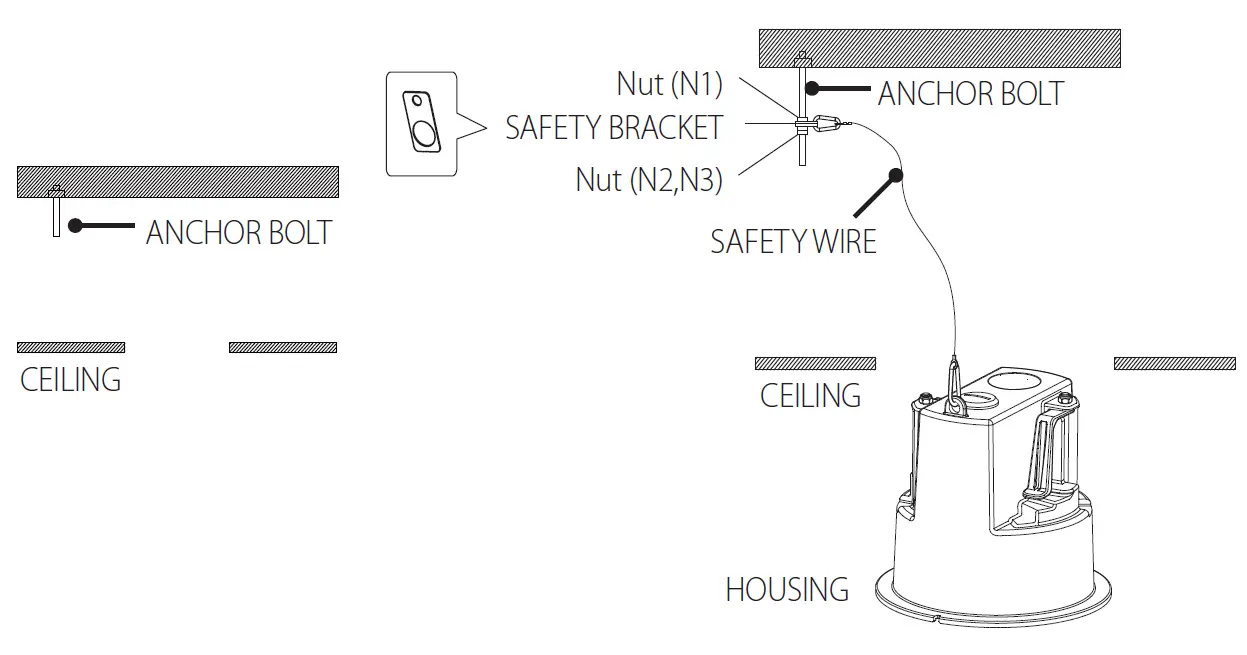
- Fix the ANCHOR BOLT onto the concrete CEILING, and secure the SAFETY WIRE to the ANCHOR BOLT as below:
- Tighten the NUT (“N1”) on the ANCHOR BOLT.
- Insert the provided SAFETY BRACKET into the ANCHOR BOLT.
- Tighten two NUTs (“N2”,”N3”) onto the ANCHOR BOLT.
- Hook and fix one end of the SAFETY WIRE onto the SAFETY BRACKET.
- Hook and fix the other end of SAFETY WIRE onto the HOUSING as shown below:
- Push the HOUSING inside the CEILING through the CEILING hole, and tighten the SCREWs (x2) clockwise to fix the HOUSING on the CEILING.
(Adjust the height of the bracket to secure the housing to the ceiling.)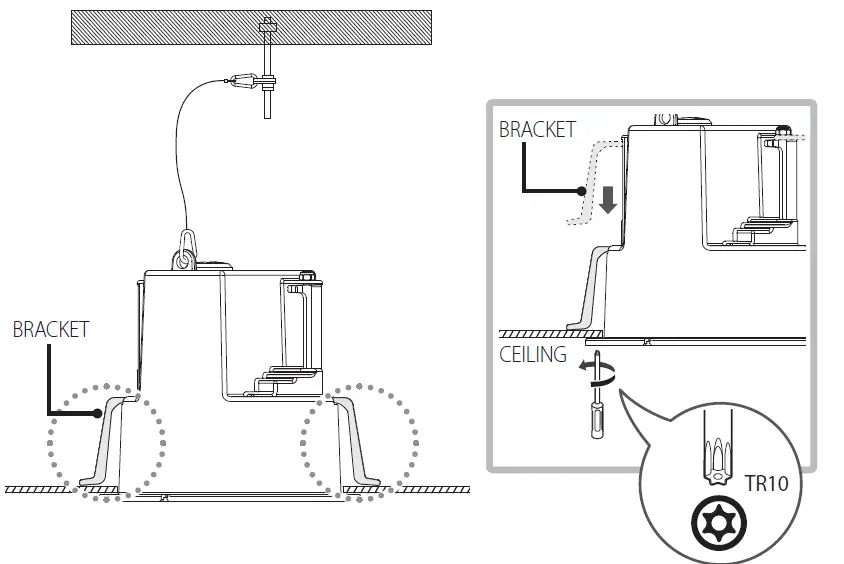
- Use the provided L16 machine screws to join the camera to the mount bracket inside the housing.
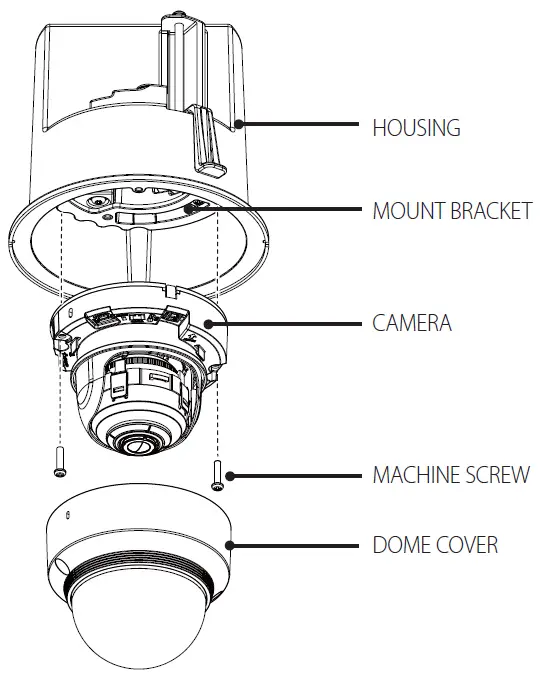
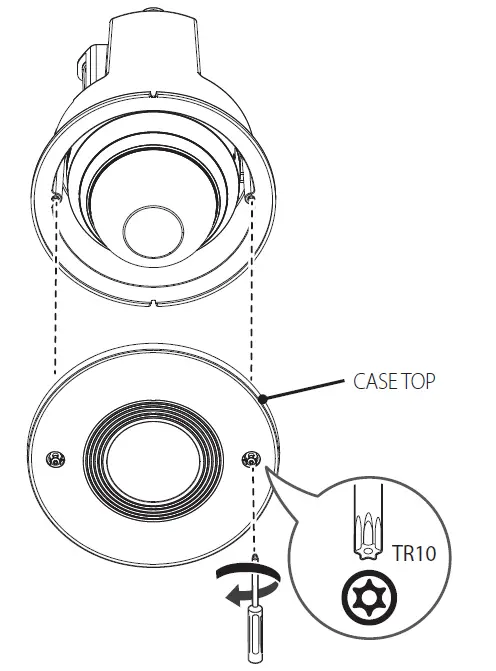
- Attach the CASE TOP to the HOUSING, and tighten the 2 SCREWS on the COVER to fix it to the HOUSING.
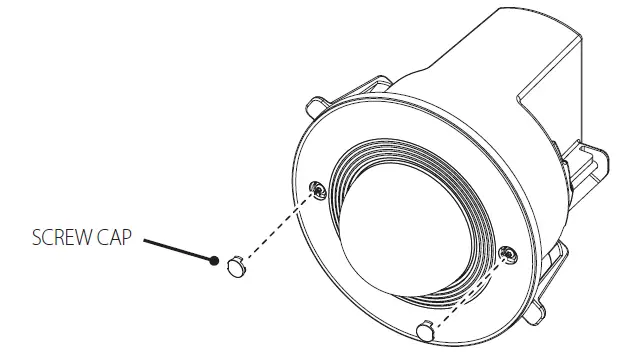
Refer to the mounting combination table to use the case top appropriate to the dome cover size of the camera. To know the type of the case top, please check the number marked inside. - I nsert the SCREW CAPS into the screw holes.