
![]() 140B Tablet Floor Stand
140B Tablet Floor Stand
Instruction Manual BrandMe SKU: 140B/W
Assembly Instructions
140B Tablet Floor Stand Instruction Manual
Exploded View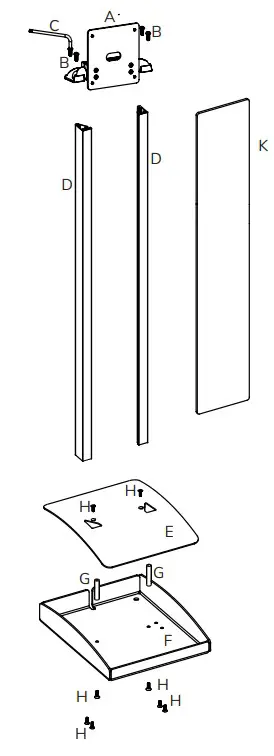
| Item | Description | Qty |
| A | Top End Assembly | 1 |
| B | M5 x 20mm Button Head Torx | 4 |
| C | T-25 Torx L-Wrench | 1 |
| D | Upright Extrusion | 2 |
| E | Base Cover | 1 |
| F | Base | 1 |
| G | M5 x 40mm Round Spacer | 2 |
| H | M5 x 20mm Flat Head Torx | 8 |
| K | Graphic Panel | 1 |
| L | T-25 Screwdriver | 1 |
Hardware Kit
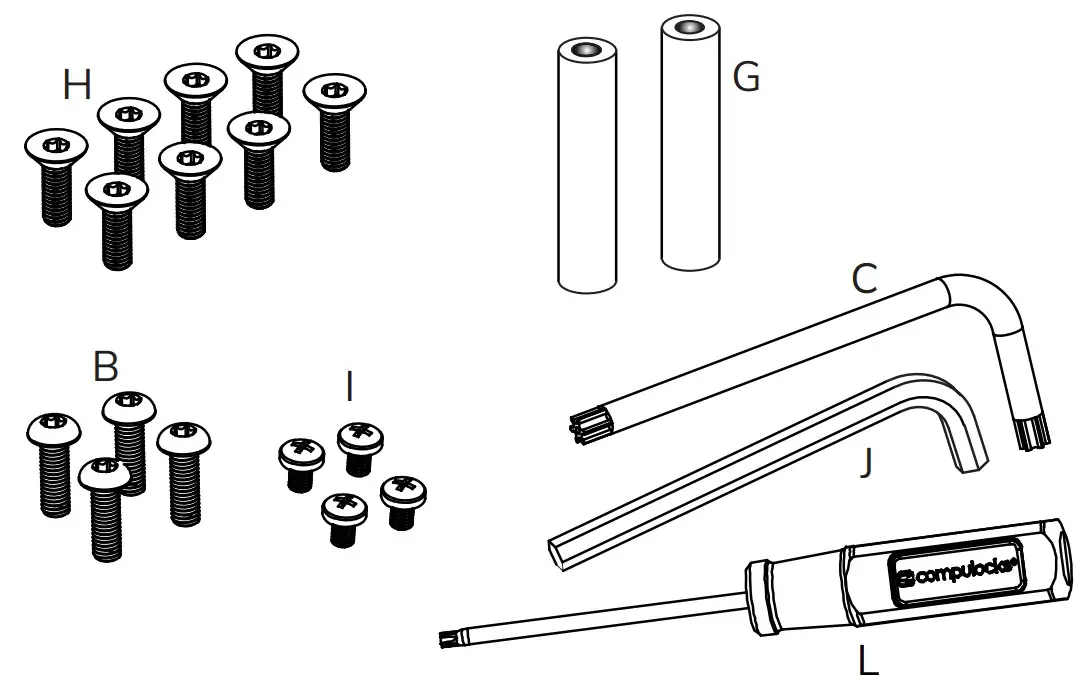
| Item | Description | Qty |
| B | M5 x 20mm Button Head Torx | 4 |
| C | T-25 Torx L-Wrench | 1 |
| G | M5 x 40mm Round Spacer | 2 |
| H | M5 x 20mm Flat Head Torx | 8 |
| I | M4 x 8mm Button Head Phillips | 4 |
| J | M5 Hex Wrench | 1 |
| L | T-25 Screwdriver | 1 |
Before Getting Started
If you plan on a constant power connection to your Tablet, you will need to obtain a longer USB cable, allowing you to route the cable through the Upright Extrusion.
You will also need a AC Power Cord to connect to a Power Cube, These Cables are not supplied with the Stand.
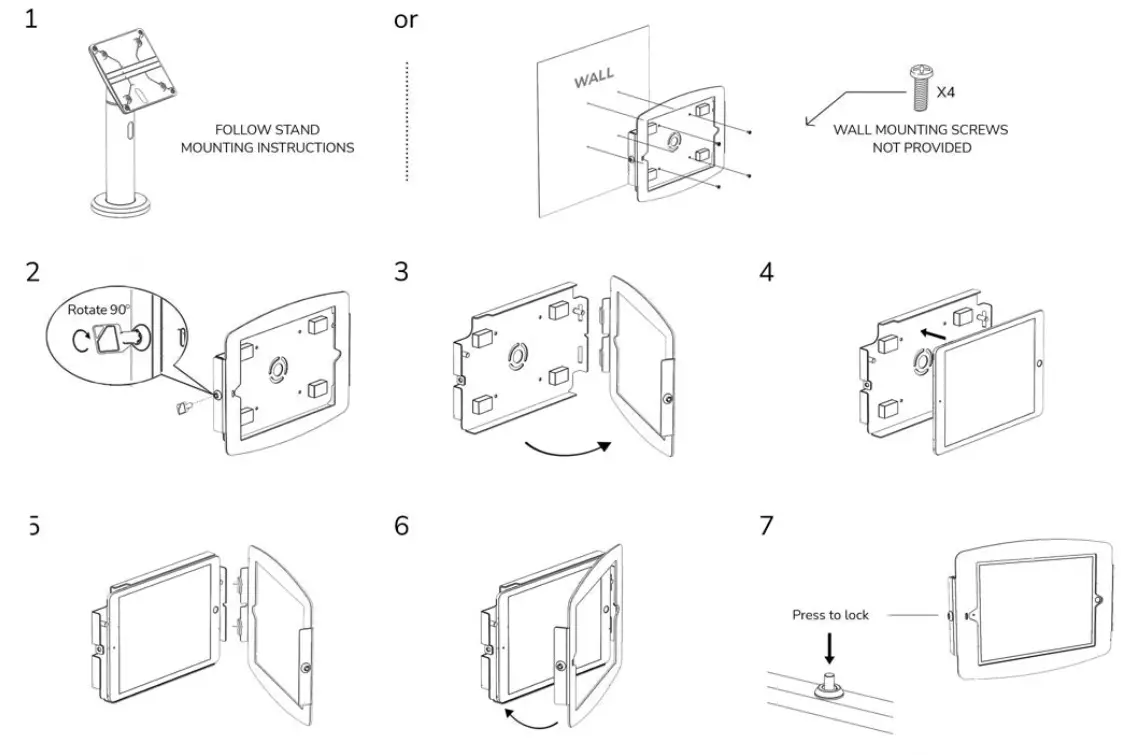
Assembly Instructions
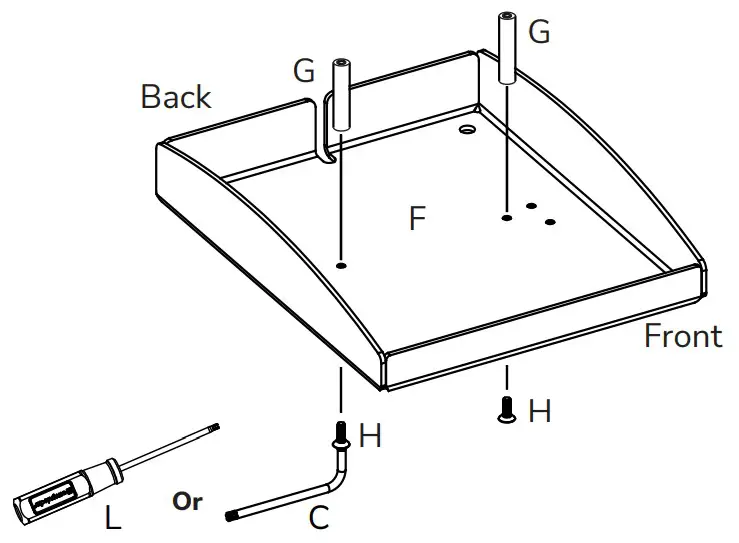 Install the two Round Spacers (G) using two of the M5 x 20mm Flat Head Screws (H) tighten using T-25 Torx Wrench.
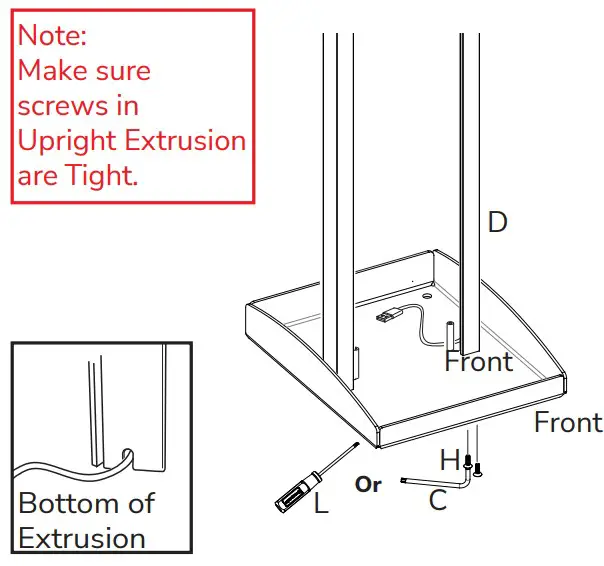
Note: Make sure screws in Upright Extrusion are Tight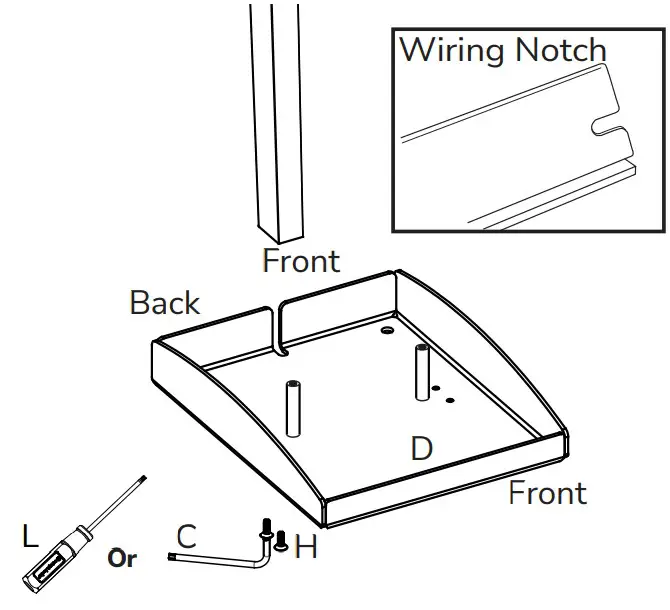 Locate the Upright Extrusions (D). Make sure extrusion has the flat edge facing forward. Install the M5 X20mm Flat Head Torx Screws (H) tighten using T-25 TorxWrench (C).
Extended USB Cable Not Included.  Prior to installing Upright Extrusion route USB Extended USB cable into extrusion. Leave 9-10” of cable at the top of the extrusion.
 Install the Uprignt Extrusion (D) using M5X20mm Flat Head Torx Screws (H) tighten using T-25 Torx Wrench (C).
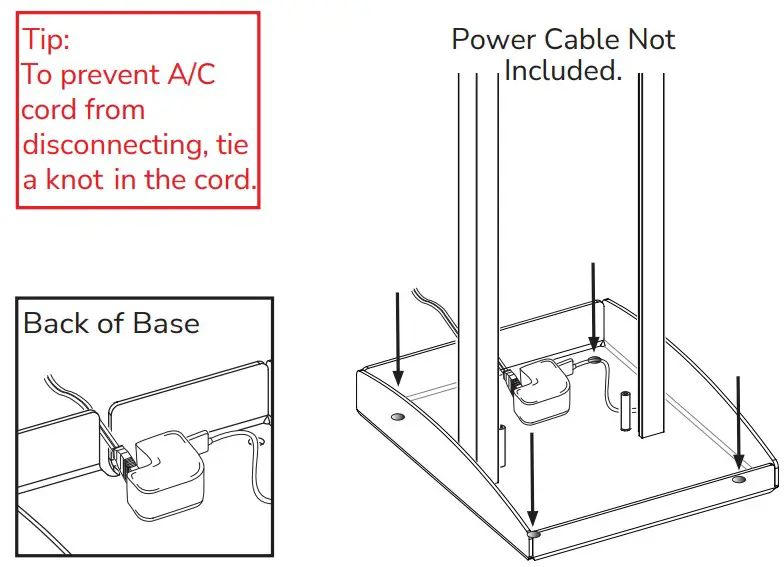 Route USB cable and plug into charging cube. Four 3/8” holes provided in the base for Floor Mounting
 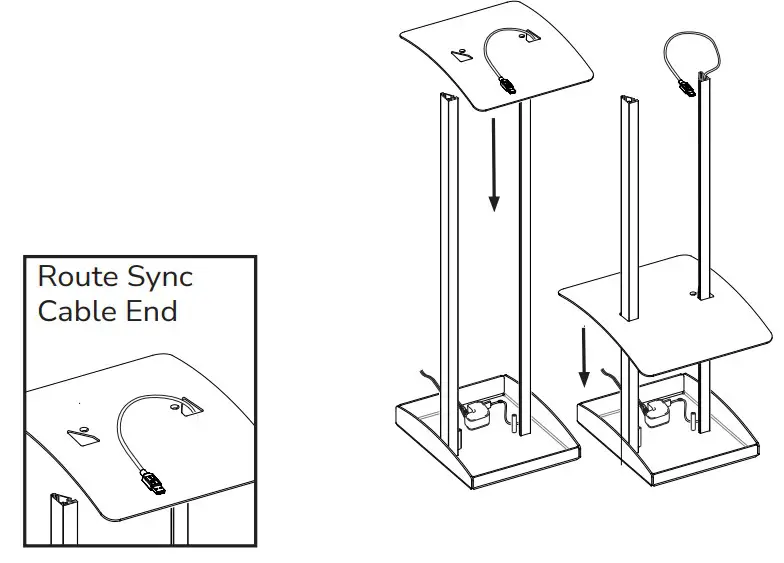 Route USB cable through Base Cover (E) as shown.
 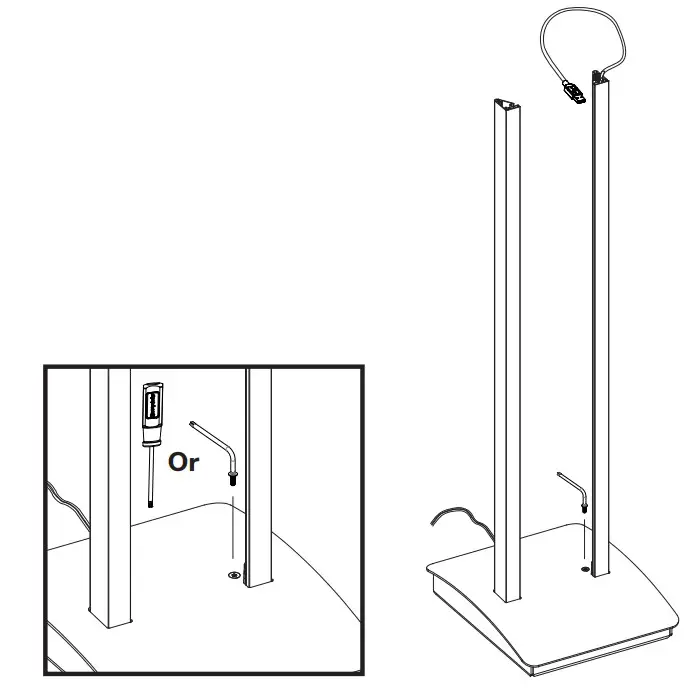 Secure Base Cover with M5 X 20mm Flat Head Torx Screw (H) using T-25 Torx Wrench (C).
Install Graphics panel (K) as shown.  Install Top End Assembly (A) using M5 X 20mm Button Head Torx Screws (B), securing with T-25 Torx Wrench (C).
 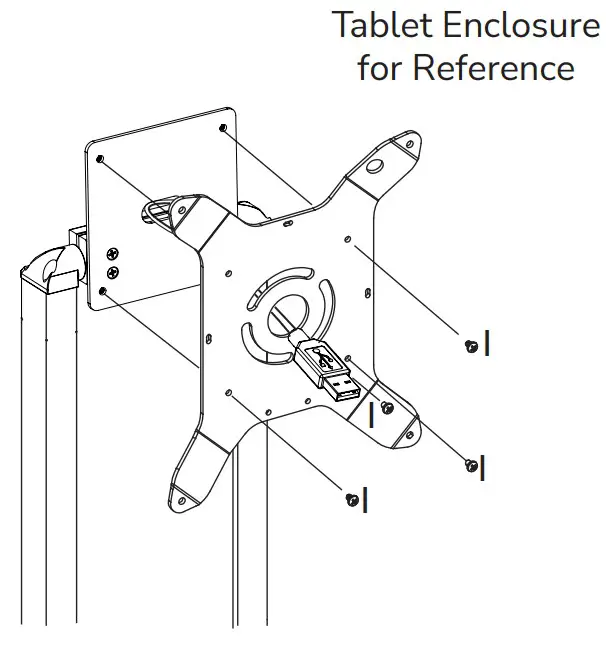 Adjust Tilt Tension by accessing the three screws on the back of the Top End Assembly. Use M5 Hex Wrench (J) to adjust screws.
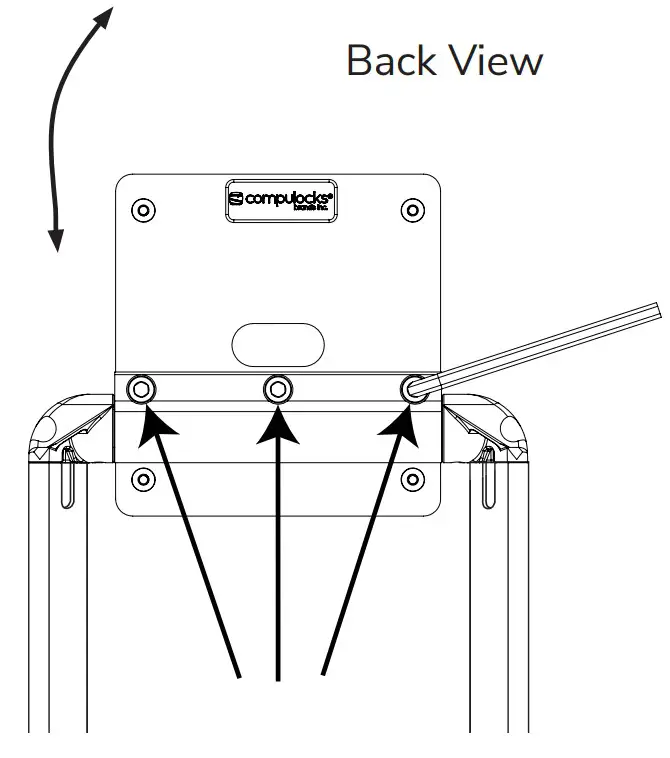
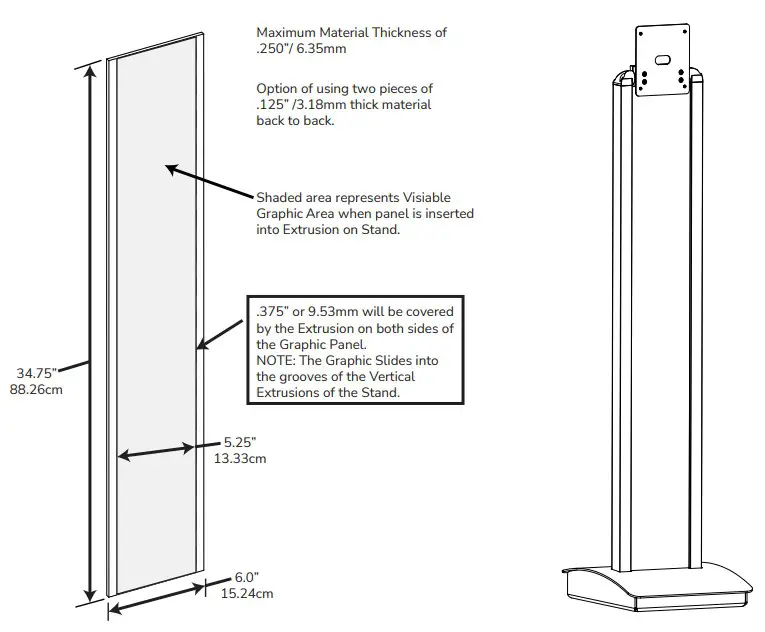
Graphic Panel Specifications
Space
![]() Compulocks Brands Inc.
Compulocks Brands Inc.
All Rights Reserved.j
www.compulocks.com
[email protected]
+1 800-948-0344


