![]()
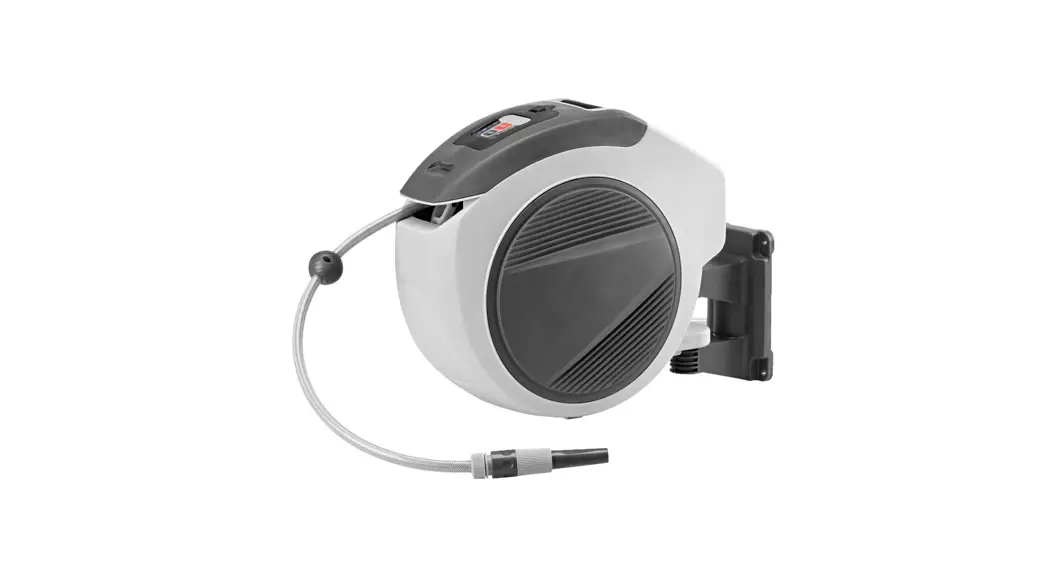
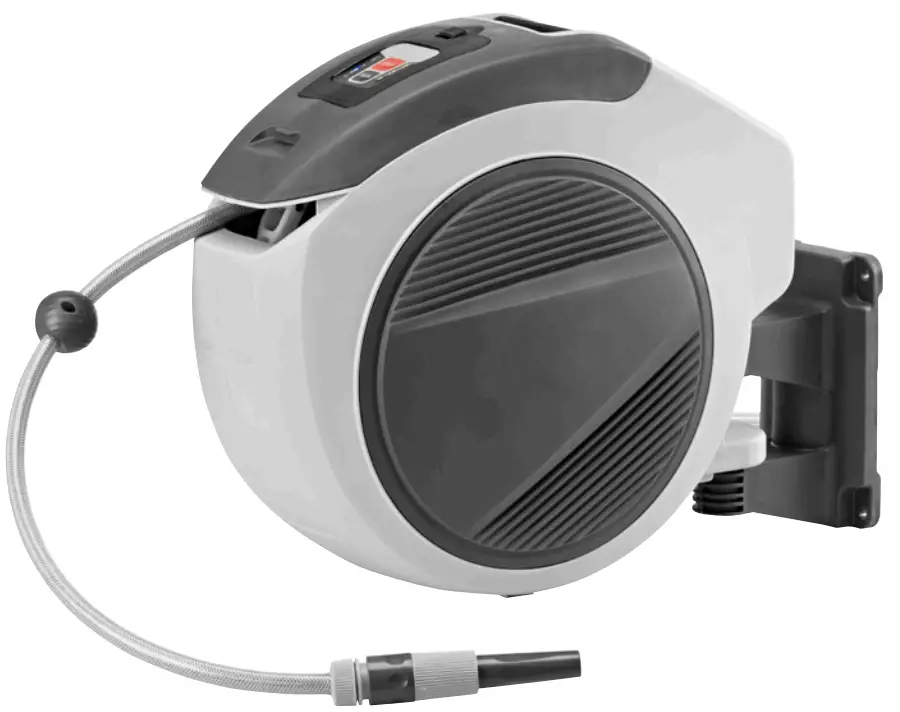
013715 HOSE REEL
Instructions
OPERATING INSTRUCTIONS
Important! Read the user instructions carefully before use. Save them for future reference. (Translation of the original instructions).
Care for the environment! Recycle discarded products in accordance with local regulations.
Jula reserves the right to make changes. For the latest version of operating instructions, see www.jula.com
![]()

EU DECLARATION OF CONFORMITY
Item number,
013715![]() Jula AB, Box 363, SE-532 24 SKARA, SWEDEN
Jula AB, Box 363, SE-532 24 SKARA, SWEDEN
This declaration of conformity is issued under the sole responsibility of the manufacturer.,
HOSE REEL.
11.1VDC, 80/min
Conforms to the following directives, regulations and standards:,
| Directive/Regulation | Harmonised standard |
| MD 2006/42/EC | EN 61029-1:2009+A11, EN ISO 12100:2010 |
| EMC 2014/30/EU | EN 55014-1:2006+A1+A2, EN 55014-2:2015 |
| RoHS 2011/65/EU + 2015/863 | EN 50581:2012 |
This product was CE marked in the year
Mattias Lif
BUSINESS AREA MANAGER (Signatory for Jula and authorized to compile the technical documentation.
SAFETY INSTRUCTIONS
- Read these instructions carefully before use.
- The product is not intended to be used by children.
- The product is only intended for household use and is not suitable for commercial purposes. The product is only intended for outdoor use.
- Do not attempt to charge other types of batteries with the supplied charger— the risk of explosion, personal injury and/or material damage.
- Do not expose the battery charger to rain or moisture.
- Only use the supplied battery in the product. The use of other batteries can result in a risk of explosion.
- Overvoltage can destroy the battery and charger. Check that the mains voltage corresponds to the rated voltage on the type plate.
- Do not allow metal objects to come into contact with the terminals on the charger or the battery as this can cause electric shock.
- The battery will get hot during long periods of use. Allow it to cool before charging.
- Pull out the charger connector before putting the battery charger away.
- Never use the battery as a power source for other products — the risk of fire and/or personal injury.
- Do not charge the battery near acid or flammable materials.
- Do not burn batteries. Do not expose batteries to heat or direct sunlight — the risk of explosion. Do not charge the battery at temperatures below 5°C or above 45°C as this can damage the battery.
- Check at regular intervals that the power cord and charger cord on the charger is undamaged and that there are no signs of fatigue. Do not use the charger if the cords are damaged.
- Never attempt to modify or open the casing or battery.
- Do not store batteries where there is static electricity.
- The product must only be repaired by a certified service center. Failure to carry out repairs correctly can result in the risk of fire, electric shock, personal injury and/or material damage.
CHARGING
Make sure to do the charging in a suitable place and to use the right charger. Never connect an unknown charger, or a charger, charging cord or battery that can be suspected to be defective. Otherwise, there is a risk of overheating and in the worst case fire. Do not leave the battery unattended when charging.
SYMBOLS
| Read the operating instructions. | |
| Approved in accordance with the relevant directives. |
| Recycle a discarded product in accordance with local regulations. |
TECHNICAL DATA
| Rated voltage | 230 V — 50 Hz |
| Hose diameter | 1/2″ |
| Hose length | 30 m |
| Max working pressure | 8 bar |
| Battery type | Li-Ion |
| Battery capacity | 2000 mA |
| Charge current | 700 mA |
| Charging time | approx. 4.5 h |
| Sound pressure level, LpA | 57.5 dB(A), K=3 dB |
| Sound power level, LwA | 68.5 dB(A), K=3 dB |
Always wear ear protection.
The declared values for vibration and noise, which have been measured according to a standardized test method, can be used to compare different tools with each other and for a preliminary assessment of exposure. The measurement values have been determined in accordance with EN 610291:2009.
WARNING!
The actual vibration and noise level when using tools may differ from the specified maximum value, depending on how the tool is used and the material. It is therefore necessary to determine which safety precautions are required to protect the user, based on an estimate of exposure in actual operating conditions (taking into account all stages of the work cycle, e.g. the time when the tool is switched off and when it is idling, in addition to the start-up time).
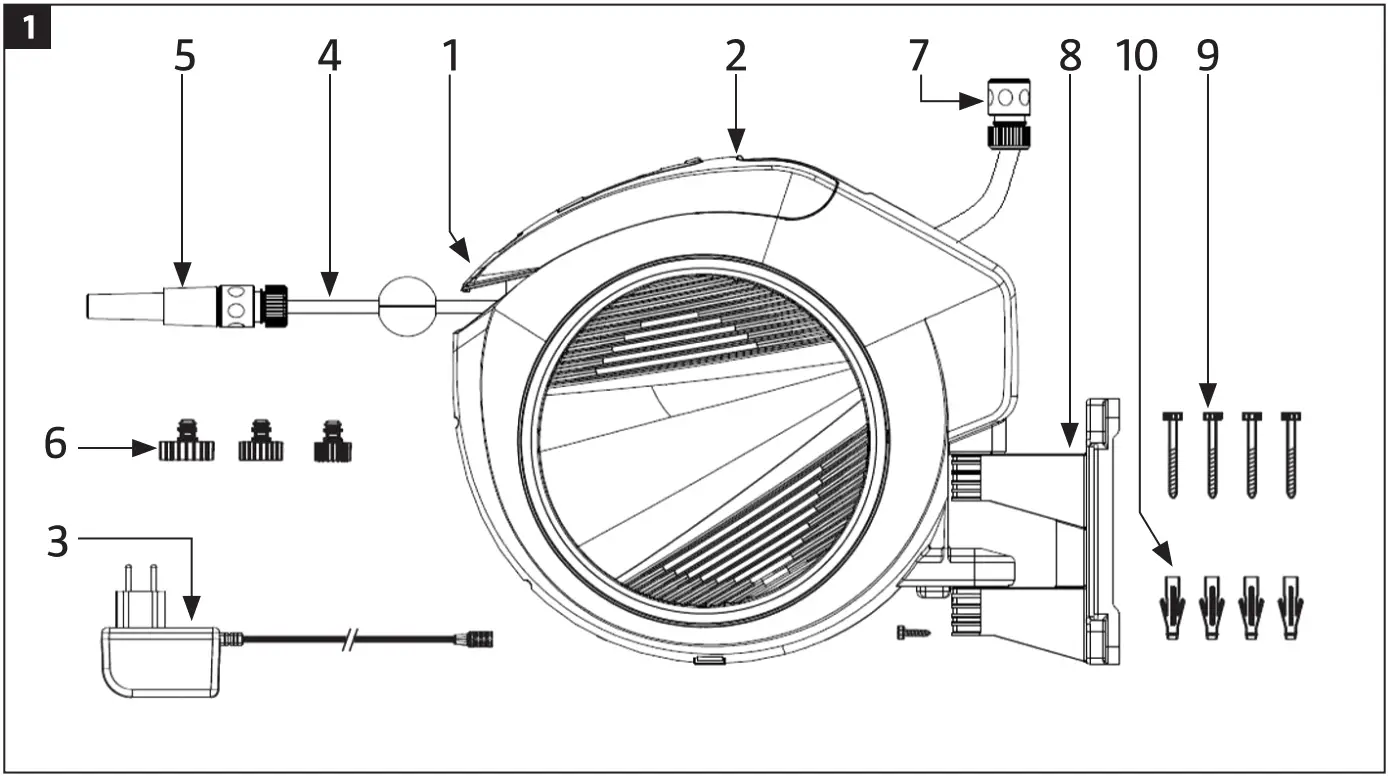
DESCRIPTION
- Hose casing
- Battery
- Battery charger
- Hose
- Nozzle, ample flow
- Quick-connectors made of PP
- Universal connection made of ABS
- Wall bracket
- Screws 8 mm, 4x
- Plugs
- 7 4x
FIG. 1
ASSEMBLY
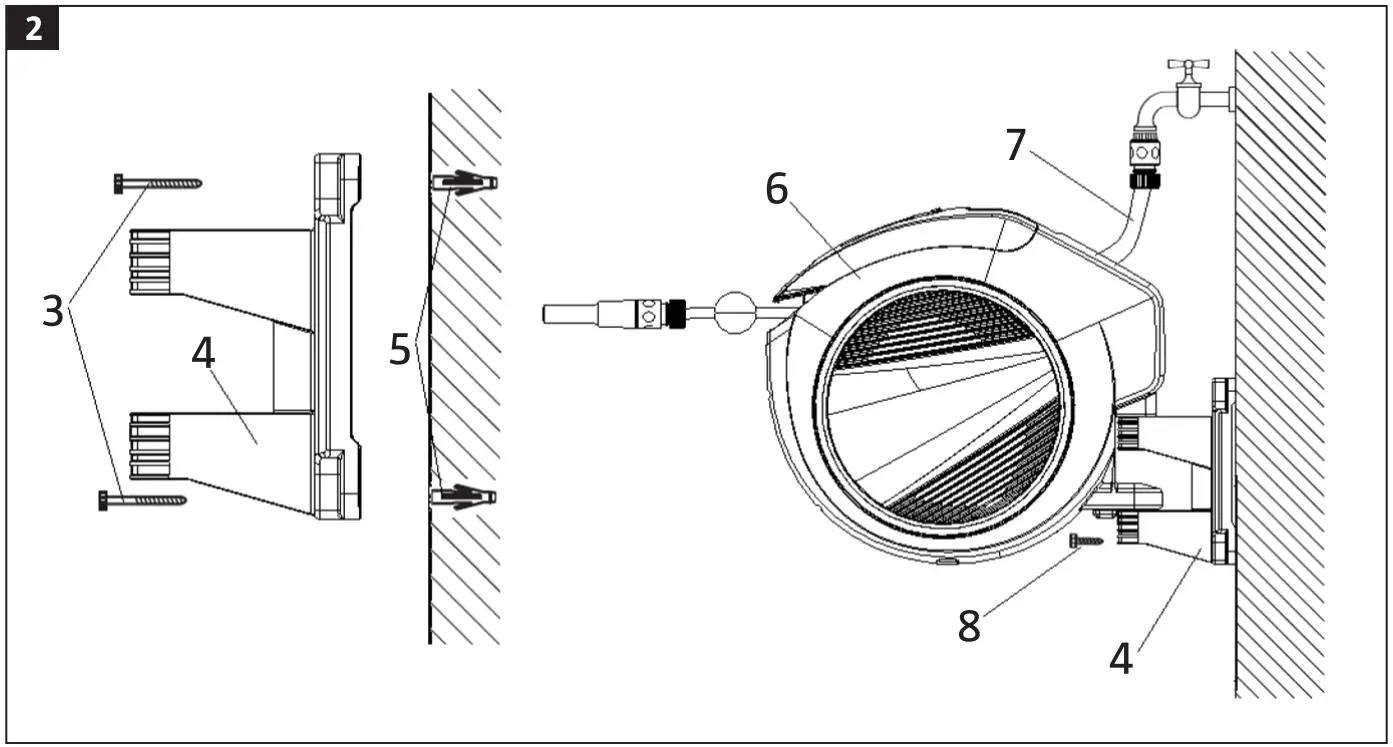
FITTING THE WALL BRACKET
- The supplied plugs are suitable for concrete walls with a surface coating of up to one cm. Use suitable parts for other types of wall (sold separately).
- Use the wall bracket (4) as a template and mark out the position of the holes. Drill holes at the marked points with an 8 mm drill and insert the plugs (5).
- Screw on the wall bracket (4) with the four screws (3) (head diameter 10 mm).
- Hang up the hose casing (6) on the wall bracket (4).
- Lock the hose casing (6) in place with the supplied locking screws (8).
- Connect the water hose (7) to the water pipe.
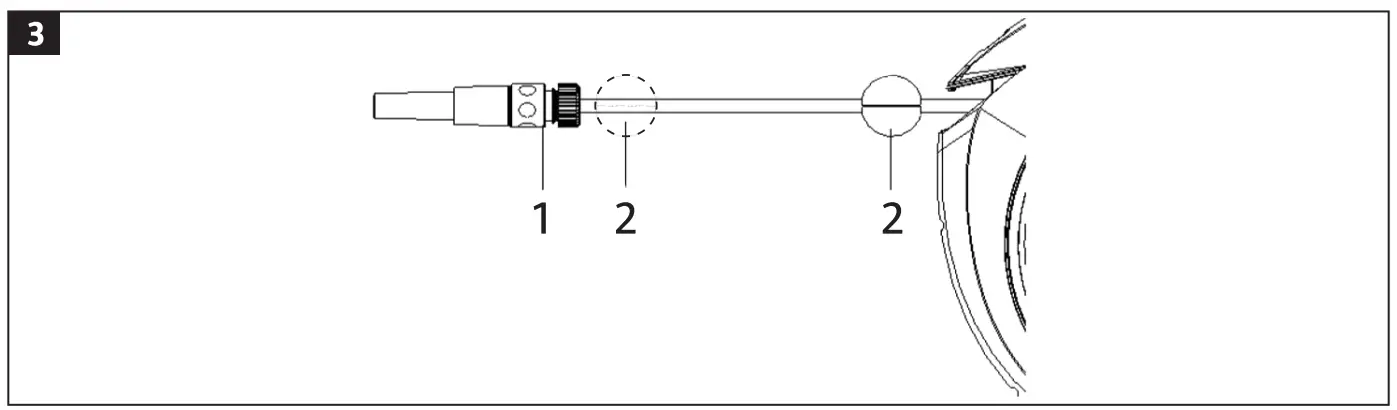
FIG. 2
Moving the hose stop
The hose stop can be moved to the required point along the hose.
- Remove the battery before moving the hose stop (2).
- Undo the 2 screws on the hose stop (2) with a screwdriver.
- Hold the hose, move the hose stop (2) and screw in the 2 screws.
FIG. 3
USE
HOW TO USE
Rolling out
Pull out the hose to the required length.
Rolling in
Hold the end of the hose and press in the RUN button (14) on the hose casing until the hose reels in to the required length. Hold on to the hose while it is winding in. (See fig. no. 6.)
Overload protection
The motor switches off automatically if the hose gets stuck, and when the hose is fully reeled in.
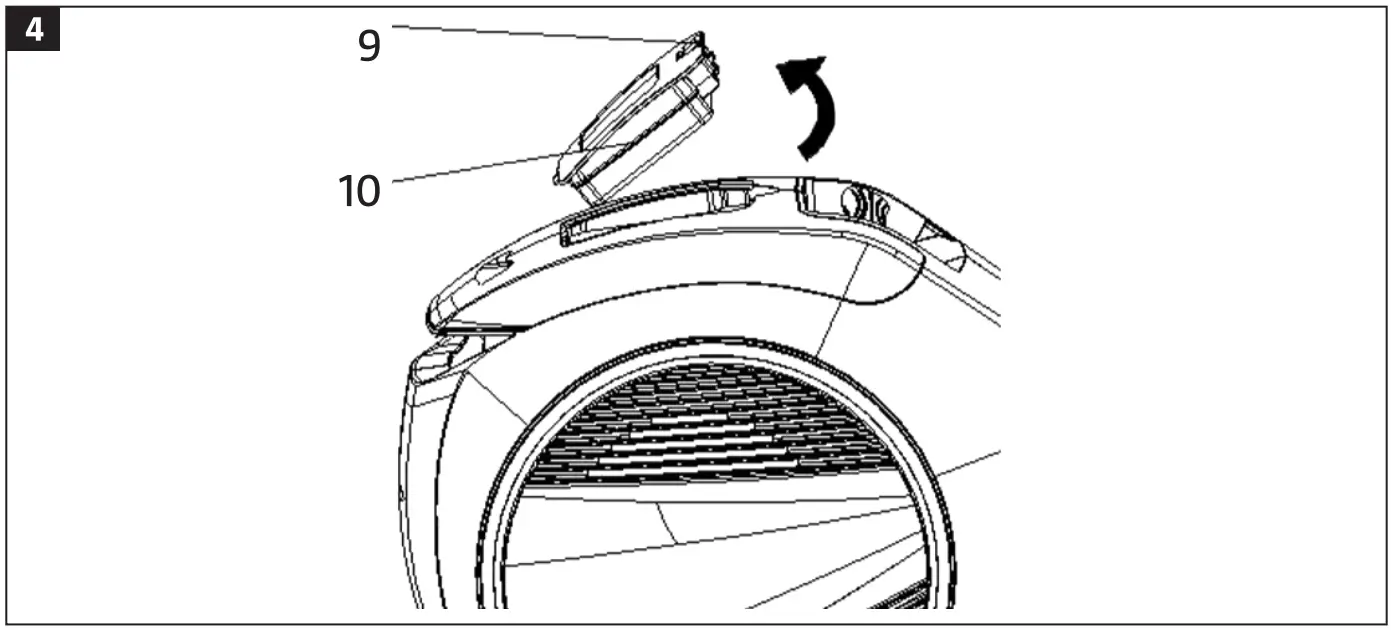
CHARGING THE BATTERY
- Press the lock button (9) and remove the battery (10).
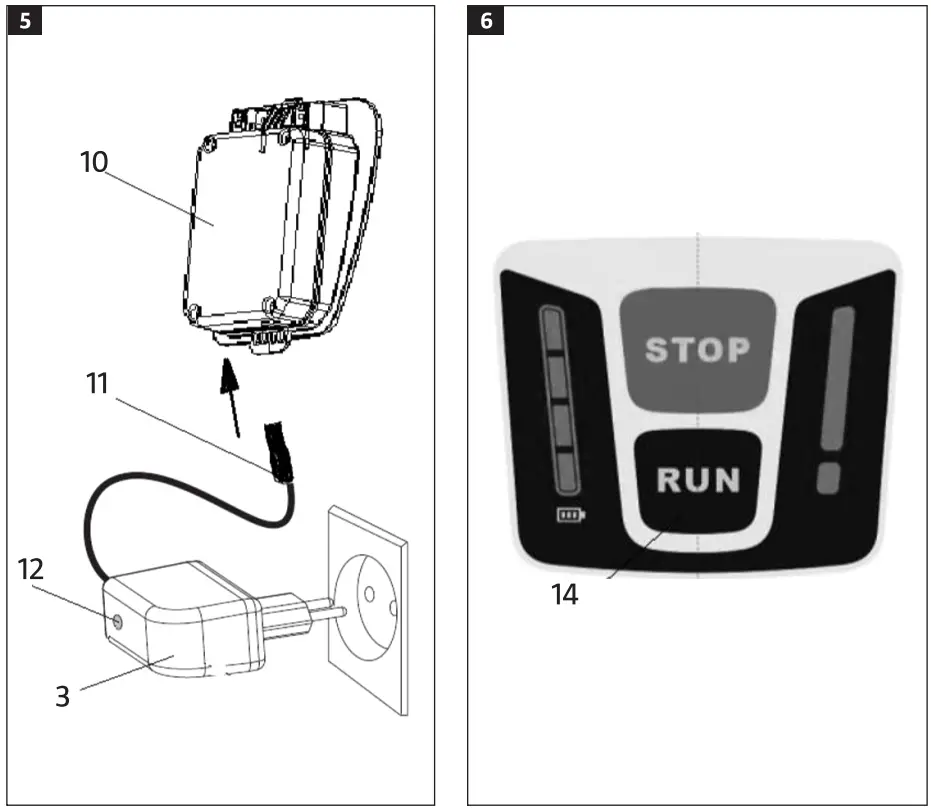
FIG. 4 - Plug the mains adapter (3) on the charger into a PowerPoint. The red status light (12) goes on to show that the battery is charging. When the battery is fully charged the status light (12) goes green.
- Disconnect the charger cable from the battery and unplug the charger
- Put the battery (10) in the hose casing and lock in place.
FIG. 5
NOTE:
- Fully charge the battery before using it for the first time.
- The lithium-ion battery can be charged from a partially discharged state and the charging can be interrupted before the battery is fully charged without damaging the battery.
Charging indicator
Pushing the RUN button (14) shows the charge status of the battery. When the battery is fully charged the hose can be reeled in up to 35 times.FIG. 6
| Status light | Meaning |
| 3 | Goes green when the battery is fully charged. |
| 2 | Goes yellow the battery is partially discharged. |
| 1 | Goes red when the battery is almost discharged and needs charging. |
| 1 | Flashes red when the battery is completely flat and must be charged. |
MAINTENANCE
CLEANING
The hose casing is maintenance-free and must not be cleaned with water or solvent. Clean the battery terminals with a dry cloth when necessary.
STORAGE
- When there is a risk of frost, store the battery upright where it is protected from frost.
- Do not store batteries at temperatures higher than 45°C, or exposed to direct sunlight. Remove the battery from the hose casing, charge and store separately.
![]() JULA AB, BOX 363, SE-532 24 SKARA
JULA AB, BOX 363, SE-532 24 SKARA
2021-12-29
© Jula AB


