
M008 HD 1080P Easy DIY Wireless Security WiFi Camera Kit
User Manual
HD1080P Easy DIY Security Wi-Fi
Camera Kit User Manual
Version: Anil. 21121
M008 HD 1080P Easy DIY Wireless Security WiFi Camera Kit
Quick guide of Wi-Fi camera function:
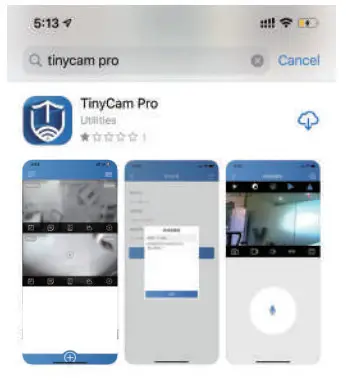
- Download Free App <Tiny Cam Pro> from App Store or Google Play.
Tips: Please allow “Tiny Cam Pro” to access smartphone location while using the APP - Insert micro SD card –> Plug in Power adapter, wait for 1 minute (Power indicator and Wi-Fi indicator is flashing regularly);
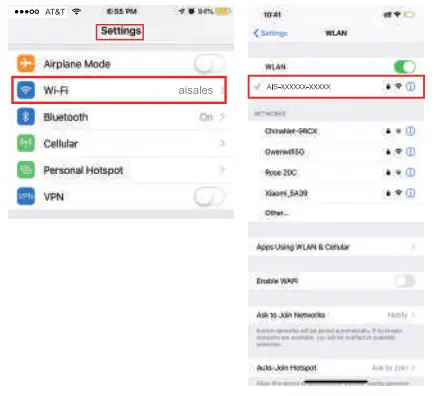
- Enter smartphone settings —> Search and connect device’s Wi-Fi named: AIS wait till phone status bar appear Wi-Fi symbol
 ;
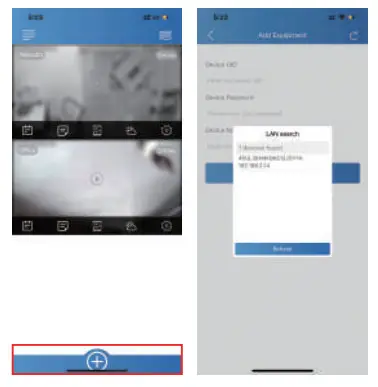
; - Enter APP, tap below “+” icon –> LAN search—>Tap the found device —> Tap Add —> Camera Online then;
Tips: This step = P2P mode, can check video locally when without Wi-Fi. - Press
 icon on the right corner of camera —>1.MFi Config —>Select local Wi-Fi (SSID) —> Input password —> Tap Next;
 - Quit APP , wait 30 seconds (device restart automatically)and connected with set Wi-Fi(Wi-Fi indicator is solid);
- Enter APP to check live video locally or remotely anywhere.
PS.: Contact local dealer for tutorial video setting up.
Overview:
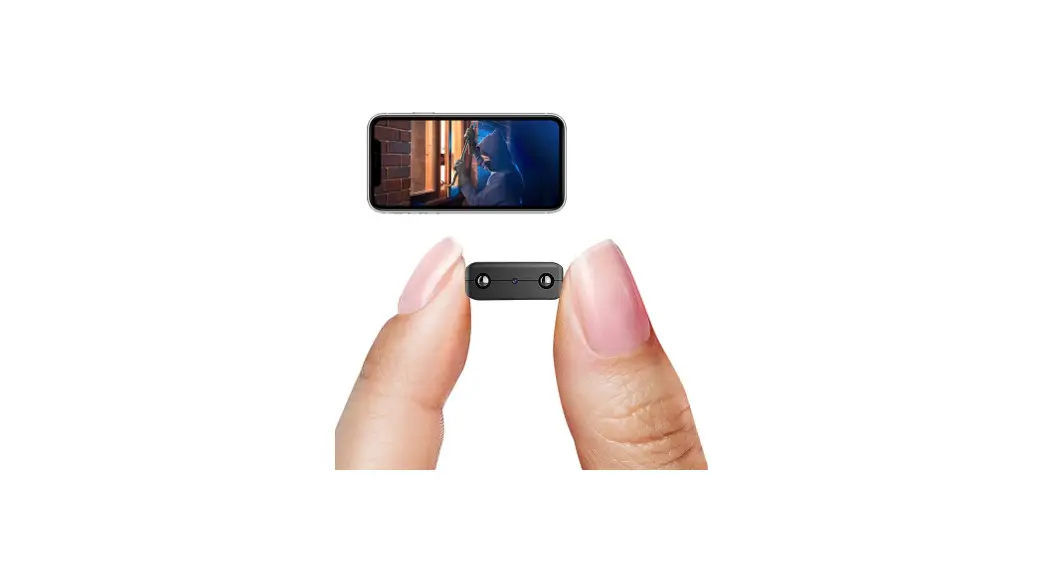
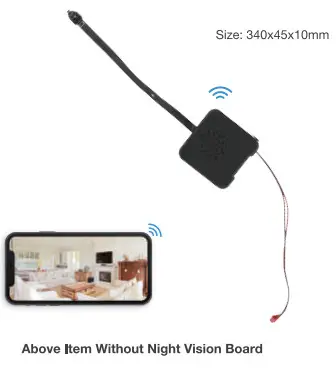
This security Wi-Fi camera kit is equipped with a powerful 1080p smart pinhole Wi-Fi camera for live streaming video, and it comes with motion detection video recording and alarm.
Mini design and easy hidden to DIY any kinds of unique and exclusive security cameras for home & business surveillance.
Usages: Nanny camera, home/ shop/ office/ warehouse surveillance
Warning : ” illegal use is not allowed! Or, there will be consequences to bear! ‘
In the box:
1 x WI-FI Camera Kit
1 x USB Cable
1 x Battery
1 x User Manual
1 x Micro SD Card Reader
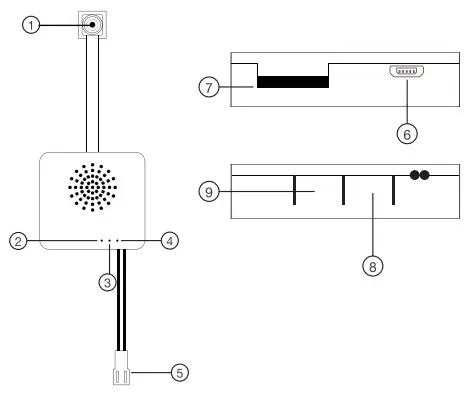
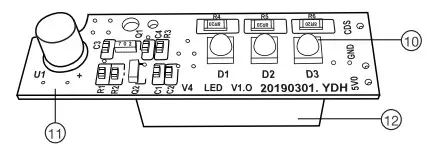
Product structure:

 Camera
- Charging indicator (Off when fully catechu
- Power indicator
- Wi-Fi indicator (Flash regulsrlyrP2P maul. connected)
- Port for Battery
- USB Port
- Micro SD card slot
- ON/OFF key
- Reset Key
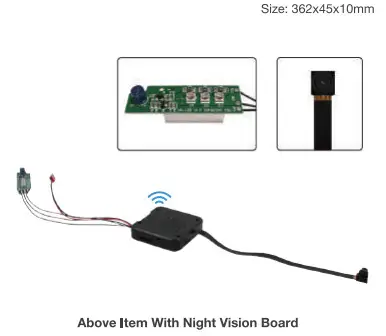
- Night vision lights
- Phot resistance
- Cooling fin
 Camera
Wi-Fi Camera Connection Setting
Step: Download and install APP Scan below QR code or search and download free APP named <Tiny Cam Pro> in Apple APP store, Google play or Electronic market, and install it;
Tips: Please allow “Tiny Cam Pro” to access your location while you are using the app(for syncing local weather info).

Step 2: Insert micro SD card –>Plug in devices with 5V2A power adapter –> Press back ON/OFF switch for 2 seconds , wait for 1 minute (Power indicator and Wi-Fi indicator is flashing regularly.);
Step 3:Connect Wi-F
- Open smartphone settings, search and connect the device’s wireless signal named”AIS “………,wait Wi-Fi connected, and phone status bar appear Wi-Fi symbol.

- Enter APP, tap below ” +” icon –> LAN search—>Tap the found device —> Tap Add —> Camera Online then;
 Tips: This step = P2P mode, can check video locally when without Wi-Fi.
 - Tap icon on the right corner of camera —> Wi-Fi Config—> Select local Wi-Fi (SSID) —> Input password —> Tap Next;

- Quit APP , wait 30 seconds (device restart automatically)and connected with set Wi-Fi(Wi-Fi indicator is solid) ; 5.Enter APP and check live video locally or remotely anywhere.
 Tips: This step = P2P mode, can check video locally when without Wi-Fi.
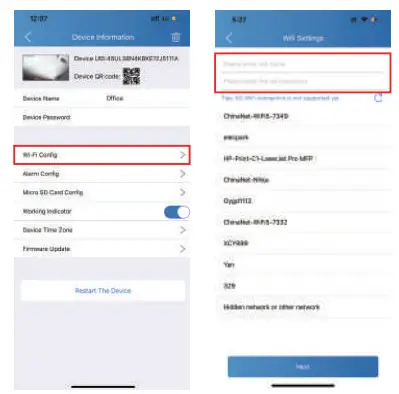
Set camera name and private code
Set name:Tap the ![]() after the camera, Input a new name(Eike Office …) in Device Name;
after the camera, Input a new name(Eike Office …) in Device Name;
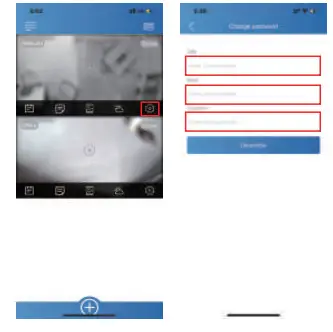
Set new password: Tap the![]() after the camera, Tap Device Password –> Old password = 888888.
after the camera, Tap Device Password –> Old password = 888888.
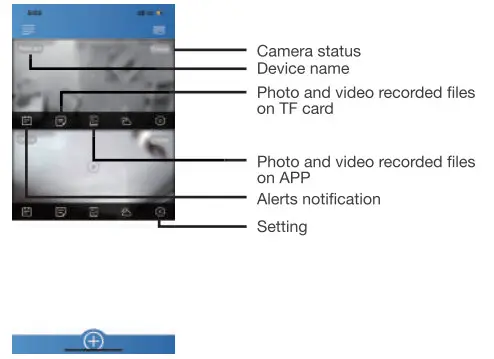
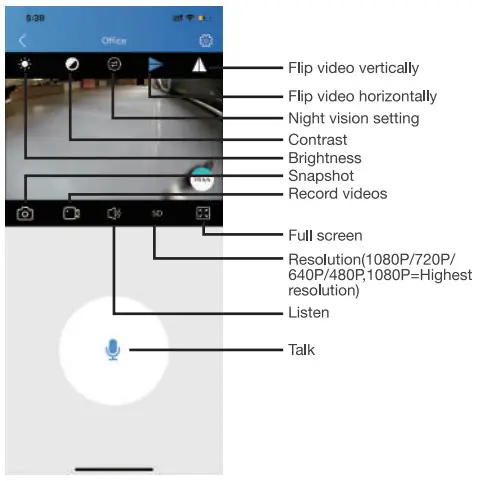
APP introduction:
Tips:
- Please confirm phone setting has allowed Tiny Cam Pro App to access the location services;
- A TF card(Micro SD card) must be inserted for saving alerts pictures.
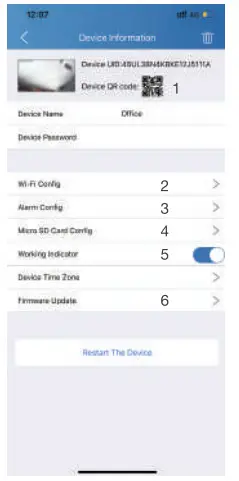
- Share camera with others by QR code
- Wi-Fi Config: Set camera to connect to local Wi-Fi
- Alarm Config: Set motion detection sensitivity
- Micro SD Card Record Config: Set SD card record mode / Resolution /File length…
- Working Indicator: To turn on/off device’s working led
- Firmware Update: Update device’s latest firmware by app
Specification
| Resolution | 1 Mega CMOS |
| Video pixel in phone | Max 1920’1080 |
| Video pixel in card | 1080″720 |
| Frames | Max 25fps |
| Compressed format | H.264 |
| View angle | 120 Degree |
| Type of memory card | TF card>=Class 4/10 and HC marked |
| Maximum capacity of memory card | 128GB |
| PC operation system | Windows 7, 8 / Mac OS X |
| Play software | VLC Player IS MP layer |
| Mobile phone operation system | Android/i0S |
| Web browser | 1E7 and above, chrome, Firefox |
| Power consumption | 300MA/3.7V |
| Battery Capacity | Rechargeable 1500 mA |
| Recording | 1 minute/ around 20MB |
| Working time in day time | Around 4-5 hours |
| Working time in night time | Around 2.3 hours |
| Charging time | 3.4 hours |
| Power adapter | 5V / 2A |
FAQ
– A:Press reset key for 10 seconds and wait 1 minute.
– A: Select suitable resolution according to the real time network environment.
– A: 1). Set motion detect sensitivity in App Setting > Alarm Config;
– 2). When motion detected, camera will push a alarm message to your phone and take one picture for checking in the APP [ Page 14 – Alert notification ]. (A micro ds card MUST be inserted for saving alarm pictures)
– A: 1). Format card before inserting;
– 2). Once device is connected to Wi-Fi, can set SD management in App Setting > Micro SD Card Config.
– A: 1). Use a card reader to read and play; 2). Use APP to play back [ Page 14 – TF card recorded files ]; 3). Play back in good speed network.
– A: Turn on camera and wait for 1 minute, press reset key around 10 seconds till back indicators off to restore factory default. Camera restarts and get ready again in 1 minute.
– A: Please contact local dealer for video guide.


