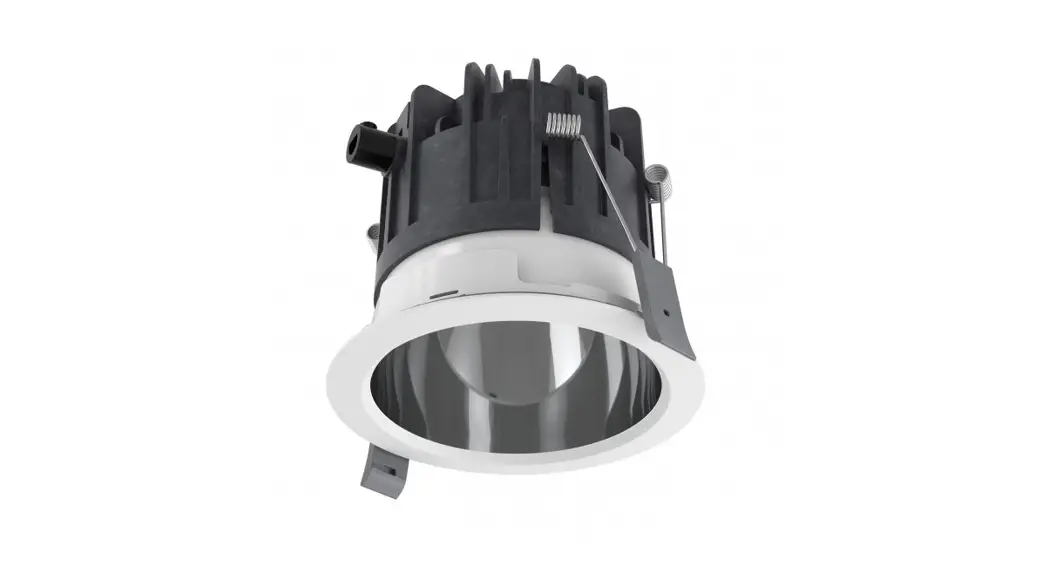
![]() Mirage 3
Mirage 3
Installation Instructions
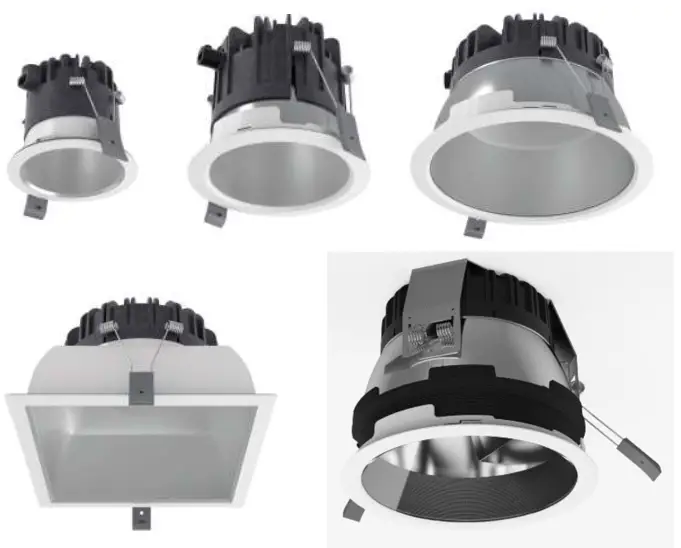
C79 / C110 / C165 / SQ165 & Nightingale M3
 Whitecroft Lighting Limited
Revision 13 – 22/06/2021
Burlington Street, Ashton-under-Lyne, Lancashire OL7 0AX
Telephone +44 (0)161 330 681
Facsimile: +44 (0)161 331 5855
www.whitecroftlighting.com
Registered No. 3848973 England
Registered Office: As above
PK-NPD134-IL![]()
INSTALLATION DETAILS
- Open the packing and locate the disposable gloves, this is to stop grease from skin contact from getting onto the reflector surface. These must be worn throughout the installation.
- Inspect the contents of the box for any damage in transit.
- Prepare aperture using the appropriate tool, circular fittings are based around standard size hole saws. See Dimensions on the last page for cut sizes.
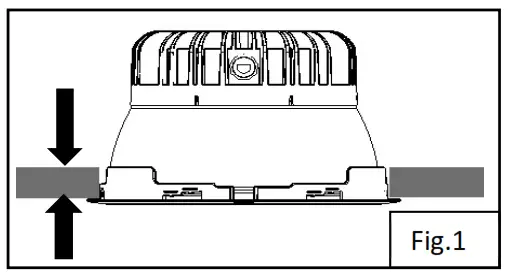
- Ceiling thickness is shown under Product and Driver Dimensions. See fig 1.

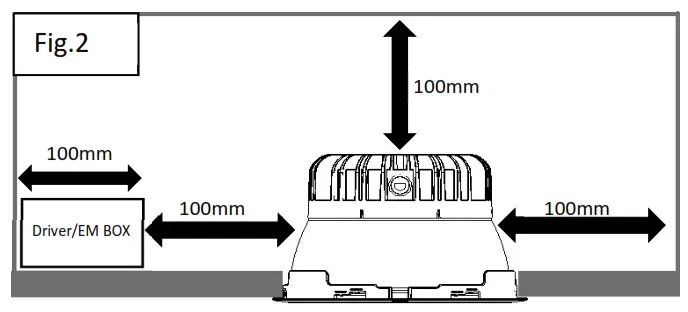
- Check void dimensions. Ensure 100mm clearance from the downlighter is given in all directions to walls/insulation and driver/EM box. See Fig.2. Insulation cannot directly cover the back of the downlighter.

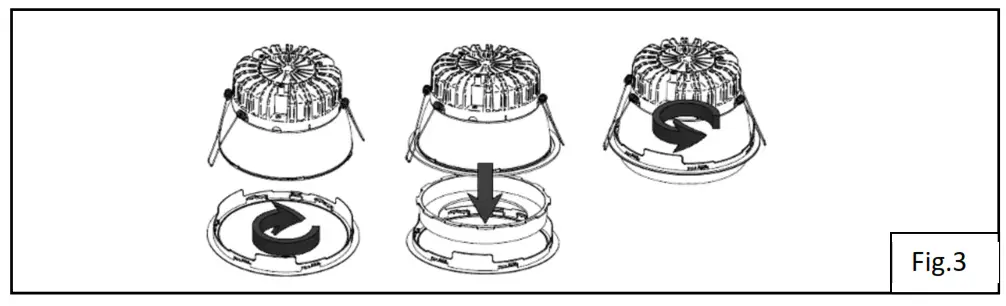
- If attachments are required these are ordered separately and will be assembled next. They are only available on C165 –IP44 products. See the attachments list on the last page. To assemble twist the bezel anti-clockwise to release as shown in fig.3. Then place the required attachment into the bezel and twist clockwise to lock. If the downlighter is an EM version take care that the EM LED indicator attached to the bezel is not overstressed. This can be easily removed with a flat-bladed screwdriver if needed. Please remember to re-attach when finished.

- For standard F/O, DALI, and Tunable white products. Wire product to mains by removing the cable restraint cover from the driver. Trim back Mains/Dali cabling 10-11mm and wire directly to the driver. See the last page for cable details.
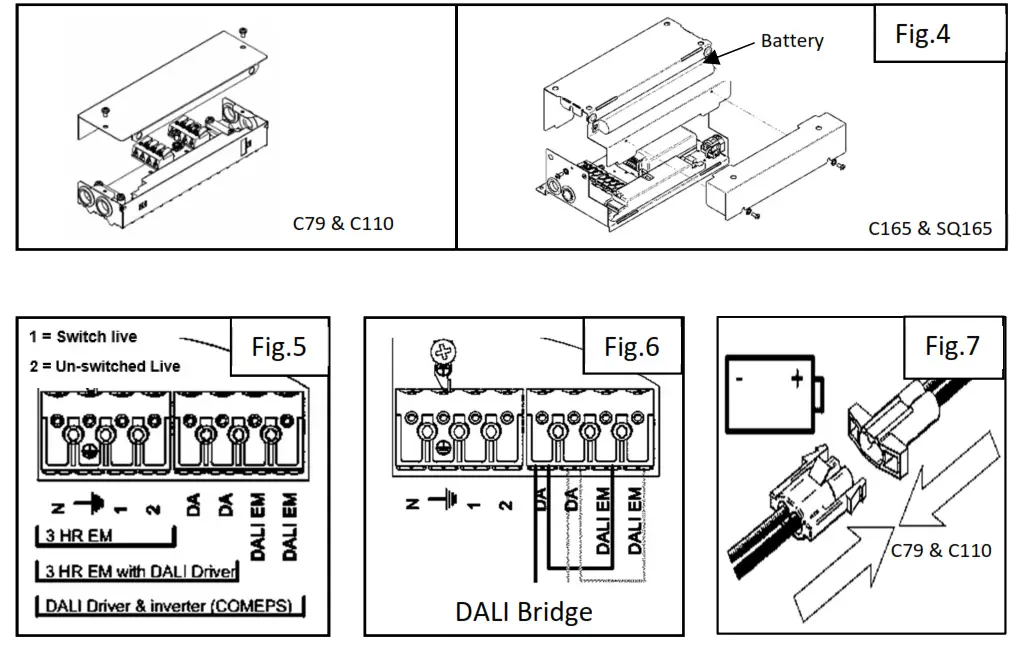
- For emergency, products remove 2 x Pozi drive screws and retain the paint breaking washer see fig.4. Wire mains to the product following the fig.5 wiring diagram. Note if driver and inverter are required to run on the same DALI pair then use the link kit provided and wire as fig.6. Once complete replace the lid and paint breaking washer and screws. The paint-breaking washer is required for earthing purposes. Access to battery on C165 & SQ165 is via cover as fig.4
 Note: Nightingale M3 requires controls for full functionality (See fig.5)
 - Install the product in the ceiling. If this is an emergency product connect the battery in fig.7 and fill in the commissioning date on the label. The battery on the C165 round and SQ165 square products is accessed by the separate cover on the gearbox lid fig.4. For the C79 and C110 round products, the battery is external. Carefully place the product through the aperture in the following order external battery/Steel box/ external driver. Ensure the process does not damage the ceiling.
- Pull back springs on the body and carefully offer up to and through the cut, aperture see fig.10, again be careful not to catch the ceiling during this process. Ensure fingers are clear before releasing spring to avoid injury. Ensure the fitting is centered in the aperture.

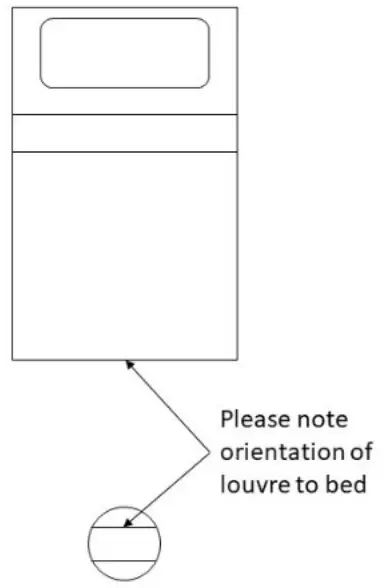
- Nightingale Orientation

12) To remove the fitting for maintenance, first ensure clean gloves are used to protect the fitting from dirt and grease. Then place a flat-bladed screwdriver carefully behind the bezel and ceiling to open up a gap. Use your fingers to grip the product and pull it down. You can also use your free hand to ease the spring through the aperture to stop damage to the ceiling.
 Note: Nightingale M3 requires controls for full functionality (See fig.5)
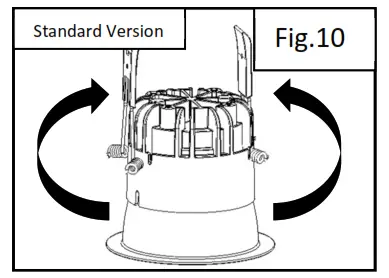
SPECIFICATION
| Lamp type: Output: Colour: Materials Supply Operating temp Power Connection Ingress: ProtectionAttachments: Tunable White: | LED 500lm, 1000lm, 2000lm, 3000lm, 4000lm (Nominal + Tunable White) size specific (check website) 3000k/4000K RA80/90 & Tunable White Acrylic Diffuser Polycarbonate Reflector (Specular, Semi Specular, White RAL 9010 or Black RAL 9005) Graphite Composite Heatsink 220-240V, 50/60Hz 0˚c to 25˚c Refer to the Whitecroft Lighting Website for a full list of power information. (See bottom) Terminal block/Driver 0.75mm² to 1.5mm², 10-11mm stripped IP44/65 (from below) MA3-FLO, MA3-CYL, MA3-DIFF (Only available on C165 – IP44 products) Note this product requires DALI type 8 controls in order to output the tunable color control. (Supplied separately or by others) |
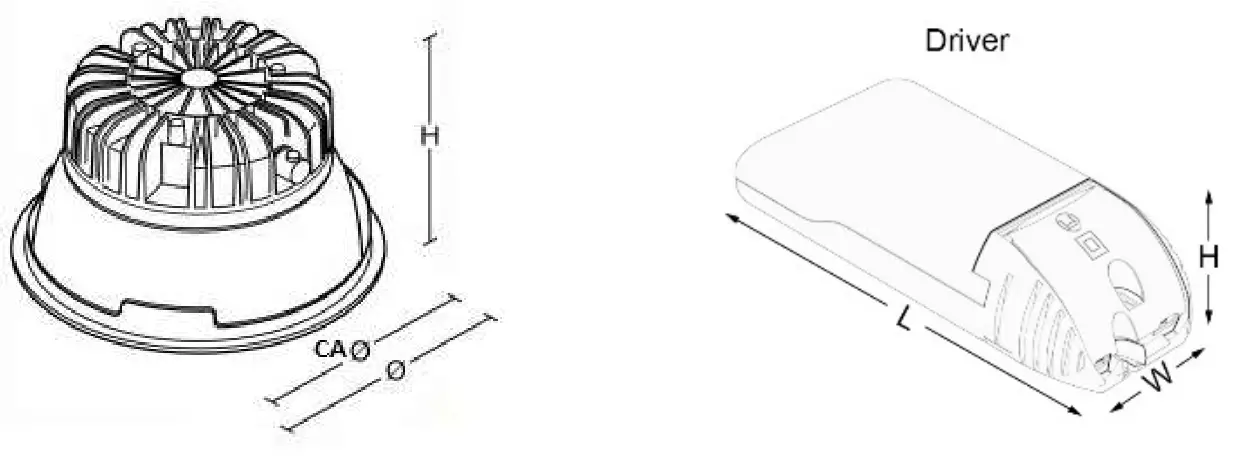
PRODUCT AND DRIVER DIMENSIONS
| Version C79 C110 C165 SQ165 Nightingale M3 C165 Tunable SQ165 Tunable | Ø(mm) 87 118 173 173sq 173 173 173sq | H(mm) 79 102 106 110 144 106 110 | Ceiling Depth(mm 1-40 1-50 1-50 1-50 1-50 1-50 1-50 | Cut Aperture CAر1mm 79 110 165 165sq 165 165 165sq | KG 0.5 1.0 1.0 1.0 1.0 1.0 1.0 | EM KG 1.5 1.5 2.0 2.0 2.0 2.0 2.0 | Driver(mm) 53(W), 30(H), 121(L) 53(W), 30(H), 121(L) 67(W), 30(H), 140(L) 67(W), 30(H), 140(L) 42(W), 30(H), 97(L) 70(W), 31(H), 215(L) 70(W), 31(H), 215(L) |

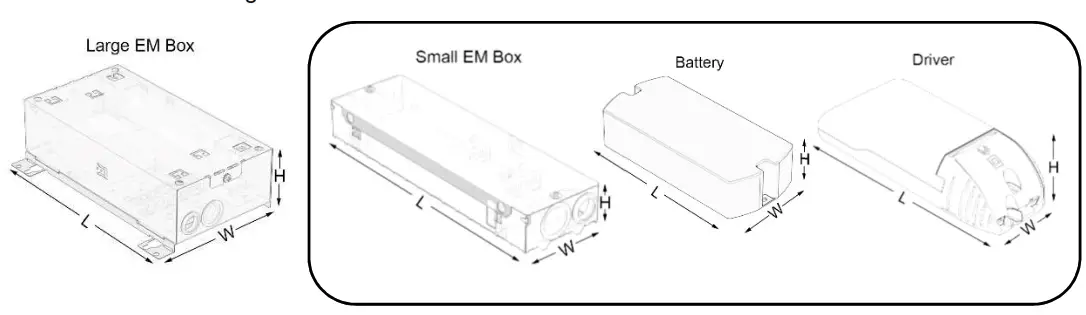
EMERGENCY BOX DIMENSIONS
| Version C79 C110 C165 SQ165 Nightingale M3 | W(mm) 69 69 145 145 145 | H(mm 40 40 80 80 80 | L(mm) 227 227 236 236 236 | EM Box Small Small Large Large Large | Battery Dims(mm)* 70(W), 34(H), 152(L) 70(W), 34(H), 152(L) N/A** N/A** N/A** | Driver Dims(mm)* 53(W), 30(H), 121(L) 53(W), 30(H), 121(L) N/A** N/A** N/A** |
*Small EM box has separate remote battery and driver.
**Included inside large EM box
GENERAL INFORMATION
- A qualified electrician, in accordance with IEE wiring regulations, should carry out the connection to mains wiring.
- Observe ESD precautions during installation.
- Emergency versions of this luminaire must be earthed
- Ensure that the rated voltage and frequency requirements are compatible with the available mains supply.
- Cleaning of reflectors and lenses should be carried out using clean, soft, and lint-free cloths. The use of cleaning fluids can mark reflector surfaces.
- Do not carry out high voltage insulation tests, i.e. 500/1000v this may damage internal components.
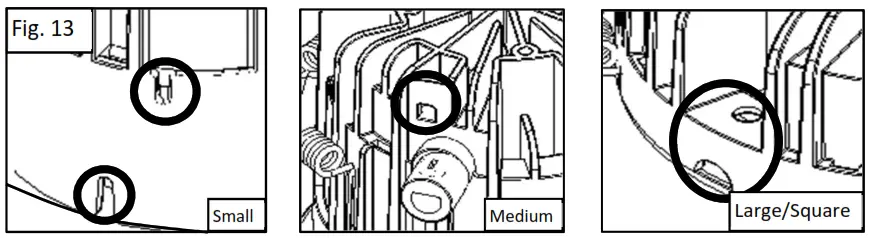
- For secondary suspension points please refer to fig.13. The holes are designed to accommodate steel cable (supplied by others).

- Allow sufficient time for the product to cool before performing maintenance. The heatsink may be hot.
- The light source contained in this luminaire shall only be replaced by the manufacturer or a designated service agent or a suitably qualified person.
- Batteries used in emergency versions of this luminaire range are replaceable by a qualified electrician.
TECHNICAL SUPPORT
Telephone: 0161 331 5700
E-mail: [email protected]
http://www.whitecroftlighting.com/


