Product Information
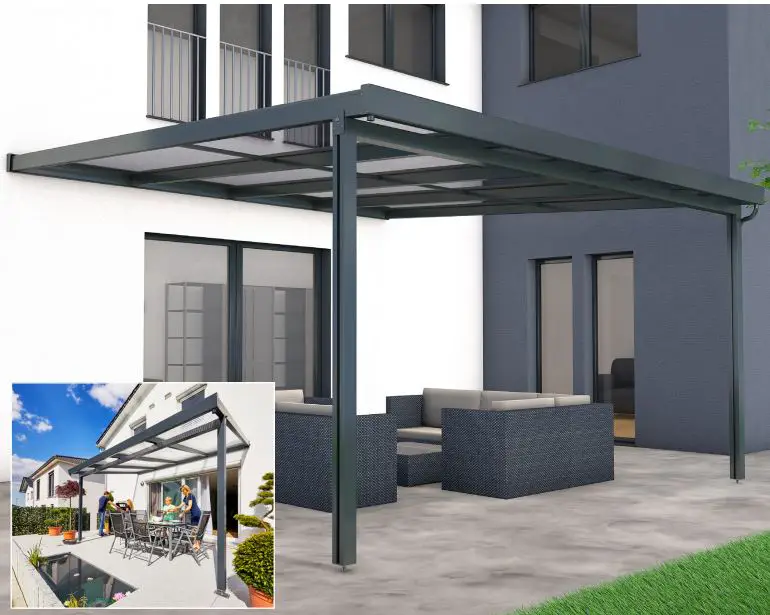
The Premium Terrace Roof is a roofing system designed for use over a terrace. It comes in two sizes: 4×3 meters and 4×4 meters. The product is available in different article numbers depending on the size and variant.
The terrace roof is made according to EN 1090 standards and is suitable for non-commercial use. It should be properly fastened to the house wall using the included wall connection. The product is intended for its described use and any other use is considered improper and may result in damage or consequential damage. Please consult a specialist if you have any doubts regarding the installation or usage of the product.
Product Usage Instructions
- Check that you have all the necessary components listed in the manual.
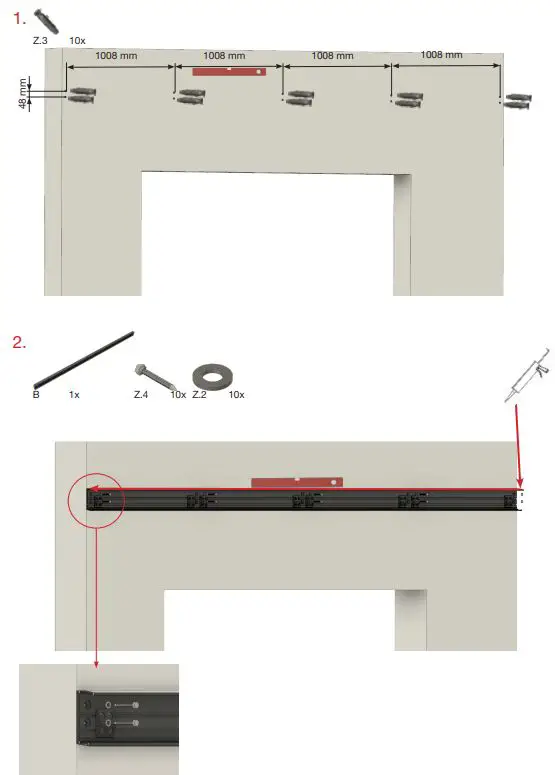
- Start by assembling the wall connection (B) using the pre-assembled bearing profiles.
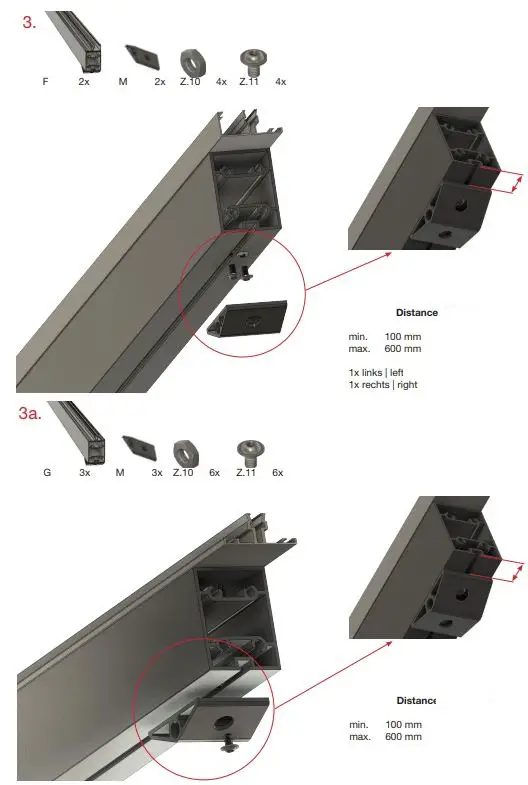
- Attach the front cross beam/purlin (F) to the wall connection, ensuring a minimum distance of 100mm and a maximum distance of 600mm between each attachment point.
- Install the cross braces (E) at the specified distances using the provided screws (Z.10, Z.11).
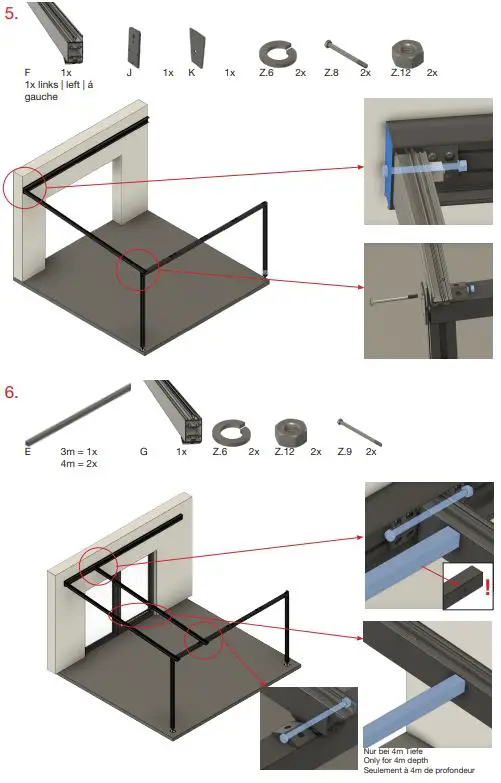
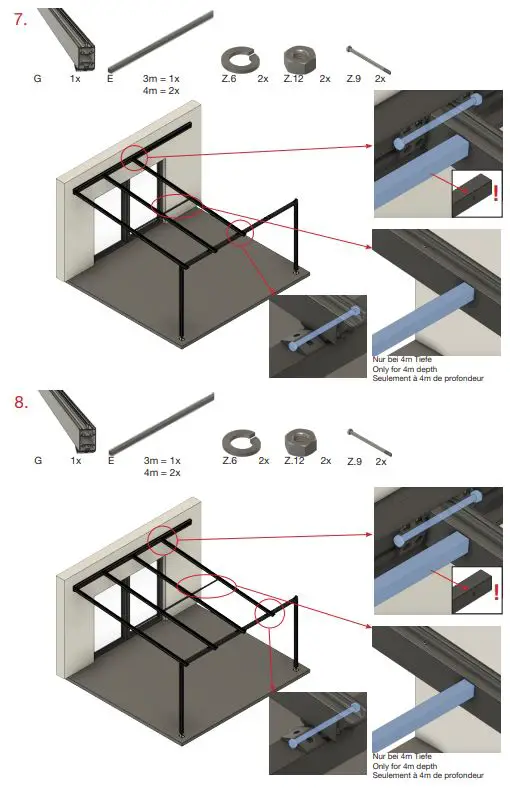
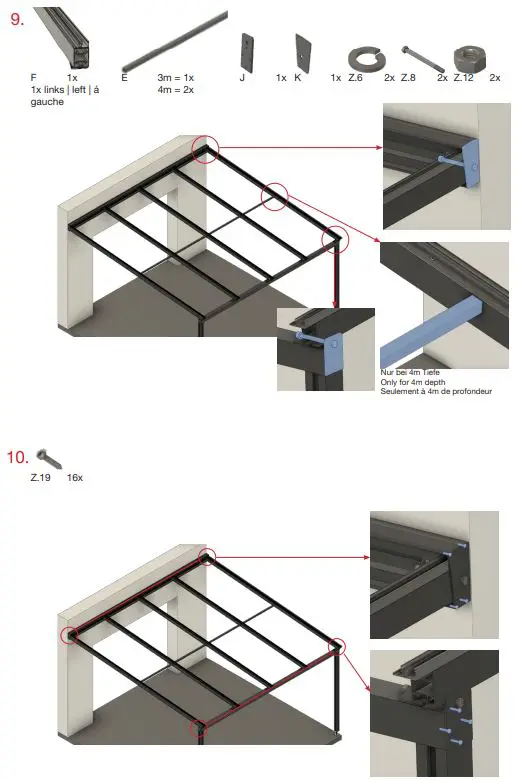
- Attach the rafter edges (G) and middle rafters (G) to complete the framework.
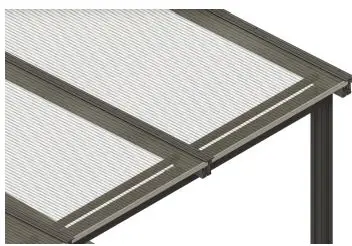
- Install the hollow chamber sheets (A) onto the framework, securing them with stainless steel screws (Z.6, Z.9, Z.12).
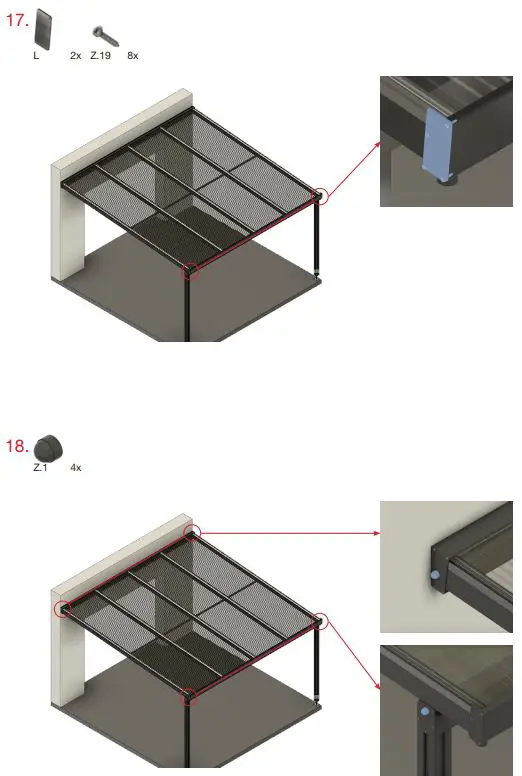
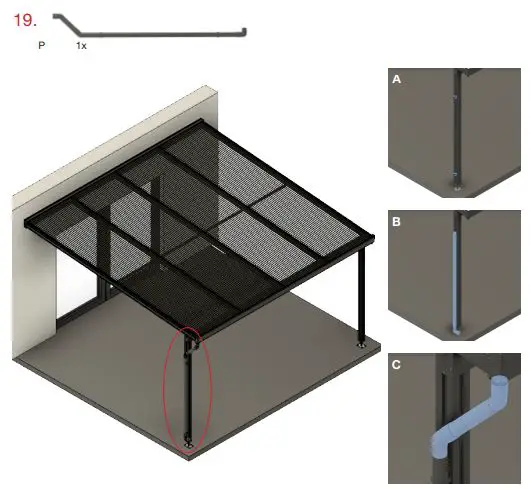
- Attach the provided caps (J, K, L) to cover the wall connection, front cross beam, and rain gutter.
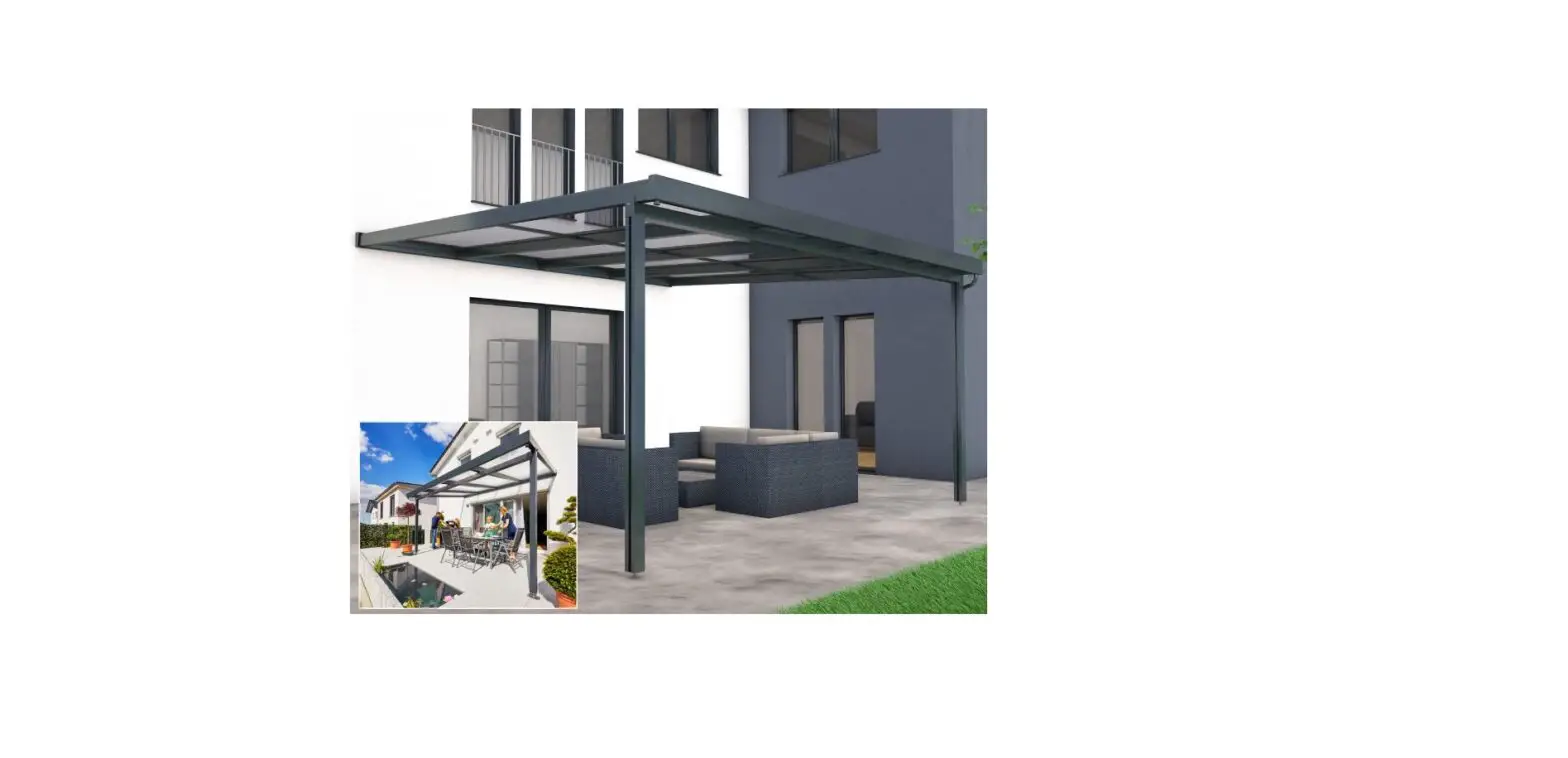
- Install the rain gutter (D) and ensure it is properly aligned and securely attached.
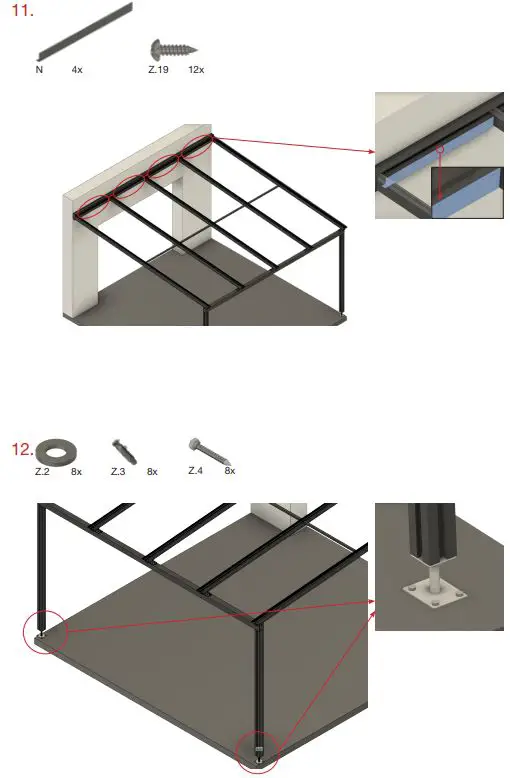
- Complete the installation by attaching the storage profiles (M) and covering them with the provided covers (N).
- Ensure that all components are properly secured and aligned before using the terrace roof.
Requirements
Assembly instructions
Care information
- Read all safety notices and instructions. Failure to do so may result in serious cause serious injury.
- Observe the local building regulations as well as the snow load zones in your region.
- Open fire, highly flammable substances or the like are not permitted underneath the product. Escape routes must be available and kept clear.
- Sort the parts before assembly and check the contents list according to the assembly instructions.
- At least 2 persons are required to assemble the patio roof kit.
- Follow the instructions and assembly steps in the assembly instructions.
- The twin-wall sheets must not be walked on without crosswise running boards (over at least 2 rafters).
- Point loads must be avoided at all costs.
- Remove snow from the roof regularly. A snow height of more than 10 cm can already become dangerous (layer heights of 36 cm for dry snow, 10 cm for watery snow and 5.5 cm for ice correspond to a weight of approx. 50 kg/m²).
- Snow load: models with 3-4 m roof depth: 150 kg/m² and models with 5 m roof depth: 100 kg/m².
- Included fastening material is for solid masonry only. Separate fasteners must be used for insulation, hollow blocks, etc.
- Keep the gutter free of leaves, dirt and snow.
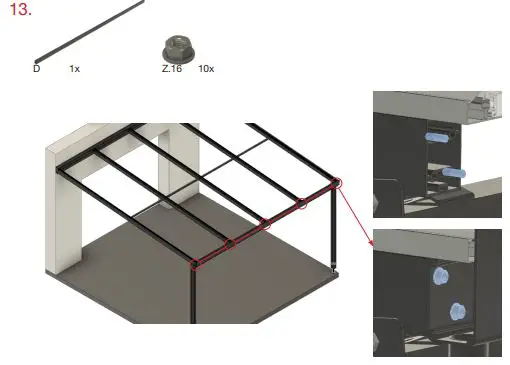
- The patio roof must be mounted on a level, solid foundation (e.g. concrete, concrete slabs). Foundation dimensions: length 40cm x width 40cm x depth 80cm.
- Clean the twin-wall sheets with water and a mild detergent, do not use abrasives, acetone or solvents!
- Defective or bent posts or beams must be replaced immediately.
- The wall connection profile must be attached at the following height (measured at the upper edge of the profile).
- 3m depth: 240cm = 7° – 300cm = 20°
- 4m depth: 240cm = 5° – 340cm = 20°
- As the cross beam can be moved by max. 60cm towards the house wall, this results in a higher roof pitch (slope).
- Colour and size deviations etc. within the usual tolerances reserved. Our recommendations do not release the custo-mer from the obligation to check the product on his own responsibility. In case of doubt, please consult a specialist. Technical modifications reserved.
- The Premium Terrace Roof has been developed and manufactured according to EN 1090. It may only be used for roofing over a terrace with appropriate fastening for the respective house wall and for non-commercial use. Any use other than the intended use described here is considered improper use. The manufacturer is not liable for any damage or consequential damage resulting from improper, incorrect or inappropriate use.

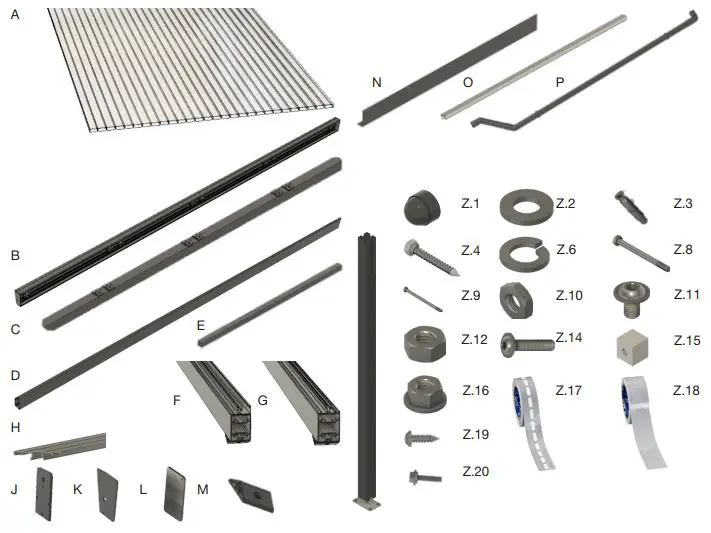
List of Items
| Nr. | Designation | Number |
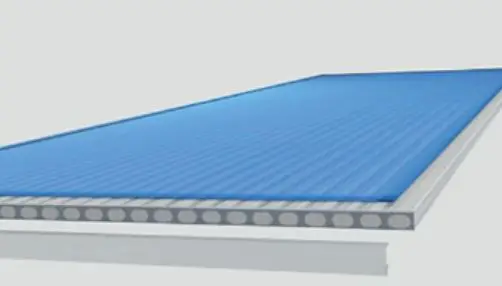
| A | Twinwall sheet 980 x 3000 / 4000 mm | 4x |
| B | Wall connection incl. pre-as- sembled bearing profiles | 1x |
| C | Front cross beam/purlin | 1x |
| D | Rain gutter | 1x |
| E | Cross brace 30x30x946 mm | 8x |
| F | Rafter Edge left and right (partly pre-assembled) | 2x |
| G | Rafter middle (partly pre-as-sembled) | 3x |
| H | Alu Cap | 5x |
| I | Pre-assembled post with stand | 2x |
| J | The cap of front cross beam/purlin | 2x |
| K | Cap wall connection | 2x |
| L | Cap rain gutter | 2x |
| M | Storage profile | 5x |
| N | Cover of wall connection | 4x |
| O | U-Profil for Twinwall sheets | 8x |
| P | Rain drainage | 1x |
| Z.1 | 4295896 – Cover cap SW 19 | 4x |
| Z.2 | 9210407 – 10,5 VZ DIN 125 | 18x |
| Z.3 | 9210408 –Dowel 12 mm | 18x |
| Z.4 | 9210411 – 10×80 VZ DIN 571 | 18x |
| Z.6 | 9210481 – M12 DIN 127 B VZ | 10x |
| Z.7 |
| Z.8 | 9210483 – M12x140 DIN 931 8.8 | 4 x |
| Z.9 | 9210484 – M12x200 DIN 931 8.8 | 6x |
| Z.10 | 9210485 – M6 DIN 439 | 10x |
| Z.11 | 9210486 – M6x10 ISO 7380- 2 10.9 | 10x |
| Z.12 | 9210487 – M8 DIN 934 VZ | 10x |
| Z.13 | ||
| Z.14 | 9210490 – M8x40 ISO 7380- 2 10.9 | 24 | 16 x |
| Z.15 | Holder for cross beam | 16 | 8 x |
| Z.16 | M8 DIN 1661 A2 | 10x |
| Z.17 | Edge closing tape with membrane | 1x |
| Z.18 | Edge closing tape without membrane (optional) | 1x |
| Z.19 | 9210479 – 4,8×13 ISO 14585 A2 TX C | 36x |
| Z.20 | Stainless steel screw 6,3×32 incl. membrane seal | 35 | 30 x |
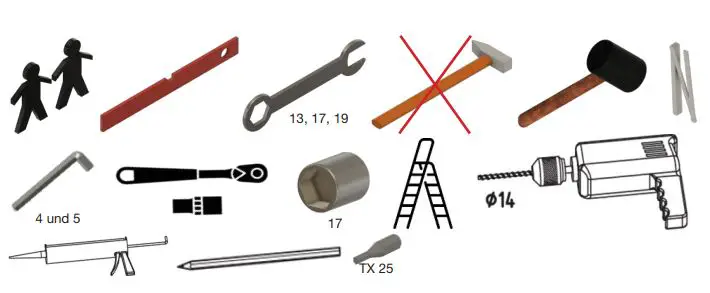
TOOLS
INSTALLATION INSTRUCTION


Only acrylic sheets the Included in delivery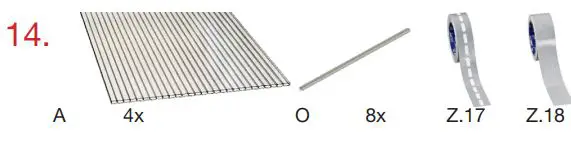
- To protect against dust and dirt, tape the front sides of the panels with edge sealing tape. To do this, beat the protective film only as far as necessary.

- Now attach the aluminum U-end profiles to the end faces. Make sure that the marked protective foil is on top. UV protection for panels is protected on one side! The dripping nose of the profile points downwards.


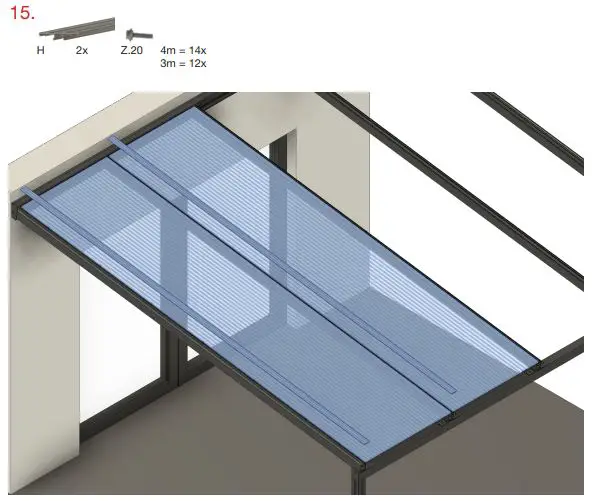
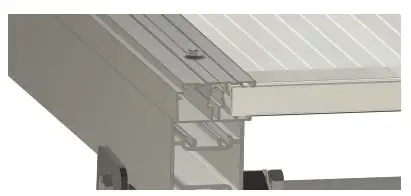
- Place the first plate and align it correctly – make sure that the protective foils are aligned correctly here too. Place the upper part of the profile and screw it to the lower part.

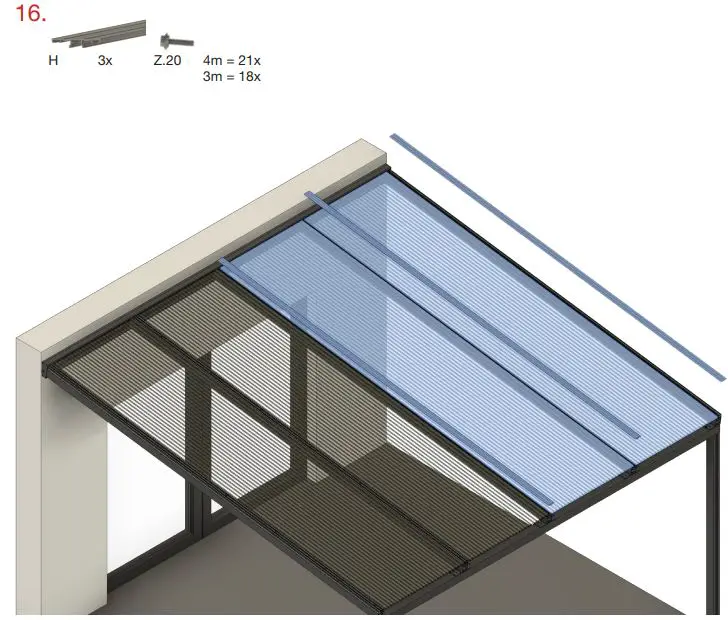
- Assemble the 3rd and 4th plates in the same way and screw this cover together as in step 15. Then remove the protective films.