![]()
![]() Mahe it happens
Mahe it happens
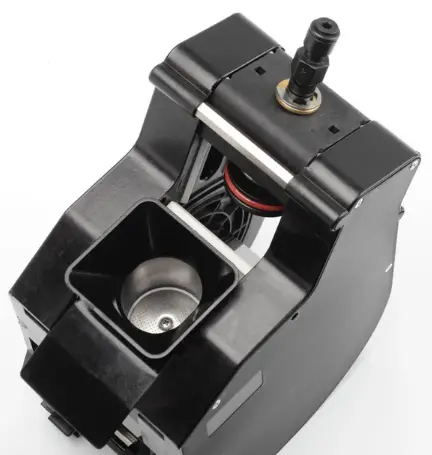
FITTING BREWER
SERVICE KIT
FITTING BREWER SERVICE KIT
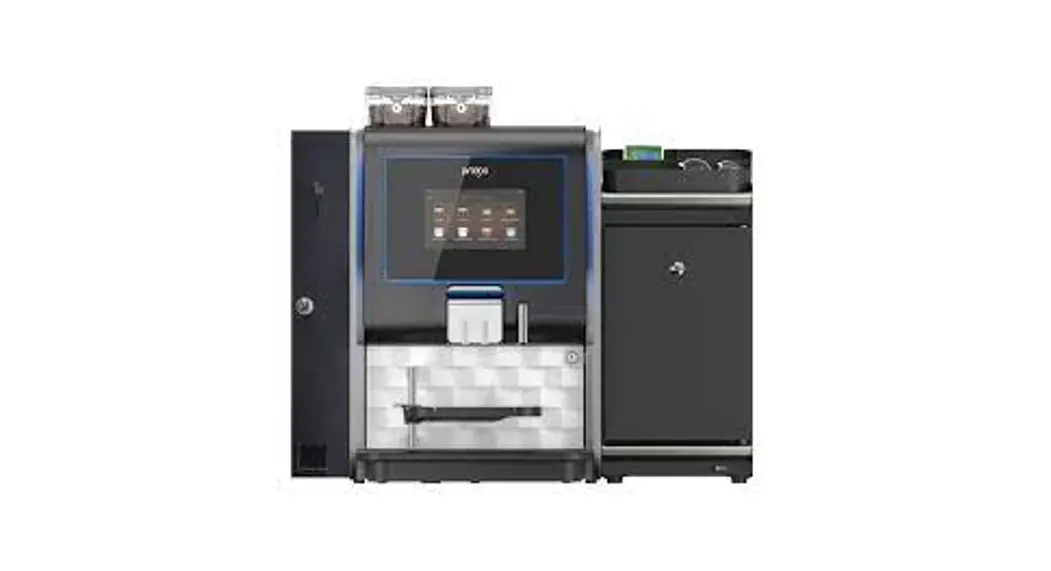
These instructions show how to replace parts from the maintenance kit with the High-Pressure Brewer.
- Recommended at 25000 drinks.
- The machine will alert the “service brewer”
You will need:
- 37mm Service Kit PN:1057167
- 44mm Service Kit PN:1057151
- 7mm socket spanner
- Crosshead Screwdriver
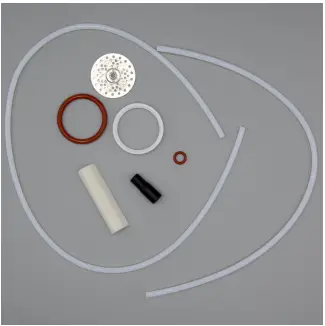
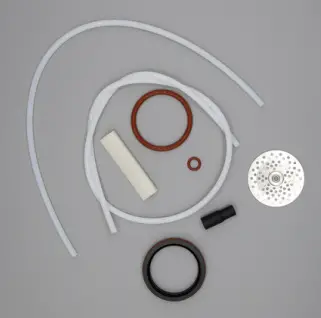
Contents:
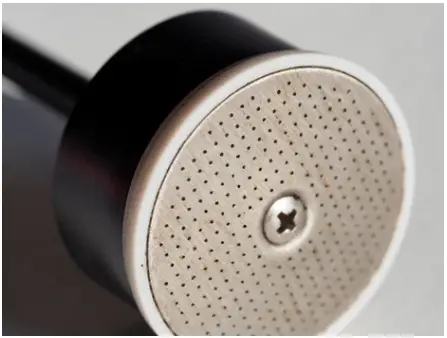
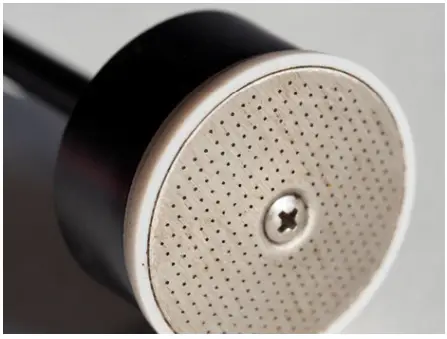
- Filter
- Seal (lower piston)
- Large O Ring
- Small O Ring
- Wiper
- Rubber Socket
- 2 x Hose
 |  |
| 37mm Service Kit PN:1057167 | 44mm Service Kit PN:1057151 |
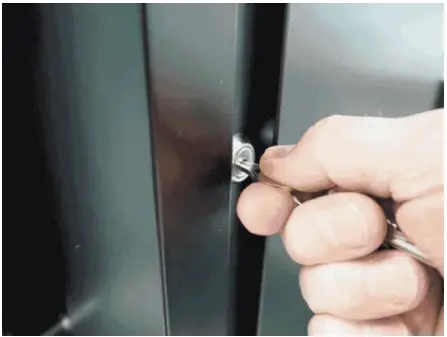
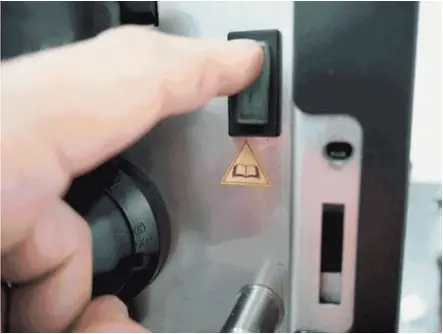
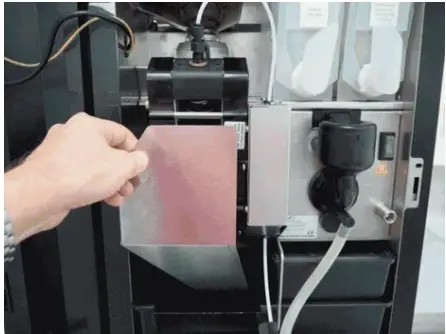
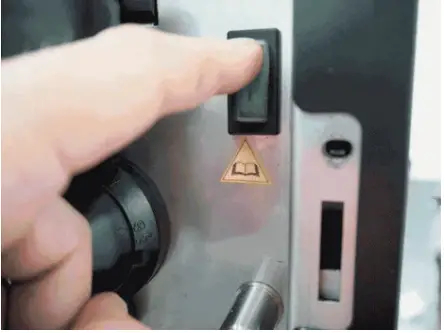
| 1. Unlock the machine, and open the door. | 2. Switch off the machine. |
 |  |
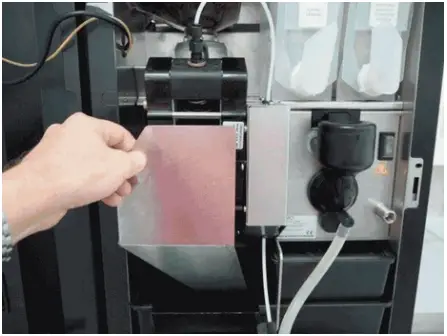
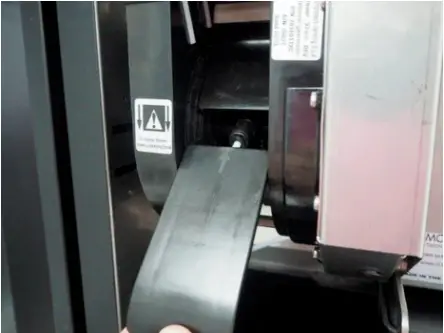
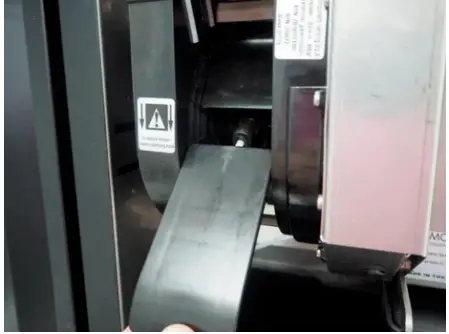
| 3. Remove the brewer cover. | 4. Remove the plastic (OG =steel) slide |
 |  |
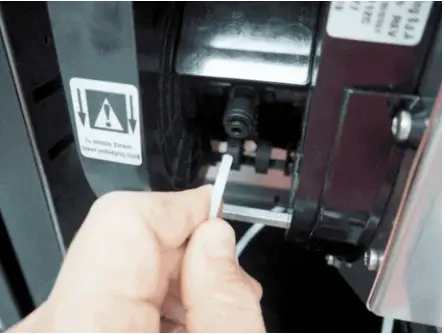
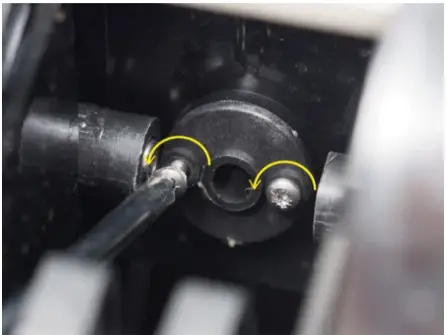
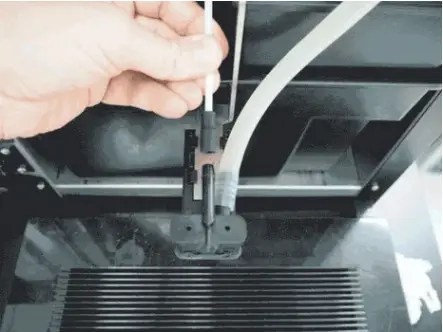
| 5. Remove the upper hose (coffee outlet) from the push fitting. | 6. Remove the lower hose (water supply) from the push fitting. |
 |  |
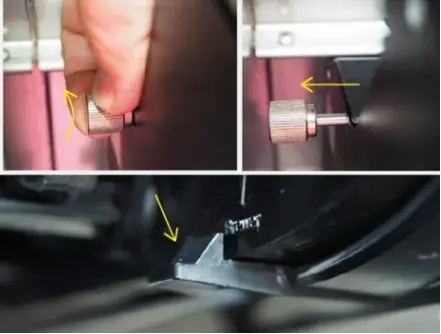
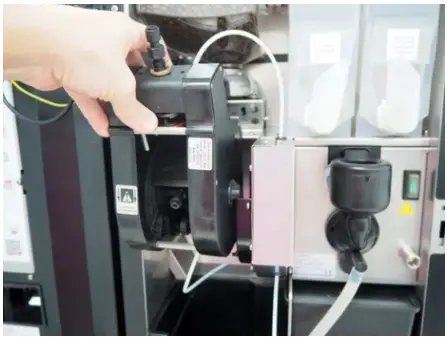
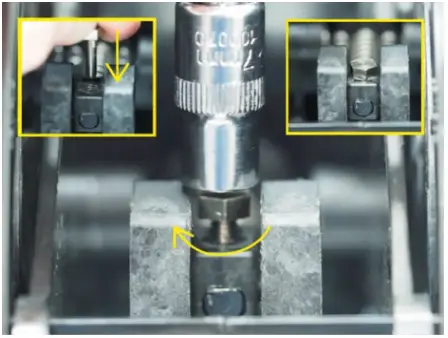
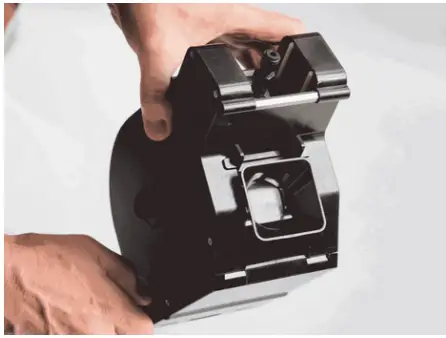
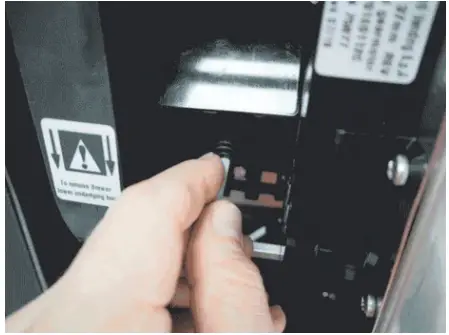
| 7. Unscrew the bolt. Press down the plastic clip and remove the brewer. | 8. Remove the brewer from the machine. |
 |  |
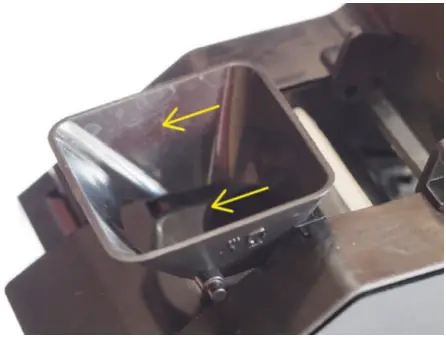
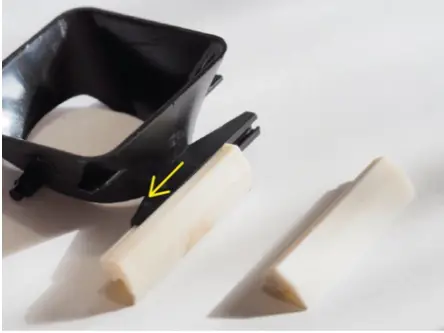
| 8. Remove the funnel and wiper by sliding them out of the brewer. | 10. Remove the old wiper & discard it, clean the funnel and replace the new wiper. |
 |  |
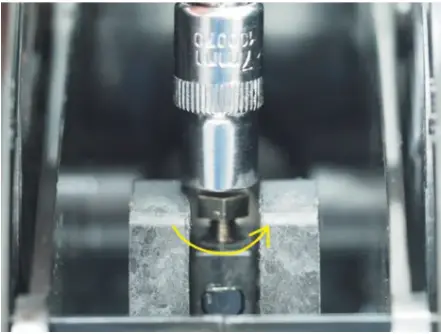
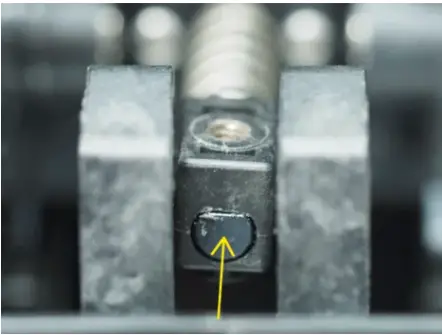
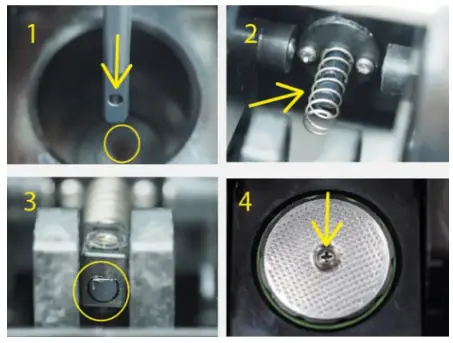
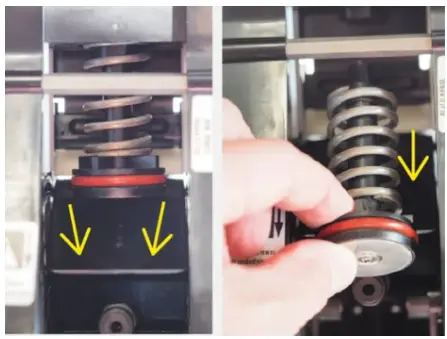
| 11. Disassemble the lower piston and unscrew the lower piston rod nut. | 12. Push the Piston upwards by pushing against the piston rod. (37mm has a metal spring! keep it safe!) |
 |  |
| 13. Disassemble the lower piston. Take out the used piston seal and discard. | 14. Replace piston shaft O Ring. Unscrew both cross-head screws |
 |  |
| 15. Remove the flange Plate | 16. Remove the old O Ring, Lubricate the new O Ring and replace it, and fix the plate with screws. |
 |  |
| 17. Replace the piston seal, and reassemble the piston. | 18. Reassemble the lower piston back into the brewer. |
 |  |
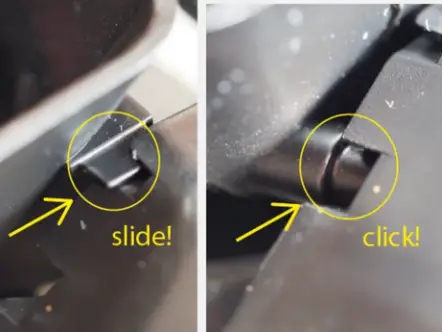
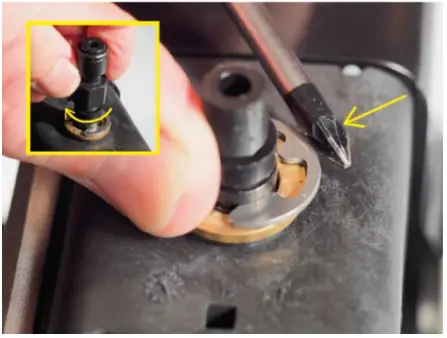
| 19. Fix the lower piston, replace the screw and fix it back into place. | 20. Replace the funnel slide both wings into the slot and push the funnel until it clicks into place. |
 |  |
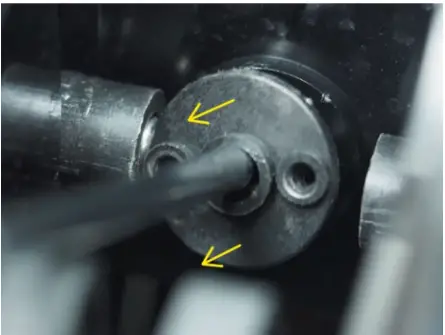
| 21. Remove the upper piston, and remove the push fitting by unscrewing. | 22. Push the plunger upward to release tension then remove C Clip, & take off the brass ring. |
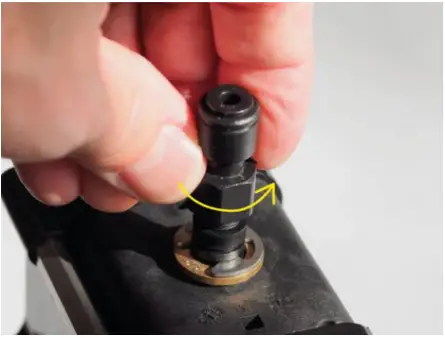 | 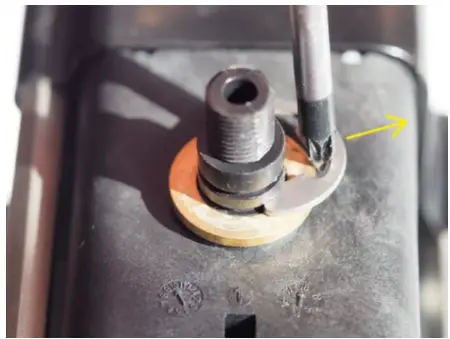 |
| 23. Remove the upper piston. Push the flap down and pull out the upper piston. | 24. Remove parts, clean pistons, and replace hygiene parts from the kit. Reassemble the upper piston. |
 | 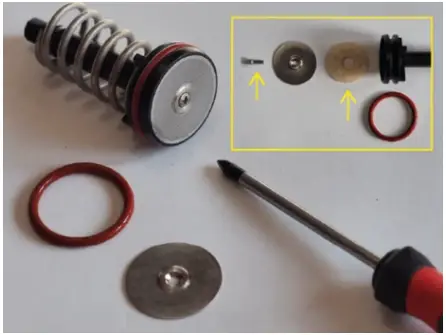 |
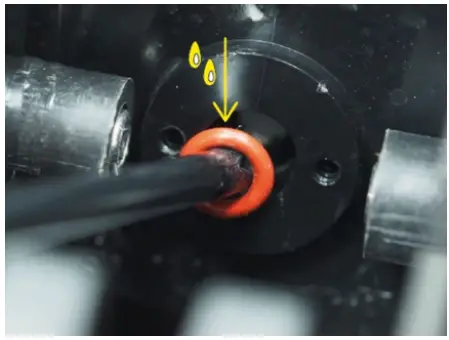
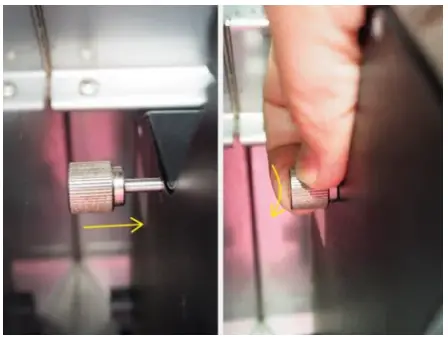
| 25. Reassemble the upper piston, and replace the brass ring and C Clip. Refit push fitting. | 26. Run a couple of manual brewer cycles by hand. Use the rotation wheel… |
 |  |
| 27. Check the pistons move without friction. | 28. Movement should be smooth. |
 |  |
| 29. Replace the brewer in the machine, and lock it with the bolt. | 30. Reconnect the upper tube (coffee outlet). |
 | 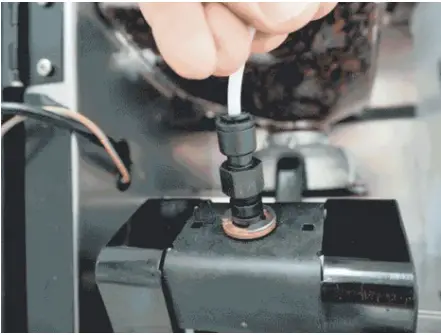 |
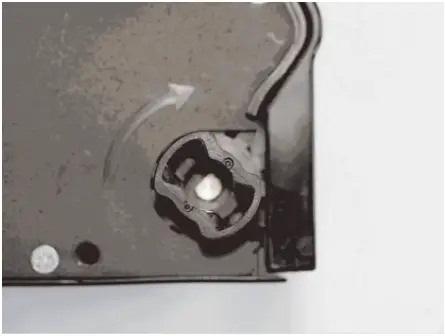
| 31. Reconnect the lower tube (water supply). | 32. Replace the rubber socket on the lid splitter in the dispensing area. |
 |  |
| 33. Replace the plastic (OG = Steel) slide into the brewer. | 34. Refit the brewer cover. |
 |  |
| 35. Switch the machine on. | 36. Lock the door and dispense a couple of coffees from the machine to check the drinks. |
 |  |
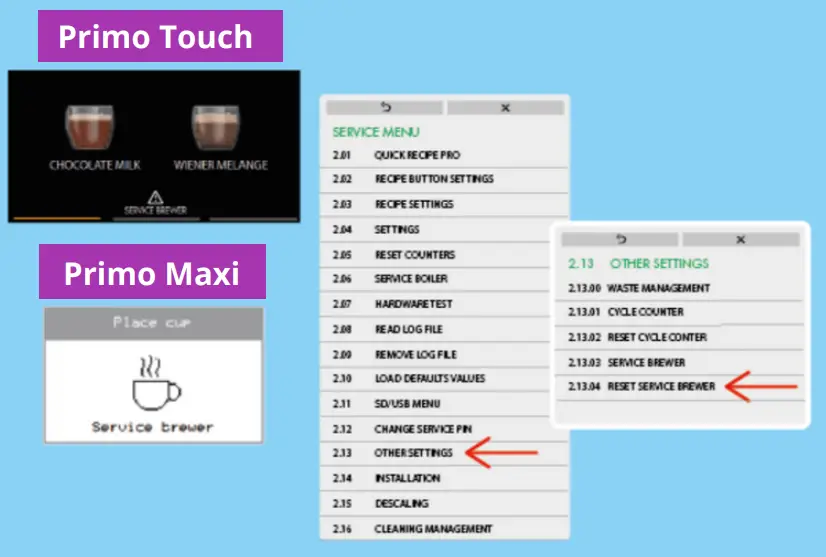
RESET BREWER COUNTER
After fitting the new service kit and servicing the brewer it is important to reset the “service brewer” counter.
- 02 SERVICE MENU
- 13 OTHER SETTINGS
- 04 RESET SERVICE BREWER
And confirm the change.
![]() CONTACT
CONTACT
Westomatic Vending Services Ltd,
Units 7 – 8 Forde Court, Block 4 Forde Road, Newton Abbot, TQl2 4BT
![]()
![]()
![]() +44 ( 0 ) 1626323100
+44 ( 0 ) 1626323100![]() [email protected]
[email protected]![]() www.westomatic.com
www.westomatic.com


