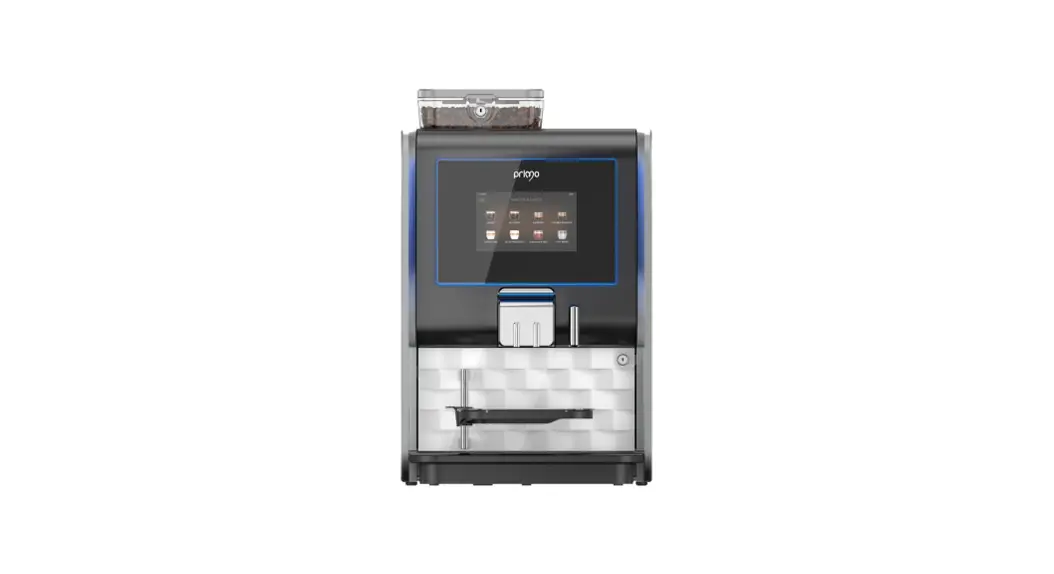

![]() INSTALL & USE
INSTALL & USE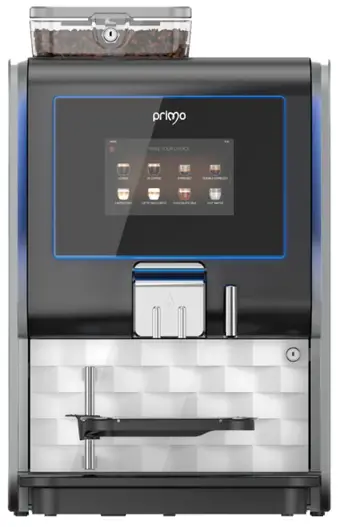
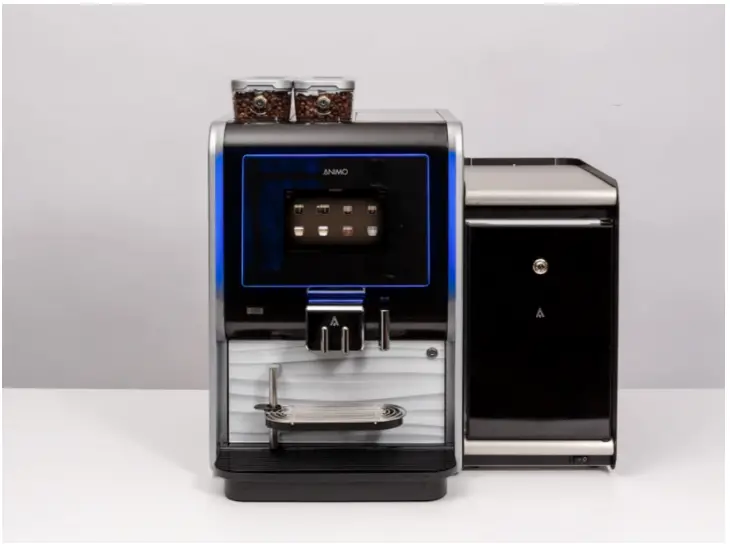
INSTALL WATER RESERVOIR
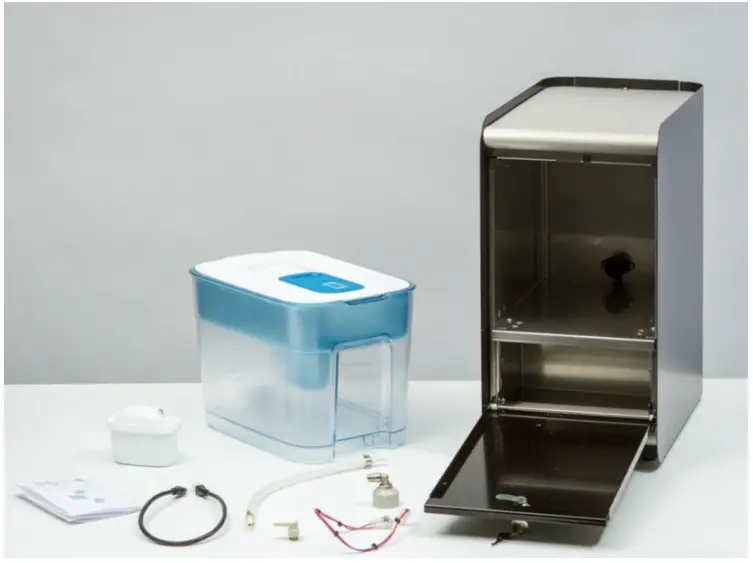
The water reservoir allows the achine to be used without mains water connection:
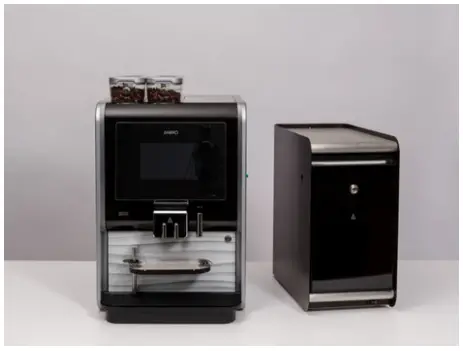
- External Dimensions Water Reservoir: W230xD420xH455mm
- External Dimensions Total: W530xD515xH600mm
- Capacity Water Reservoir: 8.2litres/5.2litres with the Filter
Parts Included:
Check the contents:
- Water Reservoir
- Water Container
- Water Hose
- Hose Connector x2
- Internal Power cable (red & purple wire)
- Power cable (black)
- User manual
- Brita Filter & cartridge (optional use)
- OPTIONAL: Ingredient Box PN: 1057339
NB: The machine will have been set up to your specifications and tested at Westomatic HQ prior to install. All parts have been assembled on the machine. The QR code inside the machine gives access to the We:Support pages with technical information.
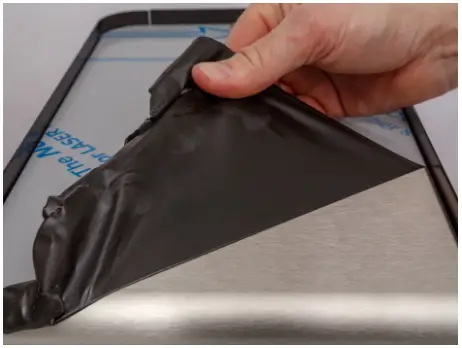
- Place the Water reservoir on a level surface Min Clearances: Rear: 50mm

- Ensure the protective plastic is removed from the top

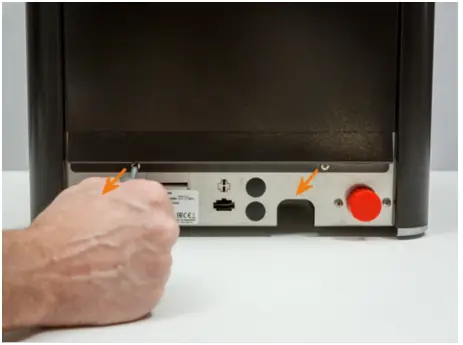
- Switch off and UNPLUG the Primo Compact from the mains power

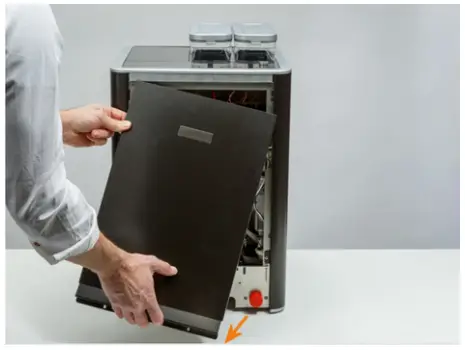
- Remove the screws from the back cover

- Remove the cover plate for the power cable feed through

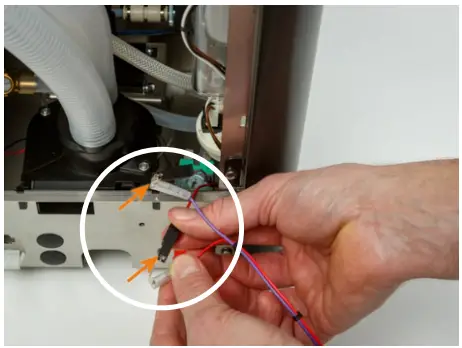
- Locate the power pins remove the red and purple wire connectors

- Connect the internal power cord to the plugs Red-Red/PurplePurple
- Place plugs back on power pins

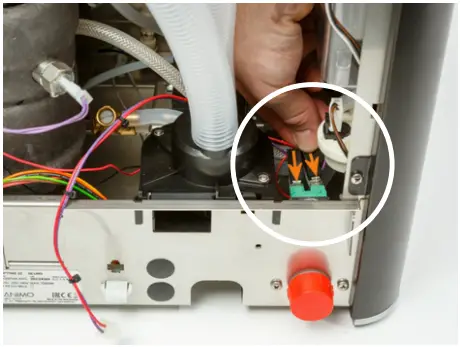
- Guide the internal power cable to the opening in back cover and push through

- Replace the back cover and fasten the two screws

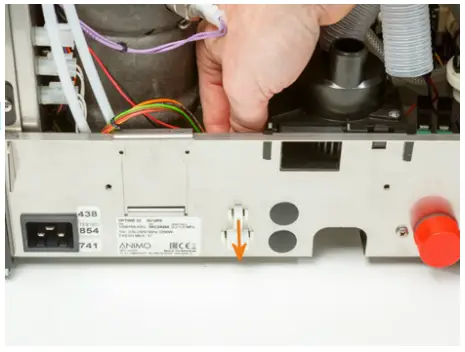
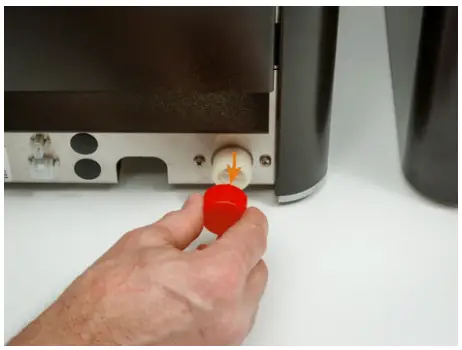
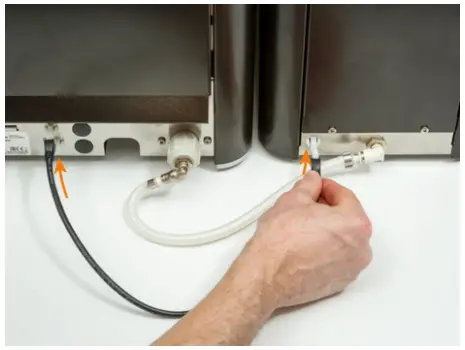
- Remove the red cover from the water entry on the Primo

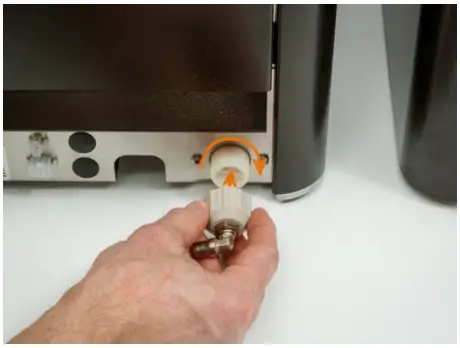
- Attach water connector and tighten
- Insert the water hose in the connector
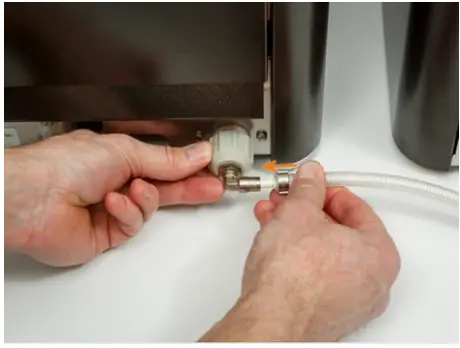
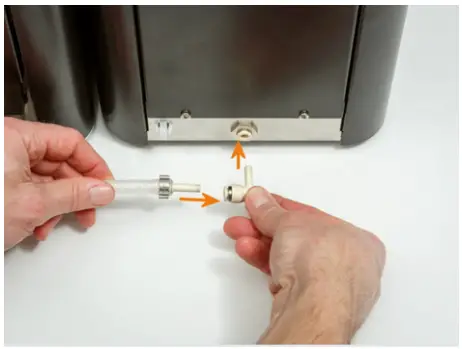
- Insert water hose into the water connector and then attach to the water reservoir

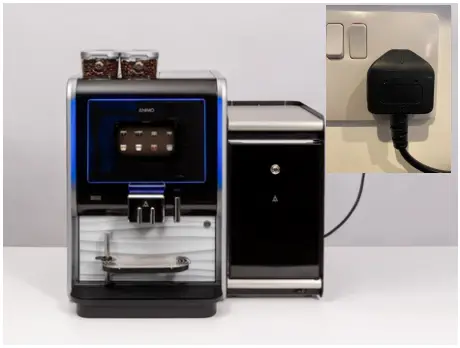
- Connect the Primo and the water reservoir with the external power cable
- Connect the Primo to the power outlet and Switch on

- Water Reservoir is now installed


USING THE RESERVOIR:
These instructions show how to commission the reservoir to use :
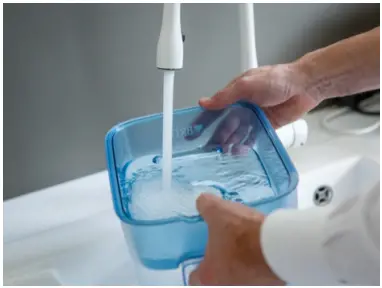
- Ensure the Water Reservoir is clean before every refill
- The reservoir is dishwasher safe to max 50°C
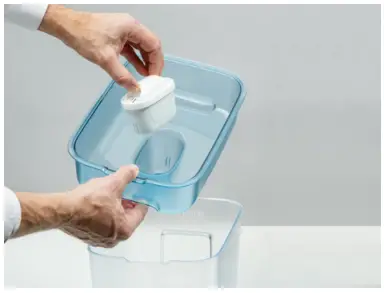
- NB. The Brita filter lid should be cleaned by hand (if using)
- Fit filter into the Brita Filter lid (If using)

- Fill container with water: 8.2litres Total (5.2liters with filter)

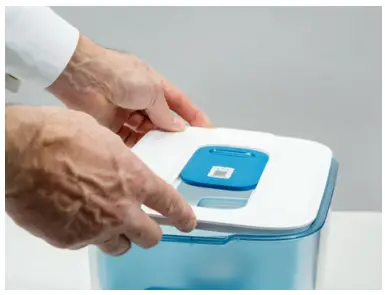
- Close the lid

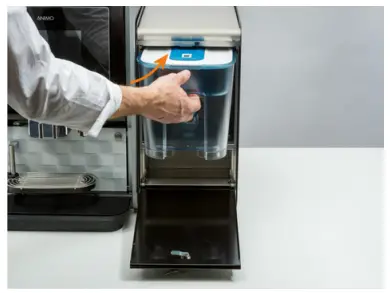
- Place the water tank into the unit and push to the back

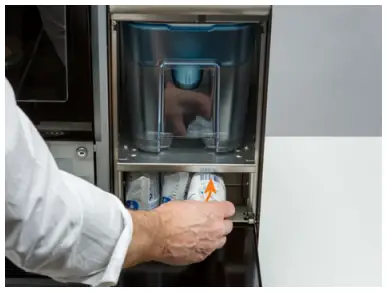
- There is space under the tank for spare water filters

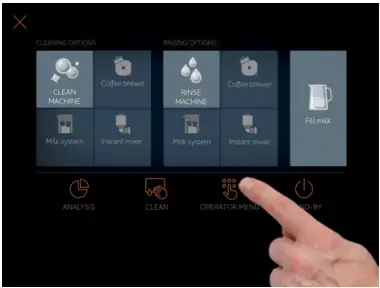
- On the main screen select the Main Menu

- Select OPERATOR MENU

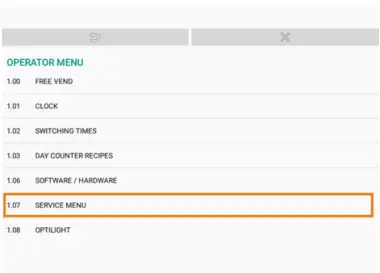
- Enter Operator Pin-Code Default = 11111

- Choose SERVICE MENU (1.07)

- Enter Pin-Code again to enter Service Menu

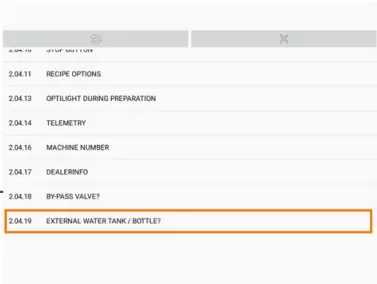
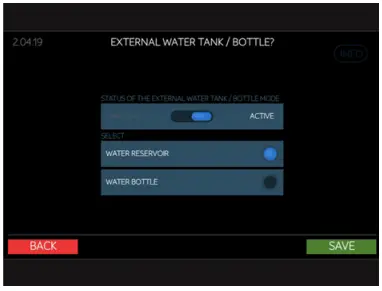
- Select SETTINGS (2.04) Select EXTERNAL WATER TANK (2.04.19)

- Switch to ACTIVE, Select WATER RESERVOIR, Press SAVE


Water Reservoir is now set up and ready to use.
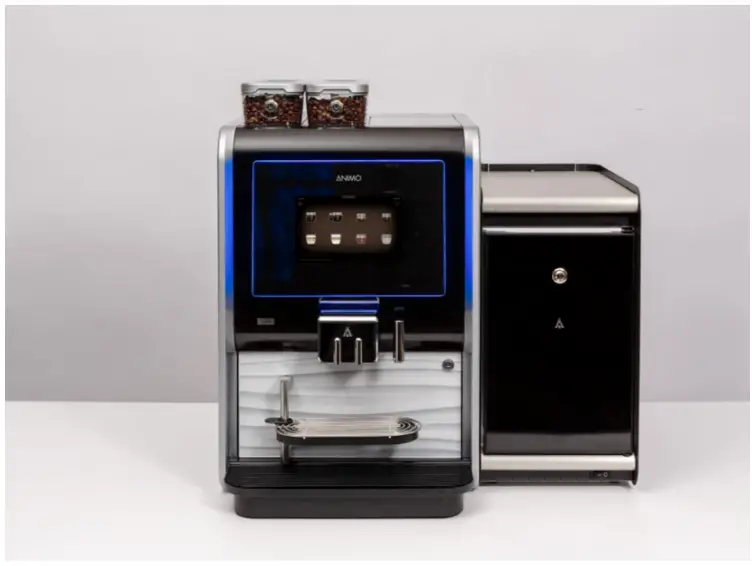
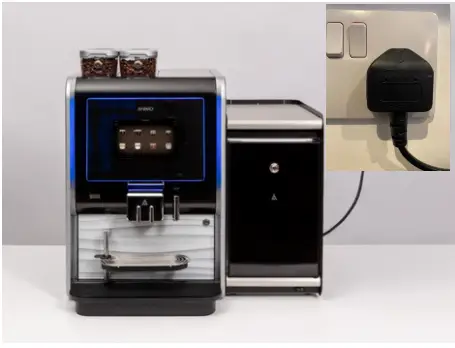
It is possible to use both the Water Reservoir and the Fresh Milk Fridge at the same time for the full experience.
![]()
![]()
![]() CONTACT
CONTACT
Westomatic Vending
Services Ltd,
Units 7 – 8Forde Court,
Block 4 Forde Road,
Newton Abbot,
TQ12 4 BT![]() +44(0)1626323100
+44(0)1626323100![]() [email protected]
[email protected]![]() www.westomatic.com
www.westomatic.com


