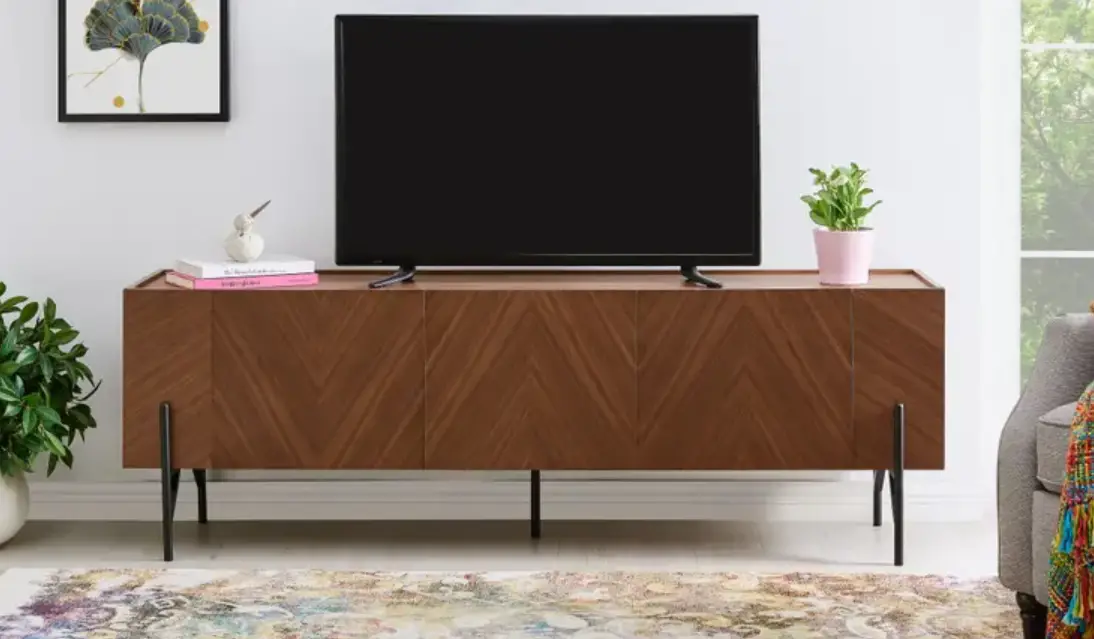
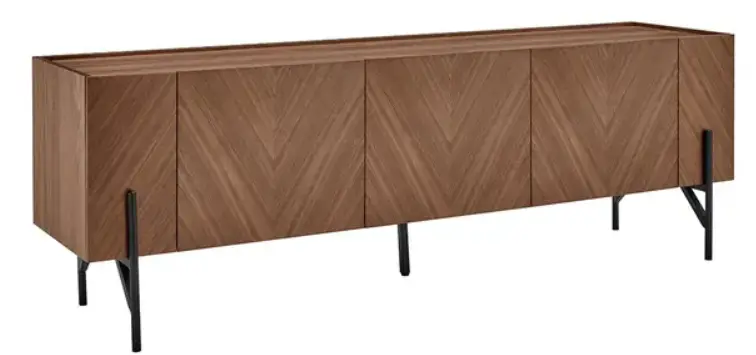
SHANGRI-LA SLRIOENTUOA Rio Entertainment Unit
COMPONENTS
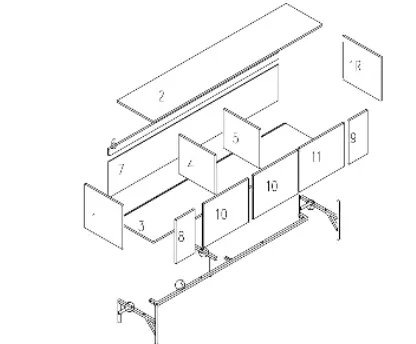
Parts list
| NO | SIZE | CARTON NO. | NO | SIZE | CARTON NO. |
| 1 | 396x396x16 (x2) | 2-2 | 7 | 1778x328x5 (x1) | 2-1 |
| 2 | 1768x379x16 (x1) | 2-1 | 8 | 396x197x16 (x1) | 2-2 |
| 3 | 1768x396x16 (x1) | 2-1 | 9 | 396x197x16 (x1) | 2-2 |
| 4 | 353x379x16 (x1) | 2-2 | 10 | 396x465x16 (x2) | 2-2 |
| 5 | 353x379x16 (x1) | 2-2 | 11 | 396x465x16 (x1) | 2-2 |
| 6 | 1768x60x16 (x1) | 2-1 | |||
Hardware
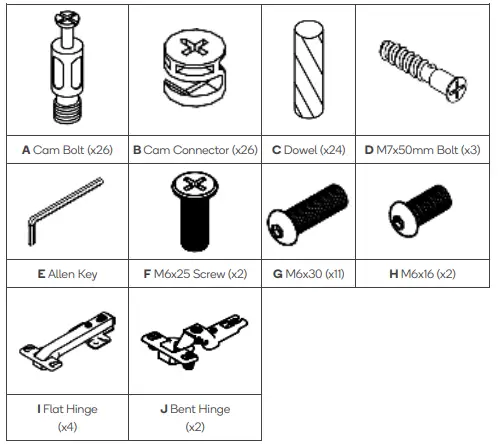
Note:
This product includes two different types of hinges. Ensure the correct ones are used during assembly.
ASSEMBLY
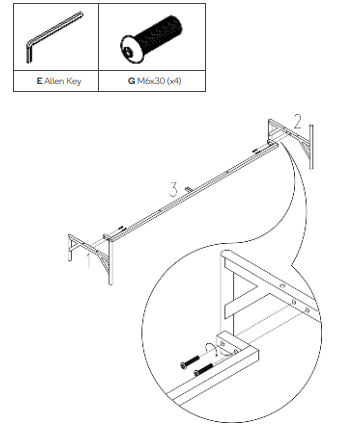
- Step 1:
Attach the two legs (1) & (2) to the centre support (3) using the four M6x30 Screws (G).
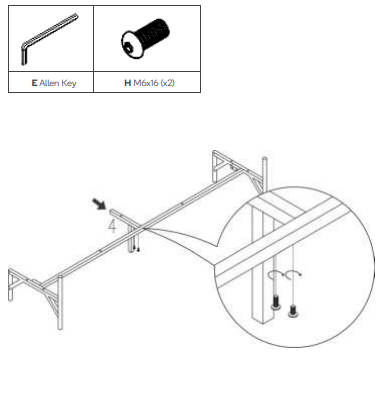
- Step 2:
Attach the centre leg (4) to the centre support (3) using the two M6x16 Screws (H).
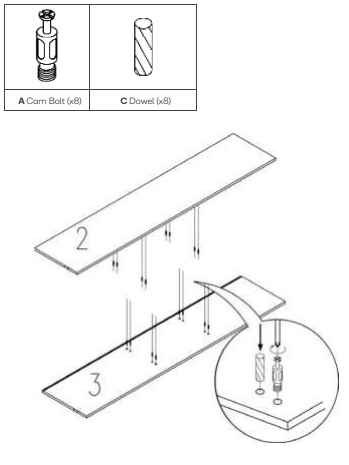
- Step 3:
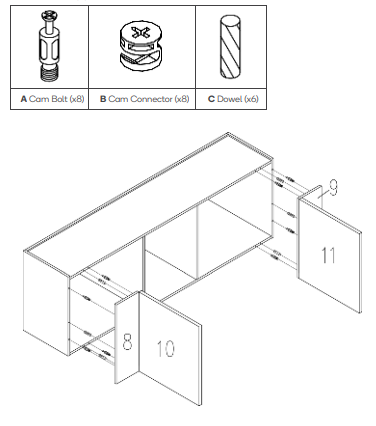
Insert eight Cam Bolts (A) and eight Dowels (C) into parts (2) & (3) in the locations shown below.
Important: Ensure the Dowels (C) are placed in the inner holes and the Cam Bolts (A) are in the outer holes.
- Step 4:
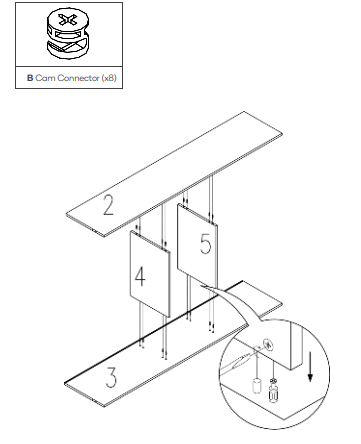
- Insert eight Cam Connectors (B) into all the holes adjacent to the corresponding Cam Bolts.
Note: Ensure the arrow on the Cam Connector (B) is facing the direction of the hole. - Attach parts (2), (3), (4) & (5) together by screwing the Cam Connectors (B) clockwise.

- Insert eight Cam Connectors (B) into all the holes adjacent to the corresponding Cam Bolts.
- Step 5:
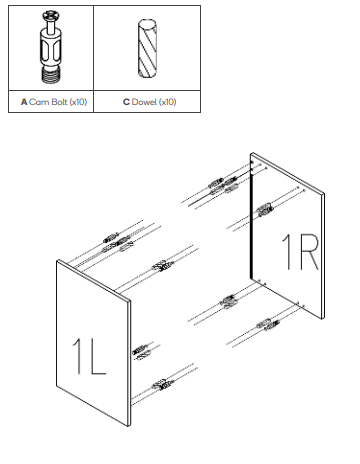
Insert 10 Cam Bolts (A) and 10 Dowels (C) into parts (1L) & (1R) in the locations shown below.
- Step 6:
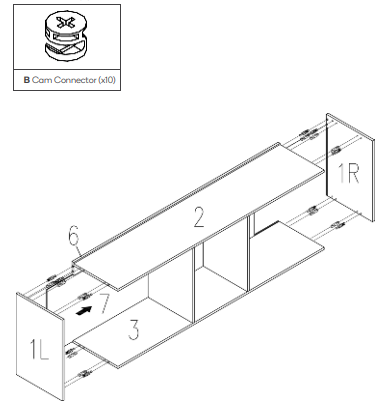
- Insert 10 Cam Connectors (B) into all the holes adjacent to the corresponding Cam Bolts.
Note: Ensure the arrow on the Cam Connector (B) is facing the direction of the hole. - Attach parts (1L), (1R), (6) & (7) to the assembled frame by screwing the Cam Connectors (B) clockwise.

- Insert 10 Cam Connectors (B) into all the holes adjacent to the corresponding Cam Bolts.
- Step 7:
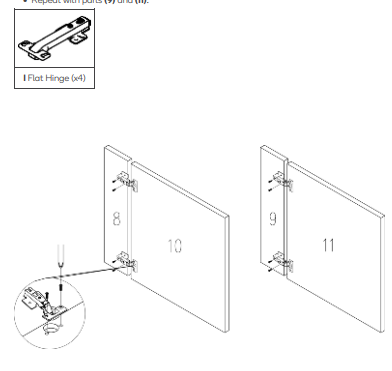
- Secure the two Flat Hinges (H) to parts (8) & (10) using the included hinge fasteners.
IMPORTANT: Ensure only the Flat Hinges (I) are used in this step. The Bent Hinges (J) will not fit. - Repeat with parts (9) and (11).

- Secure the two Flat Hinges (H) to parts (8) & (10) using the included hinge fasteners.
- Step 8:
- Insert eight Cam Bolts (A) and six Dowels (C) into parts (8) & (9) in the locations shown below.
- Insert eight Cam Connectors (B) into all the holes adjacent to the corresponding Cam Bolt (A).
Note: Ensure the arrow on the Cam Connector (B) is facing the direction of the hole. - Secure parts (8) & (9) to the entertainment unit assembly by screwing the Cam Connectors (B) clockwise.

- Step 9:
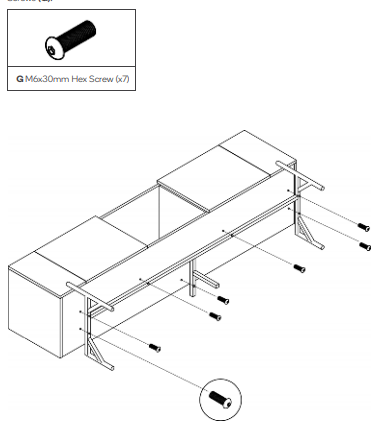
Secure the legs to the underside of the entertainment unit using the seven M6x30 Hex Screws (G).
- Step 10:
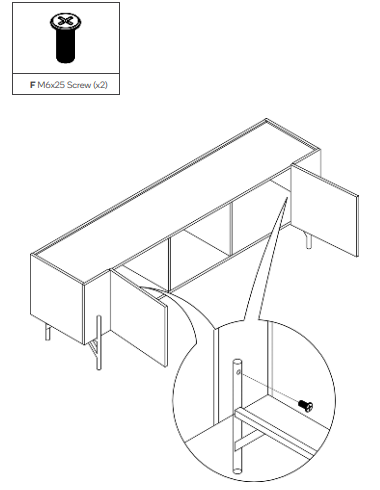
Secure the legs in place using the two M6x25 Screws (F) from inside the entertainment unit.
- Step 11:
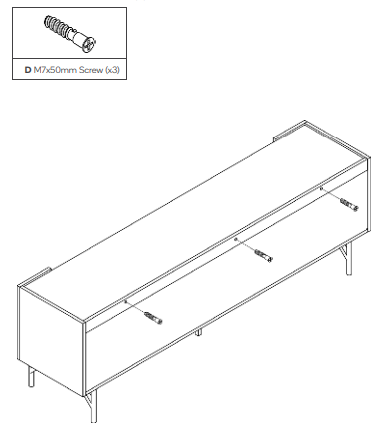
Insert the three M7x50 Screws (D) in the rear of the entertainment unit.
- Step 12:
Secure part (10) to the entertainment unit assembly using the two Bent Hinges (J) and the included hinge fasteners.
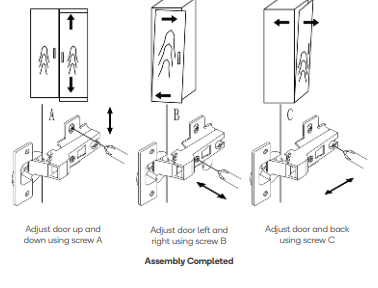
Adjustments