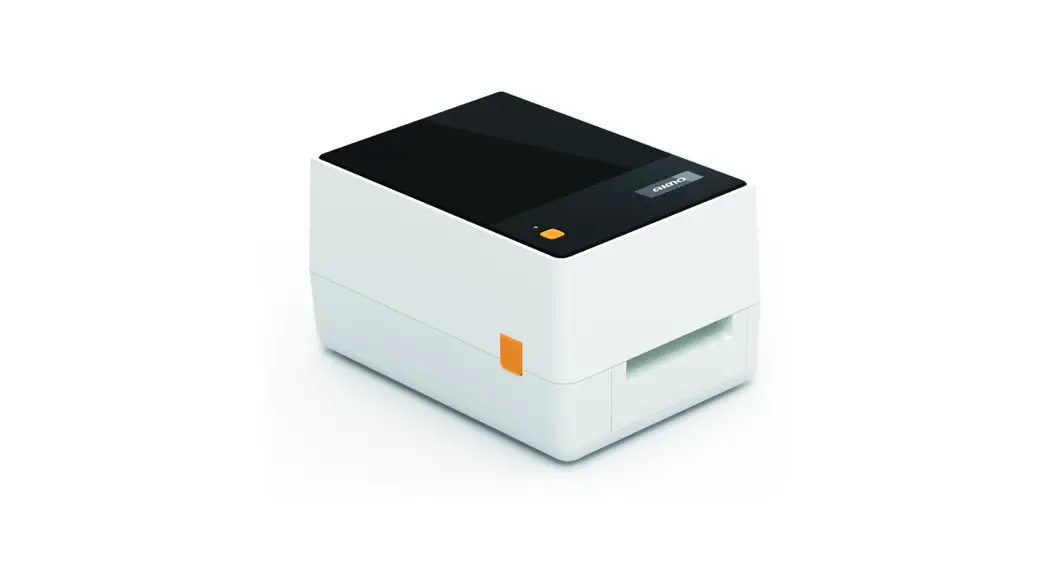
![]() Thermal Transfer Printer
Thermal Transfer Printer 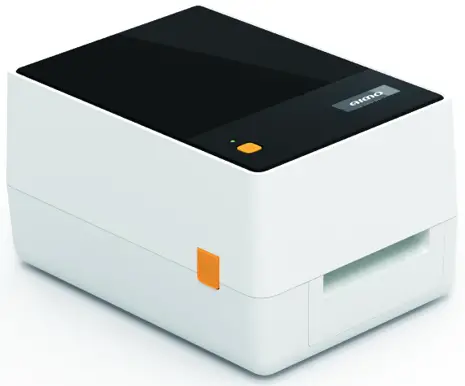 Package Contents: Instruction Manual*2, USB Cable*1, Power Cord*1,
Adapter*1, Paper Reel*1, Paper Stopper*2
https://t310.ltari.com![]()
T200-BT Thermal Transfer Printer
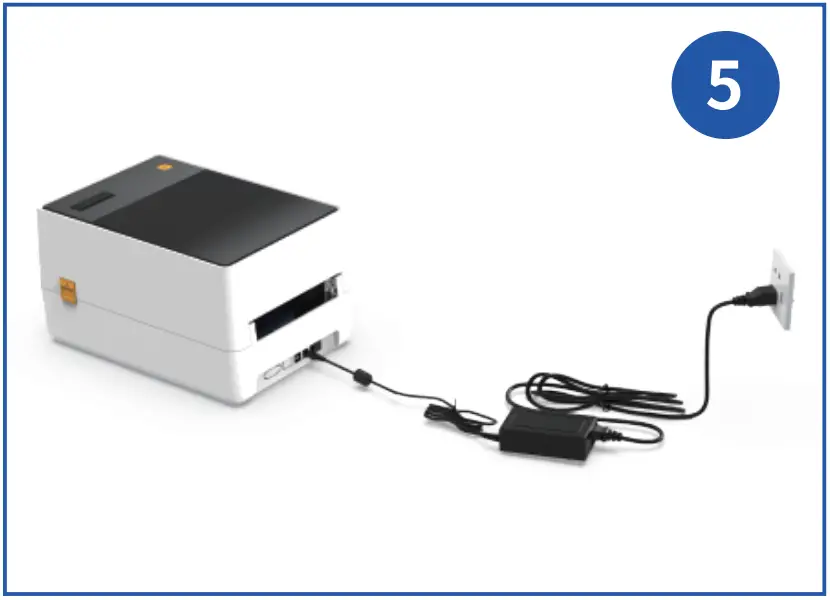
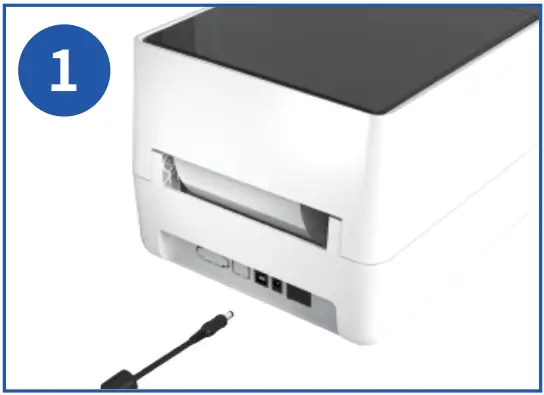 Connect the adapter cable to the machine
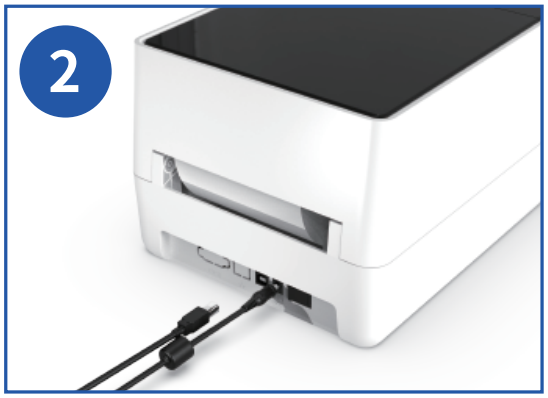 Connect the USB cable
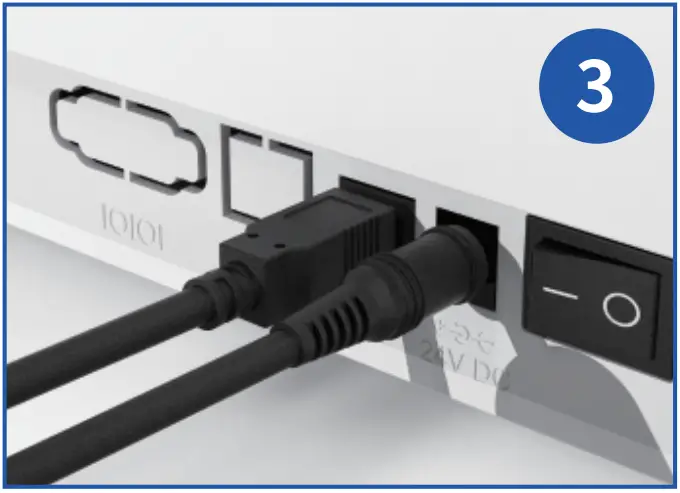 Turn on the power (1:0n; 0:0ff)
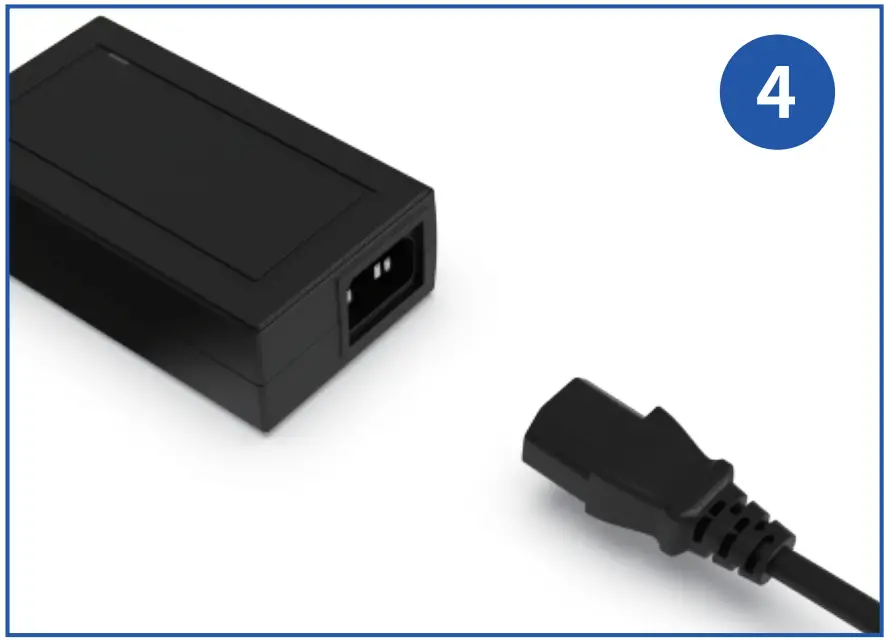
Attach the power cord to the adapter

FCC Warning statement:
“This device complies with part 15 of the FCC Rules. Operation is subject to the following two conditions:(1) This device may not cause harmful interference, and (2) this device must accept any interference received, inclu interference that may cause undesired oper:
Any Changes or modifications not expressly approved by the party responsible for compliance could void the user’s authority to operate the equipment.
This equipment has been tested and found to comply with the limits for a Class B digital device, pursuant to part 15 of the FCC Rules. These limits are designed to provide reasonable protection against harmful interference in a residential installation. This equipment generates uses and can radiate radio frequency energy and, if not installed and used in accordance with the instructions, may cause harmul interference to radio communications. However, there is no guarantee that interference will not occur in a particular installation. If this equipment does cause harmful interference to radio or television reception, which can be determined by turning the equipment off and on, the user is encouraged to try to correct the interference by one or more of the following measures:
~Reorient or relocate the receiving antenna,
Increase the separation between the equipment and receiver
~Connect the equipment into an outlet on a circuit different from that to which the receiver s connected.
~Consult the dealer or an experienced radio/TV technician for help.
FCCRF exposure statement:
The equipment complies with FCC radiation exposure limits set forth for an uncontrolled environment. This equipment should be installed and operated with minimurm distance between 20cm the radiator your body.
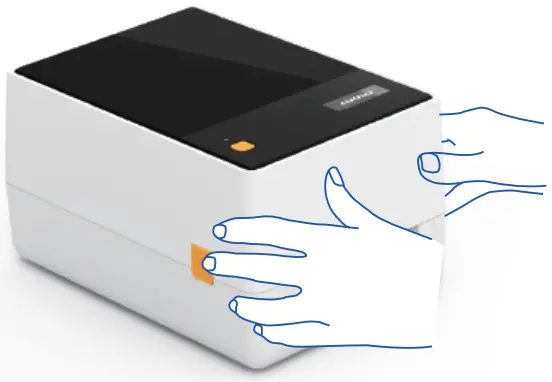
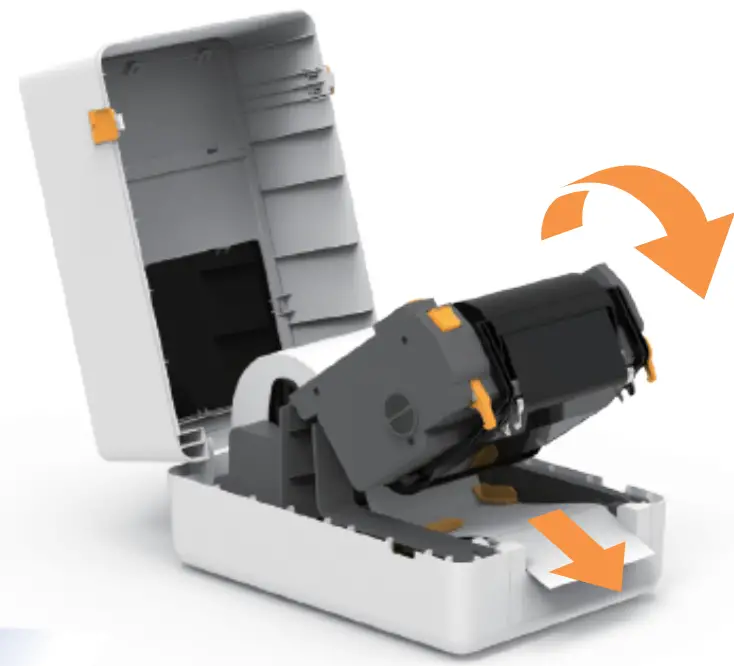
- Press the orange buttons on both sides to open the cover.

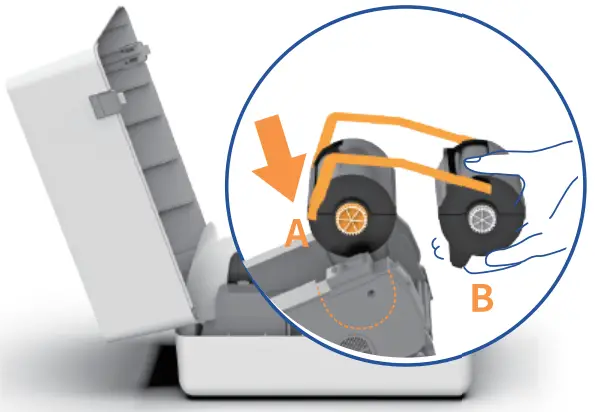
- Press the “Push” button and the ribbon cassette bracket will pop up automatically.

- Attach the receiving end (A) of the ribbon cassette at Slot A of the bracket. *If the ribbon is already installed, Please skip this step.

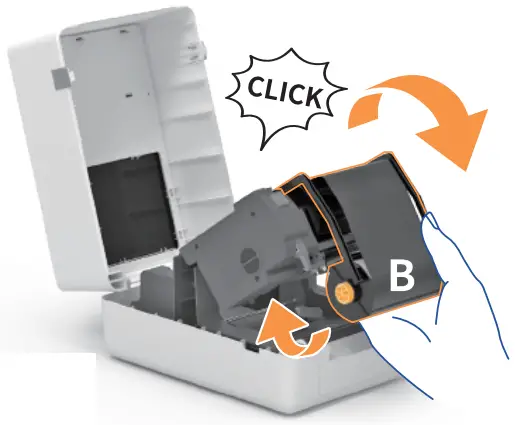
- Turn the supply end (B) downward until the pins enter Slot B. The installation of the ribbon cassette is completed when you hear a “click”. *If the ribbon is already installed, Please skip this step.

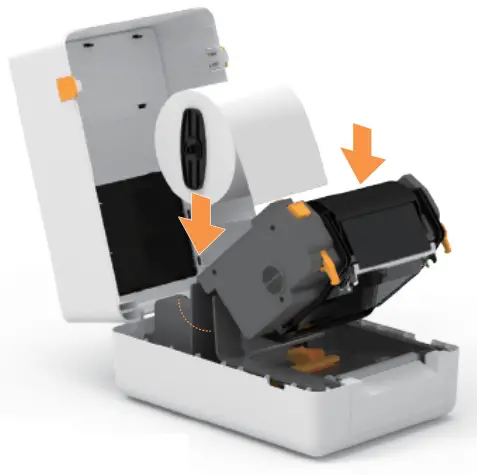
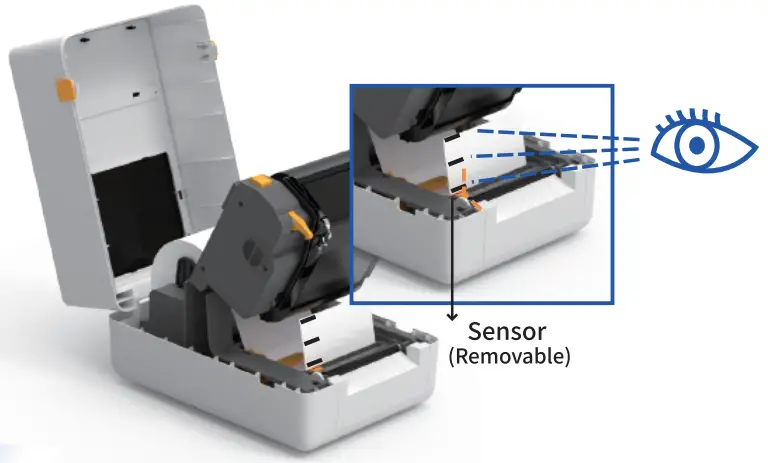
- Install the paper roll: Make sure the print side is facing up.

- Insert the label paper and adjust the label rail.

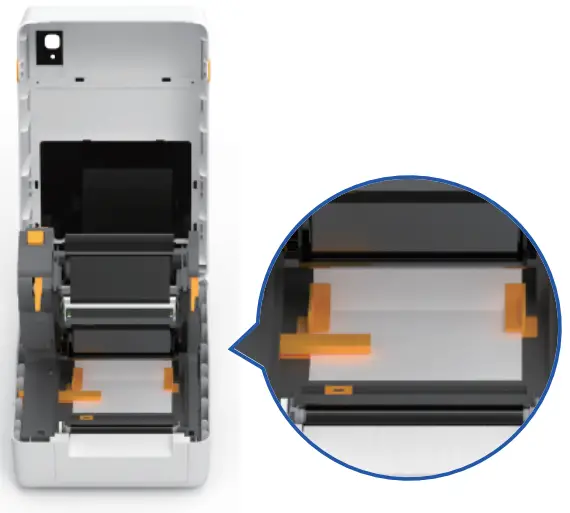
- Black mark: Make sure the sensor is facing the black mark.

- Pull the label exceed the paper exitabout 3-5cm.

- Close the printer cover and until you hear 2″click”.


Cautions: Please auto-calibrate the paper before using
| Action | Instruction |
| Run the automatic label identification | Insert the label and ensure it is straight and in good condition. When the printer is on standby, press and hold the “Feed” button for 3 seconds and release the button. |
| Skip a label | When the printer is on standby and ready (not in the middle of printing), press the ‘Teed” button once. |
| Print test page | Insert the label and ensure it is straight and in good condition. When the printer is on standby, press the “Feed” button twice. |
| Pause printing | When the printer is printing, press the “Feed” button once. |
| Resume printing | When the printing is paused, press the “Feed’ button again to resume printing. |
| Restore factory setting | Insert the label and ensure it is straight and in good condition. Turn off the printer. Press and hold the “Feed” button, and turn on the printer at the same time. After the red indicator light flashes 5 times, release the “Feed” button. |
| Sensor calibration (for labels with black marks) | insert the labels with black marks and ensure it is straight and in good condition. Turn off the printer. Press and hold the “Feed” button and turn on the printer at the same time. After the blue indicator light flashes 5 times, release the “Feed” button. |
| Sensor calibration (for labels with gaps) | Insert the labels with gaps and ensure it is straight and in good condition. Turn off the printer. Press and hold the “Feed” button, and turn on the printer at the same time. After the purple indicator light flashes 5 times, release the “Feed” button. |
| Indicator | Printer Status |
| Blue (Lit) | Standby and Ready |
| Blue (Flashing) | Printing Paused |
| Red (Lit) | Print head up |
| Red (Flashing) | Label jam, paper shortage, label detection error or memory error |
| Purple (Flashing) | Print head overheating |
| Purple (Lit) | Printing |
Disassembly and Installation
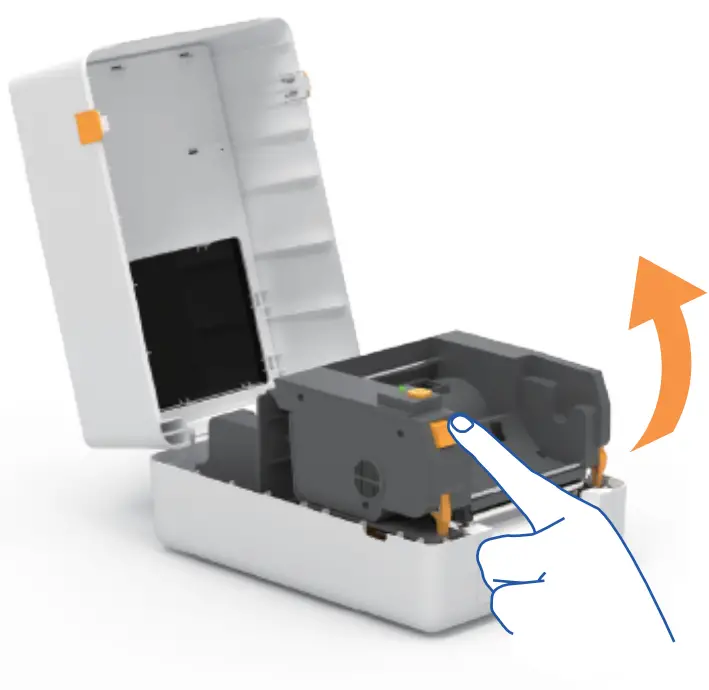
- Press the “Push” button and the ribbon cassette bracket will pop up automatically.

- Remove the ribbon cassette bracket: Press the button shown to remove the bracket.

- Remove the receiving end (A) and (B) of the ribbon cartridge from the holder.
 Installation
Please refer to step 3 and step 4 of the picture above for the installation steps.

 Installation
![]()


