![]()
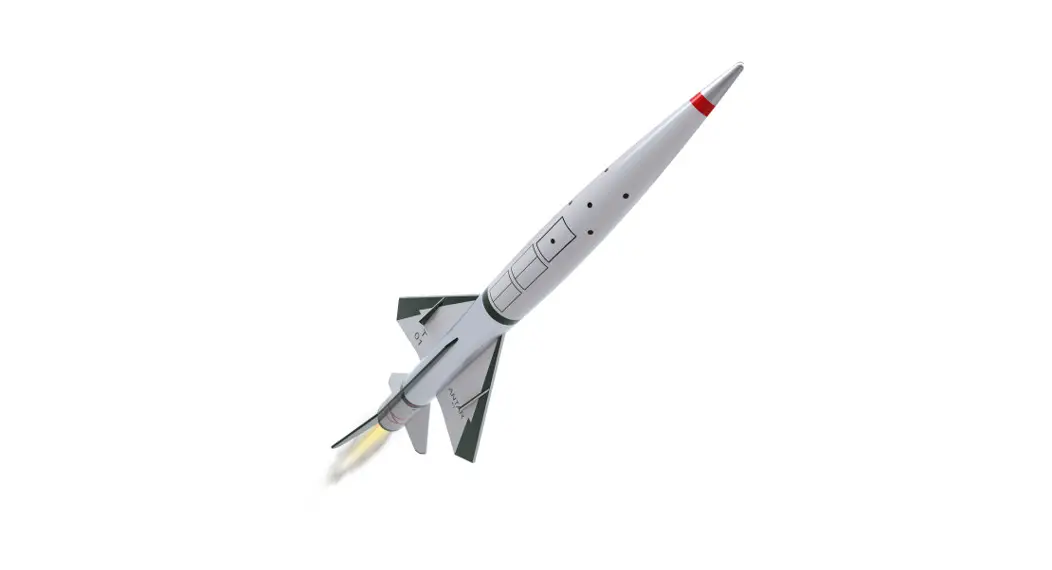
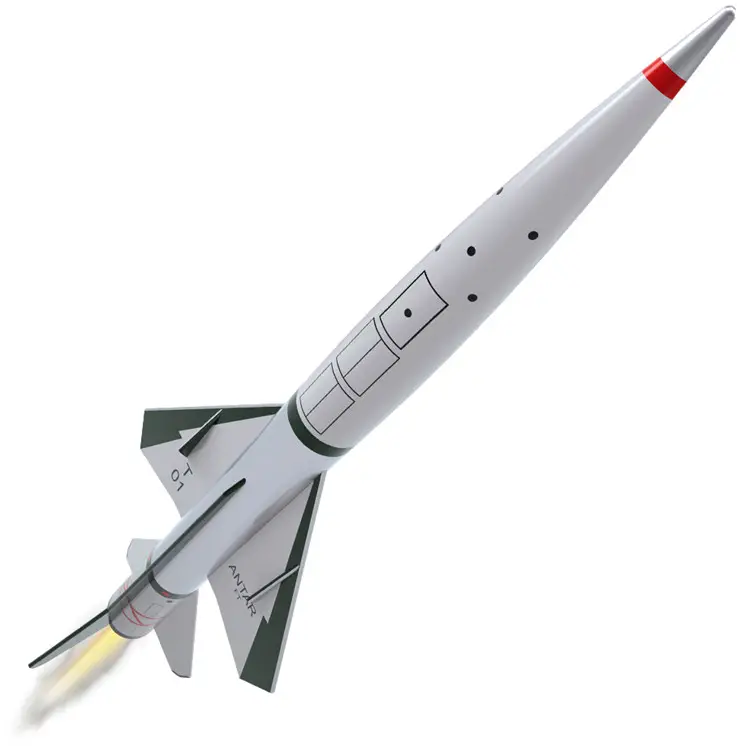
ANTAR™
7310
MODEL ROCKET INSTRUCTIONS
KEEP FOR FUTURE REFERENCE
IMPORTANT: Please record the date found on the decal and keep it for future reference. ______________
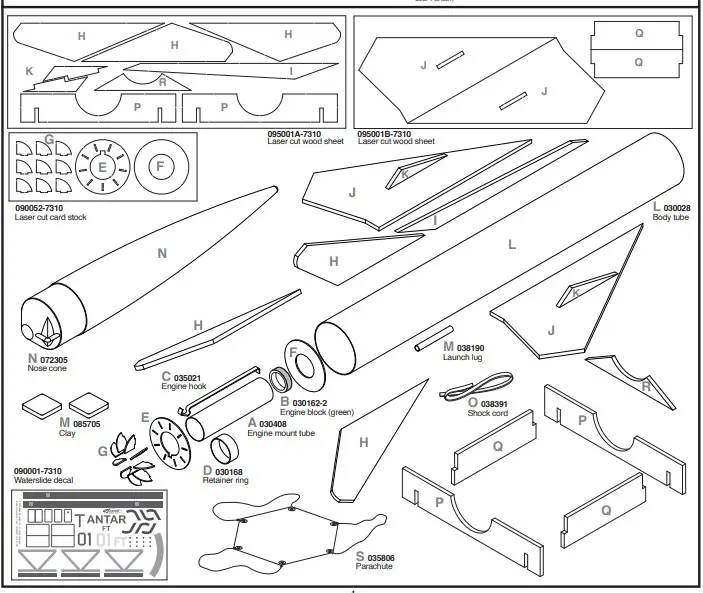
Read all instructions. Make sure you have all parts and supplies. Test fit all parts before applying glue.
SUPPLIES

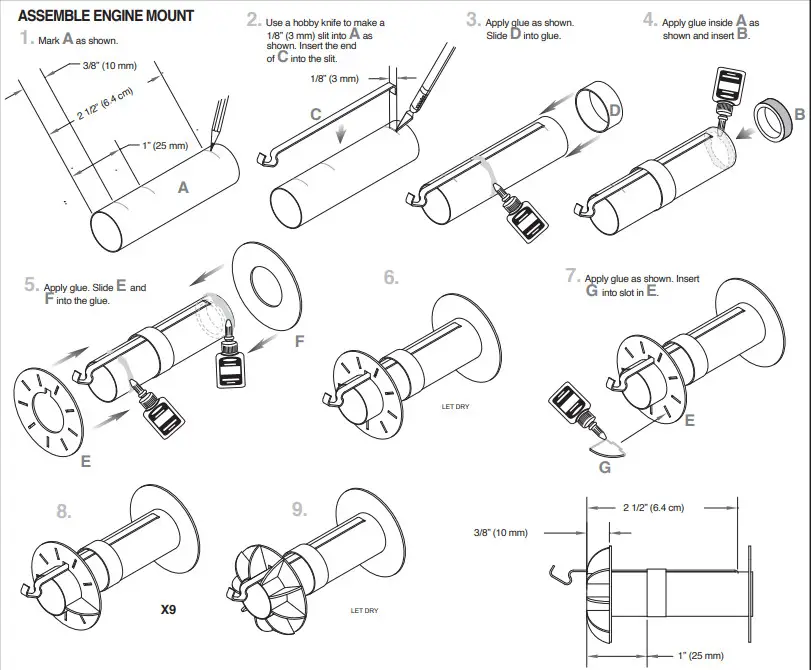
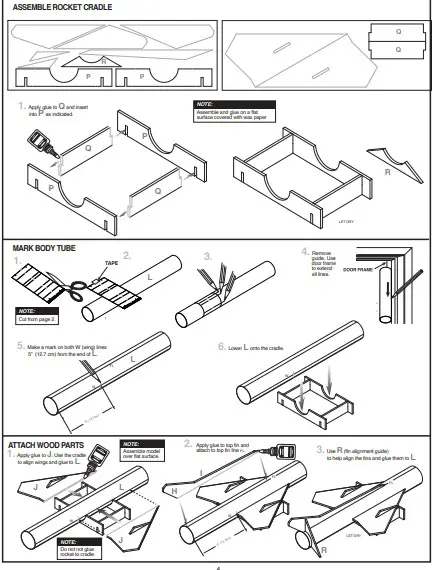
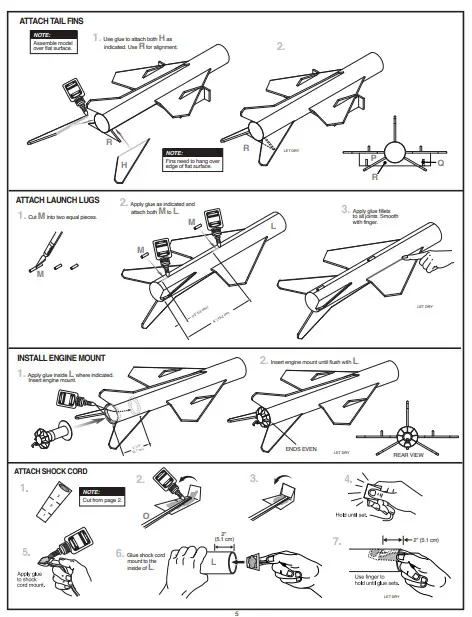
PREPARE WOOD PARTS

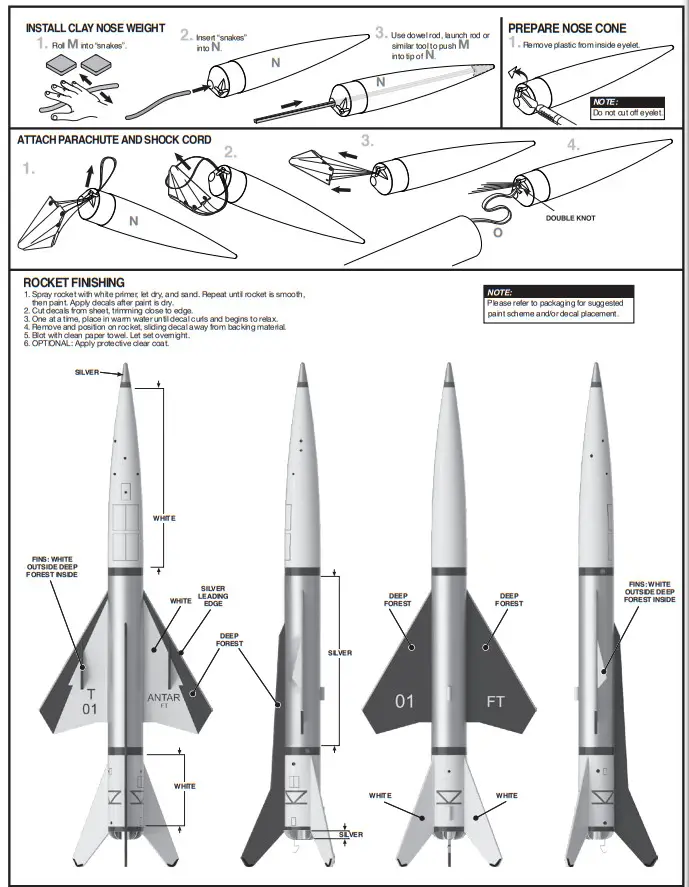
COUNTDOWN AND LAUNCH
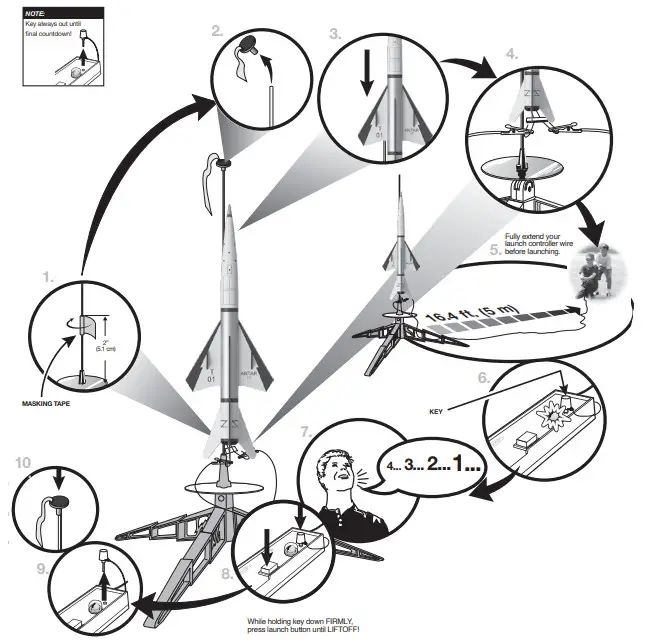
NOTE:
Estimated weight: 3.7 oz. (104.9 g)
ESTES* LAUNCH SUPPLIES NEEDED
(Sold Separately)
- LaunchPad
- Launch Controller
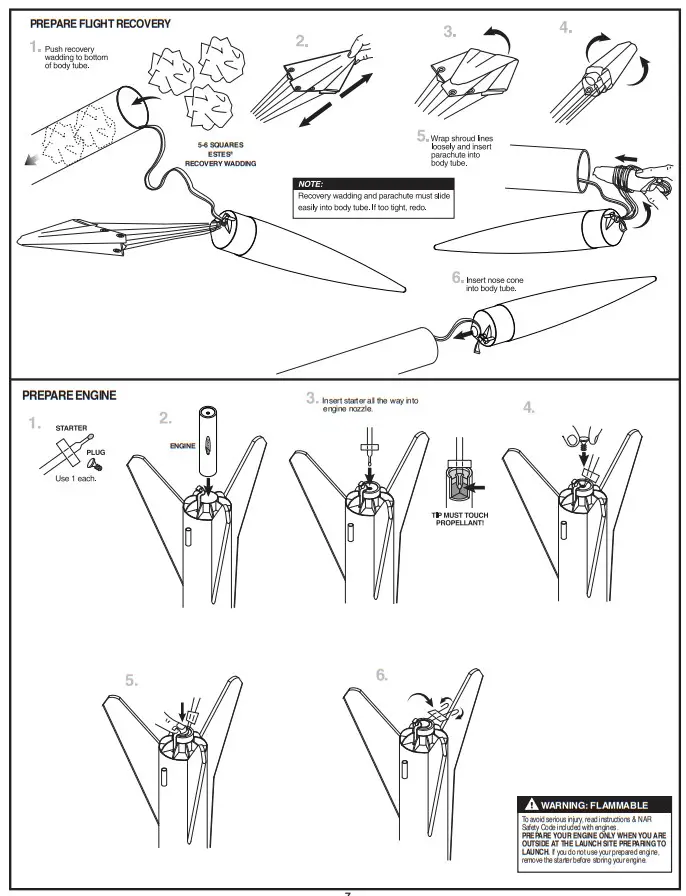
- Recovery Wadding
- Starters (with engines)
- Rugs (with engines)
- Estes® Engines: B6-2, B6-4, C6-5
PRECAUTIONS
![]() NAR SAFETY CODE
NAR SAFETY CODE

NO DRY GRASS OR WEEDS
PRE-LAUNCH CHECK For safety, never launch a damaged rocket. Check the rocket’s body, nose cone, and fins. Also, check the engine mount, recovery system, and launch lug(s). Repair any damage before launching the rocket.
FLYING YOUR ROCKET Choose a large field (500 ft. [152 m] square) free of dry weeds and brown grass. The larger the launch area, the better your chance of recovering your rocket. Football fields and playgrounds are great. Launch only with little or no wind and good visibility. Always follow the National Association of Rocketry SAFETY CODE (enclosed).
MISFIRES TAKE THE KEY OUT OF THE CONTROLLER. WAIT ONE MINUTE BEFORE GOING NEAR THE ROCKET. Disconnect the micro-clips and remove the engine. Take the plug and starter out of the engine. A burned starter means the starter tip was not touching the engine propellant. Install a new starter; be sure the tip is touching propellant inside the engine. Push the plug in place. Repeat steps under Countdown and Launch
©2020 Estes Industries, LLC • All Rights Reserved
Estes Industries, LLC • 1295 H Street • Penrose, CO 81240-9698 • Made in Guangdong, China

PN 090004-7310 (12-20)


