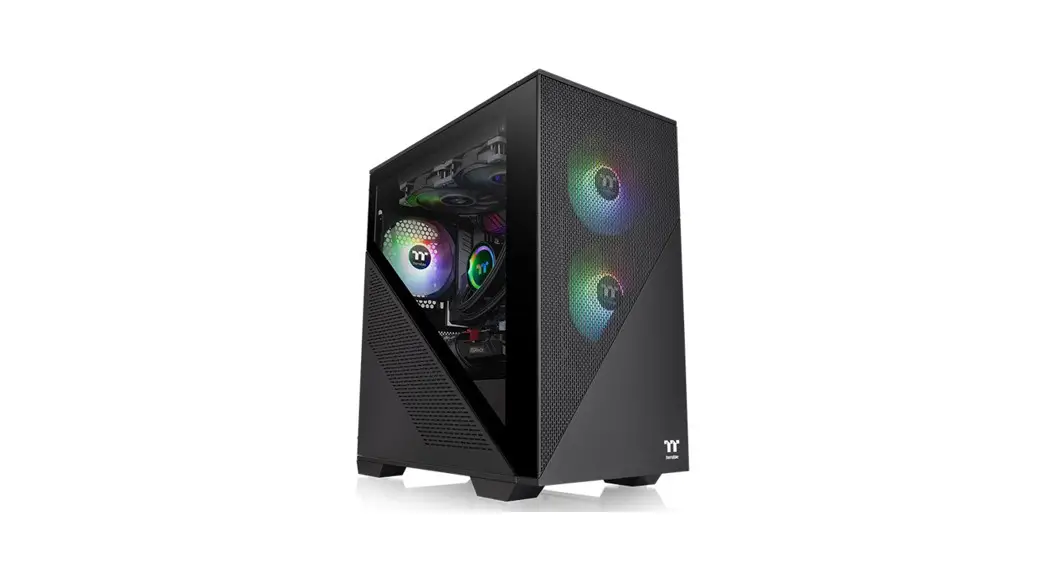
![]() Divider 170 TG ARGB Micro Chassis
Divider 170 TG ARGB Micro Chassis
User Manual
TT Premium![]() TT Premium
TT Premium
To continue achieving the corporate mission of delivering the perfect user experience, Thermaltake developed “TT Premium” 0with the essence of combining supreme quality products with a new logo design. TT Premium is far more than just a guarantee of quality. Behind the name, it represents the passion in DIY, Modding, and Thermaltake’s desire to be the most innovative brand in the PC hardware market. To satisfy the demand of the high-end PC users, TT Premium follows its core values of Excellent Quality, Unique Design, Diverse Combinations, and Boundless Creativity to provide a high-performance PC product for every enthusiast. http://ttpremium.com
Tt LCS-Liquid Cooling Support Certification
![]() Tt LCS Certified is a Thermaltake exclusive certification applied to only products that pass the design and hardcore enthusiasts’ standards that a true LCS chassis should be held to. The Tt LCS certification was created so that we at Thermaltake can designate to all power users which chassis have been tested to be best compatible with extreme liquid cooling configurations to ensure you get the best performance from the best features and fitment.
Tt LCS Certified is a Thermaltake exclusive certification applied to only products that pass the design and hardcore enthusiasts’ standards that a true LCS chassis should be held to. The Tt LCS certification was created so that we at Thermaltake can designate to all power users which chassis have been tested to be best compatible with extreme liquid cooling configurations to ensure you get the best performance from the best features and fitment.
Join Tt Community To Receive Benefits
![]() Dear Valued Customer,
Dear Valued Customer,
Thank you for choosing Thermaltake.
As new users, we value your thoughts and opinions and your feedback is important to us. We at Thermaltake would like to use this opportunity to invite you to join our Community Forums. Register today to start enjoying the full benefits of our community.
 http://community.thermaltake.com
Benefits of being a member:
- Quick and responsive user support
- Receive help and advice with new builds
- Keep up to date with new product releases
- Share your thoughts and builds with the community
- Enter monthly contests and giveaways
Brand official website
http://www.thermaltake.com/
Global Facebook
https://www.facebook.com/ThermaltakeInc
Taiwan Facebook
http://www.facebook.com/ThermaltakeTW
Global community forums
http://community.thermaltake.com
Specification
| Case Type | Micro Case | ||
| Dimension (H*VrD) | 426 x 210 x 408.5 mm (16.8 x 8.3 x 16.1 inch) | ||
| Side Panel | Tempered Glass x 1 | ||
| Material | SPCC | ||
| Cooling System | Front (intake): 120 x 120 x 25 mm ARGB PWM fan (1500 rpm, 27.2 dBA) x 2 | ||
| Drive Bays | 2 x 3.5″, 2 x 2.5″ or 4 x 2.5″ | ||
| Expansion Slots | 4 | ||
| Motherboards | 6.7″ x 6.7″ (Mini ITX), 9.6″ x 9.6″ (Micro ATX) | ||
| I/O Port | USB 3.0 x 2, USB 2.0 x 1, HD Audio x 1 | ||
| PSU | Standard PS2 PSU (optional) | ||
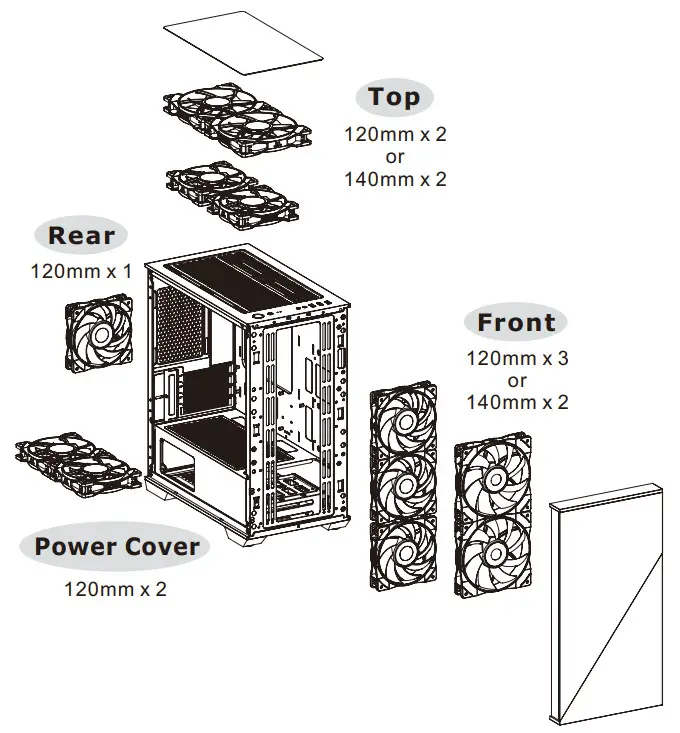
| Fan Support | Front | 3 x 120 mm, 2 x 120 mm,1 x 120 mm | 2 x 140 mm, 1 x 140 mm |
| Top | 2 x 120 mm, 1 x 120 mm | 2 x 140 mm, 1 x 140 mm | |
| Rear | 1 x 120 mm | ||
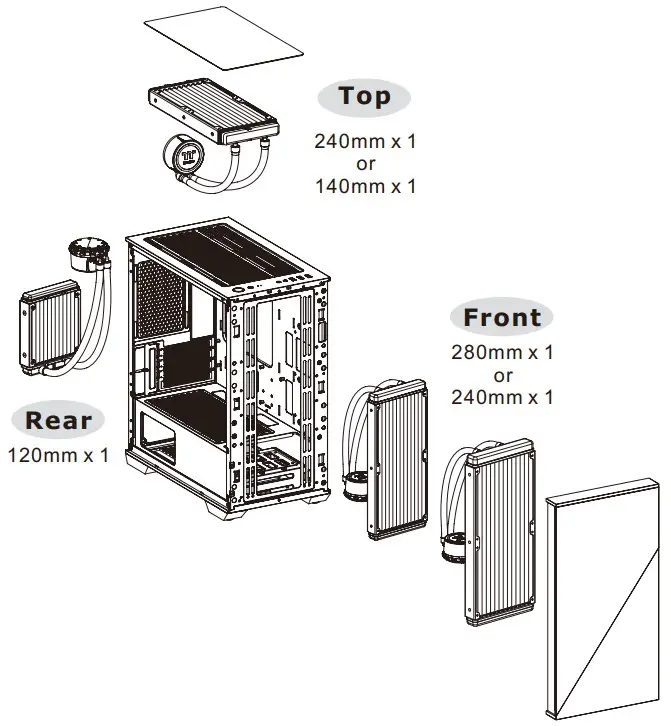
| Radiator Support | Front | 1 x 240 mm, 1 x 120 mm | 1 x 280 mm, 1 x 140 mm |
| Top | 1 x 240 mm, 1 x 120 mm | 1 x 140 mm | |
| Rear | 1 x 120 mm | ||
| Clearances | CPU cooler height limitation | 160 mm | |
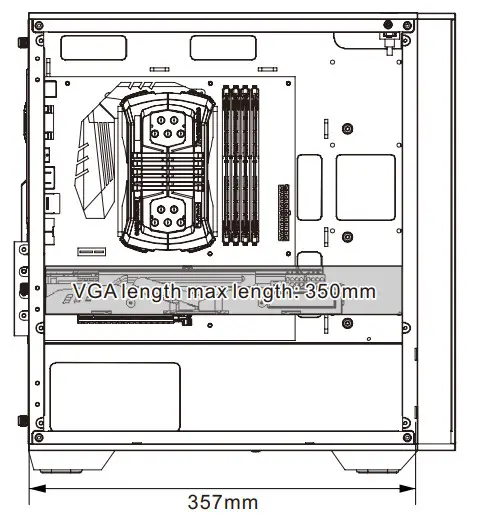
| VGA length limitation | 300 mm (With radiator) 350 mm (Without radiator) | ||
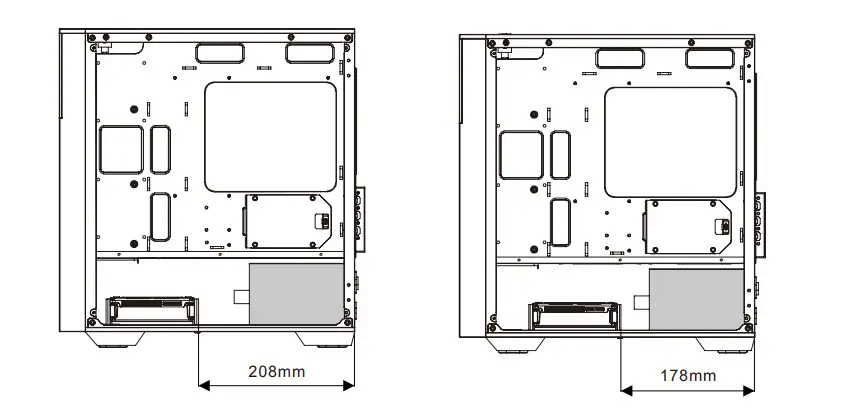
| PSU length limitation | 200 mm (With HDD Cage) | ||
Accessory
| Figure | Part Name | Q`ty | Use For |
| Screw #6-32 x 6 mm | 11 | Power Supply / VGA Card | |
| Net setter | 1 | Motherboard Stand-off installation | |
| Stand-off #6-32 x 6.5 mm | 3 | Motherboard | |
| Screw M3 x 5 mm | 30 | Motherboard / 2.5” HDD / SSD | |
| Stand #6-32 x 5 mm | 12 | 3.5” HDD | |
| Stand #6-32 x 10 mm | 2 | 3.5” HDD Cage | |
| Stand #6-32 x 28 mm | 13 | Front Fan / Power Cover Fan | |
| Buzzer | 1 | Motherboard Alarm | |
| PCI Leaf | 2 | PCI Plate | |
| Cable Ties | 10 | Cable Management |
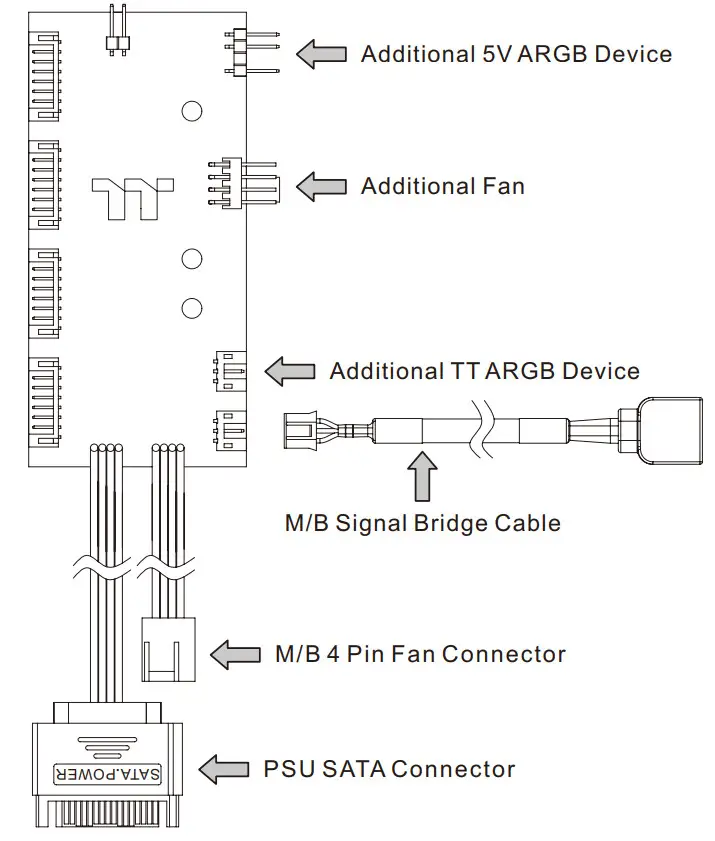
For ARGB Version Only
| Figure | Part Name | Q`ty | Use For |
| MB Signal Bridge Cable (ASUS/MSI/ASROCK/GIGABYTE) | 1 | LED Signal Sync |
Warning and Notice
Chassis dimension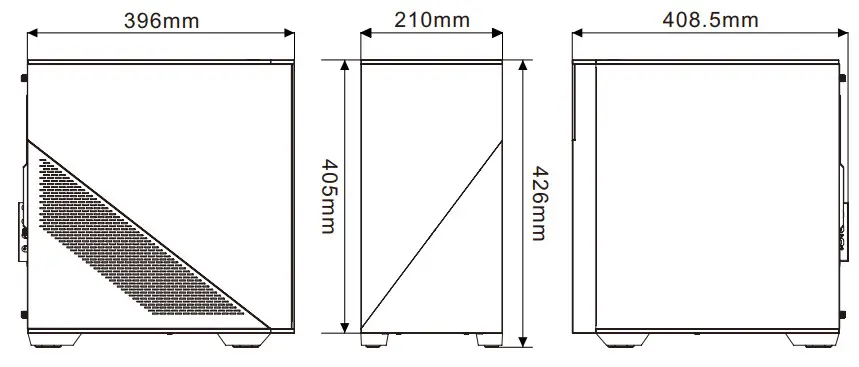
Motherboard Compatibility: ITX/mATX (Up to 244mm wide)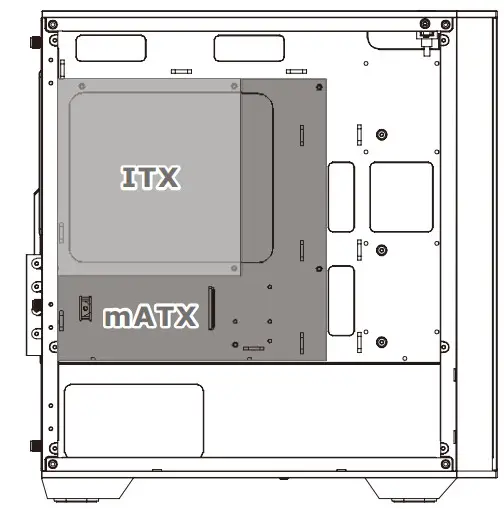
CPU cooler max height: 160mm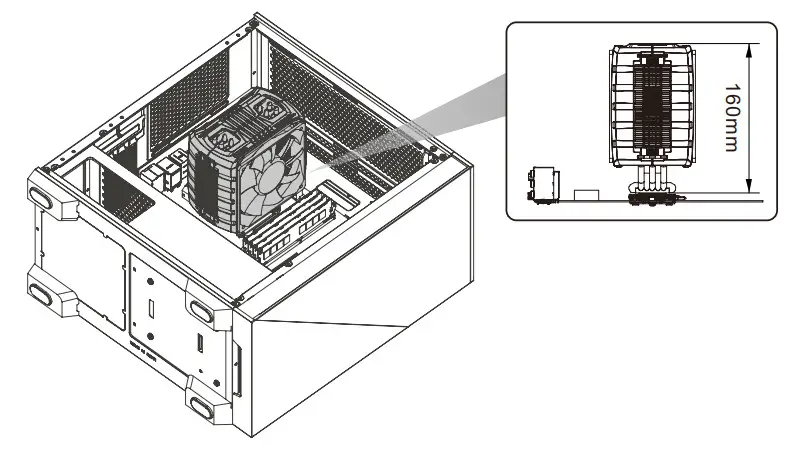
VGA length max length: 350mm
PSU max length: 200mm
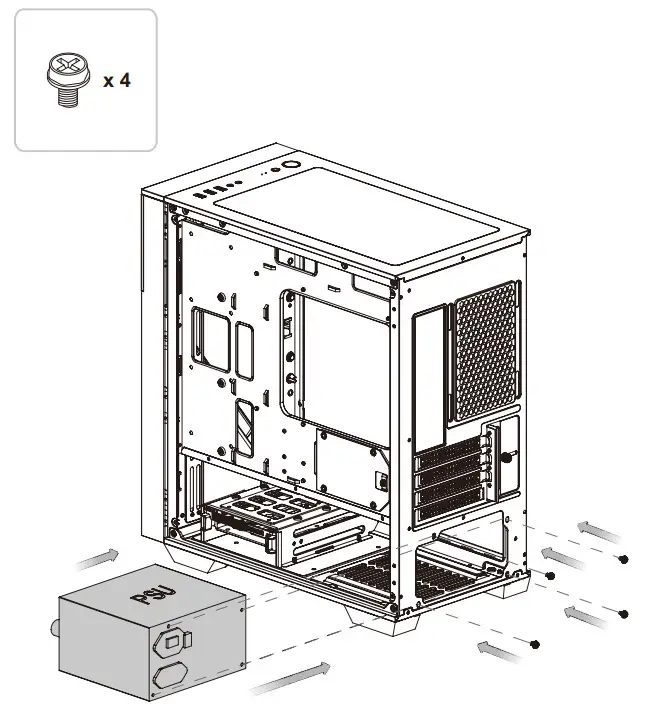
Power Supply Unit Installation
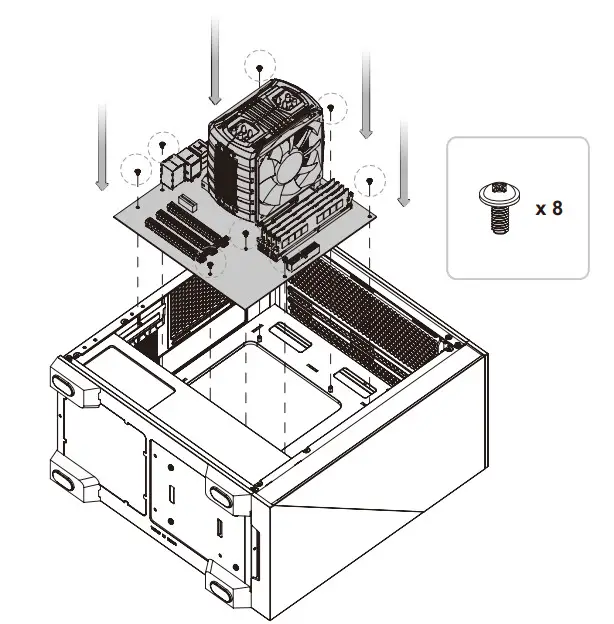
Motherboard Installation
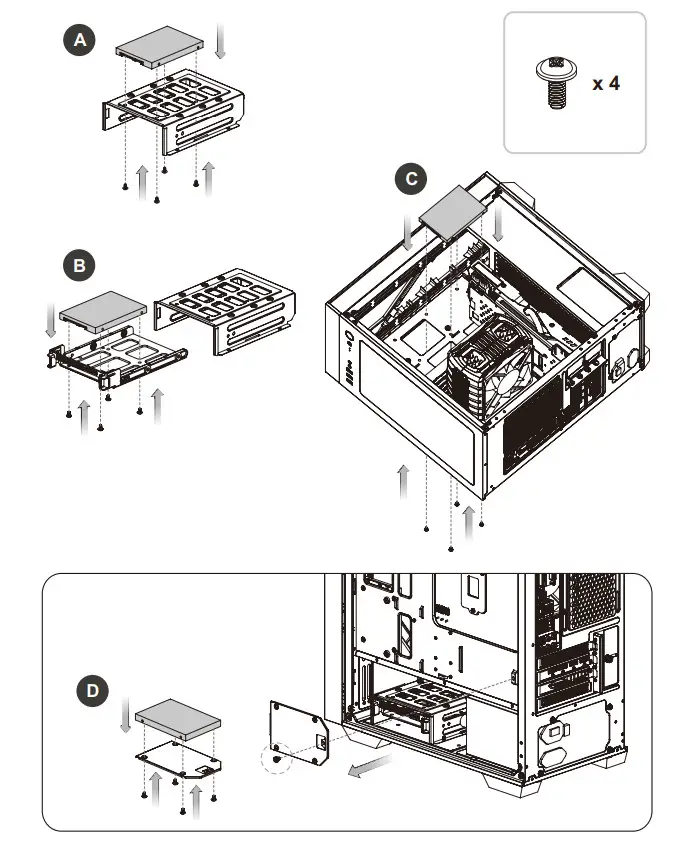
3.5” HDD Installation
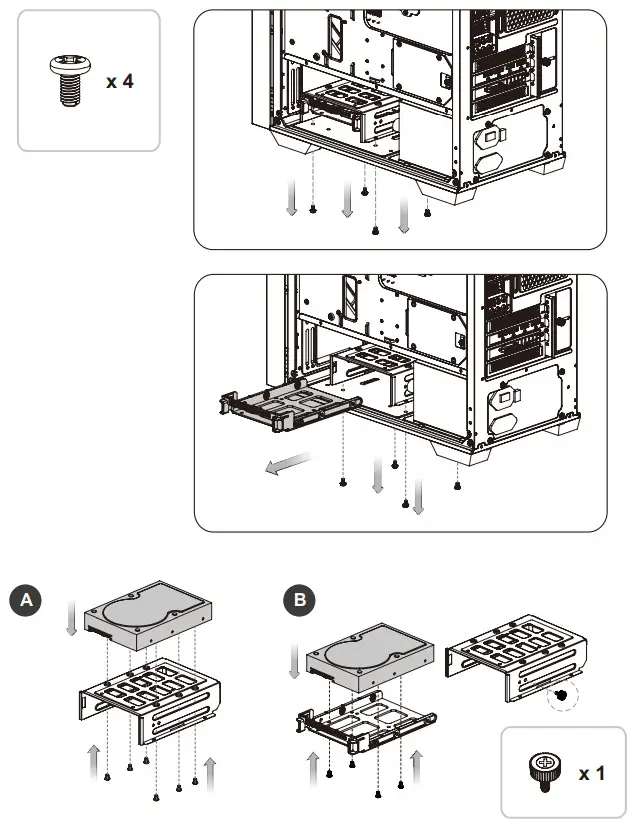
2.5” HDD Installation
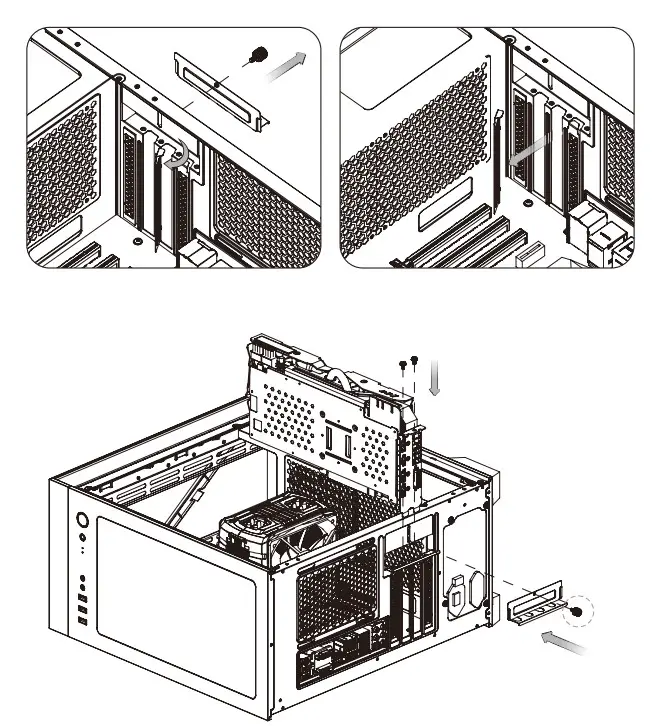
PCI Card Installation
Air Cooling Installation
AIO Liquid Cooling Installation
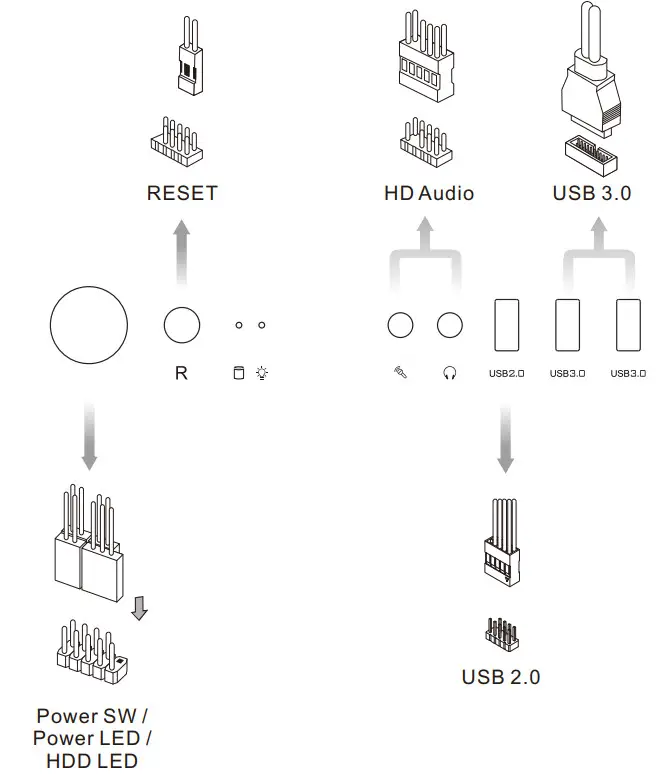
I/O Connection
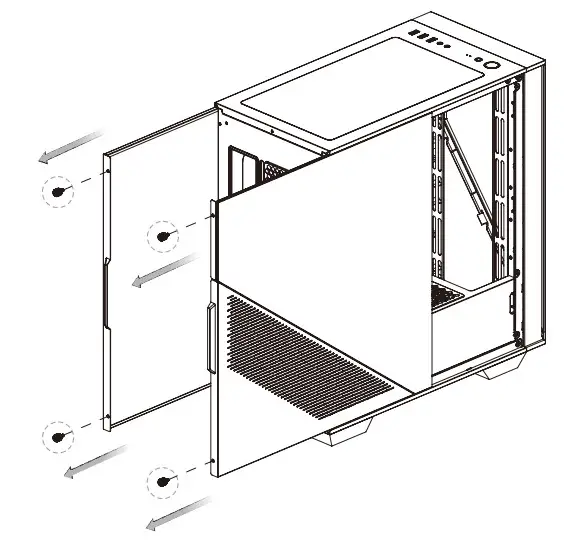
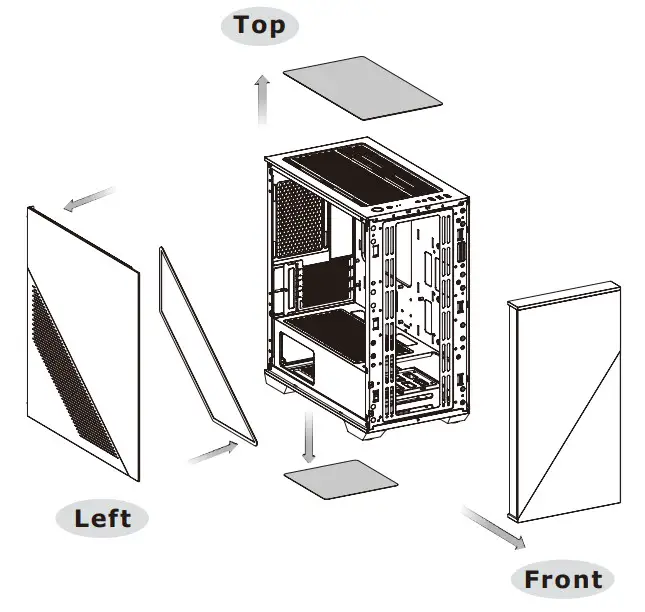
Remove Filters
ARGB Control Instruction
I/O Port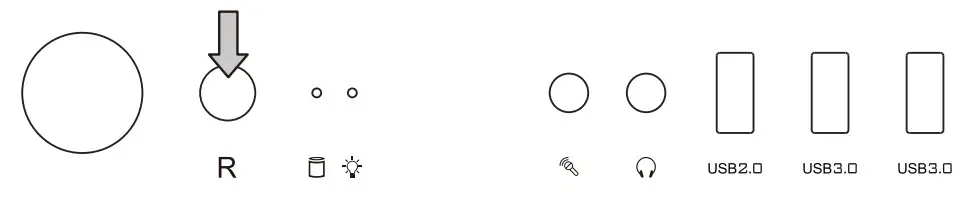
| Wave Mode | Mode 1 |
| Flow Mode | Mode 2 |
| RGB Lighting | Mode 3 (Single Color) |
| Radar Mode | Mode 4-10 (Red, Yellow, Green, Cyan, Blue, White, Purple) |
| Breath Mode | Mode 11-18 (RGB, Red, Yellow, Green, Cyan, Blue, White, Purple) |
| Full Lighted Mode | Mode 19 |
| Single color | Mode 20-26 (Red, Yellow, Green, Cyan, Blue, White, Purple) |
| Light Off | Mode 27 |
Long press on RGB button for 3 seconds, the fan will blink twice which now are controlled by MB software. And vice versa.
How to connect MB
| ASUS/ASRock/BIOSTAR Aura Addressable Strip Header(s) | MSI JRGB-strip Header(S) | GIGABYTE AOURS RGB Fusion with Digital LEDs |
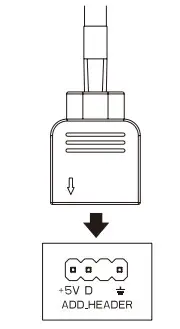 | 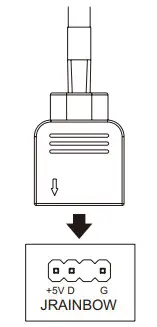 | 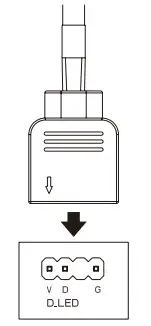 |
PWM ARGB Control Board Connection
Note:


