![]() SL-100P/SL-150P
SL-100P/SL-150P
Flexible Bi-Color SMD LED Light
Ver: B
USER MANUAL
SWIT Electronics Co., Ltd.
Congratulations on your purchase of this product.
Please read this user manual carefully.
Specification
| Model | SL-100P | SL-150P |
| Number of the lamps | 560pcs | 840pcs |
| Color Temperature | 2700K-6500K | |
| Brightness | 0%-100% | |
| Luminance | 2800 Lux/lm | 4100 Lux/lm |
| Beam angle | 100-3600 | |
| CR I | 97 | |
| TLCI | 97 | |
| Input Power | 100W | I 150W |
| Working Voltage | DC 11-36V/AC100-240V(50/60Hz) | |
| Dimensions | 600mm x 470mm | 600mm x690mm |
| Weight | Light body:0.4g | Light body :0.7Kg |
| Controller: 1.06Kg Adaptor: 0.58Kg | ||
General Precautions
- Do not disassembly the light or touch the interior of the light with metal objects to prevent causing damage;
- Please avoid storing the light in dusty and wet environment to prevent causing damage;
- Please avoid scratching the light body with hard object to prevent affecting the using effect;
- Slight oil stains on the surface of the lamp body can be wiped with a clean cloth;
- This products can only be using in the temperature range of -10°C-40°C.
Overview
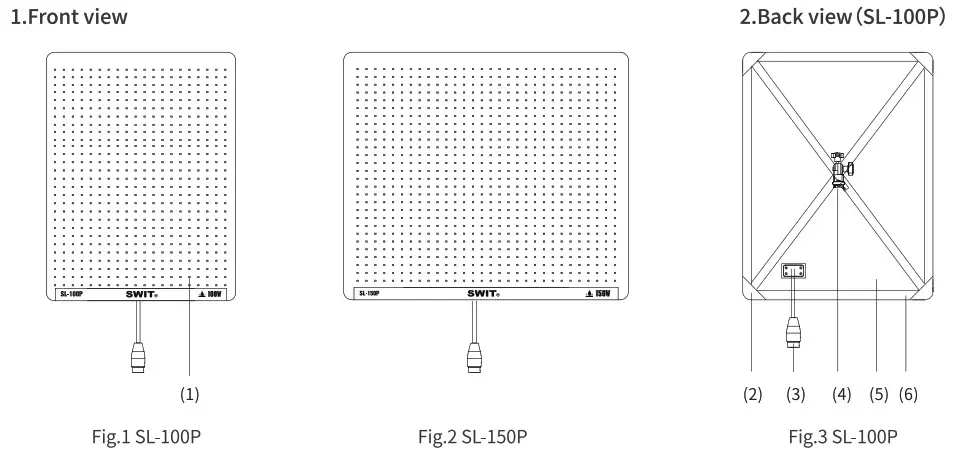
| 1. Light strips 2. Warp corner 3. Light input connection cable 4. X bracket 5. Light body 6. Magic sticker | 7. Color temp indicator light 8. Color temp knob 9. Brightness knob 10. Brightness indicator light 11. LCD screen 12. DMX OUT | 13. DMX IN 14. Control box output cable 15. Power switch 16. DC 11-36V IN 17. Battery plate 18. USB interface |
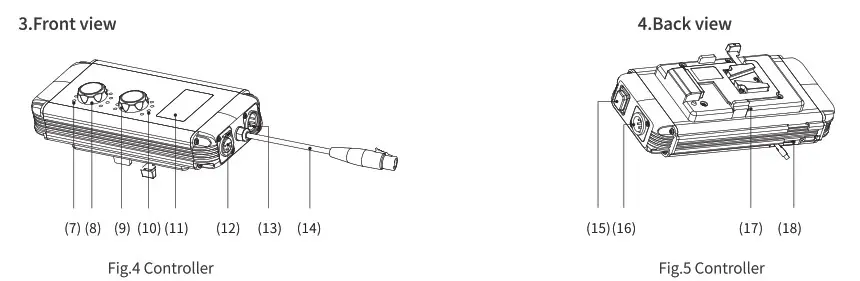
LCD display information
Take “CCT=5600K, Dimmer=100%, DMX address:008 (Group:8)” as an example:
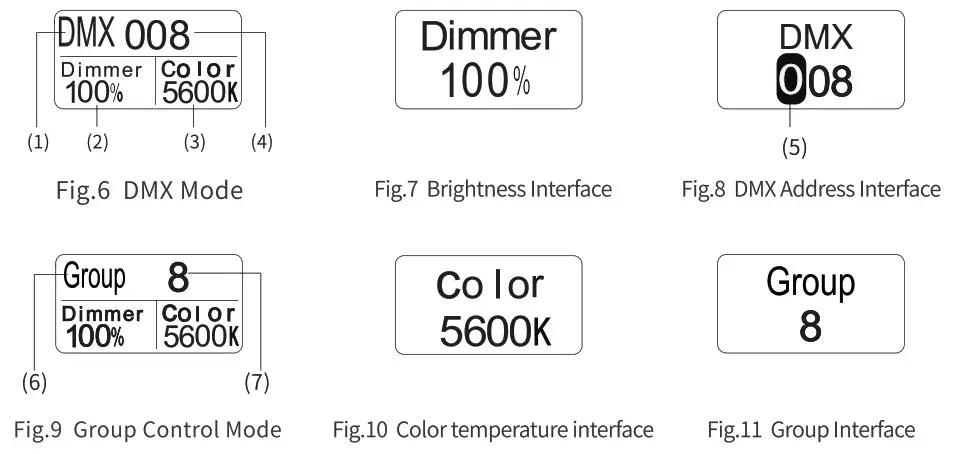
- Control Mode—DMX Mode
- Current Brightness
- Current Color Temperature
- Current DMX Address
- Current setting number
- Control Mode—
Group Control Mode - Group Number
Using Instruction
- Installation
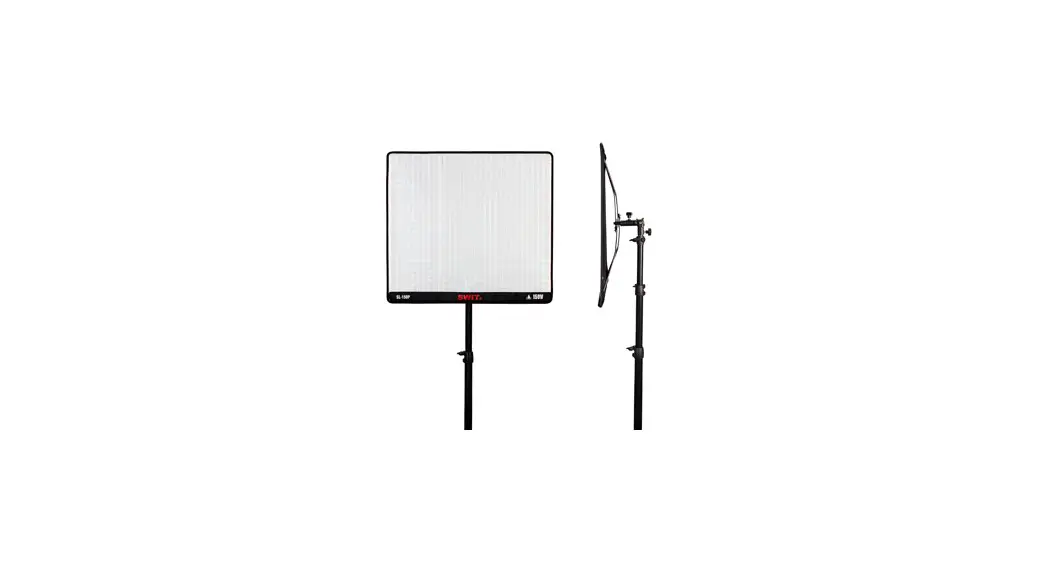
Any bend of this products will have no effects during using.Light can be fixed on back of a chair,top of the car or any narrow space,or as shown on Fig.3,hold up with the X-bracket.
Tip: Users who choose arc soft cover and egg soft box should first hold up the lamp body as shown in Fig.3, and then assemble the arc soft cover and egg soft box The light box can be used normally by fixing it on the lamp body with Magic Stick. - Power
- Power supply
The products can be powered by batteries and AC adaptor. - Usage
Connect the control box output cable(Fig.4 (14) with light input connection cable(Fig.3 (3) after installation according to the requirements, switch on the light(Fig.5 (15), set the light parameters, then it can be used normally.
- Power supply
- Parameters and working mode setting
- Setting and usage of Brightness & Color Temperature
Color temperature/Brightness can be controlled by Color temperature/Brightness knob(Fig.4( 8/9)The range of Color Temperature & Brightness are shown as below:
• Color Temperature adjusting range: 2700K-6500K; Min adjusting steps:50K;
• Brightness adjusting range:0%-100%, Min adjusting steps:1%. - DMX Address Setting
See 4.1 - GROUP Setting
See 5.1 - Working Mode Setting
Hold color temperature adjusting knob (Fig.4 ⑧) for 2s,then DMX mode(Fig.6) or Group Mode(Fig.9) can be switched.
- Setting and usage of Brightness & Color Temperature
- DMX Communication Mode
- DMX Address setting
Hold the brightness adjusting knob(Fig.4⑨) for about 2s to enter in the DMX address setting interface(Fig.8), set DMX address with Brightness adjusting knob(Fig.4⑨), DMX communication address adjusting range:001-512.
• Set the number of current bit with brightness adjusting knob(Fig.4⑨);
• Press brightness adjusting knob(Fig.4⑨) to confirm the number of current bit and enter in the setting of next bit number;
• Exit DMX communication setting interface: Stop operating or change the setting number to the last bit then press the brightness adjusting knob. - Usage of DMX Communication Mode Complete the DMX address parameter setting of the product according to the expected demand, connect the lamp and DMX control equipment reliably through DMX line, then it can be used normally. This product occupies a total of two DMX control channels, currently set the DMX address (N) for brightness control, address (N+1) for color temperature control, such as:
DMX Address DMX Channel Function 008 008 Brightness adjusting:0%-100% 009 Color temperature adjusting:2700K-6500K
- DMX Address setting
- GROUP Control Mode
- GROUP Control Mode Parameters Setting
Hold the Brightness adjusting knob(Fig.4⑨) for about 2s to enter in Group parameters setting group interface (Fig.11), adjust the brightness knob(Fig.4⑨) to set Group parameters, Group parameters setting range: 1-8, Stop operating or change the setting number to the last bit then press the brightness adjusting knob. - GROUP Control mode Usage
Set the parameters of the Group according to the expected demand, set the target light to be controlled into the same Group, network the light through DMX cable, and the light can be used normally without distinguishing the master and slave machines.
Tips: When using the group control function of the light, do not access the output device of DMX signal in the light network, otherwise the function cannot be used normally.
- GROUP Control Mode Parameters Setting
- USB Interface usage
USB Interface(Fig.5 (8) )is for specific use, Please use it according to the specified environment of the relevant products of our company. Do not use it for other purposes to avoid losses.
| No. | Details | Quantity |
| 1 | X-bracket | x 1 |
| 2 | Clam | x 1 |
| 3 | Power Cable | x 1 |
| 4 | Adaptor | x 1 |
| 5 | Light bag | x 1 |
| 6 | Softbox (Option) | Customers can purchase separately according to their needs |
| 7 | Eggcrate (Option) |
Tel:+86-25-85805753
Fax:+86-25-85805296
http://www.swit.cc
E-mail: [email protected]


