
![]() BSTG-LKWMC-21R Rectangular Black Wood Surface
BSTG-LKWMC-21R Rectangular Black Wood Surface
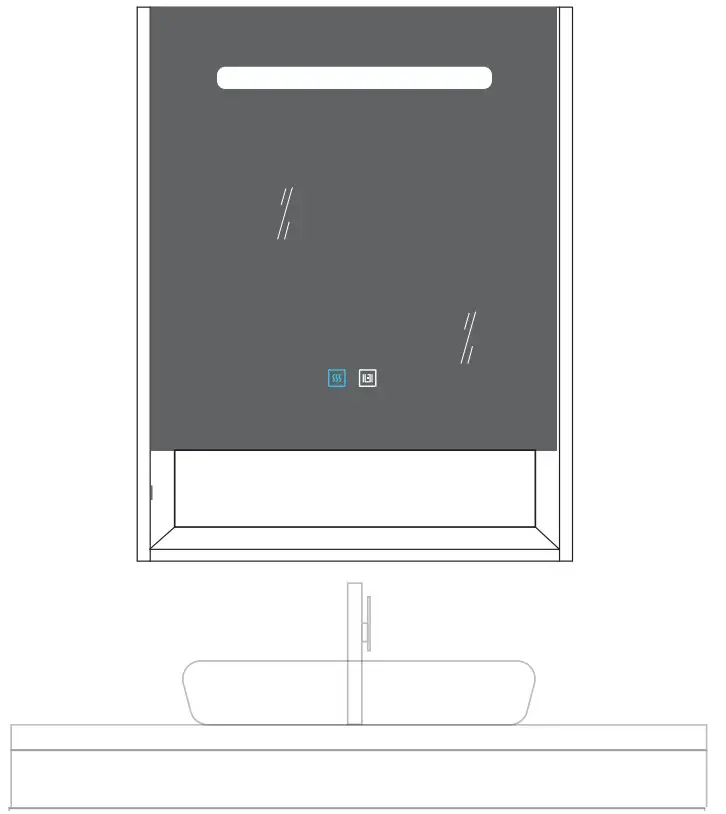
Mount Medicine Cabinet with Mirror
Installation Guide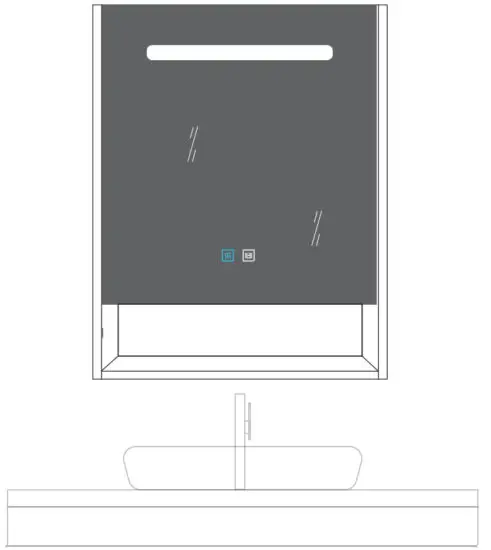
![]() *****IMPORTANT NOTICE*****
*****IMPORTANT NOTICE*****
We will guarantee all customer benefits. The products we ship out are brand new. Please check carefully before installation, and compare all parts with the parts listed in the package contents section. If any part appears missing or damaged, do not install it.
Contact customer service by E-mail: [email protected]
Send us the pictures or video, we promise will respond to you within 24 hours. We will decide to send you spare parts or deliver a replacement for free.
WARNING AND SAFETY INSTRUCTIONS
Before assembling your LED Lighted Mirror fixture, please make sure that you carefully read through this instruction sheet, and refer back to them during installation to ensure your product is fitted safely and correctly. Keep these instructions for future use.
WARNING Risk of Fire and Electric Shock
- All fittings must be installed in accordance with current IEE wiring regulations. If in doubt, consult a qualified electrician.
- Switch off the electrical supply at the main circuit board BEFORE installation and mainte nance.
- Suitable for indoor use only. This product should be positioned well away from curtains and fabrics. Never cover the mirror.
- Regularly check the cord, the transformer, and all other parts for damage. If any part is dam get the product should not be used.
INSTALLATION SAFETY
- Inspect the product immediately upon receipt for the transit damage or missing parts. Handle the product with care and protect against knocks to all sides and edges of the glass.
- Ensure there are no hidden pipes or cables in the wall before drilling.
- Wear suitable eye protection when drilling. Take care if drilling on tiled surfaces in case the drill slips.
 CATION
The light source of this product is non-changeable light diodes (LED). Do not disassemble the product, as the light diodes can cause damage to the eyes.
NOTE: The important safeguards and instructions that appear in this manual are not meant to cover all possible conditions and situations that may occur. It must be understood that common sense, caution, and care, are factors that can’t be built into any product. These factors must be supplied by the person(s) caring for and operating the fixture. Do not install this fixture in hazard ous locations.
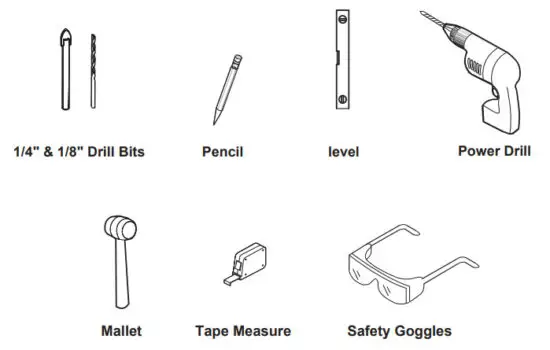
TOOLS REQUIRED
| HARDWARE LIST | |||
ITEM | REFERENCE IMAGE | NAME | QTY |
| 1 |
| Nut | 4 |
2 | Screw ST4’35 | 4 | |
| 3 | Wall Anchor | 4 | |
4 |
| Gasket | 4 |
Step
Step 1
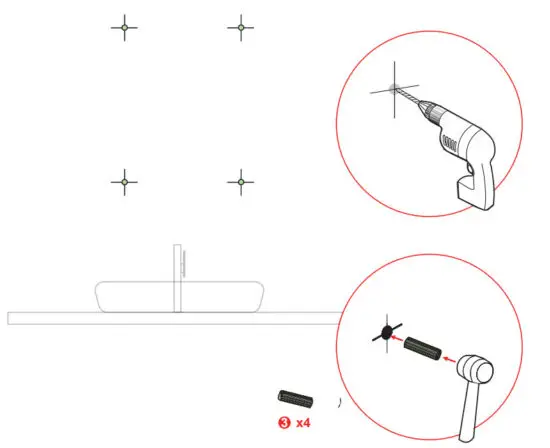
Use the tape measure to survey the high, and draw the horizontal line and the vertical line of the washbasin. 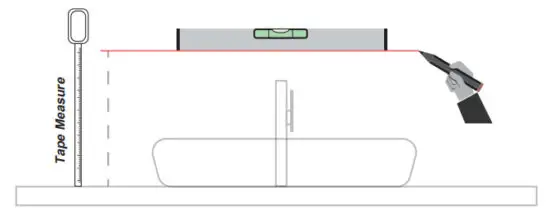 Step2
Step2
Make the bottom parallels with the horizontal line, then mark 4 holes’ place with a tape measure.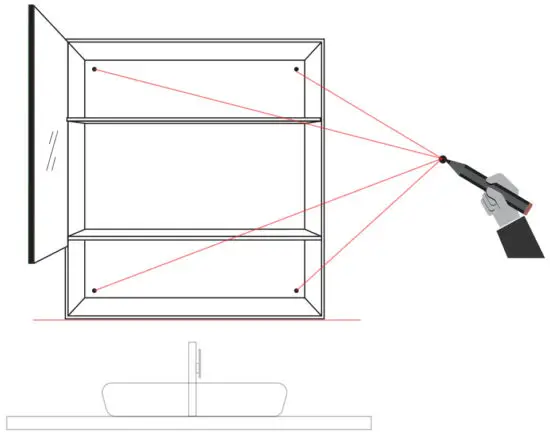
Step3
Drill the hole and inject the green rubber pellets
 step 4
Drive in the screw across the Gasket.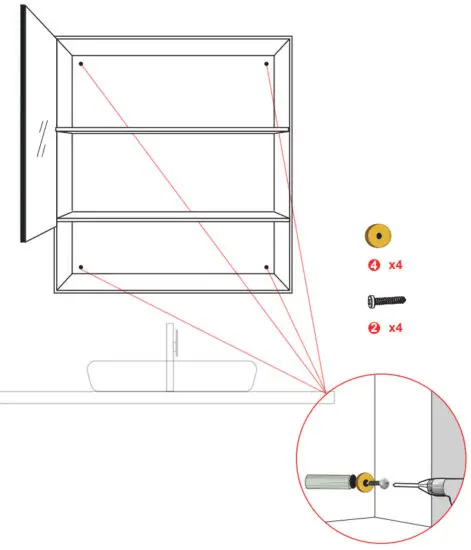
Step 6
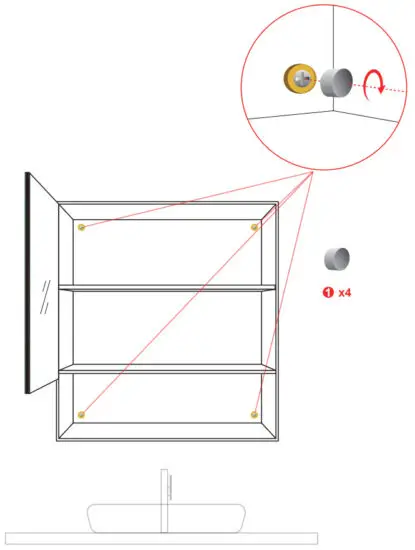
Screw in the nut.
 Step 7
The opening of the mirror cabinet door is 110° Step 8
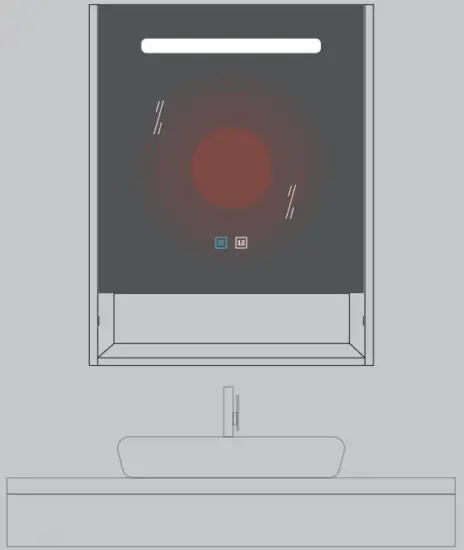
![]() After power on, the button shows blue and it is in waiting for the state
After power on, the button shows blue and it is in waiting for the state![]() lick to turn on the defogging function and the button turn to white
lick to turn on the defogging function and the button turn to white
Click again to turn off the defogging function and the button turn to blue
Step 9
![]() After power on, the button shows blue and it is in waiting for state
After power on, the button shows blue and it is in waiting for state![]() This is the LED switch. Our light is white light
This is the LED switch. Our light is white light


