![]()
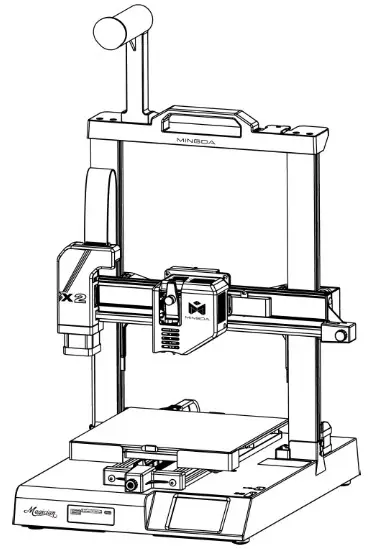
Magician X2
Instructions for quick assembly
V1.1
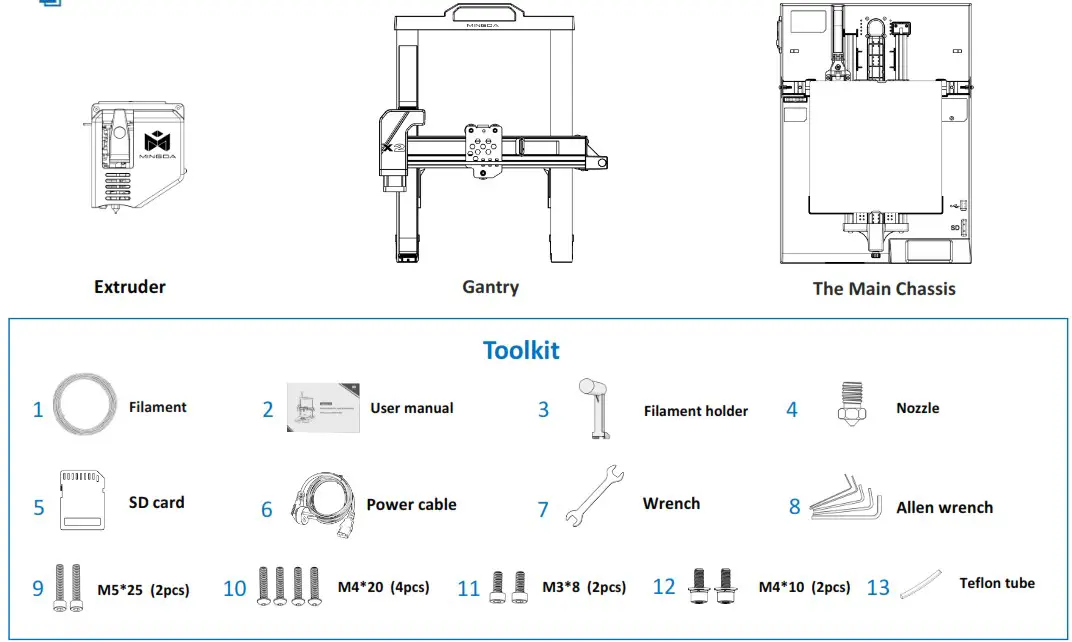
Accessories
Assemble
Step 1 Install the gantry
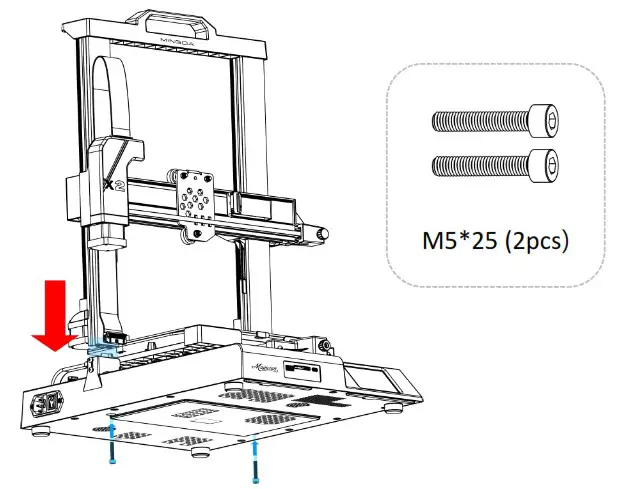
![]() Note: To avoid bending the lead screw and effect the printing model, don’t touch or twist the lead screw when take out the gantry from the package.
Note: To avoid bending the lead screw and effect the printing model, don’t touch or twist the lead screw when take out the gantry from the package.
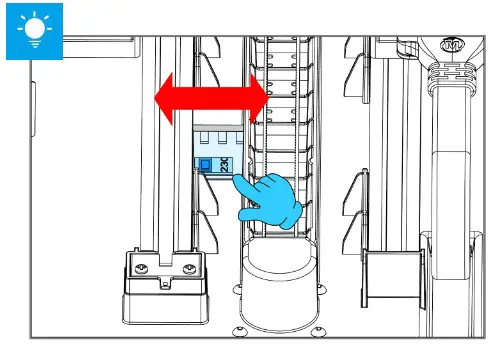
Note: The power supply has been adjusted according to the local voltage.
If you need to adjust the voltage, please follow the picture to operate it.
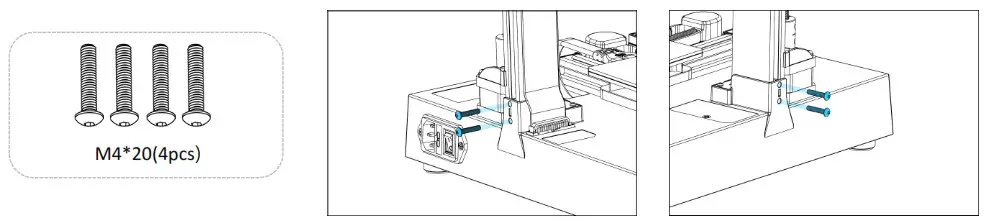
Step 2 Install the fixing plate screw
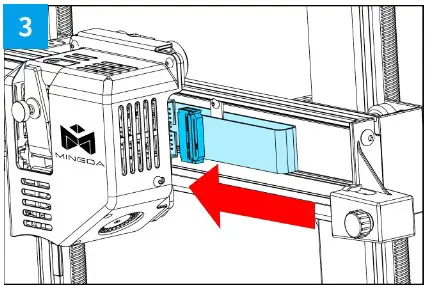
Step 3 Install the Filament Holder
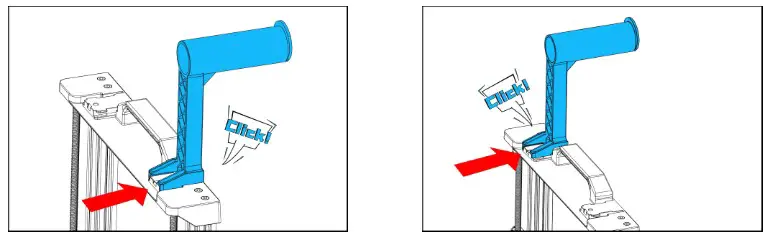
The filament holder can be installed left and right
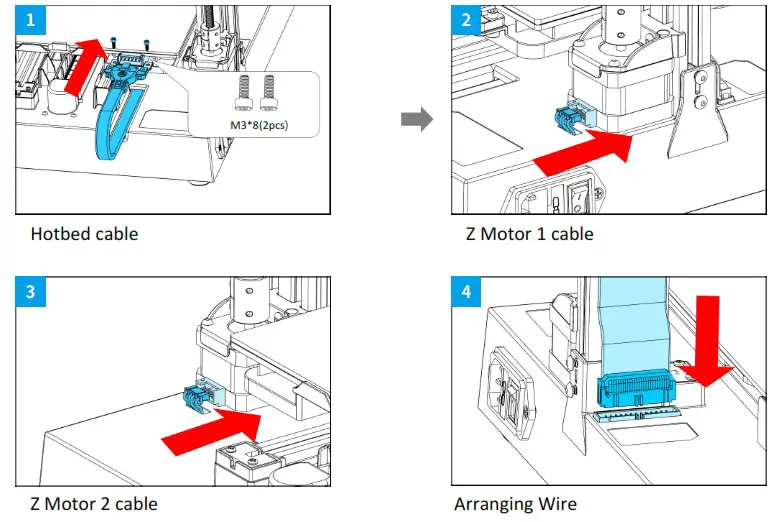
Step 4 Connect Cable
![]() Note: If you find there is a little shaking on extruder,bed or X-axis, don’t worry, this is caused by long-term transportation. Please refer to the adjustment video link in the SD card to adjust, it is helpful.
Note: If you find there is a little shaking on extruder,bed or X-axis, don’t worry, this is caused by long-term transportation. Please refer to the adjustment video link in the SD card to adjust, it is helpful.
Step 5 Install the Extruder
 | 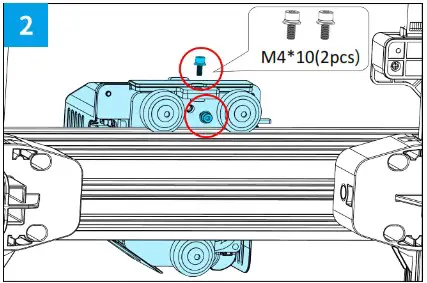 |  |
| 1.Push the extruder parallel into the support, make sure the screw holes on the top of the extruder are aligned with the screw holes on the support. | 2.Use M4*10 screws to fix the extruder on the support. | 3.Connect the ribbon cable to the port on the right side of the extruder. |
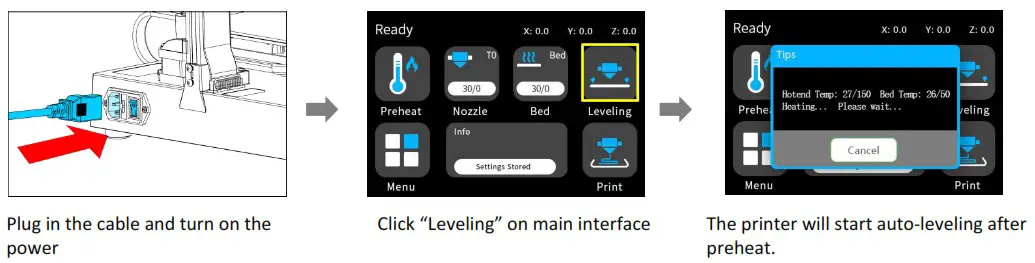
Auto-leveling
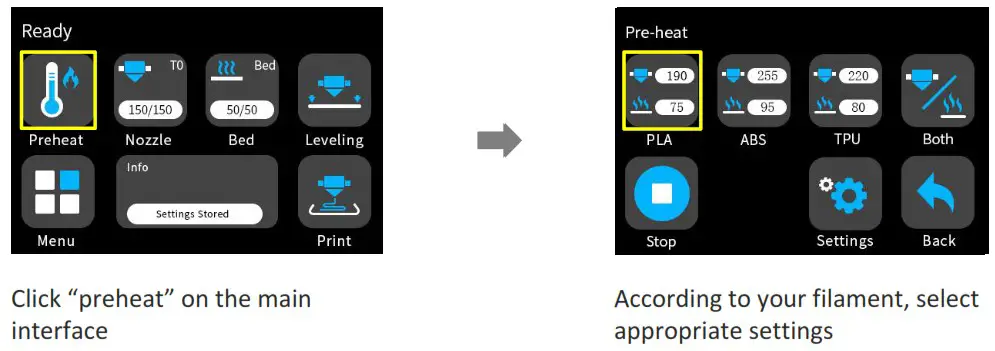
Preheat
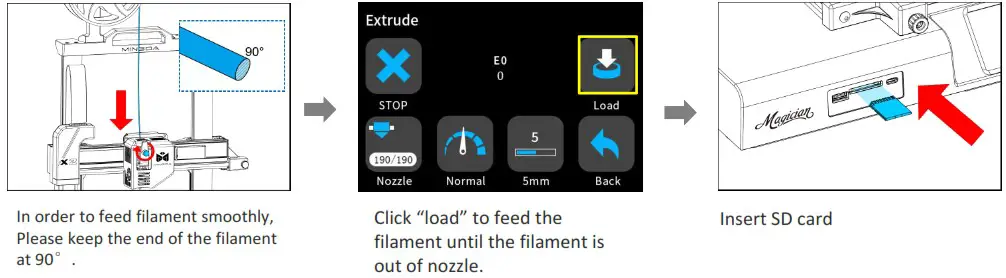
Insert the filament
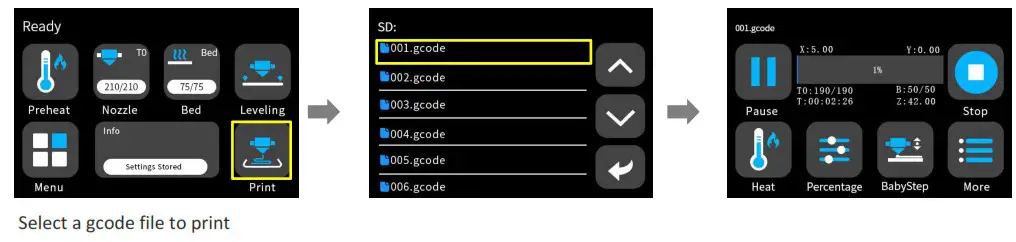
Printing
Z-offset adjust

When you start your first printing, adjust the Babystep value according to the adhesion of the filament and the glass platform. Click “Save” to save your setting, and you don’t need to adjust the value again next time.
[Note: Z-off set use for the first layer only]
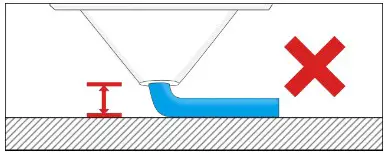 | 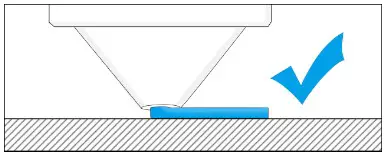 | 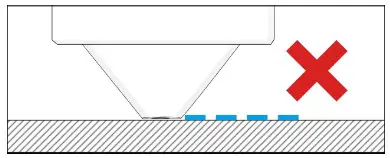 |
| If the distance between the nozzle and the platform is too high, the filament will not easy to stick to the platform. Should click “Decrease” until the distance is proper. | Keep the distance between the nozzle and the hot bed at 0.1mm, the filament will stick to the hot bed evenly | If the distance between the nozzle and the platform is too low, the filament will be not easy to feed out smoothly . Should click “Increase” until the distance is proper. |
Software Instructions
Magician X2 works with a variety of slicing software, such as Cura, Simplify 3D, Repetier-Host, and more. We will introduce CURA_xx.xx in detail, and you will learn how to set the slicing parameters, which will help you become more familiar with the slicing software and print your first model successfully.
First, you can find the CURA_xx.xx from the SD card, and install it on your computer.
Install CURA
- Double click Cura_xx.xx.exe to install
- Install the software by default as follows.
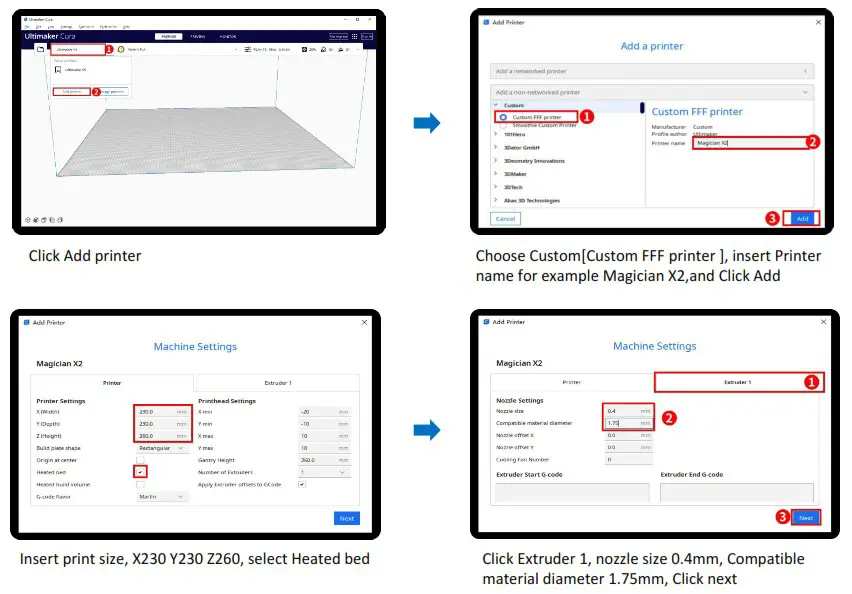
Step 1 Add Printer

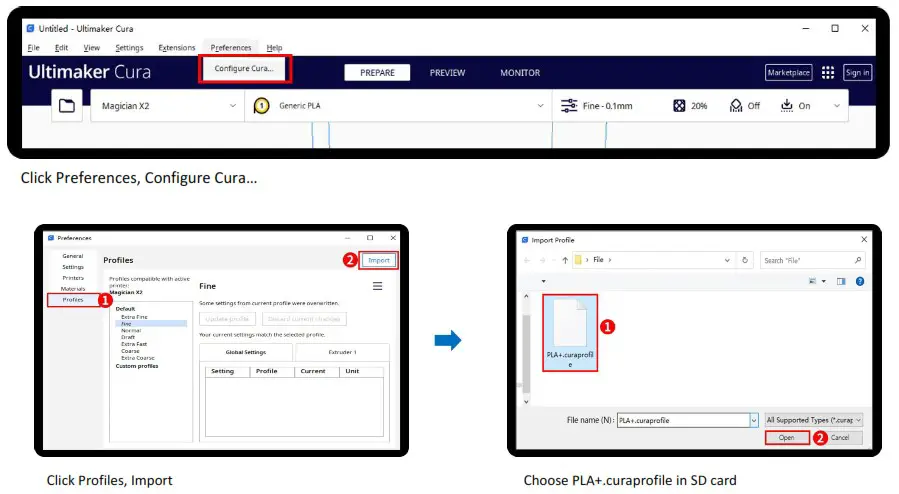
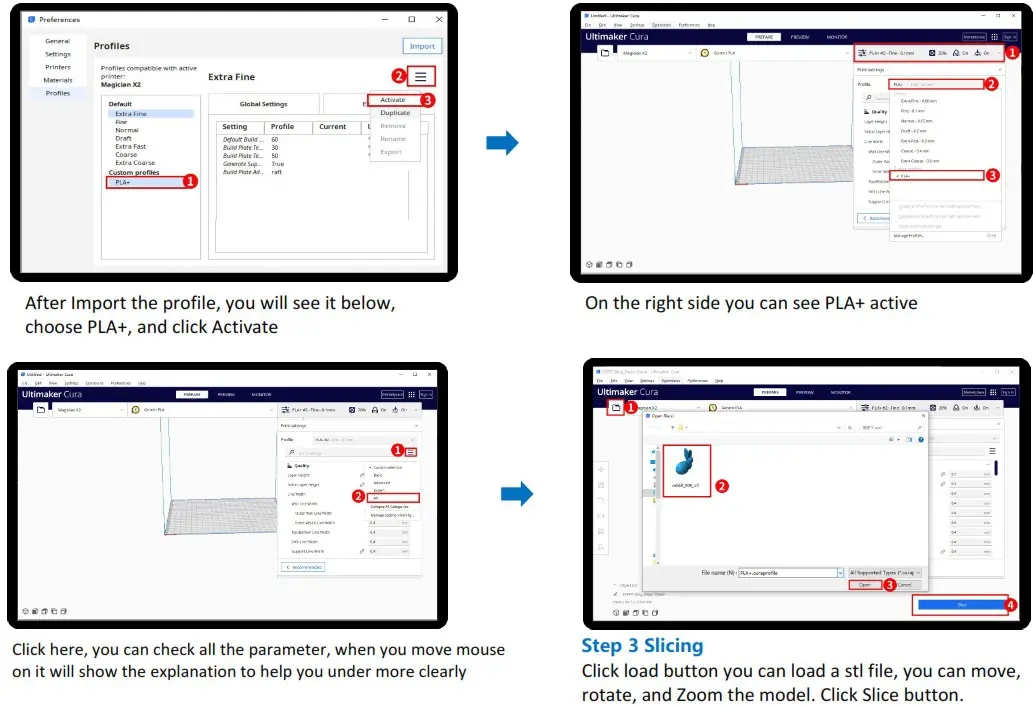
Step 2 Import Configuration file
For detailed warranty policy, please visit
http://www.3dmingda.cc/single/request_after_sales_service.html
For support ,please visit our Youtube Channel
https://www.youtube.com/channel/UC6PO64H7CfQtBy4H-fSRM4A?view_as=subscriber
Or you can visit our Facebook group at
https://www.facebook.com/groups/1018823731846578
Shenzhen MINGDA Technology Co.,LTD
Email: [email protected]
www.3dmingda.cc
 Support request
http://oa.3dmingda.cn/SystemFrameWorkV3/Role/Customer.aspx
 Youtube Channel
https://www.youtube.com/channel/UC6PO64H7CfQtBy4H-fSRM4A?view_as=subscriber
 Facebook Page
https://www.youtube.com/@Mingda3d/featured
 Official website


