![]()
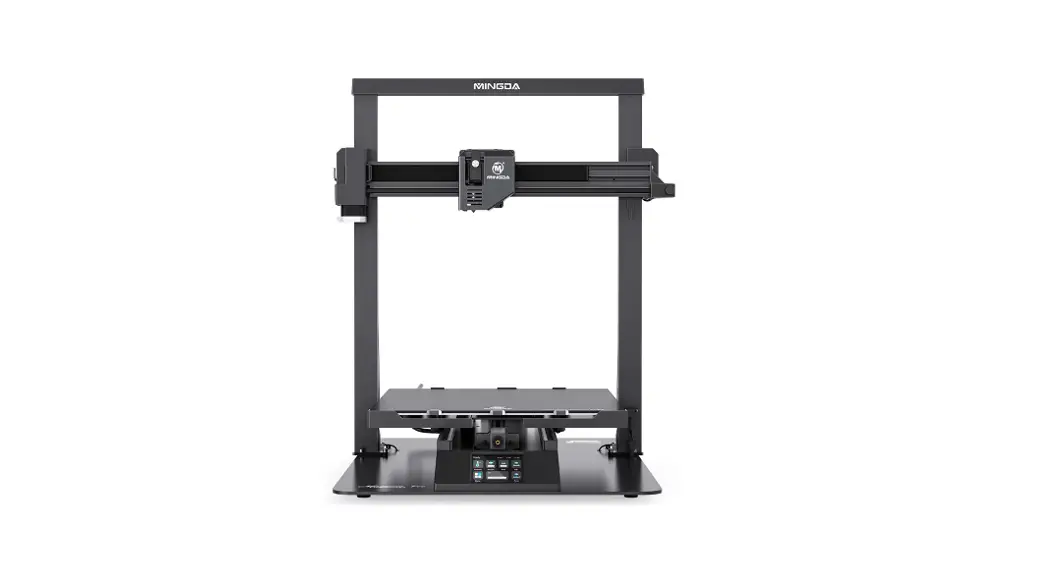
Magician Pro
3D Printer User Manual
Benutzerhandbuch des 3D-Druckers
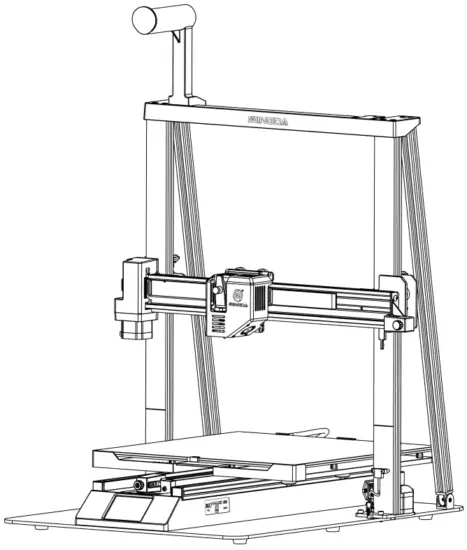
The Main Parts of the Machine
Toolkit

Assemble the 3D Printer
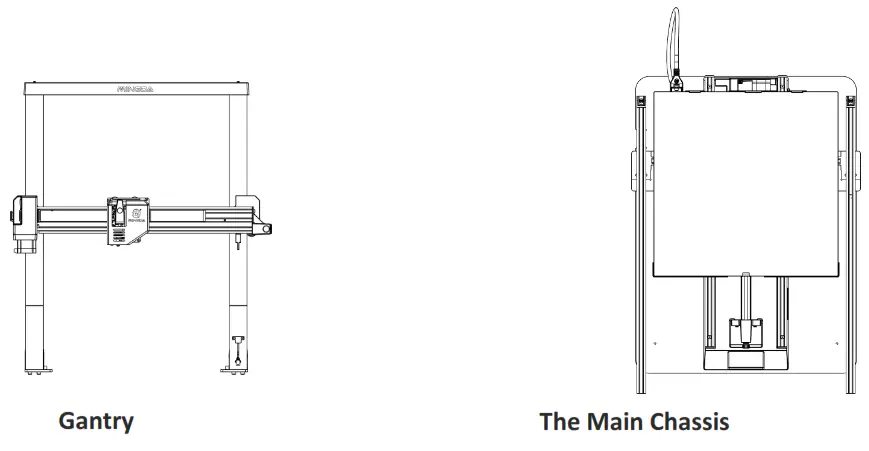
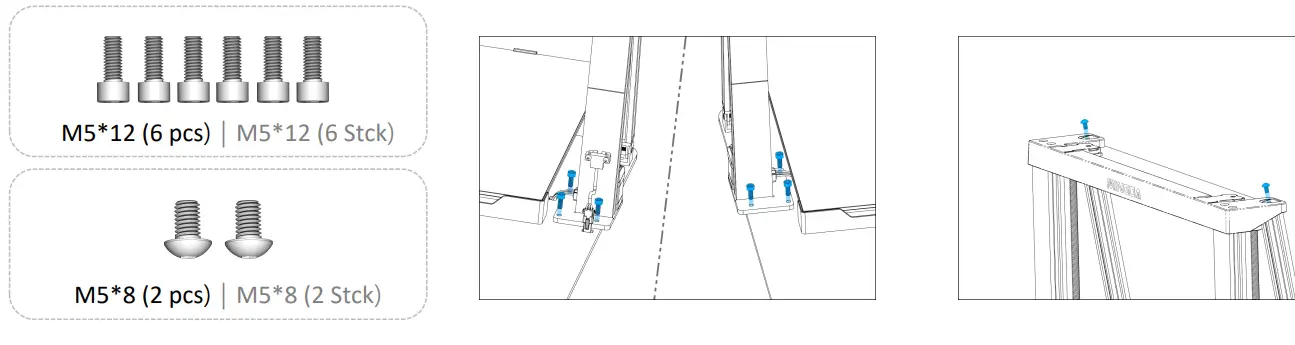
Step 1 Install the gantry
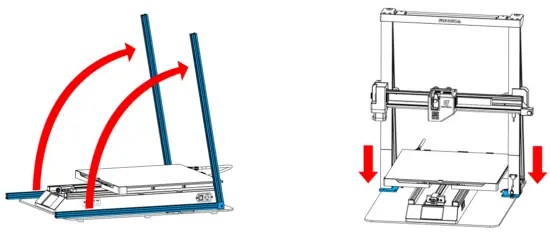
![]() Note: In order to avoid bending the lead screw and affecting the printing effect, do not touch the lead screw or twist the lead at will when taking out the gantry.
Note: In order to avoid bending the lead screw and affecting the printing effect, do not touch the lead screw or twist the lead at will when taking out the gantry.
Step 2 Install the fixing plate screw
Step 3 Install the Filament Holder
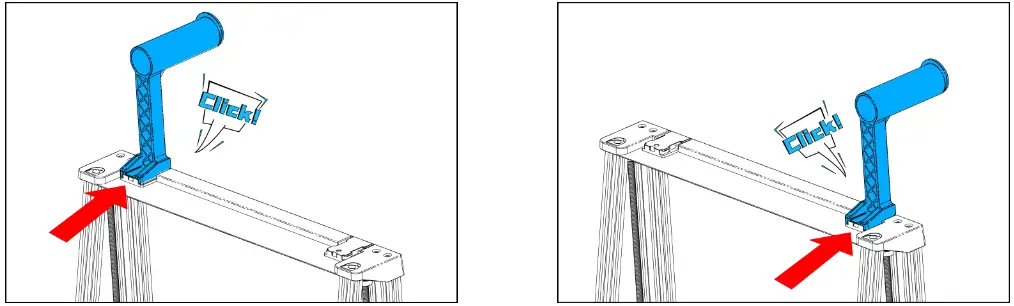 The filament holder can be installed left and right
Step 4 Cable connecting
 | ||
| Platform Line | Z Motor | Filament detector |
 | ||
| X Limit | X Motor | Arranging Wires |
Leveling
 | ||
| Plugin the power cord and turn on the power. | Click the “ABL” button | The system will automatically level after heating |
![]() Note: The UI information is only for reference, the actual UI may be different.
Note: The UI information is only for reference, the actual UI may be different.
Preheat
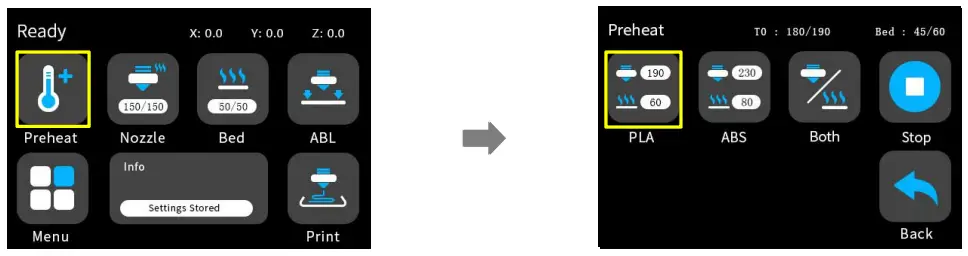 | |
| Select the preheat button on the main interface | Click the PLA button for one-key heating |
![]() Note: The UI information is only for reference, the actual UI may be different.
Note: The UI information is only for reference, the actual UI may be different.
Insert the filament
 | |
| 1. Note: Click Load to feed the material, and we suggest that don’t click Upload to pull the filament because it may make the extruder be blocked | 2. Insert SD card |
Printing

Select a code file to print![]() Note: The UI information is only for reference, the actual UI may be different.
Note: The UI information is only for reference, the actual UI may be different.
Baby Step

Note: The UI information is only for reference, the actual UI may be different.
Software Installation and Use
Magician Pro 3D printers work with a variety of slicing software, such as Cura, Simplify 3D, Repetier-Host, and so on. Now we will introduce CURA_4.9.0 in detail, you can learn how to set the printing parameters, which will help you to become more familiar with the slicing software and print the first sample successfully.
First, you can find the CURA_4.9.0 from the SD card, and install it on your computer.
Install CURA
- Double click Cura_4.9.0.exe to install
- Install the software by default as follows.
Step 1 Add Printer
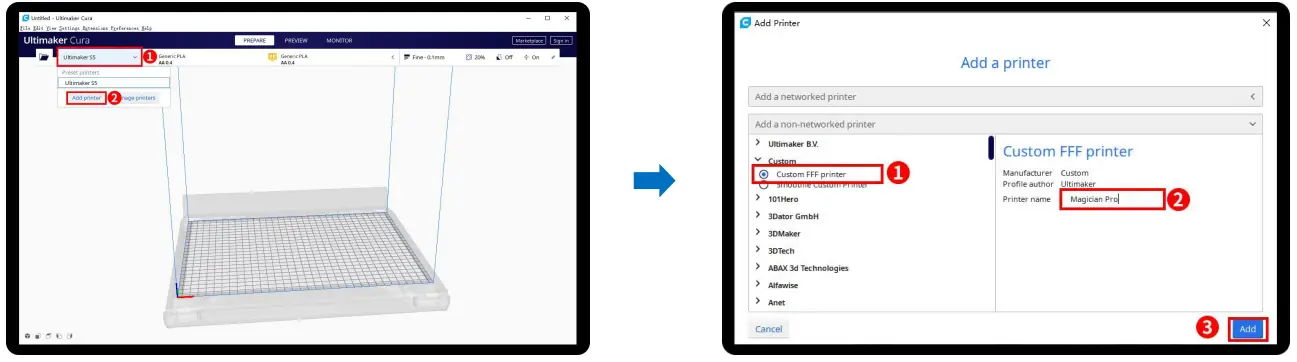 | |
| Click Add printer | Choose Custom[Custom FFF printer ], insert the Printer name for example Magician Pro, and Click Add |
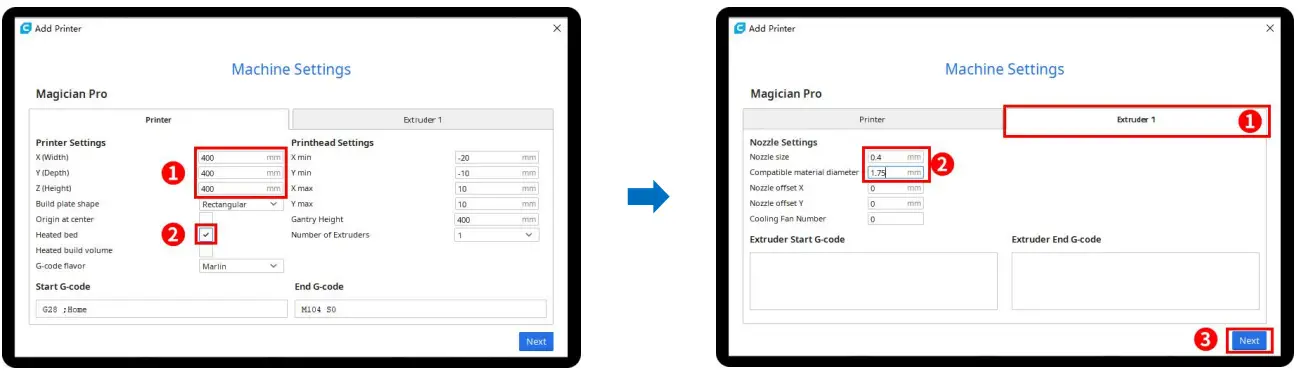 | |
| Insert print size, X400 Y400 Z400, select Heated bed | Click Extruder 1, nozzle size 0.4mm, Compatible material diameter 1.75mm, Click next |
Step 2 Import Configuration file
Click Preferences, Configure Cura…

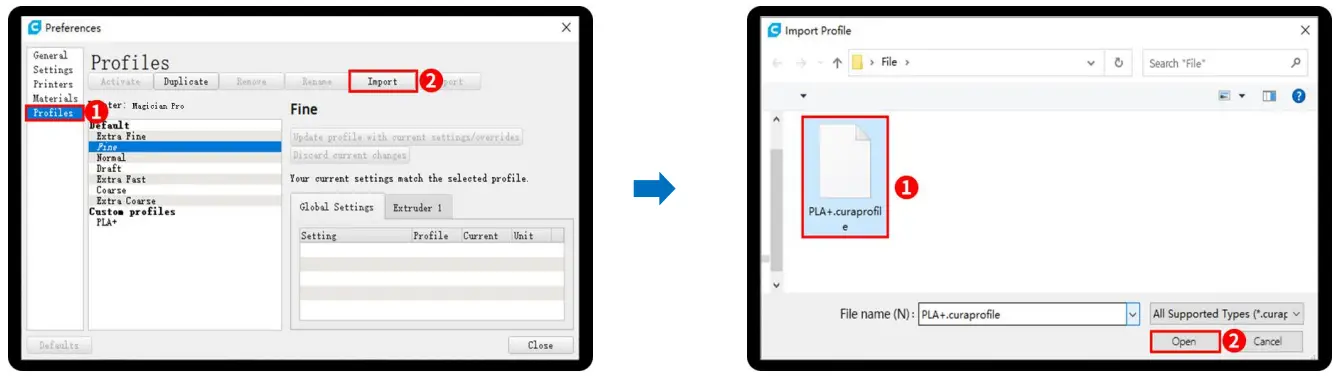
Click Profiles, Import, Choose PLA+.curaprofile on SD card
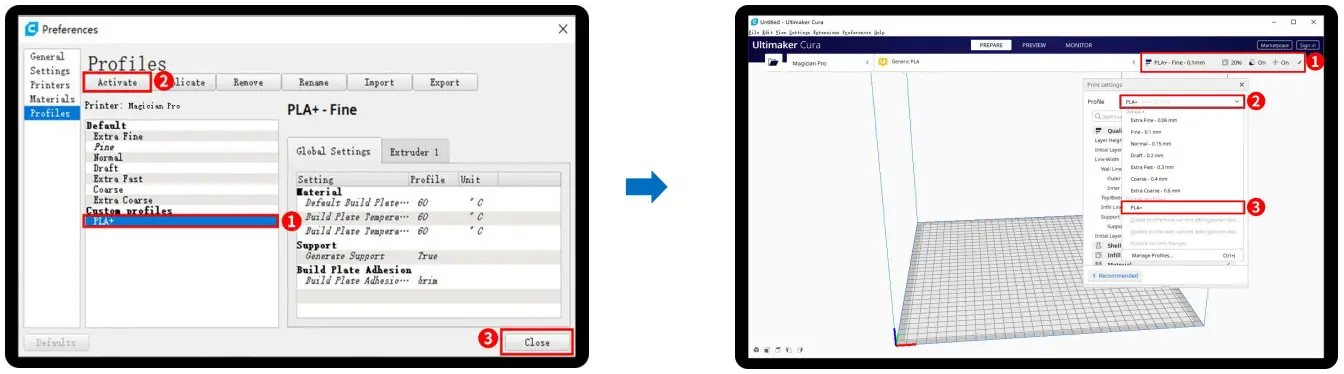 | |
| After Import the profile, you will see it below, choose PLA+, and click Activate | On the right side, you can see PLA+ active |
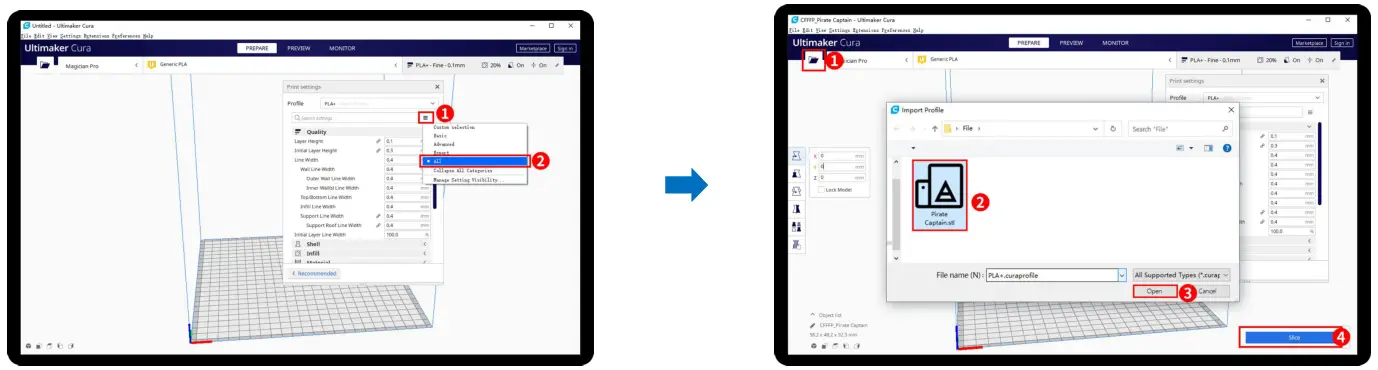 | |
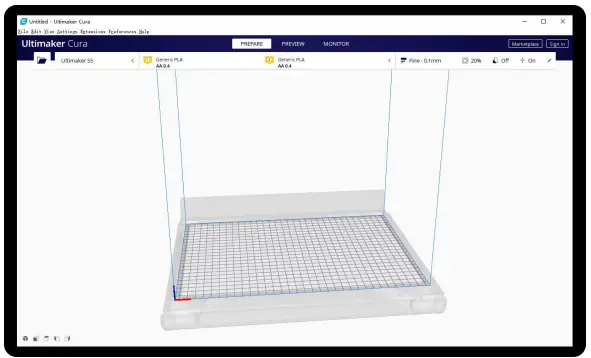
| Click here, you can check all the parameters, when you move the mouse on it will show the explanation to help you under more clearly | Step 3 Slicing Click the load button you can load an stl file, you can move, rotate, and Zoom the model. Click the Slice button. |
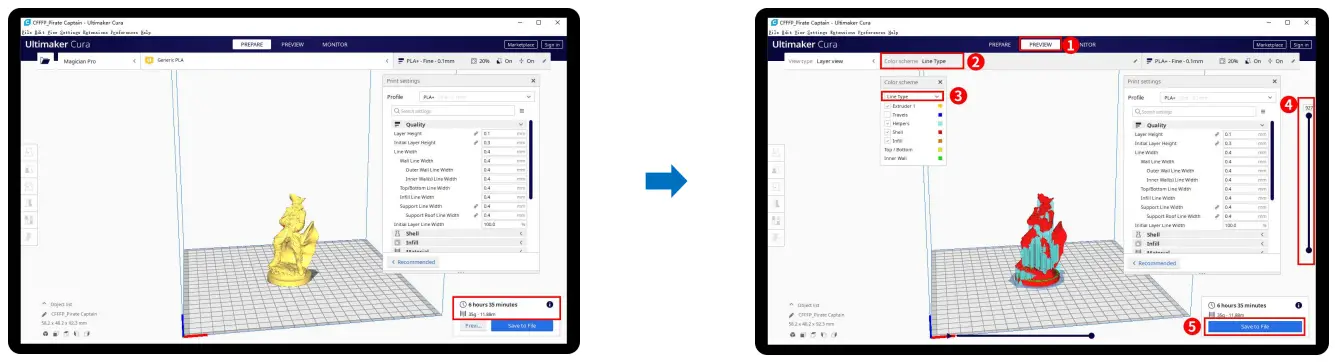
- After the slice is completed, you can see the time and weight of material that the printing will take;
- We suggest you click PREVIEW to check, you can choose line Type and Drag the slider on the right side to see the printing process clearly.
After that, you can save it on your SD card to print it out by the printer.
For a detailed warranty policy, please visit http://www.3dmingda.com/single/request_after_sales_service.html
For support, please visit our Youtube Channel https://www.youtube.com/channel/UC6PO64H7CfQtBy4H-fSRM4A?view_as=subscriber
Or you can visit our Facebook group at https://www.facebook.com/groups/1018823731846578
Shenzhen MINGDA Technology Co., LTD
Email: [email protected]
www.3dmingda.com
 | ||
| https://www.youtube.com/channel/UC6PO64H7CfQtBy4H-fSRM4A?view_as=subscriber | https://www.facebook.com/groups/1018823731846578/about | http://www.3dmingda.com |


