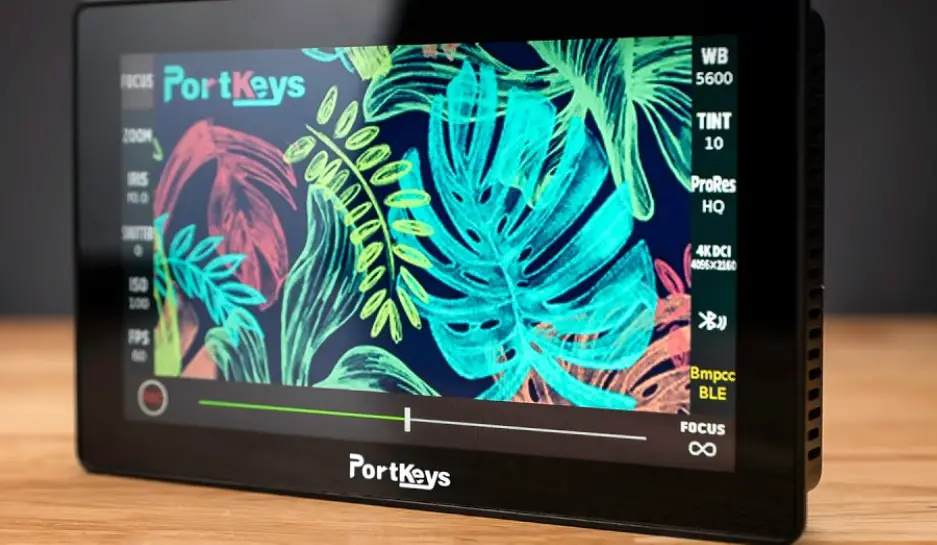
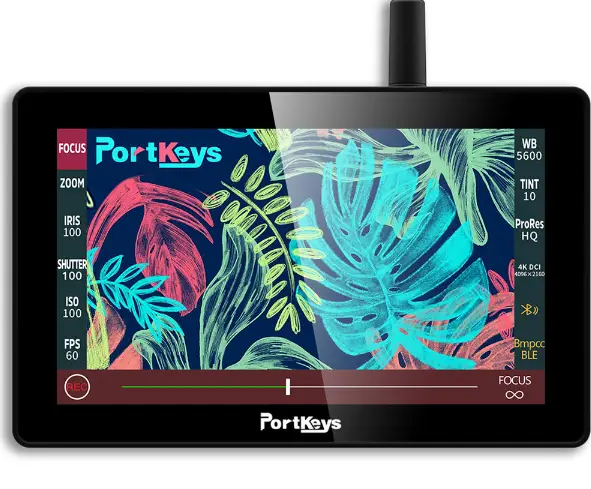
PortKeys LH5P On-Camera Monitor
Product Information
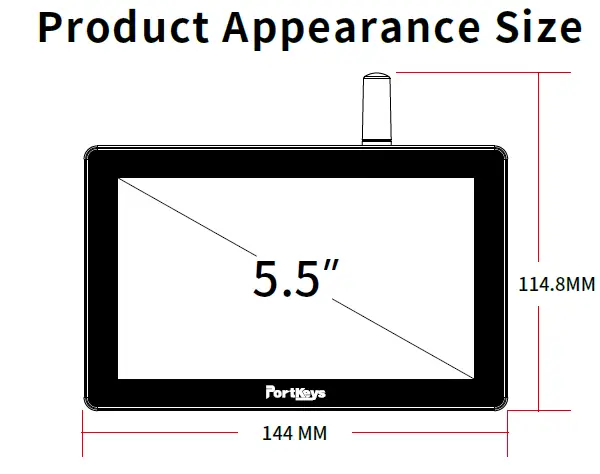
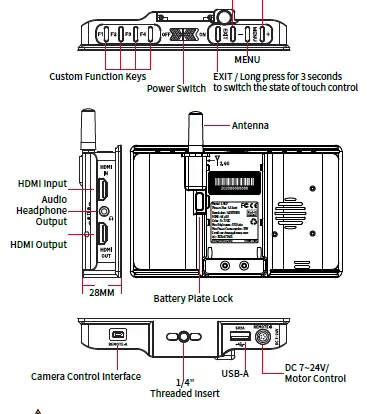
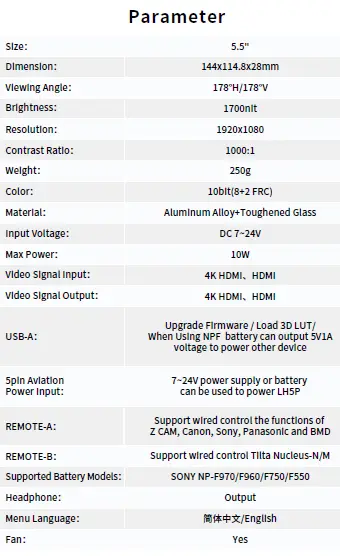
Product Information
Standard Accessories
LH5P Monitor X1 Power Cord (Aviation Port – DC) X1
Short Antenna X1 Elbow Short Antenna X1
U Disk X1
Safety Box X1
Warm Prompt Card X1 LANC Control Cable X1 TYPE-C Control Cable X1
Supported input resolution and frame rate
HDMI Signal
- 4096×2160p@24Hz
- 3840×[email protected],24Hz,25Hz,29.97Hz,30Hz
- 1920×[email protected],24Hz,25Hz,29.97Hz,30Hz,50Hz,59.94Hz,60Hz 1920×[email protected],24Hz,25Hz,29.97Hz,30Hz
- 1920×1080i@50Hz,59.94Hz,60Hz
- 1280×720p@50Hz,59.94Hz,60Hz
- 720×576p&720×576i@50Hz
- 720×480p&720×480i@50Hz,59.94Hz,60Hz
Supported output resolution and frame rate
HDMI Signal - 4096×2160p@24Hz
- 3840×[email protected],24Hz,25Hz,29.97Hz,30Hz
- 1920×[email protected],24Hz,25Hz,29.97Hz,30Hz,50Hz,59.94Hz,60Hz 1920×[email protected],24Hz,25Hz,29.97Hz,30Hz
- 1920×1080i@50Hz,59.94Hz,60Hz
- 1280×720p@50Hz,59.94Hz,60Hz
- 720×576p&720×576i@50Hz
- 720×480p&720×480i@50Hz,59.94Hz,60Hz

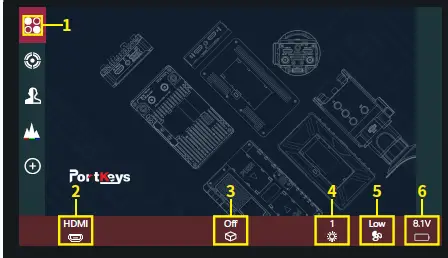
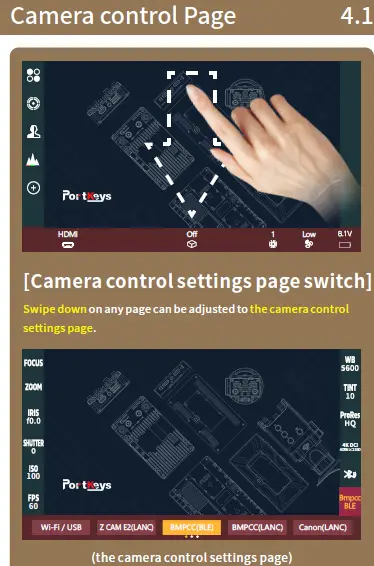
Function Setting
- Add function icon.
- HDMI signal.
- 3D LUT ON/OFF.
- Screen brightness (1-10).
- Fan strength (Low /Middle/High).
- Battery level.
Custom Function Settings
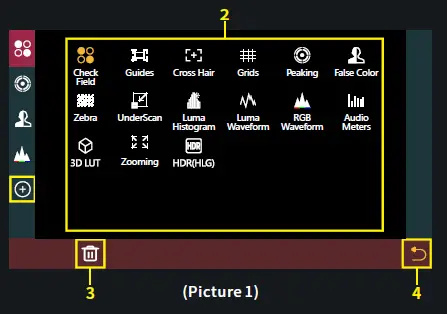
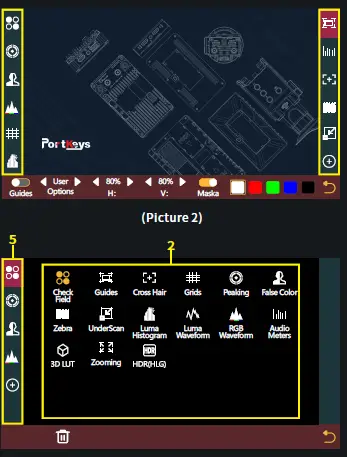
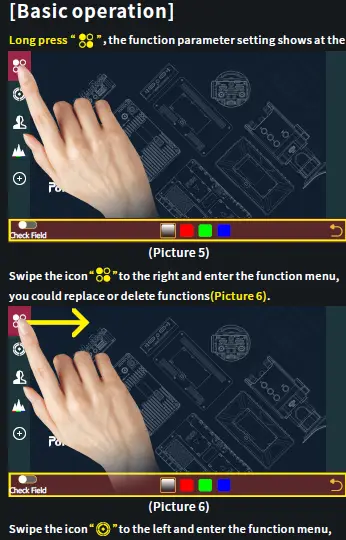
- Click “ ”add shortcut functions to the left and right sides;
If the function icons on the left and right have been added (Picture 2);can swipe down in the shortcut function title area to continue adding. - Select the function icon to replace.
- Select the function icon and click“
- ”Return key.

- The default is F1-F4 custom function, you can slide left/right to enter the function menu to change the custom function

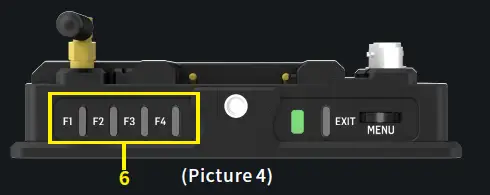
- F key setting is completed,F1-F4 button on the monitor to turn on/off the function.

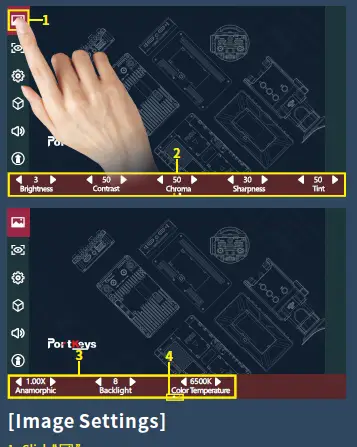
- Click “
- Parameter setting information.
- Parameter setting information(Next page ).
- Display the number of the page of Image parameter setting. Swipe left and right in the bottom information area to switch pages.
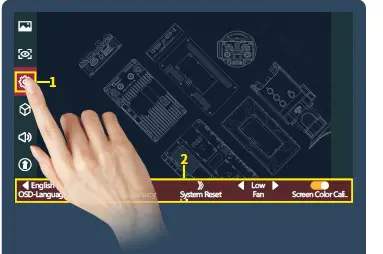
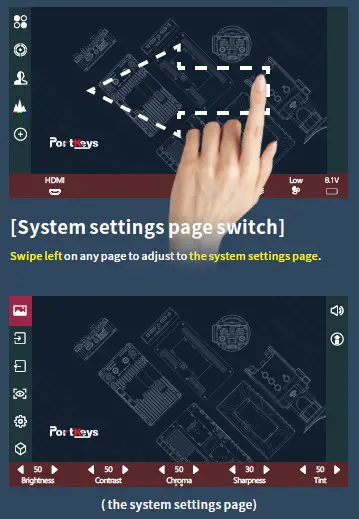
[System Setting]
- Click “
- System parameter setting information.
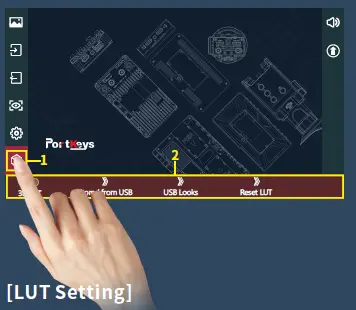
[LUT Setting]
- Click“
- LUT setting information.
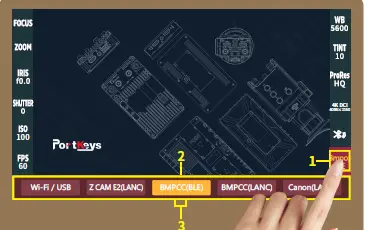
Camera Model Setting
- Click“
- Camera model options :Wi-Fi/USB、 Z CAM E2(LANC)、BMPCC4K(BLE)、 BMPCC(LANC)、Canon(LANC)、 Sony(MUTI)、Sony(LANC)、Panasonic (Remote).
- Display the number of the page of camera brands ,Swipe left and right in the bottom information area to switch pages.
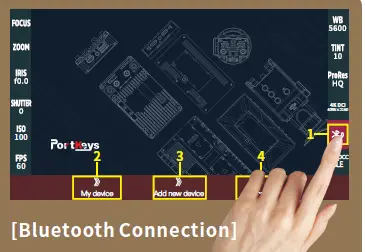
Bluetooth Connection
- Click“
- Select“”, Make bluetooth connection( Successfully connected bluetooth record).
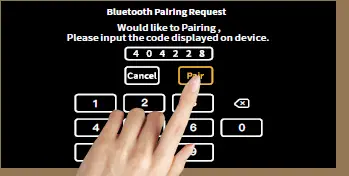
- Select “ ”,turn on the BMPCC4K/6K Bluetooth function and record the passcode (picture 1),enter the passcode on the monitor(Picture 2 and 3),click“ ”,After successful connection, The Bluetooth icon will be displayed in yellow
- Select“ ”to disconnect the Bluetooth connection.

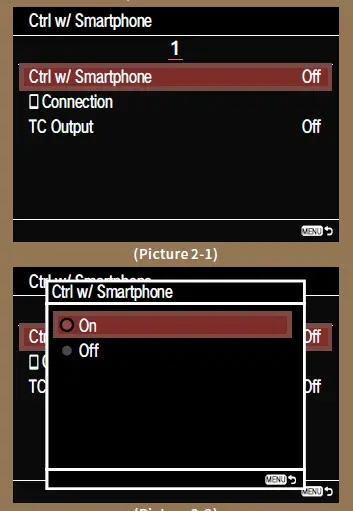
Wirelessly Connect Sony A7M iii to Portkey Monitor
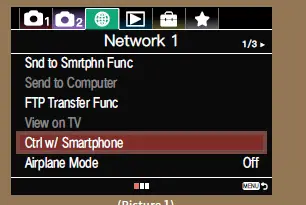
- Turn the camera ON,select the “MENU” tab.
- Go to the Network settings, select (Network 1) > 【Ctrl w/ Smartphone 】 (Picture 1).

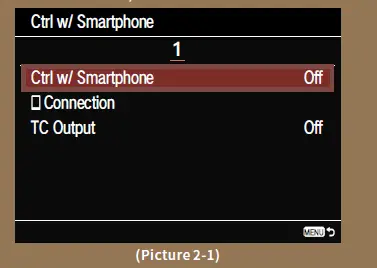
- Turn “Ctrl w/ Smartphone” On, then select Connection


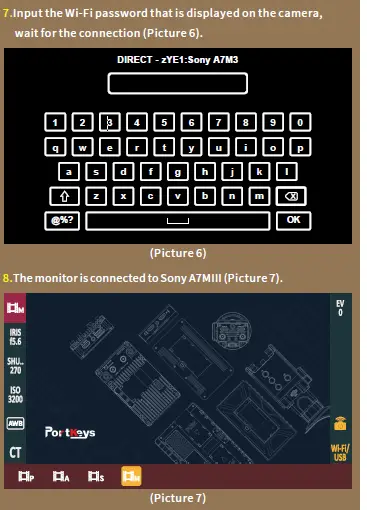
- Press the ( Delete) button, select “Connect via password”
 6.Tap “Add new device”, select the Wi-Fi name of Sony A7MIII (Picture 5).


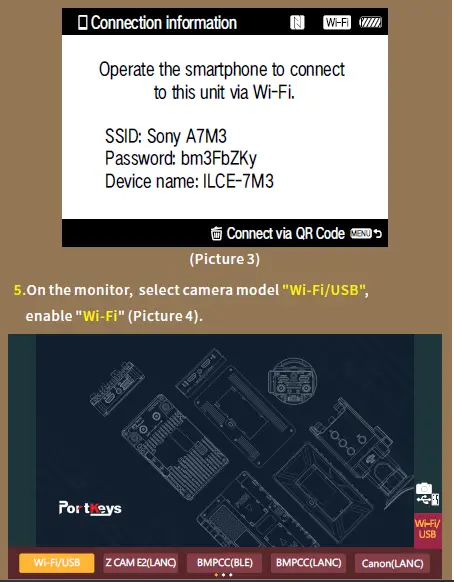 6.Tap “Add new device”, select the Wi-Fi name of Sony A7MIII (Picture 5).
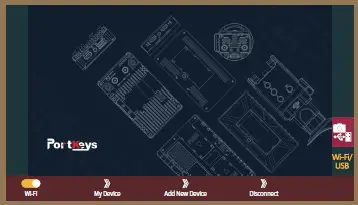
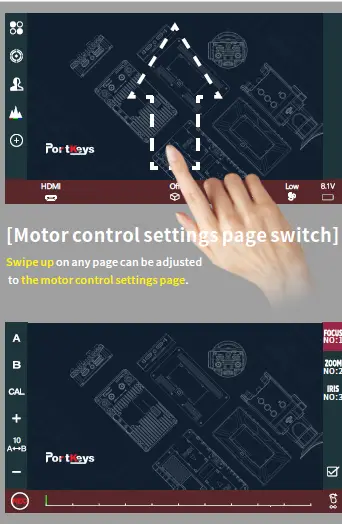
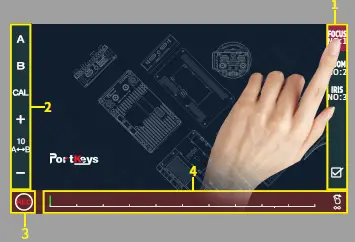
Motor Setting
- Click to select channel options“
- Select the channel option to set the channel parameters.
- Record.
- Adjust the motor stroke.


