Triton Neo Frameless Swivel Panel Chrome
Please read these instructions carefully and keep for future reference. Incorrect fitting will invalidate the guarantee.
SAFETY
- Handle glass with great care. Although the glass is very tough, sharp impacts can damage both the glass and metal frame.
- Make sure there are no hidden pipes or cables hidden in the wall where you intend to dril.
- Wear safety goggles, shoes and appropriate clothing.
BEFORE INSTALLATION
- Check that the shower tray is level in all directions. The enclosure will not sit correctly on an uneven surface.
- If uneven, the wall channels may not fit and the doors may not shut correctly.
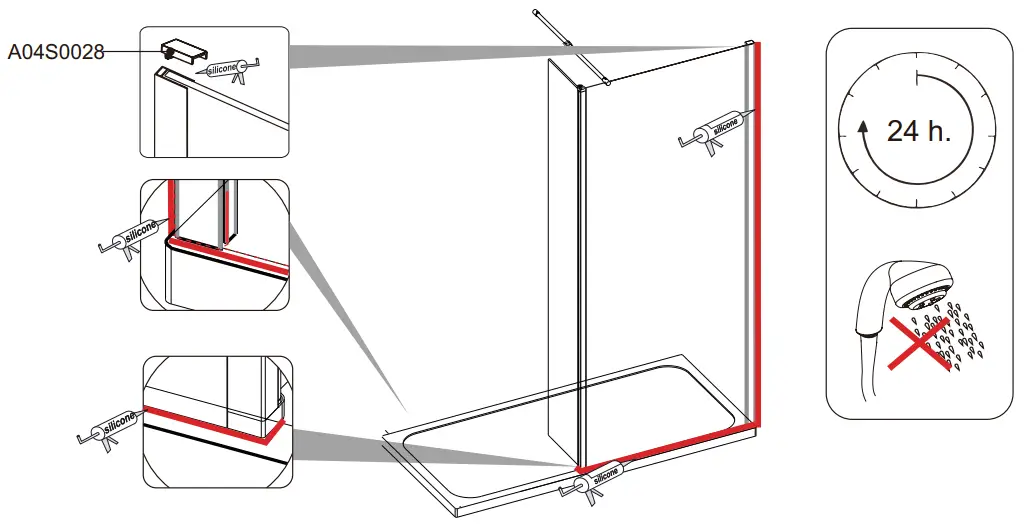
- The enclosure should be fitted on tiled walls which are sealed with waterproof grout.
- There must be a good silicone seal between the rim of the shower tray and the wall.
- The shower tray and the enclosure must match in size. Attempting to fit the incorrect size of the enclosure to the shower tray will result in water leaks.
- Always check very carefully that the components are vertical.
- To avoid damage, use the opened-out packaging to build the enclosure on.
Equipment needed:
Silicone Sealant.
Installation
Stage 1
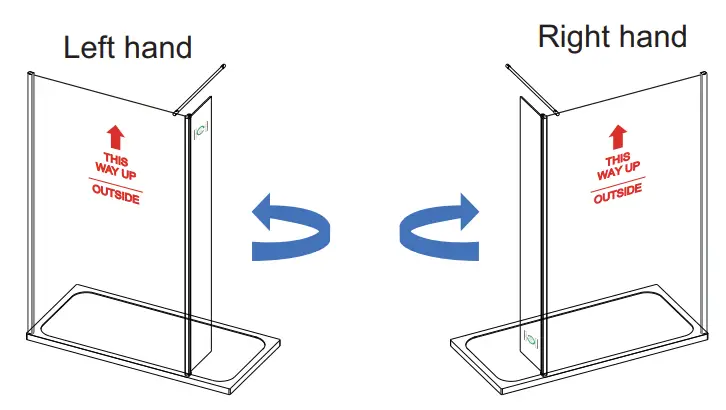
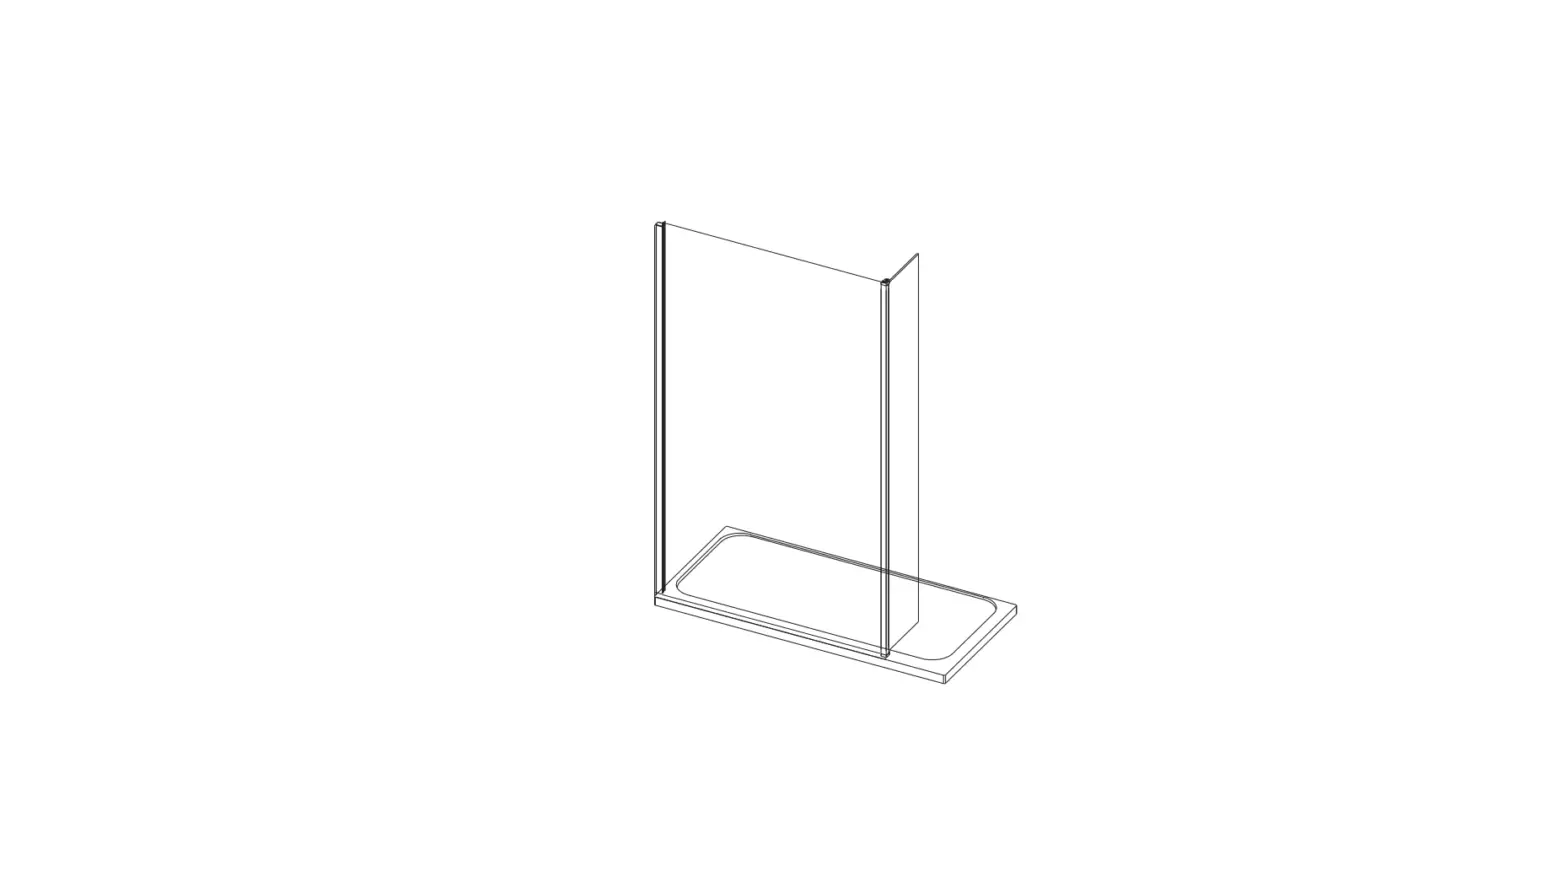
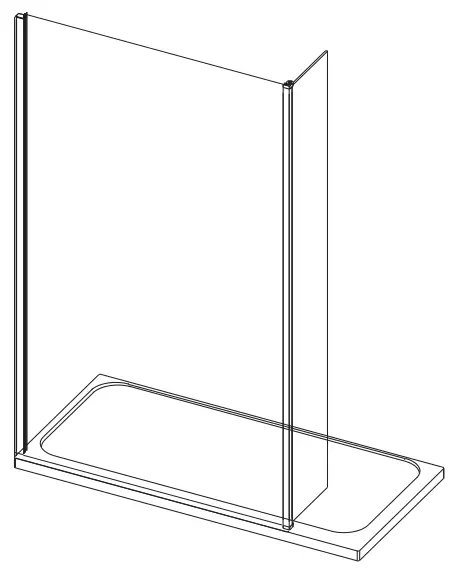
Remove swivel panel from packaging. Install the swivel panel in the required orientation. The product is reversible and no brackets need to be removed to change handing.
NOTE: Ensure swivel panel swings inward across the tray area (as shown above). If swivel panel swings outward panel is installed in the incorrect handing.
Stage 2
Stage 3
Parts list
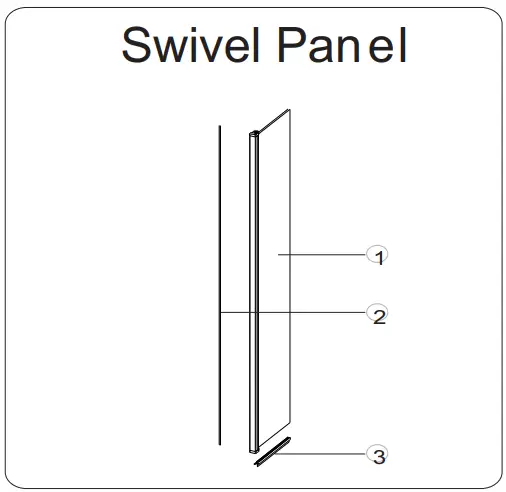
| Item No. | Part List Description | Part Code | Swivel Panel Size |
|
300 | |||
| 1 | Swivel panel | N/A | 1 |
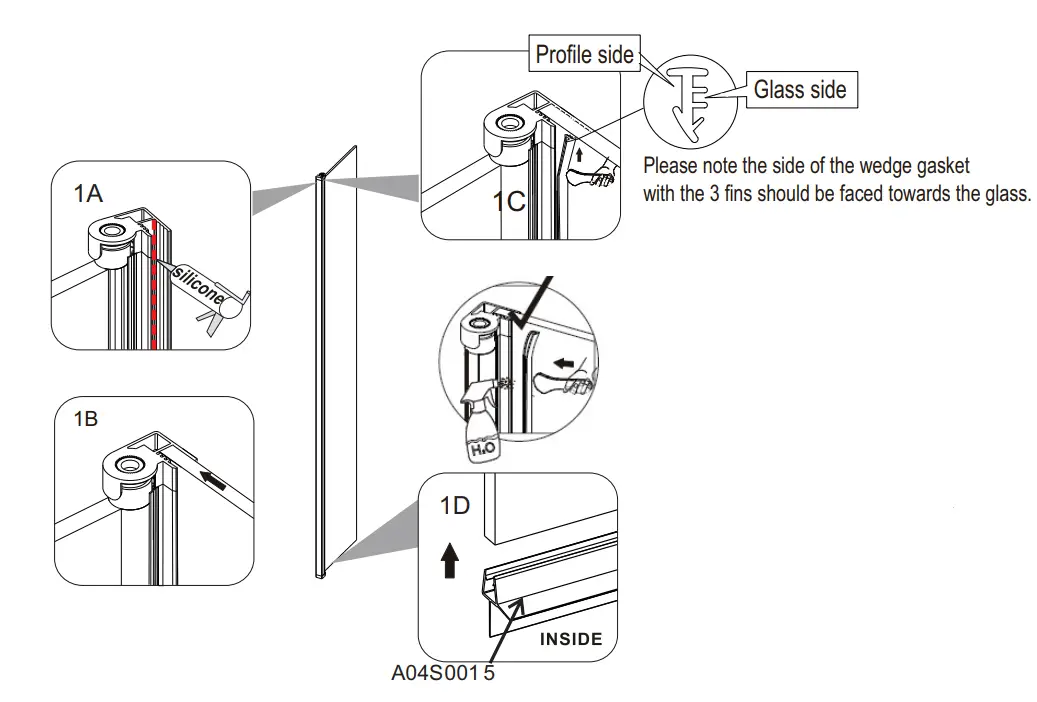
| 2 | Wedge gasket for swivel panel | A04S0013 | 1 |
| 3 | Bottom seal | A04S0015 | 1 |


