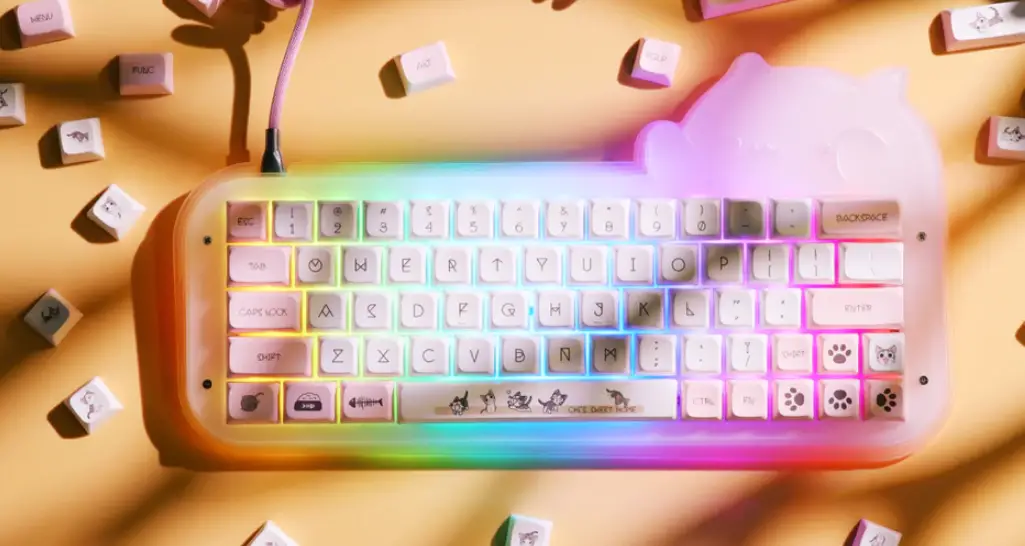
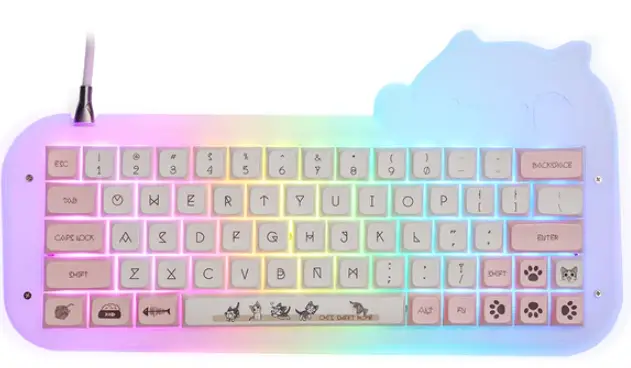
EPOMAKER Mini Cat 69 Acrylic RGB Wired Mechanical Gaming DIY Keyboard Kit
Information
SHORTCUTS
- FN +1 F1
- FN +2 F2
- FN +3 F3
- FN +4 F4
- FN +5 F5
- FN +6 F6
- FN +7 F7
- FN +8 F8
- FN +9 F9
- FN +0 F9
- FN + – F10
- FN + = F11
- FN + ; F12
- FN + BACKSPACE Del
RGB SETTINGS
- FN + A Turn on Keys’ Backlights Only / Turn on Case’s Backlights Only / Turn on All Backlights
- FN + S Hue +
- FN + D Hue –
- FN + F Saturation +
- FN + G Saturation –
- FN + Z Turn On/Off Backlights
- FN + ; Lock Win
- FN + X Mod +
- FN + C Mod –
- FN + V Brightness +
- FN + B Brightness –
To be able to customize your key layouts, RGB, macros, and other functions in your Mini Cat 69 you can use the VIA Software with the use of a JSON File.
Instructions to install on Windows:
- Unzip the file to find the .exe and .json files.
- Install the .exe file in your computer.
- Run the VIA software once installed.
- Import the JSON file to be able to edit the Mini Cat 69 settings inside VIA.
Instructions to install on macOS:
- Unzip the file to find the .exe and .json files.
- Unpack the .dmg file
- Drag the VIA software to your applications folder to install it.
- Authorize the VIA software in: System Preferences > Security & Privacy.
- Import the JSON file to be able to edit the Mini Cat 69 settings inside VIA.
FACTORY RESET
- Unplug the cable of the keyboard.
- Press the ESC and hold it.
- Plug in the cable to connect the computer and keyboard, do NOT release the ESC key until the cable is plugged into both computer and the keyboard.
- Release the ESC key
- Wait until the computer completes the setup for USB, now the keyboard won’t response to the key pressing, and a window of USB folder might pop up on the screen.
- Eject the USB from the computer.
- Re-plug the cable to connect the keyboard with the computer.
- Wait a few seconds until the backlights are on.
PRODUCT SPECIFICATIONS
- NUMBER OF KEYS 71 KEYS
- CASE MATERIAL STACKED ACRYLIC
- HOT-SWAP SUPPORTS 3/5 PIN SWITCHES
- COMPATIBILITY WINDOWS/MAC
- PRODUCT WEIGHT 550G±50G
- CONNECTION USB-C
- PRODUCT DIMENSIONS 325 * 175 (Max.) – 125(Min.) * 30mm (±20mm)
REPLACING KEY CAPS AND SWITCHES
For a full guide on how to remove keycaps and switches scan the QR Code or type in your browser:
https://epomaker.com/blogs/guides/diy-guide-how-to-remove-and-replace-your-mechanical-keyboard-switches
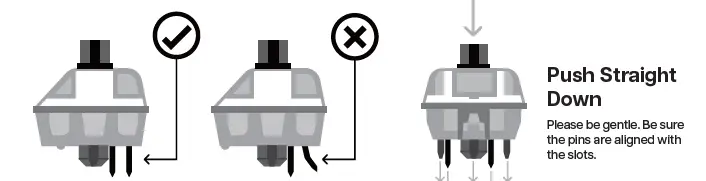
Before installing switches, be sure the pins are clean and straight.
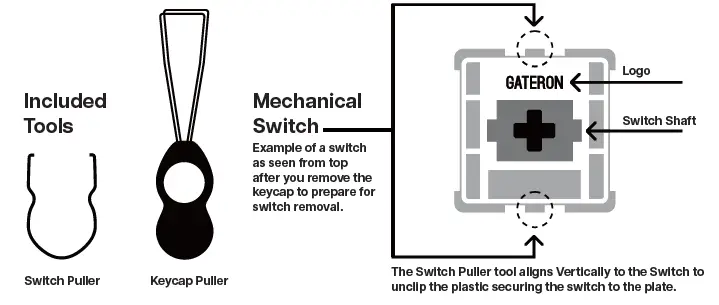
Remove Switches
- Grab your Switch Removal Tool and align the gripping teeth vertically (on the Y-Axis) at the center of the switch, as shown in the example graphic above.
- Grab the switch with the Switch Puller and apply pressure until the switch releases itself from the plate.
- Using firm but gentle force pull the switch away from the keyboard using a vertical motion.
Install Switches
- Check that all the switch metallic pins are perfectly straight and clean.
- Align the switch vertically to have the Gateron logo facing north. The pins should align themselves to the keyboard PBC.
- Press the switch down until you hear a click. This means your switch clips have attached themselves to the keyboard plate.
- Inspect the switch to ensure it’s properly attached to your keyboard, and test it.
Note: If the key doesn’t work its possible you may have bent one of the switches while installing it. Pull the switch out and repeat the process.
Pins may be damaged beyond repair and need replacement if this process is not done correctly. Never apply excessive force when replacing
keycaps or switches. If you cannot remove or install keycaps or switches please contact customer service as soon as possible to avoid
damage to the keyboard due to operating errors.
TECHNICAL ASSISTANCE
For technical assistance, please email to [email protected] with your purchase order number and a detailed description of your issue.
We normally respond to enquiries within 24 hours. If you purchased your keyboard from a distributor or not from any official store of Epomaker, please contact them directly for any additional help.
COMMUNIT Y FORUMS
https://discord.gg/2q3Z7C2
Join our community and learn together with other keyboard enthusiasts.
EN https://www.reddit.com/r/Epomaker/
WARRANT Y
EPOMAKER’s Warranty covers any factory defects that might affect the proper functionality of your purchase. It doesn’t cover any damage that may occur from normal wear and tear. If your product is defective we will send you a replacement unit. Replacement units might require you to send the
defective unit back to Epomaker. We provide a 1 year warranty for our products when bought from our website (EPOMAKER.com). Your item will not be covered by your 1 year warranty if the inspection shows any sign of modification or changes unsupported by the original product, these include: Changing internal components, Assembling and reassembling the product, Replacing Batteries, etc. We will ONLY cover the item if it is bought from our official stores. You do not have a warranty with us if you bought the item from another reseller or likewise. Please contact the store that you bought your product from to resolve issues.


