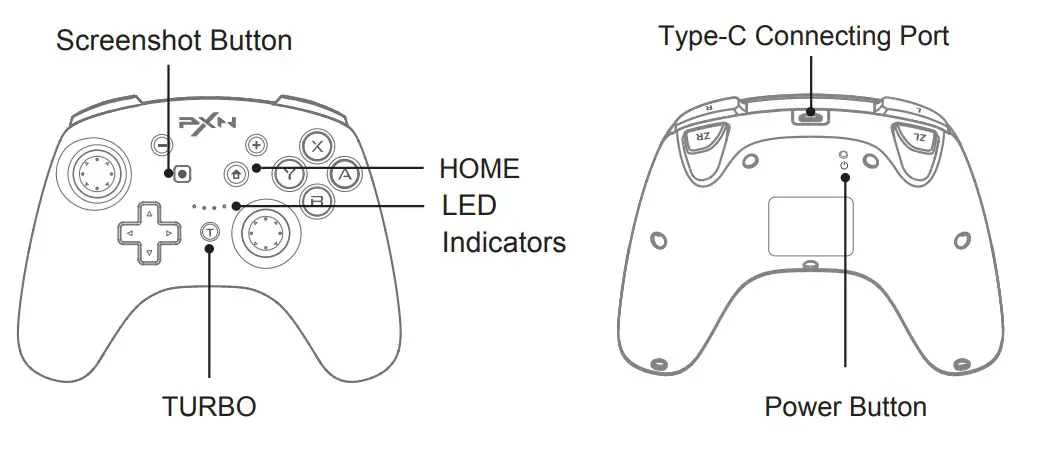
PXN 9607X Controller User Manual
Thank you for choosing and supporting PXN, please read this manual carefully before starting to enjoy your gaming experience.
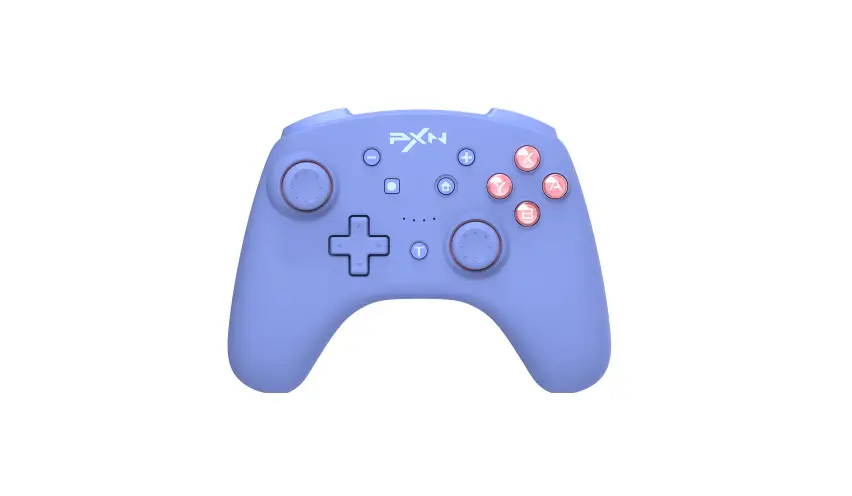
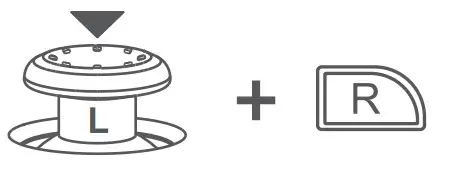
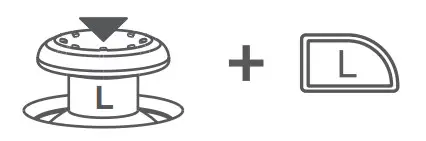
Product Overview
System Requirement
- Support platform: Switch Console/ PC/ iPhone
- Supported Systems: Windows 7/ 8/ 10/ 11, iOS 16+
Connect with Switch Console
Wireless Connection
- Click [
 ] Controller → Change Grip/Order on Switch Homepage.
 - Long press [
 ] Power Button for 3 seconds, the Four LED indicators on the controller will flash circularly when the remaining battery life displaying and then enter the pairing state.
 - The LED will remain ON when the pairing is successful. Then press [
 ] button to back to the Homepage.
Switch Console Reconnect and Wake-up
After connect successfully, press [![]() ] button on Controller can wake up and reconnect
] button on Controller can wake up and reconnect
the sleeping Switch console.
Wired Connection
Click [![]() ] Setting on Switch homepage → Controllers and Sensors → then click Pro
] Setting on Switch homepage → Controllers and Sensors → then click Pro
Controller Wired Connection. Please make sure this option state is ON.
Switch Console:
Before using the wired connection, please make sure the Controller is OFF or in sleeping state.
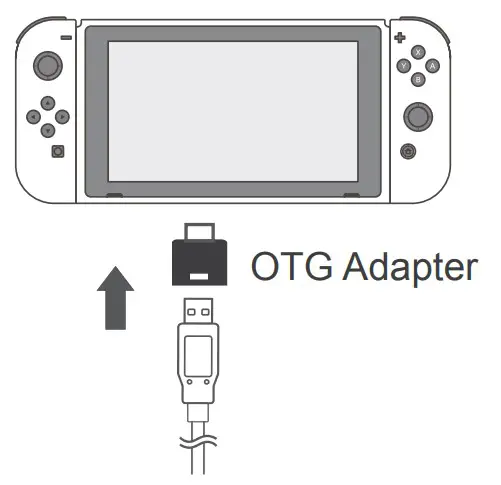
- Use Type-C cable and OTG Adapter to connect the controller and Switch console.
- The connection is successful when LED indicator in the Controller flashing
( Note: The Type-C OTG is not included )
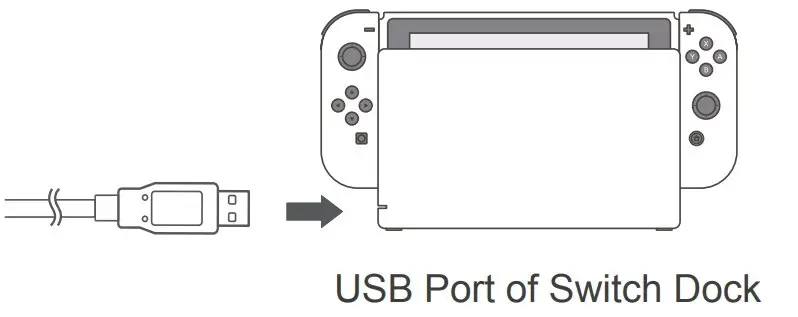
Switch Dock:
Before using the wired connection, please make sure the Controller is OFF or in sleeping state.
- Use Type-C cable and OTG Adapter connect the controller and Switch Dock.
- The connection is successful when LED indicator in the Controller flashing.

Power ON/OFF and Wake-up
| l’amepad State | Button Operation | Function Instruction |
| Dower ON | Press [ | Power ON and enter pairing |
| Nake-up Dontroller | Short press [ A/ B/X/Y/L / R / Cross button / – / + ] button on Controller | Wake up the sleeping controller and reconnect |
| Nake-up Donsole | Short press [ | Wake up the sleeping controller and reconnect |
| Dower OFF | Short press [ | Short press to Power OFF the Controller and reset the settings Wake-up function is available to use to reconnect the console after Power OFF |
Connect with PC
Wired Connection
Before using the wired connection, please make sure the Controller is OFF or in sleeping state.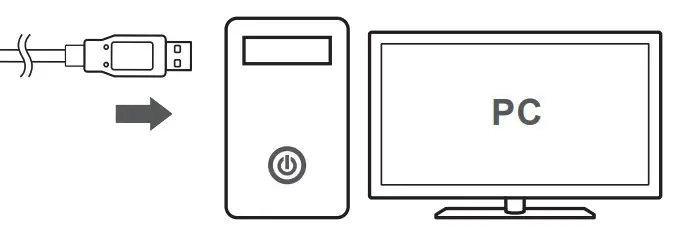
- Connect the Controller with PC by USB cable.
- The PC will prompt new hardware and install automatically, the connection is successful when LED2 indicator flashing.
Testing Function
Function testing is available when use in computer. The specific steps show below: Open Control Panel → Devices and Printers → Right mouse click Controller icon → Game Controller Setting, click Properties Testing.
NFC Function
The Controller has built-in NFC function, supported to use figures and chips. (Recommend to use genuine Amiibo figures.)
Using Instructions:
When the Controller connected with Switch console by BT, if the game support Amiibo function, place the Amiibo above the [ ] logo can activate the tool.
TURBO Function
Buttons can be set for TURBO function: A / B / X / Y / L / R / ZL / ZR.
| Manual TURBO | After the first setting, hold press this setting button can launch TURBO manually | |
| Auto-TURBO | | After the second setting, press the function button can launch TURBO automatically. Press the button again can be stopped Turbo function |
| Clear TURBO Setting | | After the third setting, the TURBO function will be cleared |
| Clear All TURBO Setting | | Clear all button TURBO function |
| Adjustable Rapid Fire | 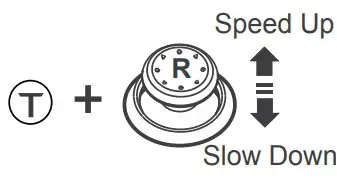 | Long press [ |
Manual TURBO: the LED indicator will be flashing when long press the setting button. Auto-TURBO: the LED indicator will flash quickly.
Reset Function
When the controller has any functional disorder, halt or other abnormality, press and hold the power button for 8 seconds to restore the factory settings.
Adjustable Vibration
Hold press the [![]() ] button on Controller and operate the UP/Down of left joystick at same time to adjust vibration level, It is in Medium Vibration in default when connect. Vibration adjustment has memory function.
] button on Controller and operate the UP/Down of left joystick at same time to adjust vibration level, It is in Medium Vibration in default when connect. Vibration adjustment has memory function.
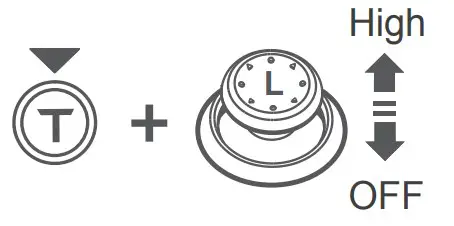 | High Vibration | |
| Medium Vibration | ||
| Low Vibration | ||
| No Vibration |
Controller Calibration Function
When the Controller occurs disorder or joystick problem, can use calibration function to fix.
- In sleeping state, press [ L3+R ] to enter the calibration mode, the 4 LED indicators on the controller will flash alternately in 2 groups.

- Place the controller on a horizontal table and press [+] button.
- The sensor will automatically complete the calibration after releasing the button in 3 seconds.
Charging Function
Using a standard USB 5V input, the controller will be fully charged in 2-3 hours.
| Controller State | Battery State | Indicator State |
| Working State | | |
| Power OFF | ||
Sleeping Function
| Controller State | Enter Sleeping State | |
| Reconnect State | 30 seconds without connection | |
| First Pairing State | 60 seconds without connection | |
| Working State | 5 mins without any opperations | |
 Press [ L3+L ] in Power OFF state, then the auto sleep time can be adjusted by operating UP/DOWN of D-pad. | Auto sleep after 5 minutes | |
| Auto sleep after 10 minutes | ||
| Auto sleep after 20 minutes | ||
| Turn off the sleep function | ||
Attentions
- Avoid strong vibration, do not disassemble, modify or repair by yourself.
- Prevent water or other liquids from entering the controller to avoid damage.
- Avoid storing in humid, high temperature, oily smoke and other places.
- Built-in battery, please do not throw the controller into fire to avoid explosion.
- If you have any problems or suggestions about the product, please contact the seller or the after-services
| Model | PXN-9607X |
| Connect Type | Wireless / Wired Connection |
| Working Power | Built-in 550mAh Lithium Battery |
| Working Current | 5V 20 mA |
| Packaging Size | About 185*138*78 mm |
| Product Size | About 153*111*42 mm |
| Unit Weight | About 210 g |
| Usage Temperature | 10 – 40℃ |
| Usage Humidity | 20~80% |
“![]() ” is a registered trademark of ShenZhen PXN Electronics Technology Co., Ltd.
” is a registered trademark of ShenZhen PXN Electronics Technology Co., Ltd.
Nintendo /Nintendo Switch /Amiibo is a registered trademark of Nintendo Co., Ltd.
All trademarks are the property of their respective owner. Technical specifications are subject to change. lnformation contained herein is subject to change without prior notice. ShenZhen PXN Electronics Technology Co., Ltd. shall not be made liable for any errors that may appear. Please keep this information for later reference.


