![]()
10.2″ 1080P Carplay Monitor
BT12
User Manual
Please read all instructions carefully before using, and keep the manual for future reference.
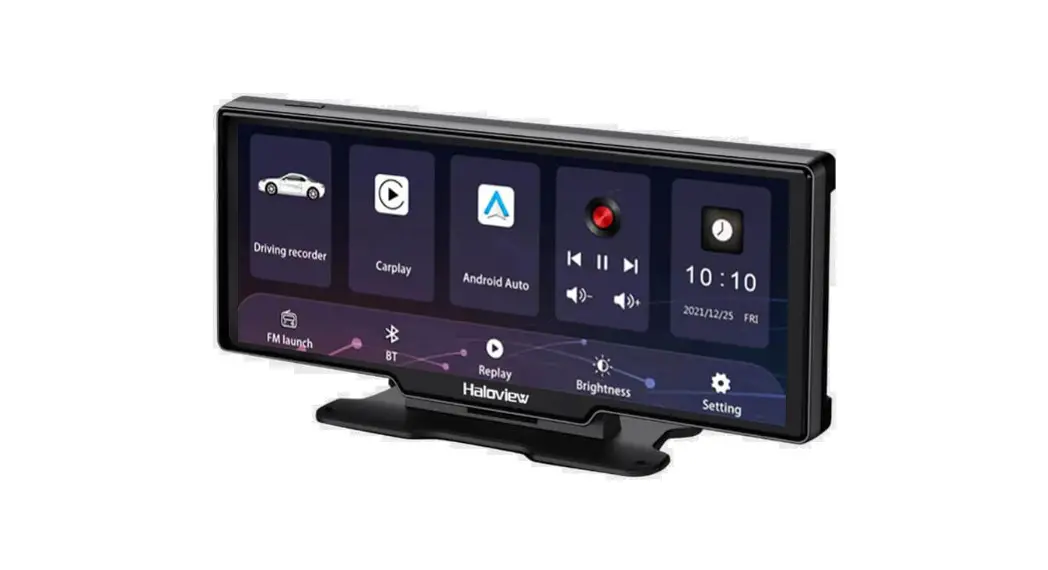
BT12 10.2 Inch 1080P Carplay Monitor
The Haloview BT12 vehicle observation carplay monitor carry two 1080P cameras installed inside/outside of the vehicle to capture images around the vehicle while navigating and music listening. It’s a combination of carplay, dashcam and rear view real-time observation. With this system, drivers can intuitively see the obstacles and pedestrians around the vehicle, which effectively reducing the occurrence of accidents such as scratches and collisions. The video recording function it has can record the driving picture as valid evidence.
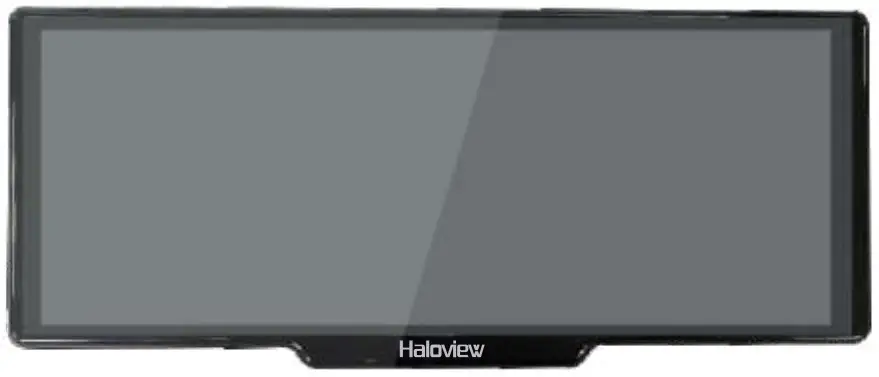
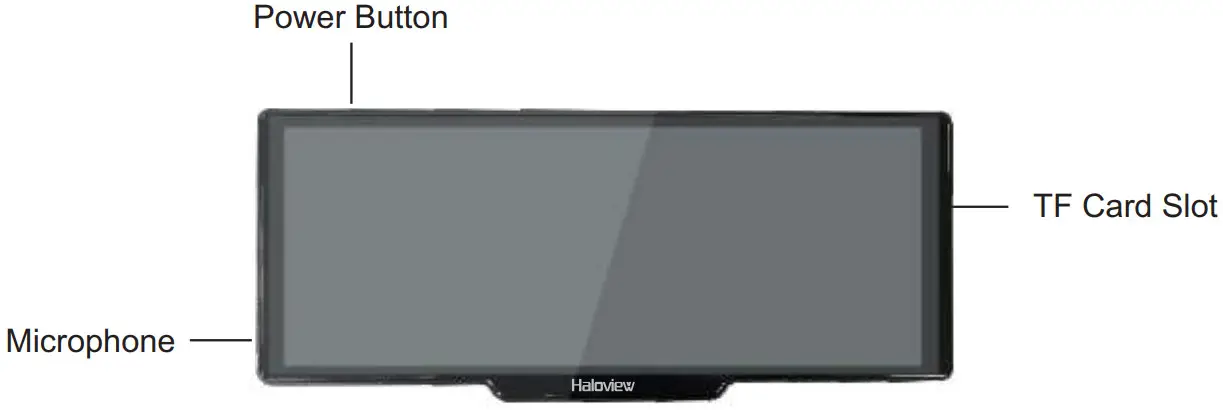
Functions of each part
Package contents
| Item | Picture | Description | Quantity |
| Carplay Monitor |  | 10.2″(1600*600) carplay monitor support 2 channels of cameras | 1 |
| Cameras | 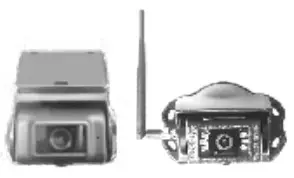 | Wired 1080P Dashcam Wireless 1080P Camera | 2 |
| Smart Box | 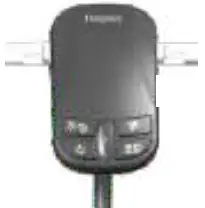 | BMW connector x 1 5V output port x 2 | 1 |
| Camera Extension Cable |  | 3.5m x 1 1.5m x 1 | 2 |
| Mount |  | Base | 1 |
| TF Card | 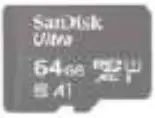 | 64G C10/U1 | 1 |
| Suction Mount | 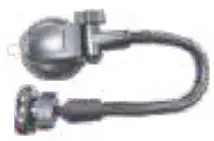 | 1 | |
| 1. Static Sticker for Dashcam 2. Anti-glare film for display |  | 2 |
Specifications
Monitor (BT-M12)
| bleaductIon | Function | |
| Language | EnglahSerclified Chinese/Trackbrol Choose/ JapaneseeKoreararenchataianiSpanish. of | |
| Interface | Grapls MENU | |
| Opened= | Thud’ screenPush button Short press to stanctry the screen Long press to turn ON/OFF | |
| Video lioUl | b’cleo Input | 2 Channels 1080P Cameras |
| Reaming | Default toot cecinas no mason seconds. automatic recording alter 15 seconds of no operation | |
| Rethlan0 Iambi | TS. video saved separately, dashcarn recorded Me is 5101080P/720P opbanal, rear view cameras recorded file debut 1080P. | |
| Display | Real-time display | 10.2″ 1600*600MIPI |
| Display Mode | Single channel display and split display | |
| Playback | Local playback can be viewed at any time, or select the playback button to urgent-record, lock or delete files, support real-time viewing and playback via mobile phones. | |
| Screen Saver | 1 minute/3 minutes/5 minutes/off | |
| Storage | SD Card | CLASS10 U1 or above, minimum 64GB, maximum support 256GB |
| Wireless Connection | WIFI | Support IOS carplay/Android auto Supports RoadCam wireless connection |
| Bluetooth | Support bluetooth music, bluetooth calling | |
| FM | Support FM range 87.5-108.0MHz, the minimum unit is 0.1MHz | |
| Audio | Microphone | Support audio recording. Audio recording can be set ON/OFF. |
| Voice Control | Temporarily only English is supported. A variety of voice control commands. Note: The voice control may be affected in noisy environment. | |
| Power | Power input | The working voltage is DC11-18V, with vehicle-grade surge, overload, overvoltage, undervoltage, short circuit and other power protection circuits, suitable for various vehicles. |
| Others | Working Temperature | -20-65°C |
| video duration | Video recording time can be set | |
| Mirror/Flip | Split display can respectively set mirror and flip | |
| license plate settings | Supported | |
| Time Setting | Supported | |
| Brightness Setting | Supported | |
| Volume Adjusment | Supported |
Smart Box (BTR100)
| Output Pixels | 1920 ×1080 |
| Operation Frequency | 2400-2483MHz |
| Transmission Distance (barrier free) | 300m (984ft) |
| Transmission Power | 18dBm |
| Video Codec | H.265 |
| Spread Spectrum | DSSS |
| Latency | 120ms |
| RF Bit Rate | 12Mbps |
| Power Supply | DC11~18V |
Dashcam (CA617)
| Image Device | 1/2.9” CMOS |
| TV System | 25fps/30fps |
| Effective Pixels | 1920×1080 |
| Pixel Size | 2.8umx2.8um |
| Video Output | 10bits MIPI |
| Scanning System | Progressive Scanning |
| Sync. System | Internal |
| Gamma Consumption | 0.45 |
| AGC | Auto |
| White Balance | Auto |
| BLC | Auto |
| Electronic Shutter | Electronic Rolling Shutter |
| Viewing Angle | 140° |
| Audio | No |
| LED | No |
| Power Supply | DC10~32V |
| Waterproof rating | IP69K |
| Minimum Illumination | 0.5Lux |
| Operating Temperature | -20℃ ~ 70℃, RH95%MAX. |
| Storage Temperature | -30℃ ~ 80℃, RH95%MAX. |
Wireless Rear View Camera (BTC128)
| Image Device | 1/2.9″ CMOS |
| TV System | 25fps/30fps |
| Effective Pixels | 1920×1080 |
| Pixel Size | 2.8um×2.8um |
| Video Output | 8bits YUV |
| Scanning System | Progressive Scanning |
| Sync. System | Internal |
| Gamma Consumption | 0.45 |
| AGC | Auto |
| White Balance | Auto |
| BLC | Auto |
| Electronic Shutter | Electronic Rolling Shutter |
| Operation Frequency | 2400-2483MHz |
| Transmission Distance (barrier free) | 300m (984ft) |
| Transmission Power | 18dBm |
| Video Codec | H.265 |
| Spread Spectrum | DSSS |
| Latency | 120ms |
| RF Bit Rate | 12Mbps |
| Minimum Illumination | 0Lux |
| Power Supply | DC10~32V |
| Night vision distance | 8~10m (26-32ft) |
| Waterproof rating | IP69K |
| Viewing Angle | 120° |
| Audio | Yes |
| LED | 6 x LED |
| Operating Temperature | -20℃ ~ 70℃, RH95%MAX. |
| Transmission Distance (barrier free) | -30℃ ~ 80℃, RH95%MAX. |
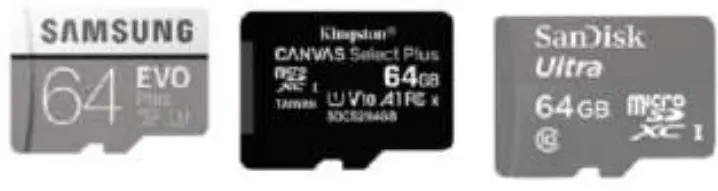
TF card requirements
The quality of the SD card has a great influence on the stability of the video recording.
In order to record the video safely, please choose the best SD card such as SanDisk, Kingston, Toshiba and Samsung. The speed must be at least Class10/ U1.
Installation
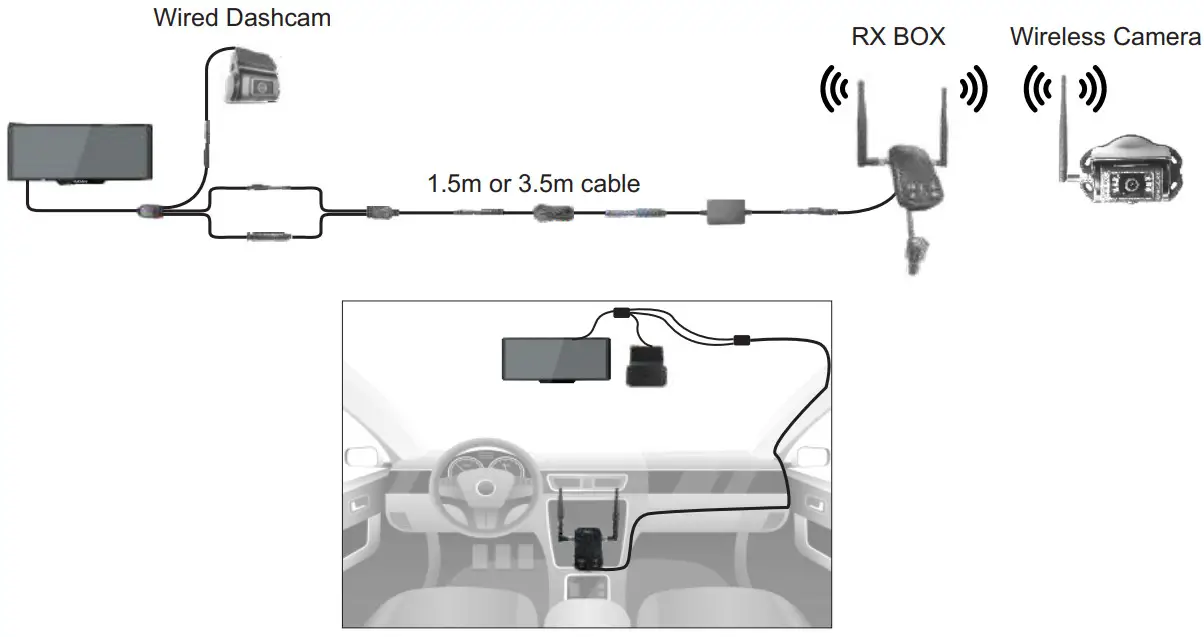
Installation Method 1:
Mount Carplay Monitor on Rearview Mirror
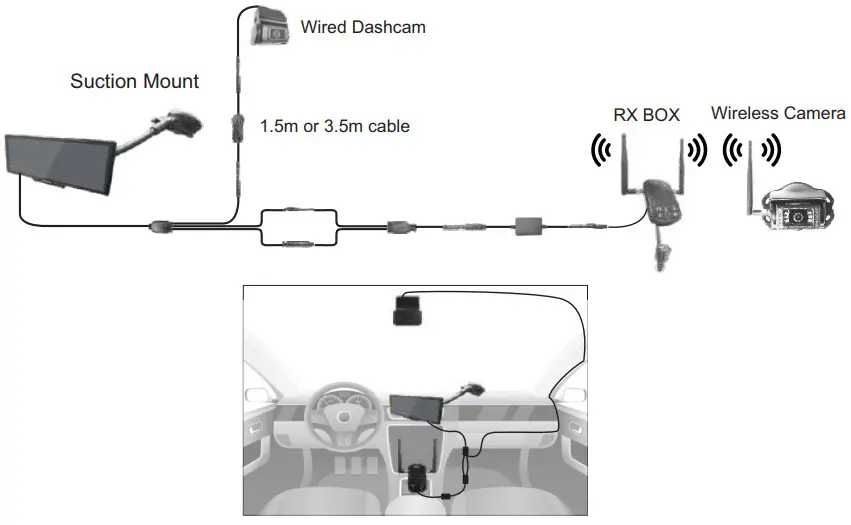
Installation Method 2:
Mount Carplay Monitor on Front Windshield by Provided Sunction Bracket
Dashcam installation
- Please wipe the front windshield with cleaning paper before installation.
- Paste the provided static sticker on windshield.

- Tear off the film of 3M glue, and then stick it on the static sticker

- Turn the camera up and down to adjust to the appropriate angle.

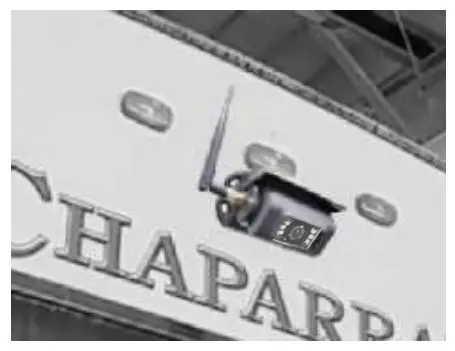
Reaview Camera installation
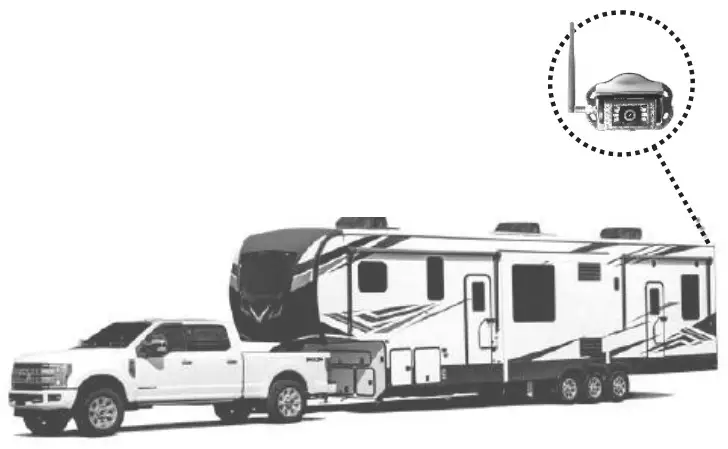
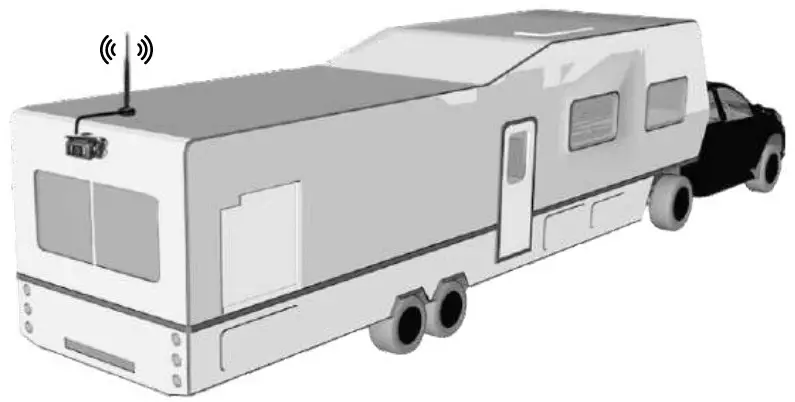
If signal strength of the position that you planned to install a camera is under 2 bars, please change to another position, or mount the camera higher to make sure the antenna highest of the top without being blocked. Please refer to below pictures:
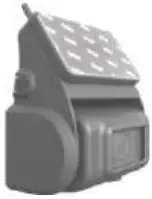
 Installation Position 1: Mount the camera higher than your vehicle’s roof, keeping the antenna vertical.
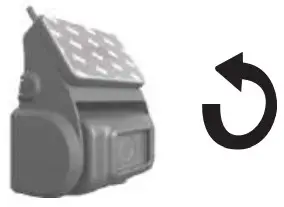
Installation Position 2: Mount the camera lower but as close as possible to vehicle’s roof, and move the antenna outward 15-30 degree. The antennas proximity to any metal surfaces on the vehicle may affect signal strength.![]() Special Notice
Special Notice
After position adjustment, you can start installation if your signal strength is still above 2 bars.
Image freezing may occur when the vehicle is 42-65ft long and the antenna is mounted in a poor location (the antenna is not placed on the roof of the vehicle or there is obstruction around the antenna). In this case, it is recommended to purchase the Haloview 0.6m antenna extension cable and place it on the roof without any obstacles.
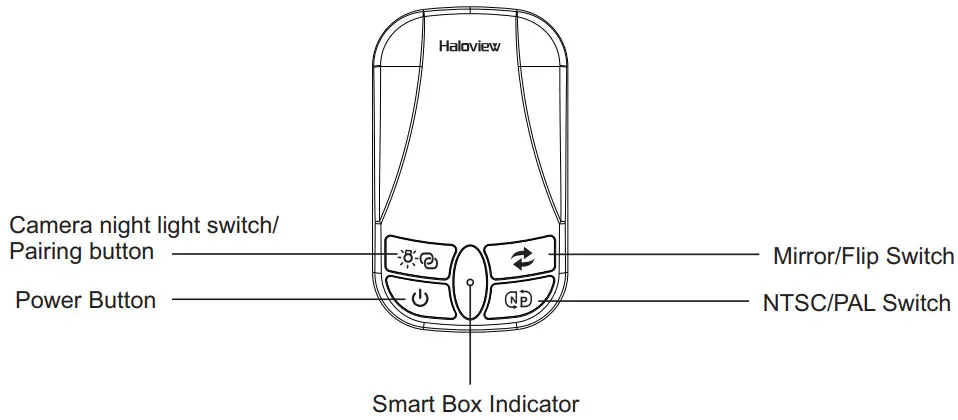
Smart box
- Functions of each part

- Indicator Status
 Short press to turn ON/OFF camera night light. The icon
  shown on the left of the screen.
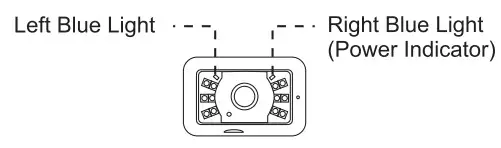
• When night light turned ON, display shows “” , camera left blue light ON.
• When night light turned OFF, display shows “” , camera left blue light OFF. Note: Once camera night light turned ON, it will automatically light up when there is no sunlight.
Press and hold the button for 3 seconds to enter pairing. Please press the camera pair button to complete pairing before the 50 second countdown ends.
Smart box indiacator blink during pairing countdown. Press Power button to turn ON/OFF the smart box. Indicator turns to green when operating. Indicator turns to red when standby.
 Short press Mirror/Flip button to switch image among mirror/normal/flip/mirror-flip.
 Press and hold NTSC/PAL button to switch image format between 1080P NTSC and 1080P PAL.
 Note: Once camera night light turned ON, it will automatically light up when there is no sunlight.
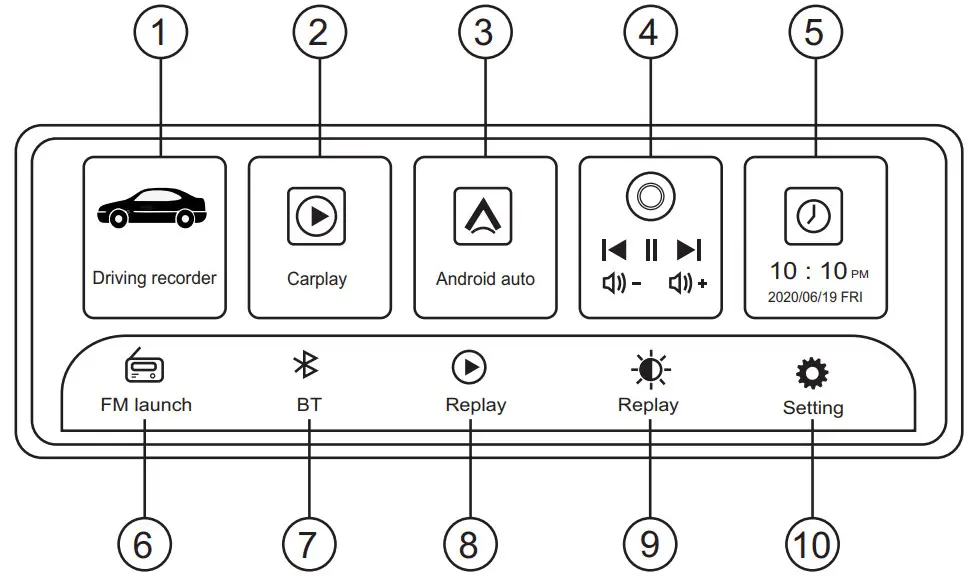
Insert the SD card, after formatting, the system will automatically enter recording mode
① Driving recorder
② Carplay
③ Android auto (#)
④ Volume settings: volume +, volume -, previous song, next song, play, pause
⑤ Time setting: you can set the time manually, or automatically synchronize the time after the mobile phone is connected.
⑥ FM launch: FM frequency range 87.5–108MHz.
⑦ Bluetooth settings
⑧ Replay: Driving video playback, ordinary video, emergency video, photo view, delete or lock video, etc.
⑨ Brightness adjustment
⑩ Settings
A. Touch the Driving Recorder ![]() to enter dashcam real-time stream
to enter dashcam real-time stream
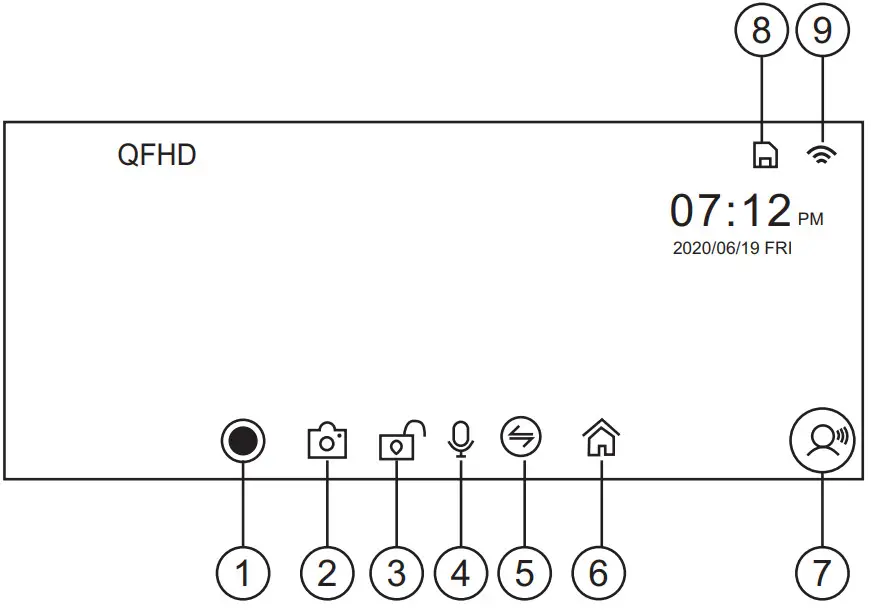
① Turn on/off recording
② Snapshot
③ Lock the video file to avoid being overwritten during loop recording
④ Turn on/off the recording sound
⑤ Switch channel of cameras
⑥ Return to the homepage
⑦ Voice command list
⑧ SD card status
⑨ Wifi status
B. Touch Carplay ![]() Android auto to start smart phone screen projection
Android auto to start smart phone screen projection
![]() Connection matters:
Connection matters:
- Open the device WiFi and Bluetooth, the first connection of the phone needs to manually connect to Bluetooth
- Wait for the Bark Select to use the car function
- Non-iPhone mobile phone connection device Bluetooth, even with ordinary Bluetooth
Button description: Volume -, Volume +, back to the main interface
Carplay/Android auto connection tutorial
- Carplay: For the first time using an iPhone to connect to the carplay monitor, please turn on the Bluetooth of both phone and the carplay monitor to establish connection. The Bluetooth will be automatically disconnected once authentication done, and the screen of the iPhone will be projected to the Carplay. After the first connection, it will automatically connect in the future (just turn on the carplay monitor bluetooth without any other operation).
- Android auto: For the first time using an Android phone to connect to the carplay monitor, please turn on the Bluetooth of both phone and the carplay monitor to establish connection. The Bluetooth will be automatically disconnected once authentication one, and the screen of the Android phone will be projected to the Carplay. After the first connection, it will automatically connect in the future (just turn on the carplay monitor bluetooth without any other operation).
Q: How to disconnect Carplay/Android auto?
A: Just turn off the wifi of the phone.
Q: Manually disconnect Carplay/Android auto, how to connect again?
A: Turn on the mobile phone bluetooth and connect again.
Q: How to connect Carplay/Android auto after the device is powered off and restarted?
A: After the first connection, the phone will automatically connect to the carplay monitor if the wifi and bluetooth is turned on.
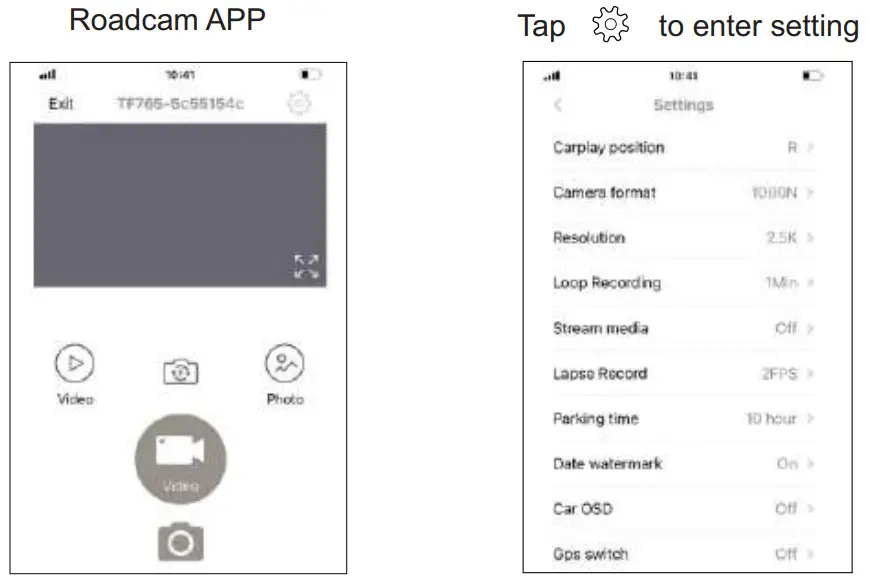
Q: How to use the APP RoadCam when connected to Carplay?
A: When connected to Carplay, you can use the RoadCam to control the carplay monitor at the same.
Q: How to connect the original car audio
A: After connecting to Carplay/Android auto, you can turn on the carplay monitor FM and turn on the car radio. Tune them to the same frequency, the phone radio will be projected to the car.
C. Tap![]() to enter playback interface. Replay
to enter playback interface. Replay
Note: To achieve replay function, please insert TF card.
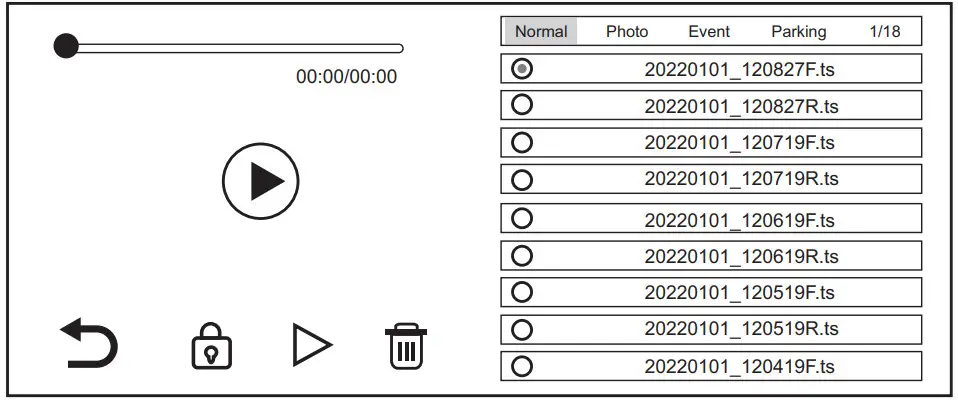
Select the video file to be played from the playlist and tap it.
During playback, tap the lock/delete icon to lock/delete the playback video file.
If a video file is locked, the video will be moved to the Event directory and it won’t be deleted or overwritten when the TF card is full.
D. Tap![]() to enter Bluetooth interface
to enter Bluetooth interface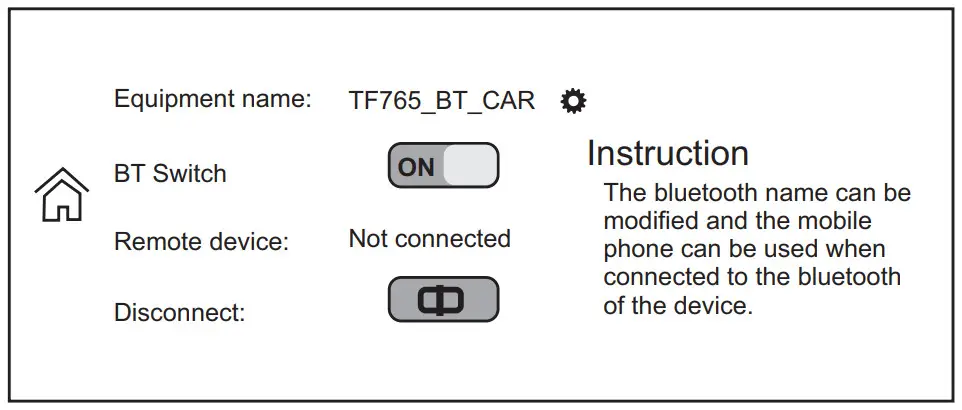
- Tap
 to set the Bluetooth name
 - Turn ON/OFF the BT Switch
- Tap Disconnect to disconnect current connection
E. Tap![]() to enter FM setting
to enter FM setting
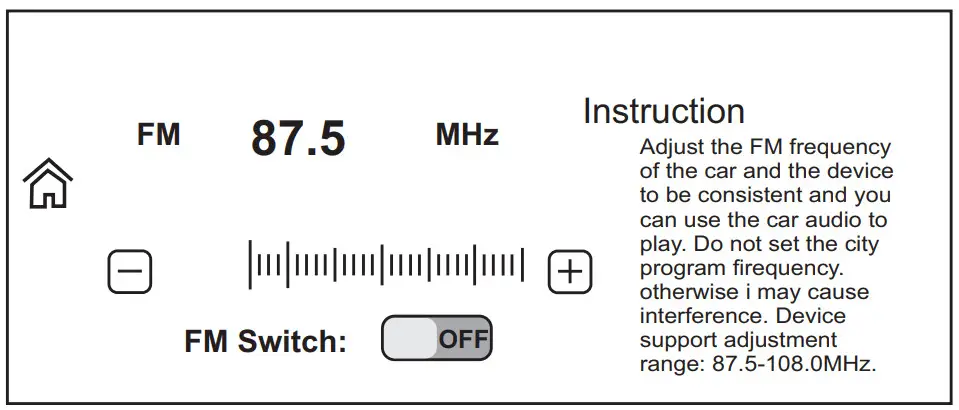
- Turn ON the FM Switch
- Select FM frequency from 87.5 to 108MHz by tapping – or +.
F. Tap![]() to enter setting interface
to enter setting interface
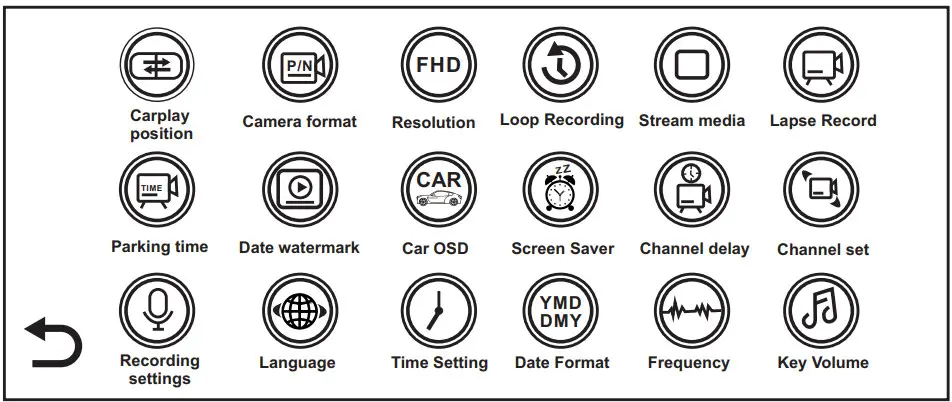
Carplay position
Tap Carplay position to set the carplay in the left, right, or full screen.
Camera format
Tap camera format to set the camera format 720P PAL/720P NTSC/1080P PAL/1080NTSC.
Resolution
Tap Resolution to set dashcam recording resolution 2.5K/1080P/720P.
The rear camera recording resolution is 1080p by default.
Loop Recording
Tap Loop Recording to set duration 1Min/3Min/5Min for each recording file.
Stream media
Tap Stream media to set the display mode in Driving recorder.
If Front and rear camera selected, the dashcam and rear camera will be displayed as split screen in Driving recorder.
If Front camera selected, only dashcam will be displayed in screen in Driving recorder.
If Rear camera selected, only rear camera will be displayed in screen in Driving recorder
Date watermark and Car OSD
Turn on Date watermark and Car OSD, enter your license plate number. After setting, the license plate number and time will be displayed in the upper left corner of every recorded file.
Screen Saver
Screen saver can be set off/1/3/5 minutes.
If you set 1Min, the screen will automatically turn off after 1 minute of no operation.
Tap the screen again or press the power button awake the screen.
Screen Saver is Default OFF.
Channel set
Tap Channel set to change “flip” and “mirror” settings for the front/rear view camera respectively.
Recording settings
Select On to enable recording with sound.
Language
11 languages selectable.
Time Setting
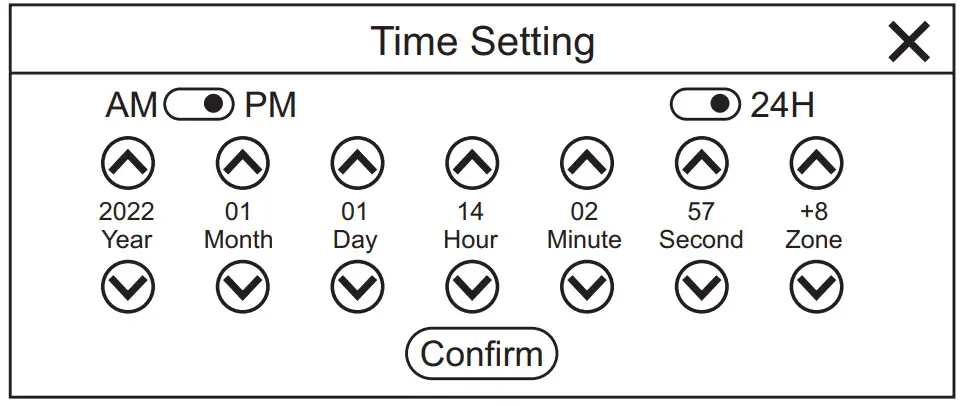
Turn ON 12H AM/PM or 24H.
Select Year/Month/Day/Hour/Minute/Second/Time Zone. Tap Confirm after setting.
Date Format
Select the date format YY/MM/DD MM/DD/YY DD/MM/YY
Key Volume
Set whether to make a sound when tap the screen.
Boot sound
Turn ON/OFF the boot tone when you turn on the device.
Voice Ctrl
Turn ON to activate voice command function.
Wifi switch and Wifi info
Turn ON Wifi switch and tap Wifi info. Scan code to download roadcam app. Login app with provided Wifi SSID and password. After that, it will realize real-time remote control of the device.
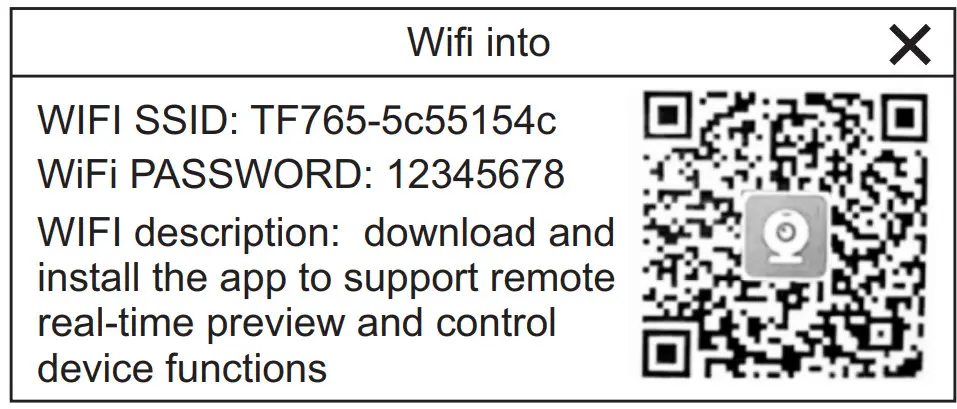
http://www.ligoor.com/app/roadcam/roadcam.html
Format SD
This option will format all data of the inserted TF card. It is recommended to format the TF card when inserting it for the first time.
Note: It is recommended to format the TF card regularly.
Reset Factory
If you choose restore factory settings, the device will restore all settings to factory settings.
Version
It shows current software version, which is convenient for future software updating.
![]()


