![]()
![]()
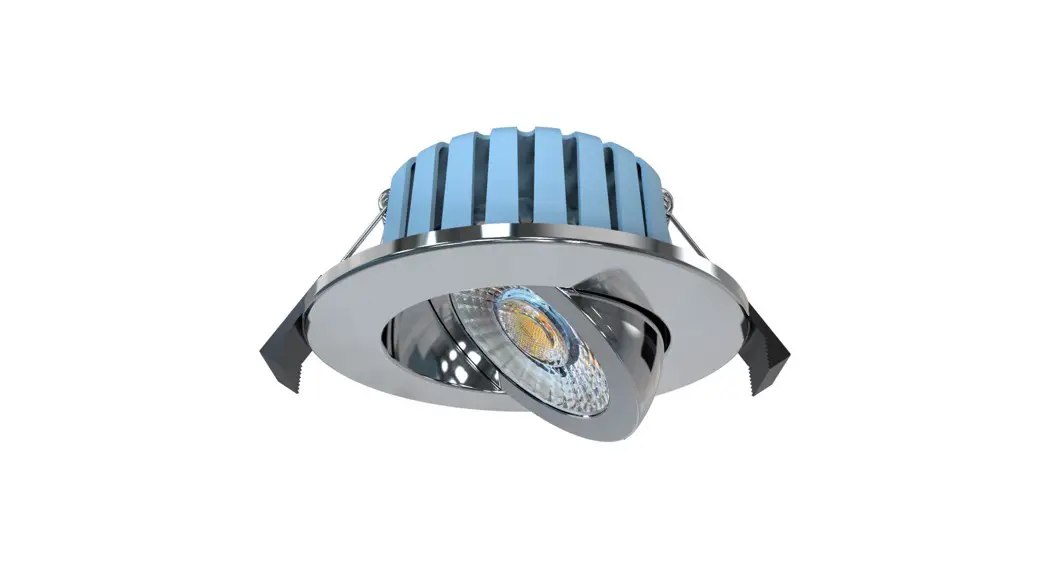
41111 Eden Tilt 7w LED Downlight
Warning
- Installation only to be carried out by qualified electrician
- Please ensure surface is suitable and capable of holding the luminaire and driver weight
- Pre-cut hole before installation, (see below chart for hole diameter)
- Do not operate if product is damaged
- IP65 rated front, suitable for bathroom zones 1 &2
- This product is suitable for fire rated installations, Part L Compliant of UK Building Regulations, Part B Compliant BS476 Parts 21 and 22-Suitable for 30 minute 600mm/15mm single layer Standard Wallboard, 60 minute 600mm/12.5mm twin layer Fireboard and 90 minute450mm/15mm twin layer Fireboard ceilings
| Voltage: | 220-240V AC |
| Lampless: | Built in LED |
| Wattage: | 7W |
| Lumens: | 700lm |
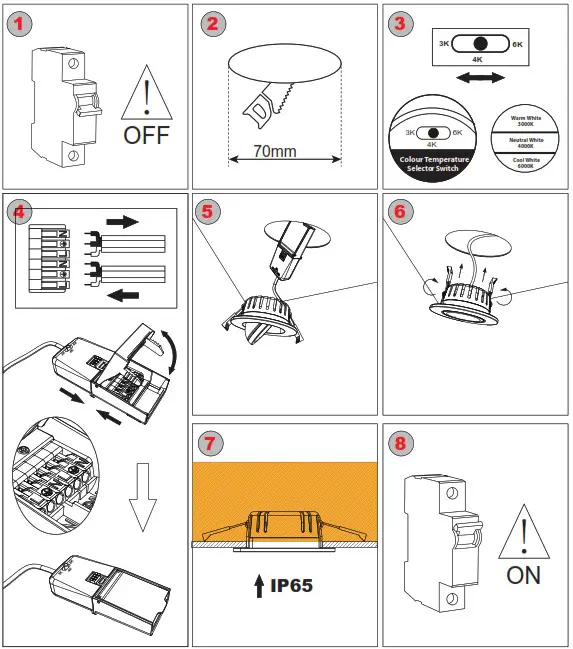
| Colour Temperature: | 3000K/4000k/6000k |
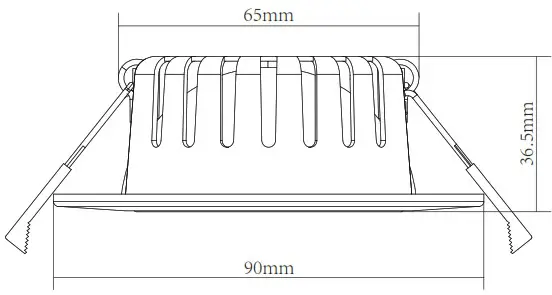
| Cut Out: | 70-75mm |
| Minimum Void: | 40mm. |
| Bezel Finish: | Supplied with White, Black, Chrome, Satin Brass |
| CRI: | > 80Ra |
| Connection: | Plug & play |
| Beam Angle: | 60º |
| Dimmable: | Dimmable with leading edge or trailing edge dimmer |
| Driver: | Non-Detatchable |
![]()
- This product must be installed by a qualified electrician in accordance with instructions provided and incompliance with recognised electrical and safety regulations relevant to the country it is being installed.
- The product and its associated control gear are designed to operate on 220-240volts 50Hz.
- This downlighter range is designed to be installed in a ceiling tile/solid material with a minimum dimension of 3mm thickness.
- This product is for Indoor use only.
- Minimum Clearance is 40mm above the installed fitting, and no product should be installed within 40mm of any joist.
Specific Installation details
- Ensure the AC/mains power is not connected and cannot be reconnected during installation.
- For new installations use cutting tools suitable for the material and carefully cut the required hole to allowinstallation.(Figure 2)
- For Refurbishment installations ensure that the existing hole is suitable and strong enough to hold the new down light. Support the surrounding area if required.
- Connect the AC/mains cable to the driver using the marked terminals provided. Incoming Cable connections are,
L=Live power conductor(brown),N = Neutral power conductor(blue). The driver offered is Class ll. - Remove downlighter from box and connect to the driver via the connection system provided. (Fig.4)
- Raise the springs and place the downlighte into the tile cut-out ensuring that both the driver and mains power cable are not trapped. (Fig.6)
- Once correctly connected, position the downlighter fully into the aperture so that the outer flange is flush withthe installed ceiling tile/solid material. (Fig 7)
Helpline
If you receive this item with parts broken or missing, please telephone: 0333 0050077![]()
Please have ready your name, address, tel. no., product reference, where purchased and parts required. An answering service is in operation outside office hours and during busy periods.![]()
We regret that we are unable to give advice on internal house wiring.
Cascade Holdings Ltd, Gorse Mill, Gorse Street, Chadderton, Oldham. OL9 9RJ
EU Authorised Representative: Authorised Rep Compliance, Ground Floor, 71 Lower Baggot Street, Dublin, Ireland, DO2P593.
v2


