
TELLUR RVSH1 Smart WiFi Thermostatic Radiator Valve User Manual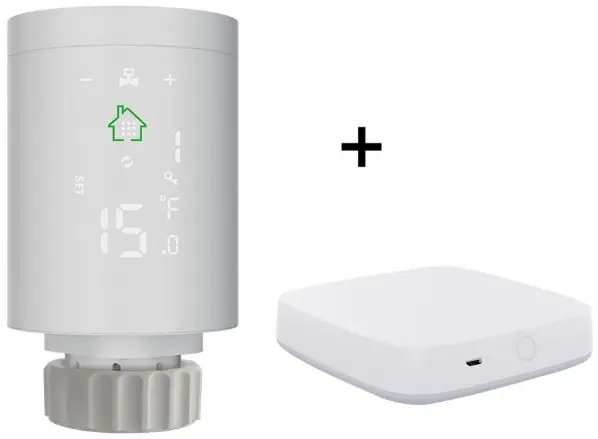
Thank you for choosing Tellur!
To ensure an optimum performance and safety, please, read this user manual carefully before using the product. Keep this user manual safe for future references.
What’s in the box
TRV | 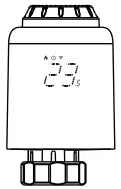 |
| User Manual |
|
For Danfoss RA valves | 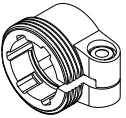 |
| For Danfoss RAV valves |
|
For Danfoss RAVL valves | 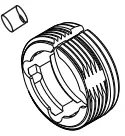 |
| For Caleffi valves |
|
For Giacomini valves | 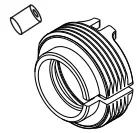 |
| For M28 valves |
|

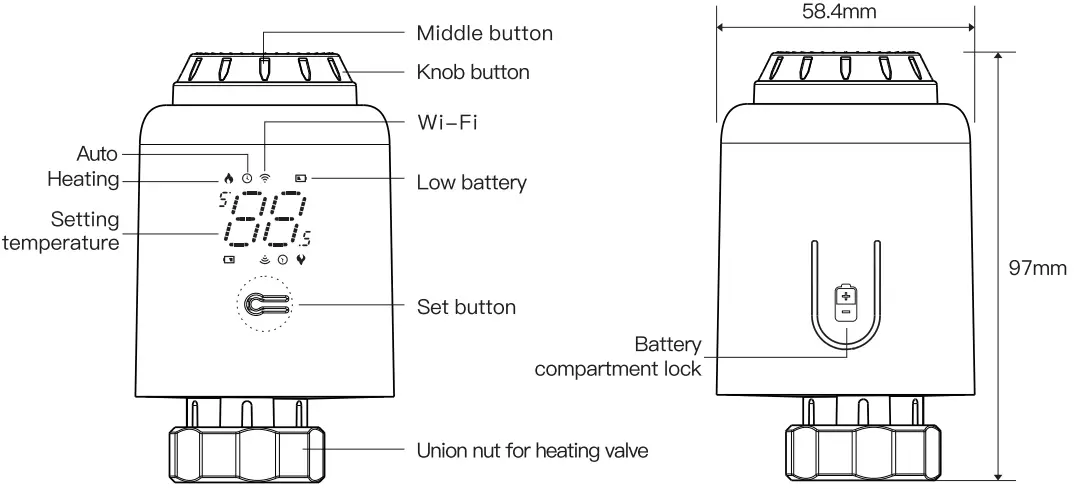
Product diagram
Technical specifications
- Utilization: Thermostatic radiator valves
- Brand compatibility: Universal
- Power supply: 3 x 1.5V AA Alkaline batteries (not included)
- Connector: M30 x 1.5mm
- Adapters included: Danfoss RA / RAV / RAVL, Caleffi, Giacomini, M28
- Connectivity: Wi-Fi (no additional gateway required)
- Linear travel: 4.3mm
- Temperature setting range: 5 – 35° C
- Display: LED
- Hysteresis: 0.5° C
- Temperature measurement accuracy: 0.1° C
- Temperature calibration: Yes, by APP
- Temperature statistics: Yes, by APP
- Weekly programing: Yes, up to 4 periods each day
- Frost protection: Yes
- Child lock: Yes
- Display parameters: Set temperature, Wi-Fi, Heating, Auto, Low battery
- APP name: Tellur Smart
- Amazon Alexa: Yes, compatible
- Google Assistant: Yes, compatible
- Siri Shortcuts: Yes, compatible
- Open window detection: Yes, 1.5° C drop in 4.5 minutes
- Low battery alarm: Yes
- Anti-Scale function: Descaling every Monday at 12:00
- Power saving mode: After 5 seconds with no operation
- Wireless frequency: 2.4GHz
- WiFi standard: IEEE 802.11b/g/n
- Security: WPA-PSK/ WPA2-PSK /WPA/WPA2/WEP
- Encryption type: WEP/TKIP/AES
- Compatibility: Devices with Android 6 / iOS 11 or higher
- Color: White
Package includes:
- 1 x Thermostatic Radiator Valve RVSH1
- 1 x Adapters set
- Product dimensions: 58.4 x 58.4 x 97mm
- Product weight: 130gr
Product installation
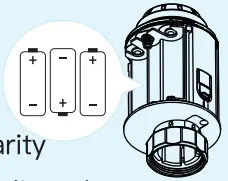
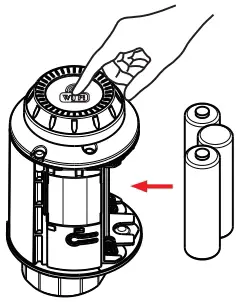
- Press the battery compartment lock, remove the cover, and insert the batteries.

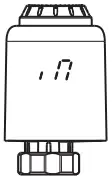
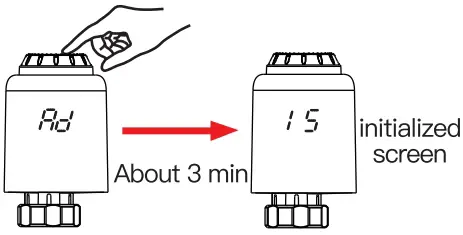
- Initialize, the mandrel pulls back, then “
 ” is displayed and blinking on the screen.
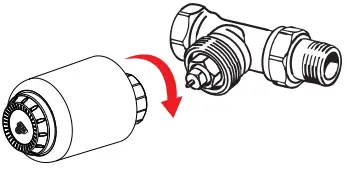
- When “ ” stop blinking, install the TIRV union nut with M30*1 .5 thread for heating valve, and then tighten the nut.

- Press the middle button and then”
 start blinking, the device enter valve-adjusting process. After several minutes, the process is completed when initialized screen is displayed.
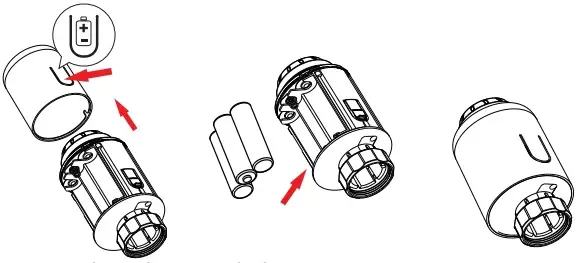
*Attention:
While inserting the nun batteries, please make sure the polarity of battery (+1-) is aligned.
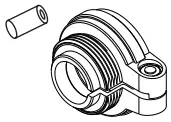
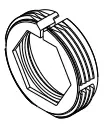
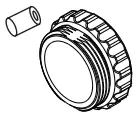
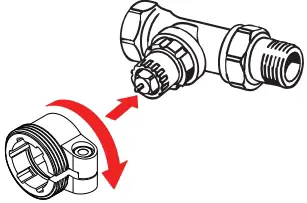
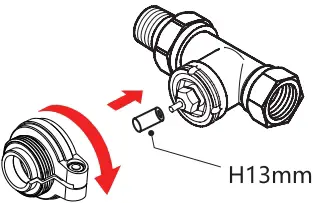
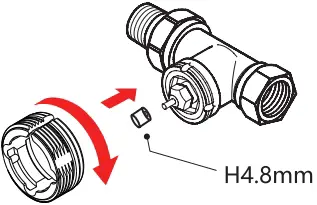
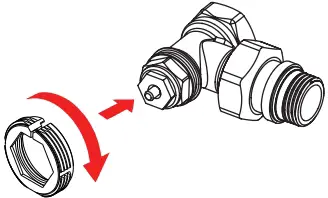
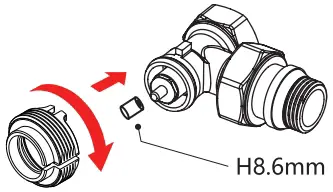
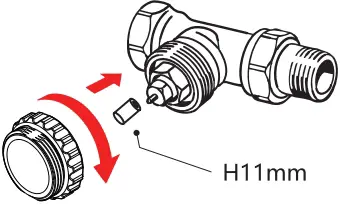
How to Install the adapter correctly
| For Danfoss RA valves | For Danfoss RAV valves | For Danfoss RAVL valves |
|
|
|
| For Caleffi valves | For Giacomini valves | For M28 valves |
|
|
|
Product utilization
Temperature control mode
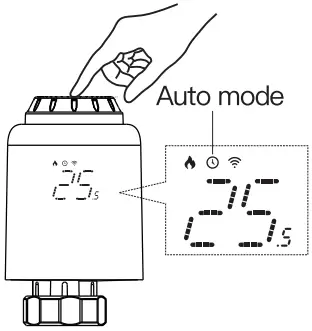
Press the middle button to switch between Auto mode and Manual mode.
- Auto mode
When ” ” is displayed on the screen, it is under Auto mode. Four time periods and setting temperature could be programmed per day, one week as a cycle, based on customized needs.
- Manual mode
When “” is not displayed on the screen, it is under Manual mode. The device will work according to current setting temperature, without controlled by the time period program. - Temporary mode
Under Auto mode, “” will be blinking after setting temperature, and then it will enter Temporary mode.The device is switched to Manual mode temporarily, without controlled by the time period program. It will return to Auto mode by next time period.
* Attention: Only Manual mode is available when the device is not connected to Internet.
Stop heating and pause heating
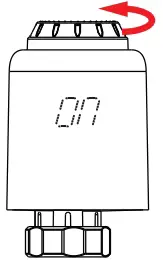
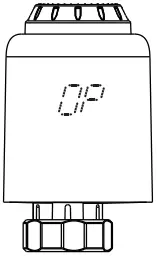
- ON: In summer, rotate the knob clockwise until “
 ” is displayed under manual mode to stop heating. At this time, the heating valve is fully open. This can extend the use life of valve.
- OFF: In winter, rotate the knob counterclockwise until “
 ” is displayed under manual mode to pause heating temporarily. At this time, the heating valve is closed and the frost protection is activated.
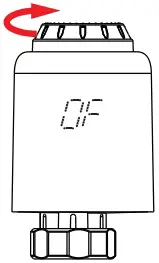
*Attention: After the antifreeze function is activated, the valve will open when the room temperature is lower than 5°C, and the valve will be closed when the room temperature exceeds 7°C to prevent damage to the radiator thermostatic valve due to freezing.
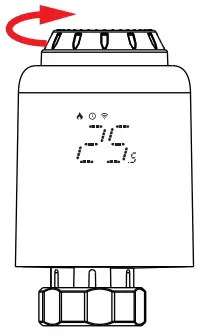
Adjust setting temperature
Adjust setting temperature: Rotate the knob to adjust setting temperature, stepping by 0.5°C.
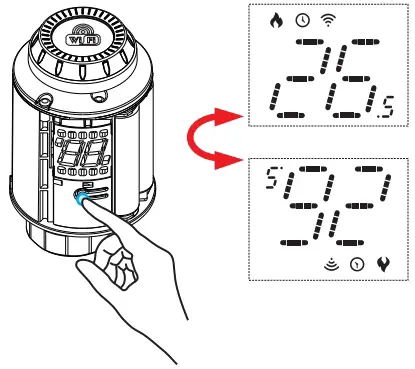
Screen rotation
Screen rotation: Long press the Set Button for 3 seconds to switch the screen display direction.
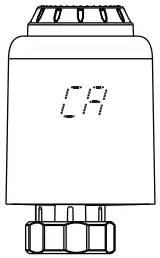
Open window detection and Anti-scale function
Open-window function: First, enter the APP home page to turn on the window detection function, the device will automatically identify whether the window is open. When it is detected that there is cold wind, and the temperature drops by more than 1.5°C within 4.5 min, the open-window function will be activated. At this time, the screen displays “![]() ”, and the temperature is set to 12°C.
”, and the temperature is set to 12°C.
Anti-scale: TRV executes routine decalcification every Monday at 12:00 to protect the valve from calcification. “![]() ” will be displayed on the screen during decalcification.
” will be displayed on the screen during decalcification.
*Attention: When the open-window function is activated, following operations will terminate it from taking effect.
- Temperature setting operation on the APP or device.
- The detected temperature rises by more than 1.5°C within 4.5 minutes.
- No operation on the APP or device within 30 minutes.
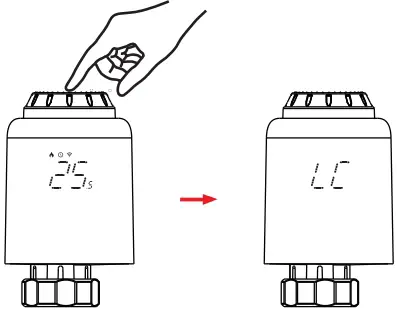
Child lock function and restore to factory settings
Child lock function: Long press the middle button for 3 seconds until “![]() ” is displayed on the screen to activate the child lock. While the device is locked, long press middle button for 3 seconds until “
” is displayed on the screen to activate the child lock. While the device is locked, long press middle button for 3 seconds until “![]() ” disappear to deactivate the child lock.
” disappear to deactivate the child lock.
Restore factory settings: Long press the middle button and insert the battery at the same time until “![]() ” is displayed on the screen and blinking for 3 seconds, the device will be restored to factory settings and restarted.
” is displayed on the screen and blinking for 3 seconds, the device will be restored to factory settings and restarted.
*Attention: Once the device is restored to factory settings, all previous settings can not be recovered.
Wi-Fi pairing using Tellur Smart APP
Important notes:
Make sure, that your phone, is connected to the 2.4GHz wireless network, and you have access to Wi-Fi password before you start the pairing procedure.
The app does not support Wi-Fi 6 networks with 802.11ax standard. Please set the 2.4GHz WiFi network to 802.11b/g/n.
We also recommend having the Bluetooth function activated for an easier pairing.
Pairing the device with APP
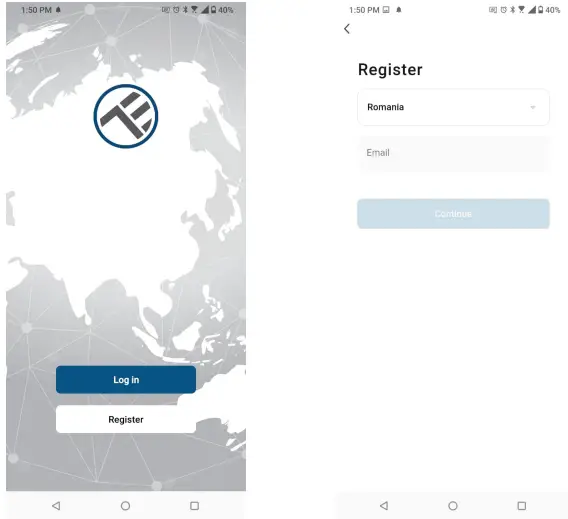
- Download and install the Tellur Smart app, available for either iOS or Android devices.

- Once downloaded, the app will ask you to create an account (if you do not have any already). Enter your email, select the country you live in and create a password for your Tellur Smart account.

Set up router
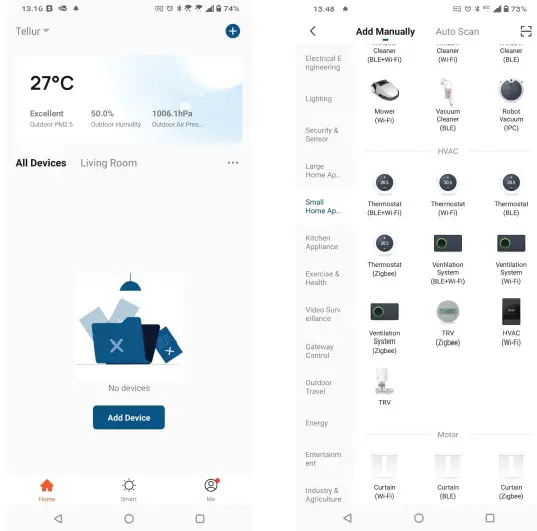
This device only supports 2.4GHz frequency band router, does not support 5GHz frequency band router. Please set the relevant parameters of the router before Wi-Fi configuration, Wi-Fi passwords do not include special characters such as ~! @#$%^&*(). When, the device is connected to the Wi-Fi, keep the mobile phone and device close to the router to speed up the configuration of the device. - Open the Tellur Smart app and click “Add device” or “+” and then select “Small Home appliances” -> “TRV (Wi-Fi)”. If Bluetooth function is active the app will detect the product automatically.

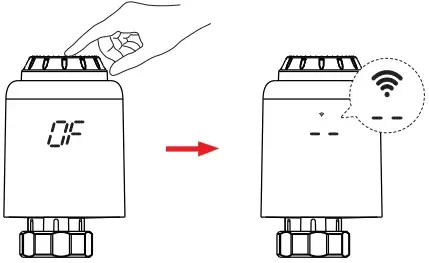
- Activate pairing mode
Under manual mode, rotate the knob counterclockwise until “” is displayed. Then long press the middle button for 3 seconds until ”  is blinking.
*Attention: Network configuration can only be done under manual mode. Please turn on the Bluetooth of your phone in advance.
Once, Tellur Smart app is installed on your device and you have added your smart device to your app you will be able to control it.
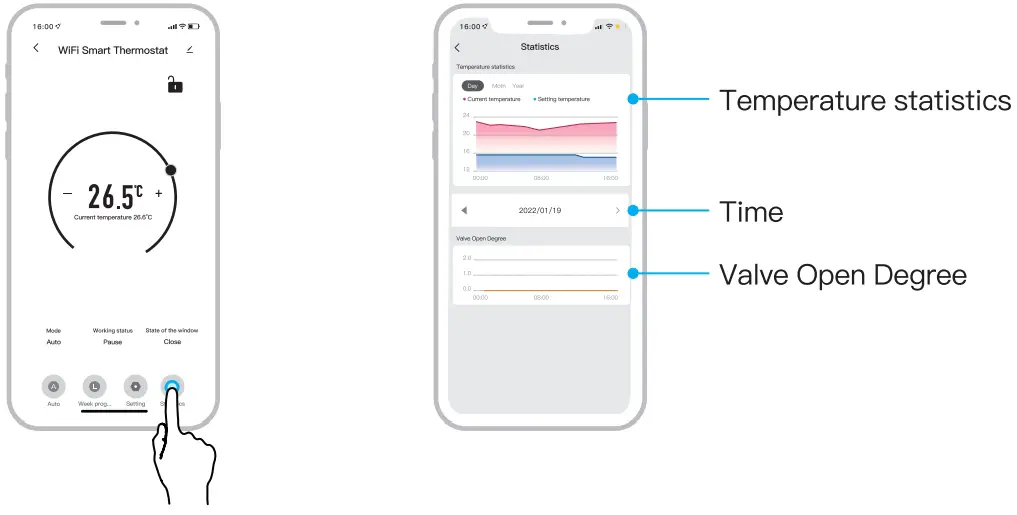
Using Tellur Smart to control the device
Mode selection
Click ” ![]() ” to select mode.
” to select mode.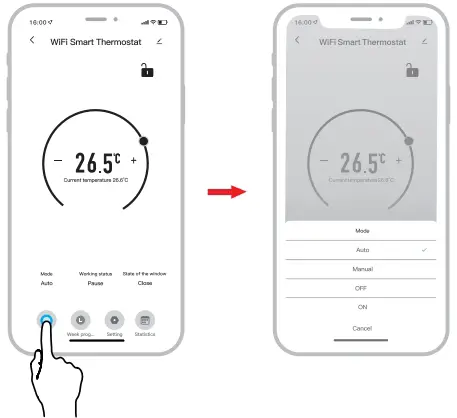
*Attention: Click “+ “ or “—” to adjust the setting temperature.
- Auto mode: Four time periods and setting temp. could be programmed per day, one week as a cycle, based on customized needs.
- Manual mode: The device will work according to current setting temp. without controlled by the time period program.
- OFF mode: The valve will be closed to stop heating.
- ON mode: The valve will open in heating.
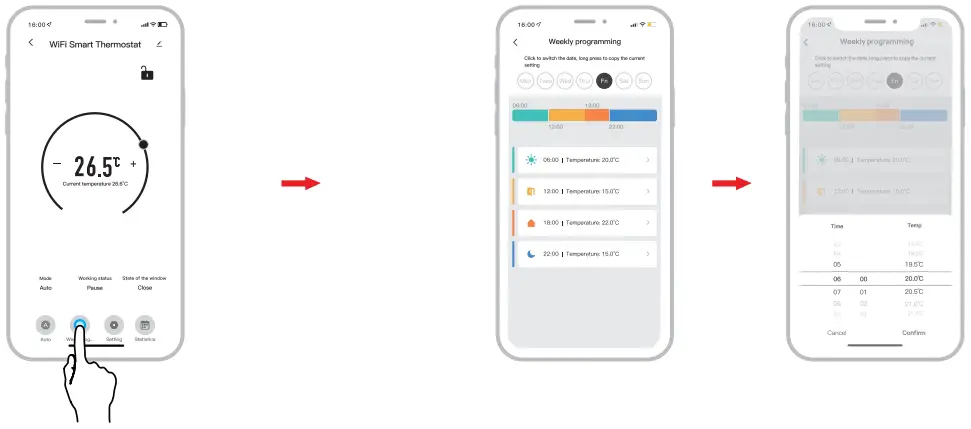
Weekly programing
- Click ”
 ” to enter the Weekly programming page.
 - Set four time periods and setting temperature based on customized needs.

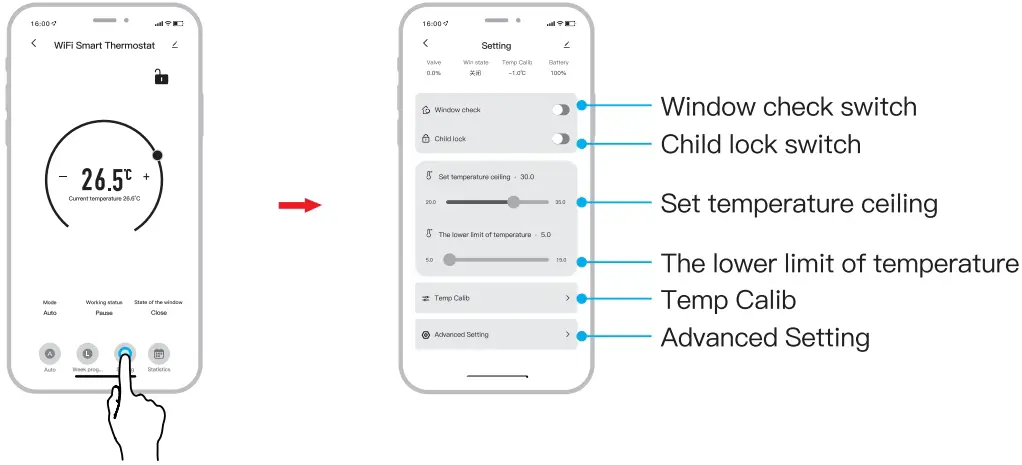
Settings
- Click “” to enter the setting page.

Statistics
- Click ”
 ” to enter the Temperature Statistics.
Failed to add device?
- Make sure the device is powered on.
- Check the Wi-Fi connection of your phone.
- Check if the device is in pairing mode. Reset your smart device to enter pairing mode.
- Check router or related: If you use a dual-band router, select the 2.4GHz network to add the device. You also need to enable the router’s broadcasting function. Set encryption method as WPA2-PSK and authorization type as AES or set both on “auto”.
- Check if the Wi-Fi signal is strong enough. To maintain the signal strong, keep your router and the smart device as close as possible.
- Wireless mode should be 802.11.b/g/n (Wi-Fi 6 protocol 802.11ax not supported)
- Make sure you do not exceed the maximum number of registered devices supported by the app (150).
- Check if the router’s MAC filtering function is enabled. If so, remove the device from the filter list and make sure the router is not prohibiting the device connection.
- Make sure the Wi-Fi password entered in the app is correct.
Can I control the device with 2G/3G/4G network?
When adding the device for the first time, the device and the phone need to be connected to the same Wi-Fi network. Once, the device it has been successfully paired with the Tellur Smart app, you can remotely control it via 2G/3G/4G networks.
How can I share my device with family?
Open Tellur Smart app, go to “Profile” -> “Device sharing” -> “Sharing sent”, tap “Add sharing” and share the device with the added family members.
Notice – users must install the Tellur Smart app on their device in order to see shared devices.
How can I manage the devices shared by others?
Open App, go to “Profile” > “Device Sharing” > “Sharing Received”, then you can find the devices shared by other users. To delete a shared device, swipe left.
Troubleshooting
Error code | Problem | Solution |
F0 | Temperature sensor abnormality | Contact after-sales staff |
F 1 | Slow valve operation | Check the installation and heating valve |
F2 | The stroke is too long | Check the fastening of TRV |
F3 | The stroke is too short | Check the heating valve |
F4 | Running out of battery | Replace batteries immediately |
| Battery symbol | Low battery | Replace batteries within 3 days |
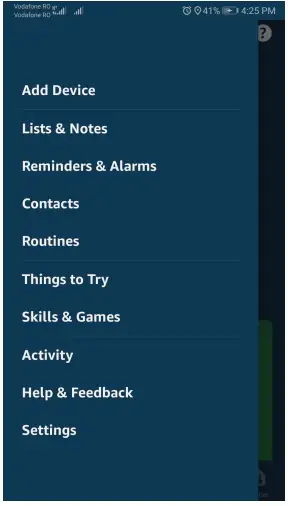
ALEXA INTEGRATION
- Go to Home menu on Alexa app.
- Select “Skills” / “Skills & Games”.

- Type Tellur Smart in the search bar.

- Select Tellur Smart and click “Enable” to activate Tellur Smart.
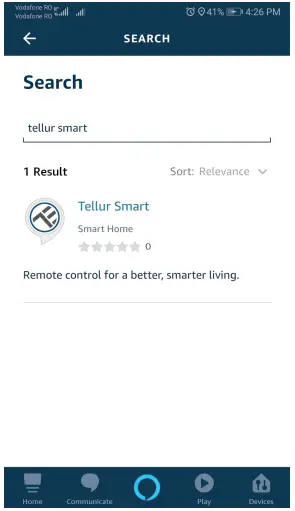
Enter your Tellur Smart account and password. Now you have finished the integration with Alexa.
Tellur Smart app is now skilled with Alexa and you can vocally control the devices added in Tellur Smart.
Remember – if you rename your smart devices, use a simple name that Alexa can recognize.
Here are some examples for Tellur Thermostat:
- Alexa, set the thermostat temperature to 25 degrees”
- “Alexa, turn on the thermostat”
- “Alexa, what is the thermostat temperature ”
GOOGLE HOME INTEGRATION
Before using Google Home to control your devices, make sure you meet the following conditions:
- You have a Google Home device or an Android device with Google Assistant.
- You have the newest version of Google Home app.
- You have the newest version of Google app (Android only).
- You have the Tellur Smart app and a related account.
Add devices in Tellur Smart app (refer to app instructions) – you can skip this part if you’ve already added some devices to your Tellur Smart account. Make sure your devices’ names are easily recognizable.
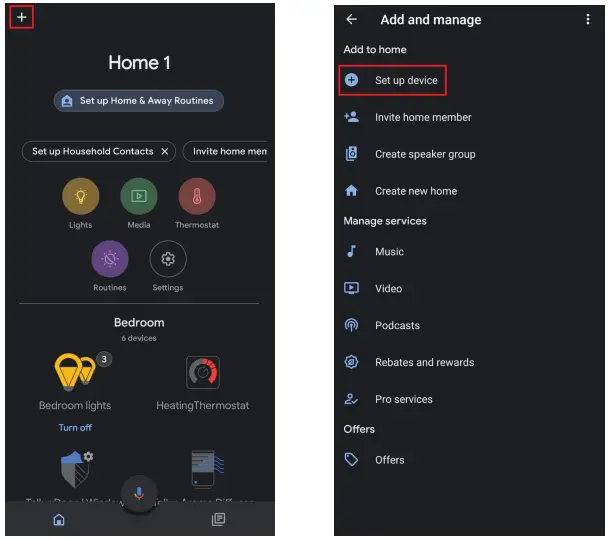
Link account in Home Control
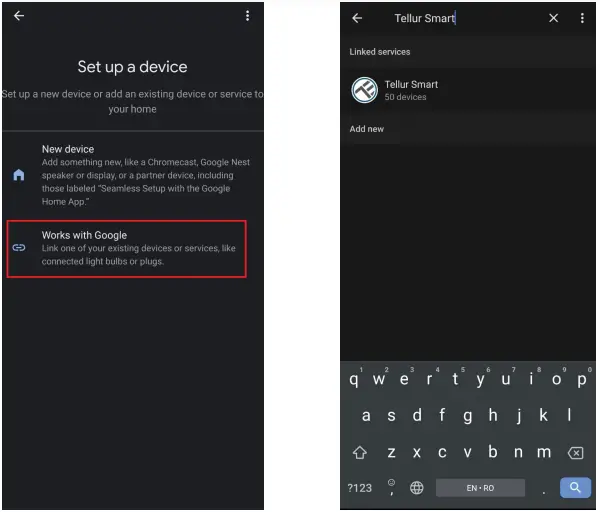
- Go to Google Home’s homepage and tap “+”.

- Hit the “Add new” button, enter Tellur Smart in the search bar and select the app from the list. Next, select your Tellur Smart account’s region, enter your Tellur Smart account and password and tap “Link now”. After you assign rooms for devices, your devices will be listed in the Home Control page.

Now you can control your smart devices through Google Home.
Here are some examples of commands for Tellur Thermostat:
- ”Ok Google, raise the temperature for thermostat by 2 degrees”
- “Ok Google, turn of the thermostat”
- “Ok Google, change the thermostat to Auto”
- “Ok Google, set the thermostat to 22 degrees”
DISPOSAL AND RECYCLING INFORMATION
 The crossed-out wheeled-bin symbol on your product, battery, literature or packaging reminds you that all electronic products and batteries must be taken to separate waste collection points at the end of their working lives; they must not be disposed of in the normal waste stream with household garbage. It is the responsibility of the user to dispose of the equipment using a designated collection point or service for separate recycling of electrical and electronic equipment waste (WEEE) and batteries according to local laws. Proper collection and recycling of your equipment helps ensure EEE waste is recycled in a manner that conserves valuable materials and protects human health and the environment. Improper handling, accidental breakage, damage, and/or improper recycling at the end of its life may be harmful for health and environment.


