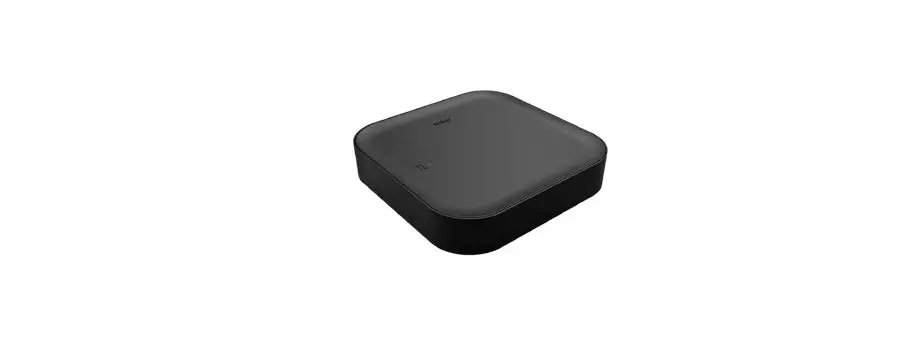
niko 552-00001 Wireless Smart Hub

Consult guide.niko.eu for more information about the installation and configuration.
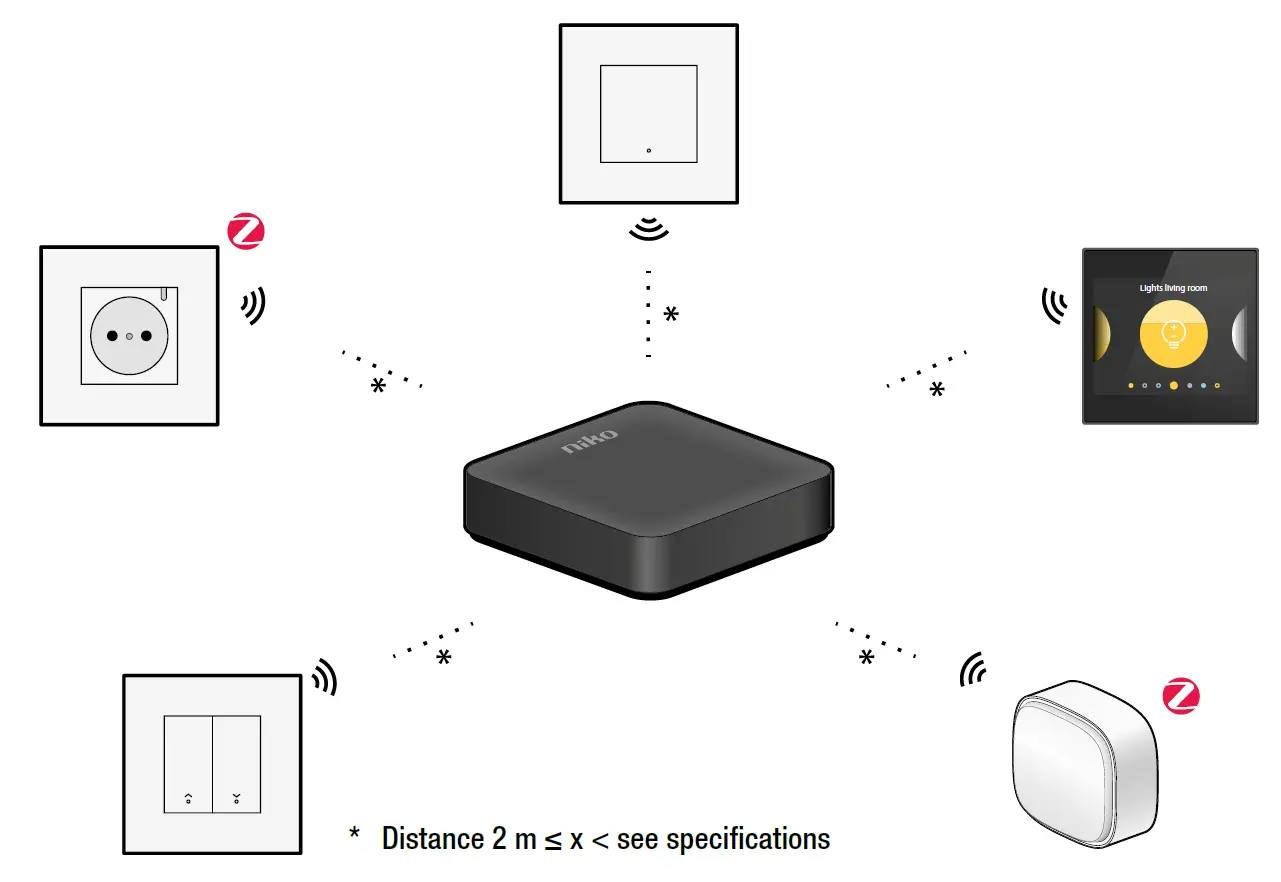
Wireless smart hub for Niko Home Control
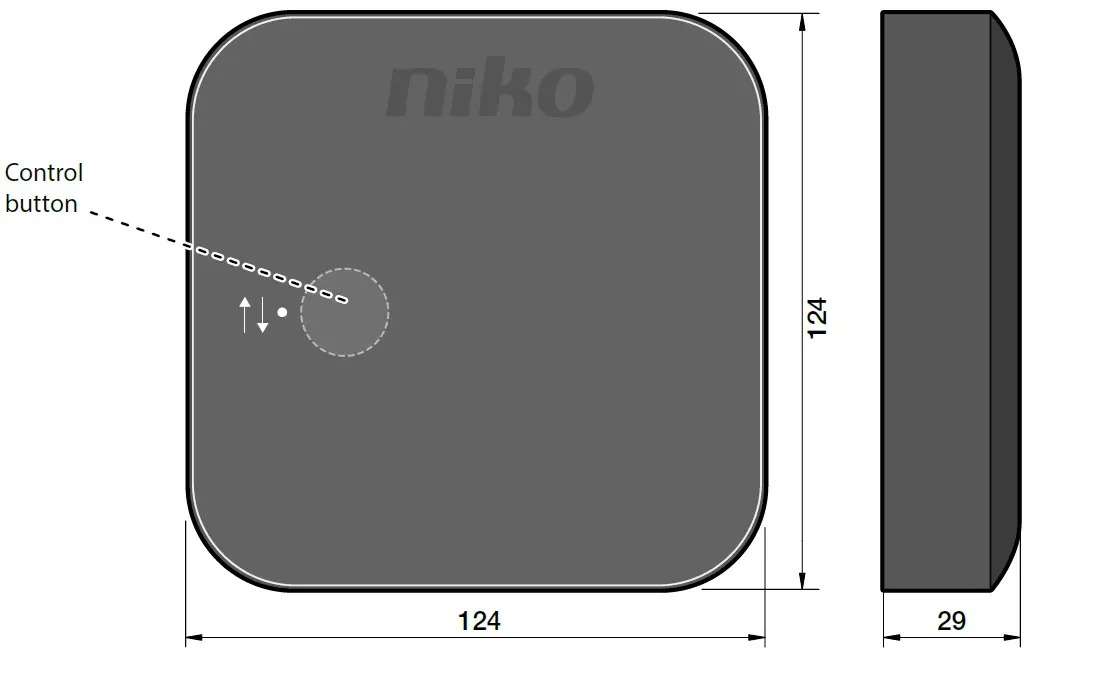
Dimensions
Installation
- Step 1
Install all connected and/or wireless Niko devices.
- Step 2
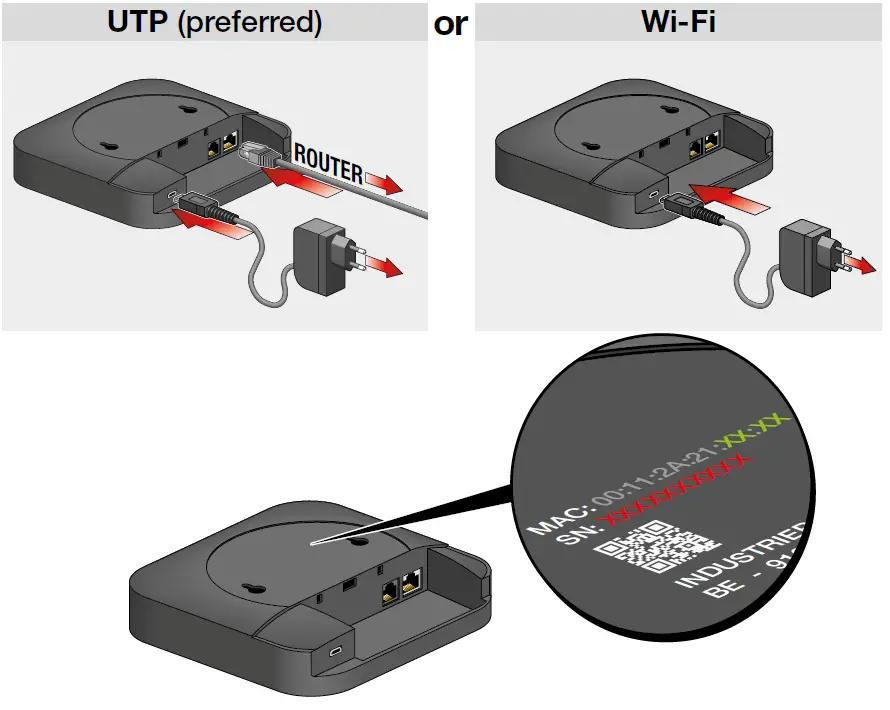
Connect the smart hub via UTP or Wi-Fi
- Wi-Fi
EN Accessing the Wi-Fi network the smart hub is broadcasting 1 Connect your device to the Wi-Fi network called “Niko” followed by the last 4 characters of the smart hub’s MAC address (XX:XX). 2 Insert the network password. The password is the smart hub’s serial number (SN:XXXXXXXXXX) On mobile devices the smart hub’s web portal will open automatically. - Step 3
EN Setting the smart hub’s network connection 1 Open a web browser and go to the following address: Nikoxxxx.local (xxxx = the last 4 characters of the smart hub’s MAC address (XX:XX)). Note: you may have been automatically redirected to this page on mobile devices.
2 You will be asked a password. The password is the smart hub’s serial number (SN:XXXXXXXXXX). You now get an overview of all available wireless networks. 3 Select your preferred network for the smart hub and enter the password for this network (if applicable). The smart hub will now connect to this network and will stop broadcasting its own wifi network.
- Step 4 (optional only for the Netherlands and Belgium)
Step 4 (optional only for the Netherlands and Belgium) EN Connecting the P1 cable to the digital/smart meter Step Action 1 Connect the P1 cable to the smart hub’s SMR port 2 Connect the P1 cable to the P1 port of the digital/smart meter 3 (optional)
Contact your distribution company to activate the P1 port of the digital/smart meter
Configuration
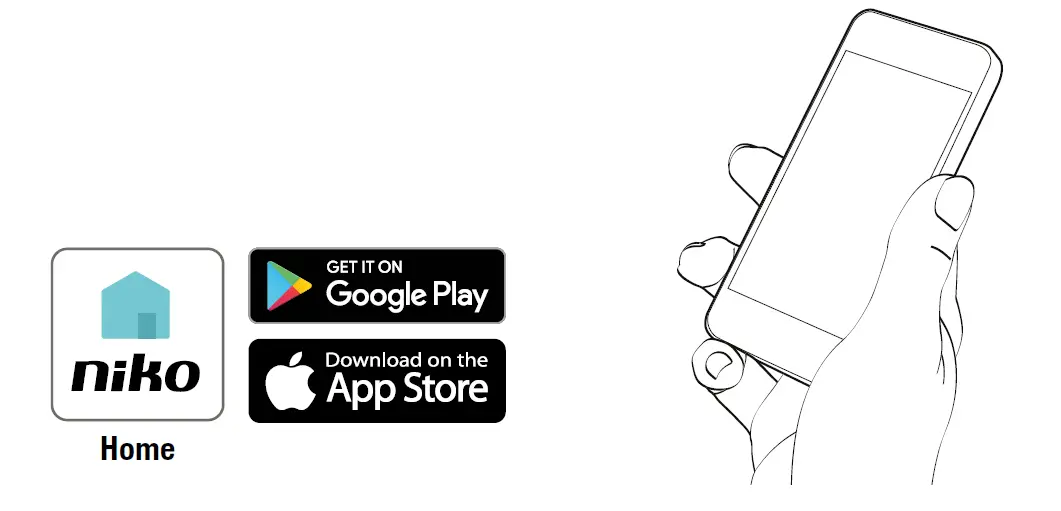
To add wireless or connected devices and configure the Niko Home Control system, please download and follow the instructions in the Niko Home Control programming software or Niko Home app.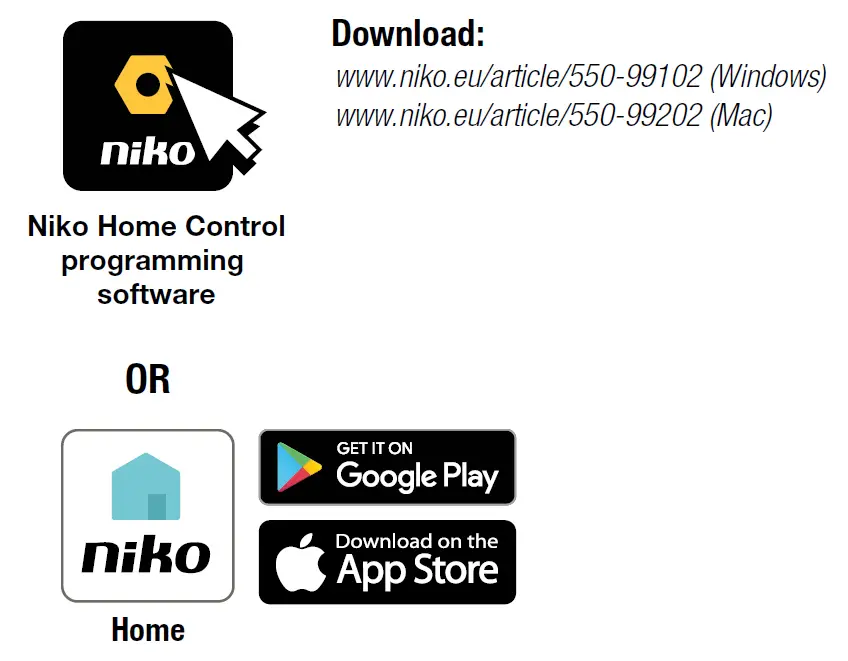
Control
LED behavior
| EN | |||
| Green LED flashing |  | The smart hub is connected to your home network but has no internet connection | See § Troubleshooting > 2 in this manual |
| Green LED continuous on |  | The smart hub has started up and is connected to the internet | Your smart hub is working fine and your instal- lation can be controlled remotely with the app |
| Red LED flashing |  | The smart hub is not connected to your home network and is trying to reconnect (if a network was already configured) | See § Troubleshooting > 1 in this manual |
| Red LED continuous on |  | The smart hub is malfunctioning | Contact Niko customer services |
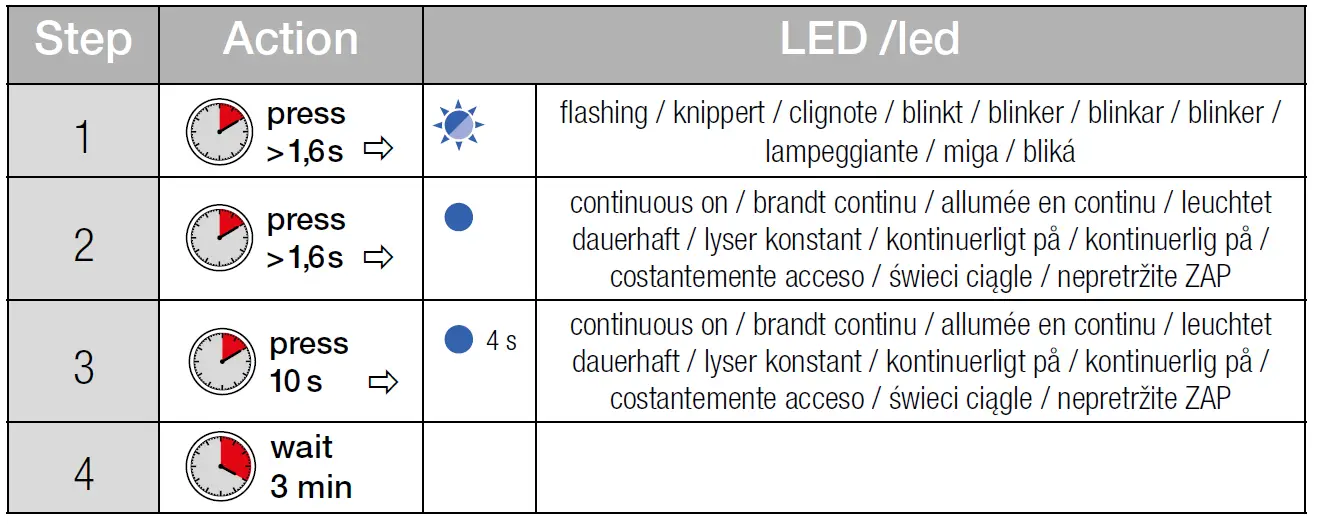
| Blue LED flashing |  | The smart hub is getting ready for a reset | See § Reset in this manual |
| Blue LED breathing |  | The smart hub is starting up or upgrading | Wait until the LED has stopped flashing. Do not cut the power |
| Blue LED continuous on |  | The smart hub is being reset | See § Reset in this manual |
| LED off |  | There is no mains voltage | Check the mains voltage |
| The smart hub or its power supply is faulty | If the problem persists, contact Niko customer services | ||
Reset
A reset will remove your Niko Home Control configuration and wireless network settings.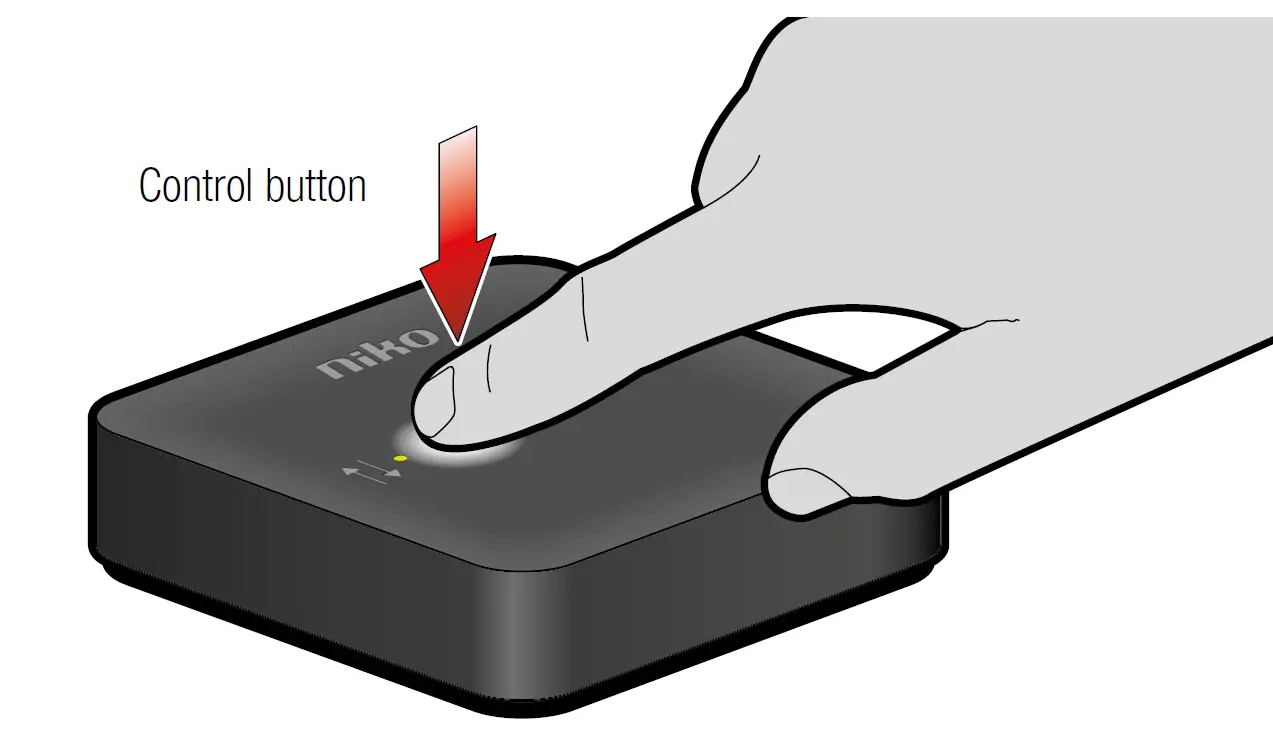
Troubleshooting
Probleemoplossing
| EN | ||
| Problem | Solution | |
| 1 | The smart hub is not connected to your home network and has no internet connection. The red LED is flashing | • Check if your home network is working correctly and has internet access • Reconfigure the smart hub’s Wi-Fi network connection: – If you are using a UTP cable to set up the Wi-Fi network: connect the smart hub using a UTP cable (see § Installation > step 2, UTP) and reconfigure the smart hub’s network connection (see § Installation > step 3) – If you connect directly to the smart hub’s Wi-Fi network: press the smart hub’s control button for 2 sec. The blue LED will start flashing. The smart hub will start broadcasting its own Wi-Fi network. You have 5 min to access this network (see § Installation > step 2, Wi-Fi and § Installation > step 3) |
| 2 | The smart hub is connected to your home network but has no internet connection | Check your home network internet connection. You can use your smart hub in your home network without an internet connection |
| 3 | I want to connect the smart hub to a different network. The red LED is not flashing | Reconfigure the smart hub’s network connection: – If you are using a UTP cable to set up the Wi-Fi network: connect the smart hub using a UTP cable (see § Installation > step 2, UTP) and reconfigure the smart hub’s network connection (see § Installation > step 3) – If you are using a Wi-Fi connection: reconfigure the network settings (see § Installation > step 3). If you can’t access the network configuration portal, connect directly to the smart hub’s own Wi-Fi network: press the smart hub’s control button for > 1,6 s. The blue LED will start flashing. The smart hub will start broadcasting its own Wi-Fi network. You have 5 min to access this network (see § Installation > step 2, Wi-Fi and § Installation > step 3) |
Specifications
- Article number: 552-00001
- Wireless communication: Easywave, Zigbee® 3.0, Easywave Sharp, Wi-Fi
- Communication protocol 1: Niko Easywave – 868.3 MHz
- Transmission range 1: Max 30 m indoors
- Communication protocol 2: Zigbee® 3.0 – 2.4 GHz
- Transmission range 2: Max 10 m indoors, with mesh networking support for longer range
- Communication protocol 3: Niko Easywave Sharp – 869.05 MHz
- Transmission range 3: Max 30 m indoors
- Communication protocol 4: Wi-Fi – 2.4 GHz
- Mounting: Horizontal or vertical mounting on the wall (at a maximum height of 2 m)
- Dimensions: 124 x 124 x 30 mm (HxWxD)
- Weight: 60 g
- Maximum power consumption: 6 W
- Maximum radio frequency power: 2 dBm
- Input voltage: 5 V via micro USB port (power adapter supplied)
- Ports: RJ45 port, 100 Mbit WAN port, SMR P1 port (smart meter cable P1 RJ12 supplied)
- Ambient temperature: 0 – 45 °C
- Protection degree: IP20
- Compatible with: Dutch smart meter (DSMR 2.2, 3,4 and 5) Belgian digital meter (Fluvius, Ores, Sibelga)
Warnings regarding installation
The installation of products that will permanently be part of the electrical installation and which include dangerous voltages, should be carried out by a qualified installer and in accordance with the applicable regulations. This user manual must be presented to the user. It should be included in the electrical installation file and it should be passed on to any new owners. Additional copies are available on the Niko website or via Niko customer services.
Support & contact
nv Niko sa
Industriepark West 40 9100 Sint-Niklaas, Belgium
www.niko.eu
+32 3 778 90 80
[email protected]
Niko prepares its manuals with the greatest care and strives to make them as complete, correct and up-to-date as possible. Nevertheless, some deficiencies may subsist. Niko cannot be held responsible for this, other than within the legal limits. Please inform us of any deficiencies in the manuals by contacting Niko customer services at [email protected].


