
TELUS MC8010CA Smart Hub Indoor Unit
Before You Start
Overview
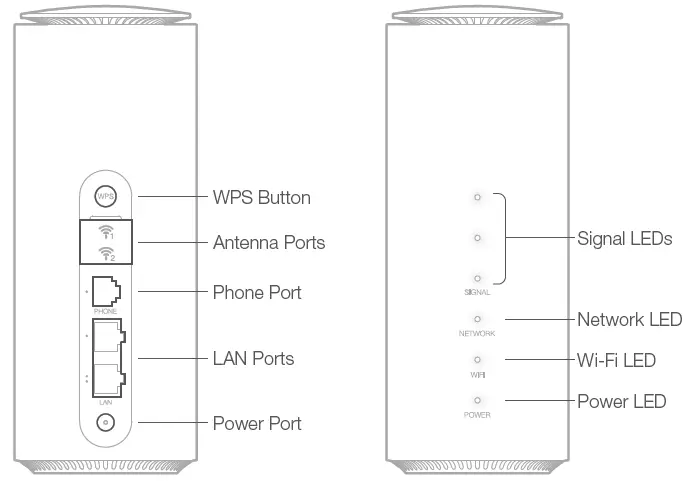
IMPORTANT The phone port is not supported. The port cannot be used to make voice calls including 911 calls.
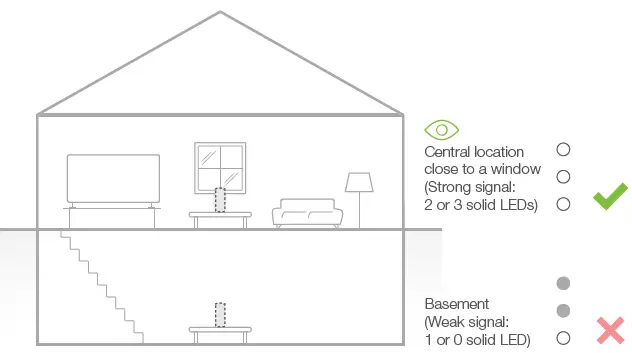
Select a Location
For Optimal Network Connection:
For Optimal Wi-Fi Performance:
TIP Avoid placing Smart Hub closer than 2 metres to devices such as microwaves, cordless phones or Bluetooth wireless devices.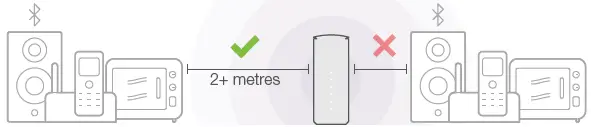
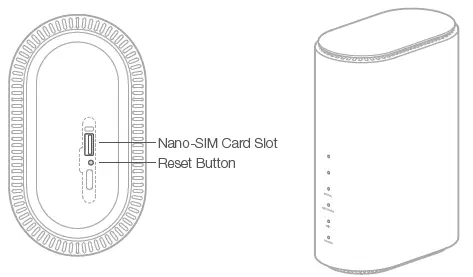
Insert Nano-SIM Card
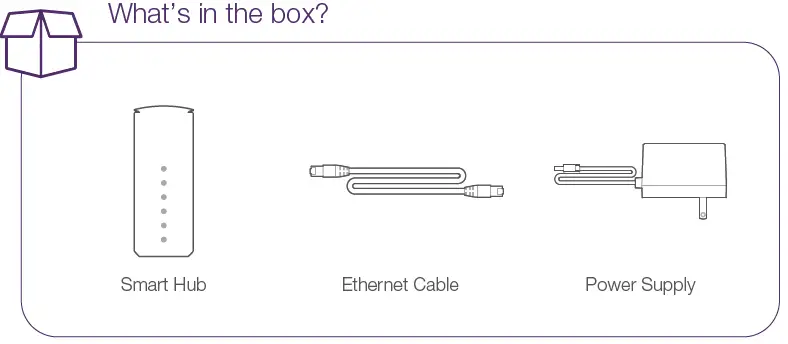
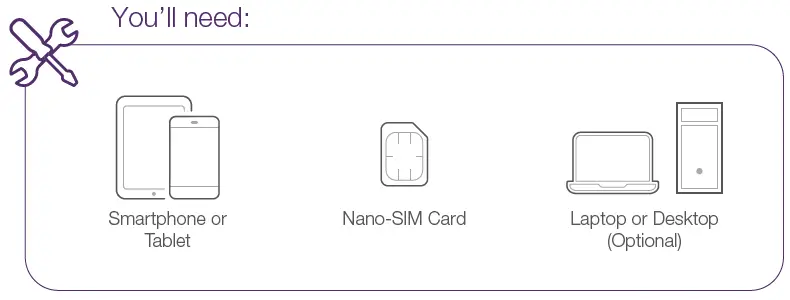
You’ll need:

Smart Hub

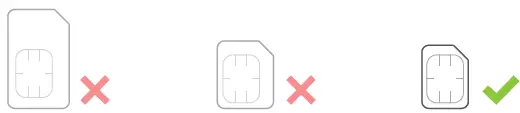
Nano-SIM Card
- Standard/Mini-SIM
- Micro-SIM
- Nano-SIM

IMPORTANT Device must be powered off before installing or removing the nano-SIM card. SIM card must be activated on a compatible rate plan.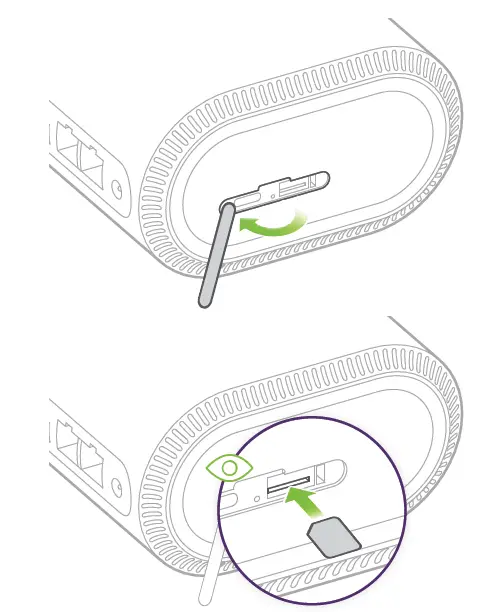
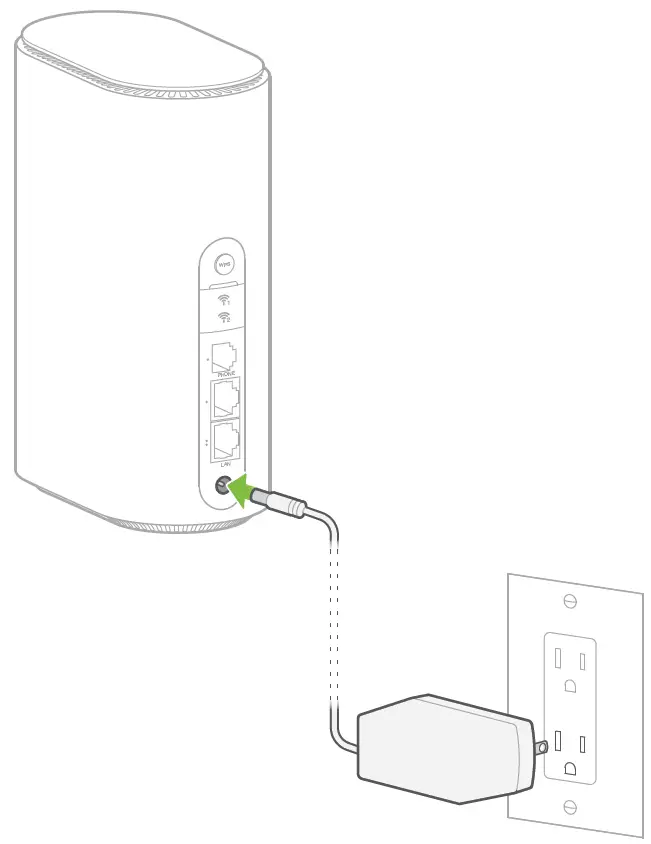
Connect Power
You’ll need:
Power Supply
Booting Up
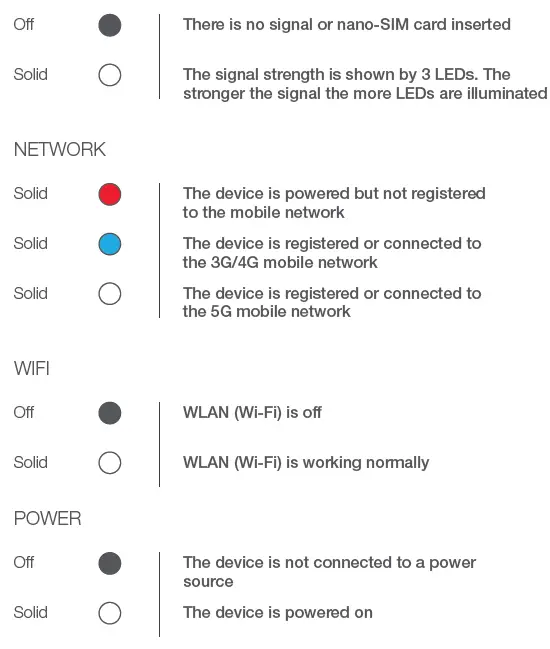
SIGNAL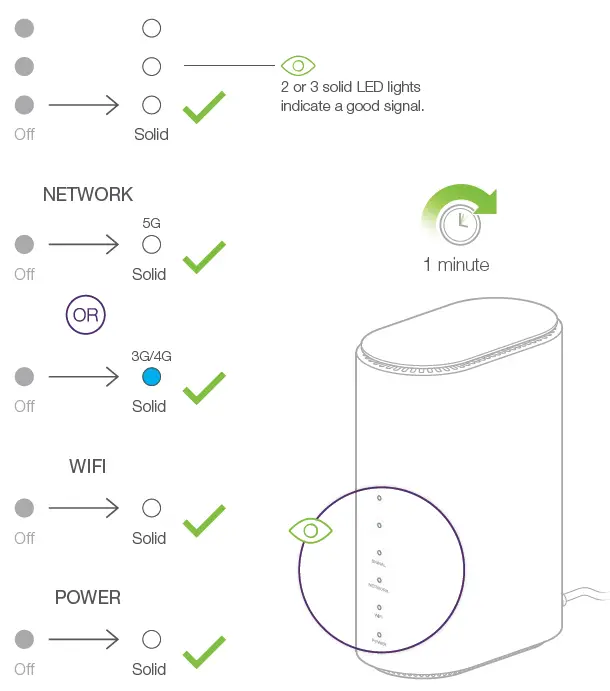
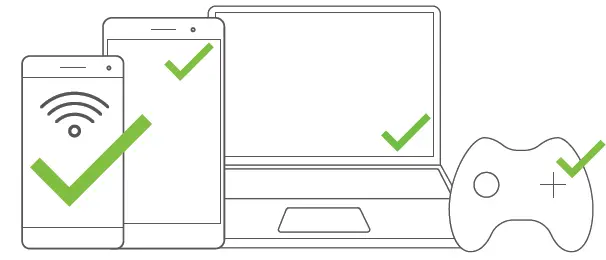
Connect Your Devices
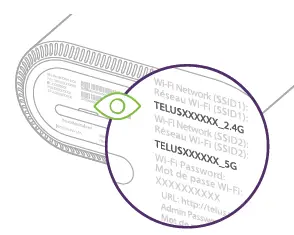
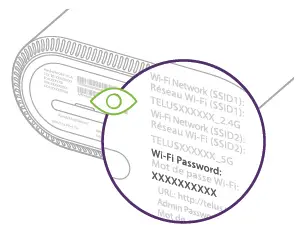
- Select a Network:

- Use Password:


NOTE Once you are connected to the Smart Hub, test your Internet connection by searching for a website from your Internet browser.
Alternative: Wired Connection
You’ll need:
- Smart Hub
- Ethernet Cable
- Laptop or Desktop

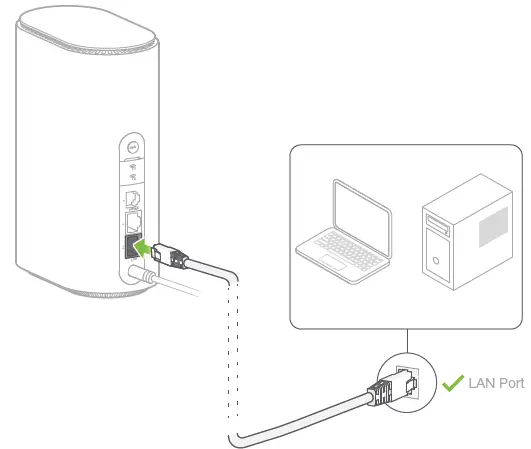
NOTE Once you are connected to the Smart Hub, test your Internet connection by searching for a website from your Internet browser.
Configure
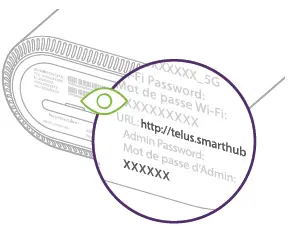
- http://telus.smarthub to log in to the Smart Hub Web User Interface to change the Wi-Fi SSID Name, password or other settings.


TIP Manage data usage, parental controls and access advanced settings with the Smart Hub User Interface.
Nice Work, You’re All Done!
Additional Support
Contact TELUS at 1-866-558-2273 or dial 611 from a TELUS phone to speak to a TELUS representative. For additional installation instructions and troubleshooting, please visit telus.com/SmartHub or scan the QR code below.
Manage Your Account
TIP With your My TELUS account, track your usage and pay bills.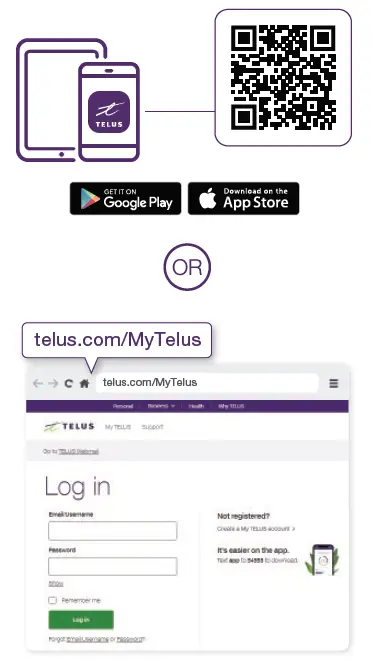
Download the My TELUS app or visit telus.com/MyTelus, then log in with your My TELUS credentials.
LED Reference Guide
Troubleshooting (Factory Reset)
NOTE If you have issues connecting the device to the TELUS network, power cycle the Smart Hub (unplug the power cable from the Smart Hub and plug it back in to restore power). If issues persist, reset the device to factory defaults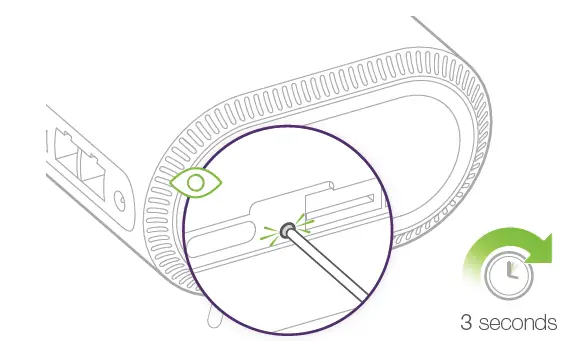
Can’t access the Internet?.
- Please wait 1~ 2 minutes for the Smart Hub once connected to an electrical outlet.
- Check your network indicators.
- Please check your Wi-Fi configuration settings.
Slow download/upload speeds?
- The speed is dependent on signal strength.
- Move your Smart Hub to a location in your home that has 2 or more signal LEDs.
Can’t access the Smart Hub Web Interface?
- Enter the correct URL. Refer to the label on the base of the Smart Hub to get the default URL information.
- Only use one network adapter in your PC.
- Do not use any proxy server.
Can’t connect your devices?
- Make sure the Wi-Fi function is active.
- Refresh the network list and select the correct SSID or Wi-Fi network name.
- Type the correct network Wi-Fi password when you connect to the device.


