
Legrand, Home Office & Theater, In Wall Speakers, 6.5 inch, 3000 Series
Specifications
- Product Dimensions
3.16 x 12.31 x 9.02 inches - Item Weight
7.5 pounds - Size
3000 Series - Mounting Type
Wall Mount - Usage
Residential - Speaker Type
In Wall - Brand
On-Q
Introduction
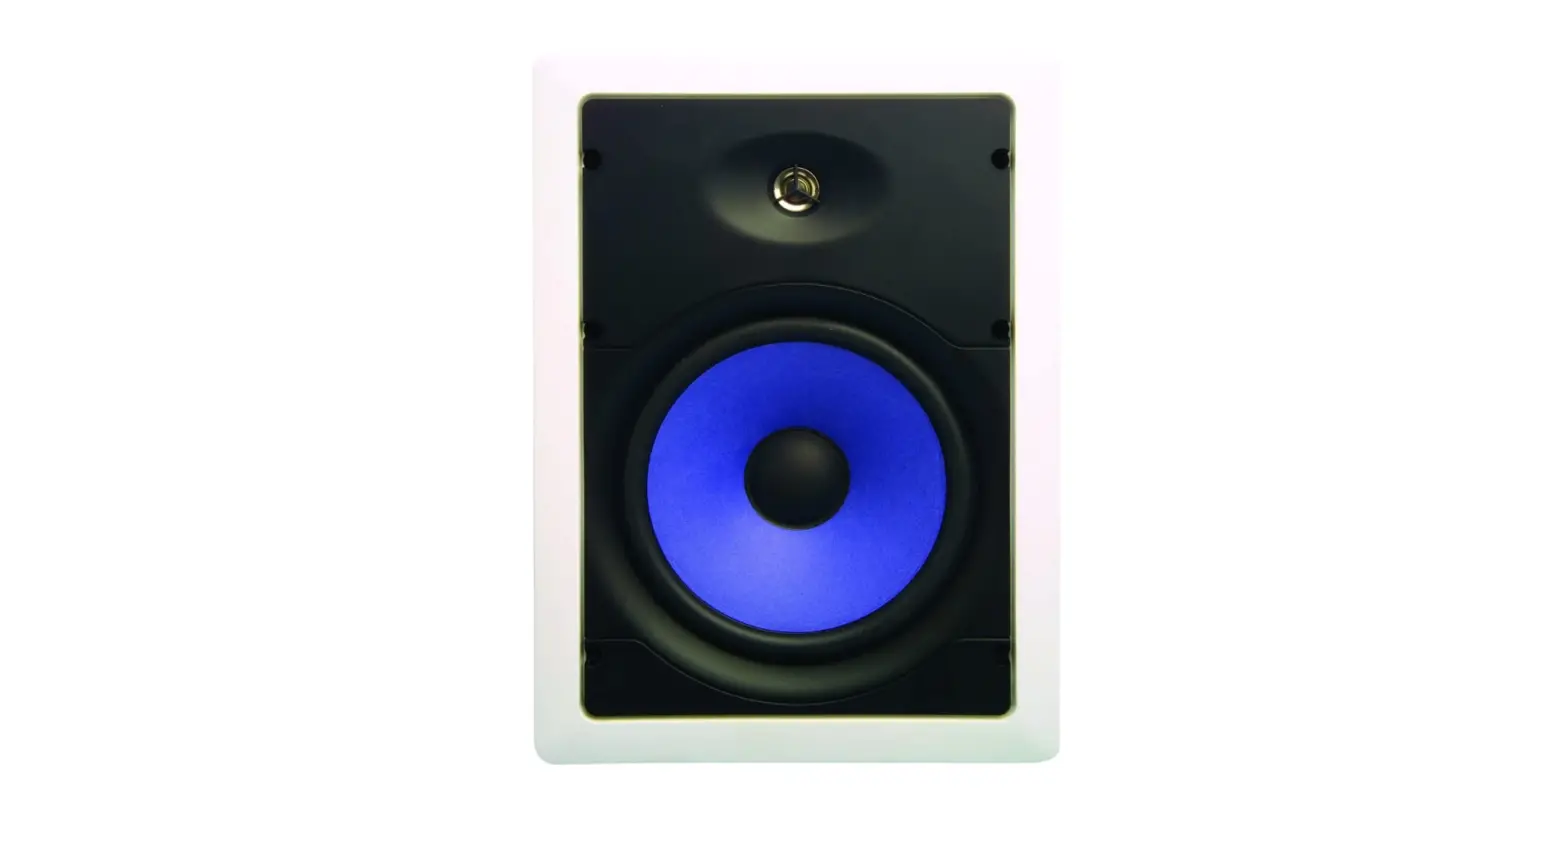
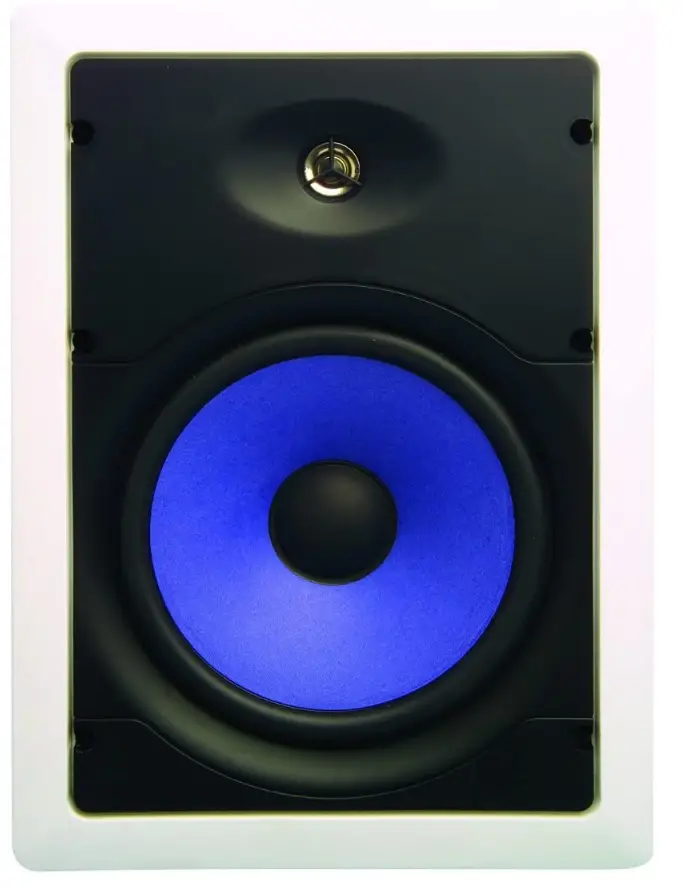
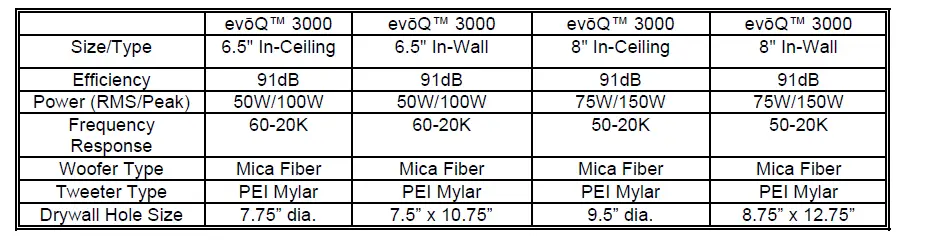
The 3000 Series In-Wall Speaker features high-efficiency blue mica fibre woofers and silver mylar tweeters for superb sound quality and an even, smooth frequency response. It was specifically created for multi-room audio setups.On-Q/Legrand offers both in-ceiling and in-wall styles of evōQ™ 3000 speakers. These two styles encompass two (2) sizes and five (5) part numbers (as shown in Figure 1 to the right). The speakers are optimized for audio distribution (central sound). All models are 2-way speakers that feature Mica-Fiber woofers and PEI (Polyetherimide) Mylar tweeters. These speakers come with dual templates with center markings and paint rings. Optional speaker pre-construction brackets are available for all models.
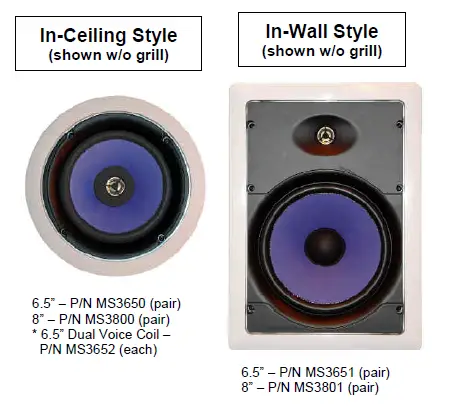
(*P/N MS3652, 6.5” In-Ceiling Dual Voice Coil Speaker, is for reference only and NOT part of this instruction sheet.) Disclaimer: Make sure you are in compliance with local building codes before installing these speakers. On-Q evōQ™ 3000 In-Wall and In-Ceiling Speakers are suitable for moisture-rich environments such as bathrooms, saunas, and outdoor applications.
Description
The On-Q/Legrand evōQ™ 3000 speakers are made of a tough semi-flexible plastic frames that feature a built-in foam gasket to minimize vibration and maximize seal-ability. They also feature a perforated metal grill with an acoustically transparent scrim cloth to enhance the speaker’s appearance once installed. All evóQ speakers, except subwoofers, are paint-able. They also come with painting shields to protect the drivers while painting. These speakers are suitable for moisture-rich environments. They also feature flip-out tabs for easy installation and removal.
Installation
Installation of the evōQ™ 3000 speakers is best accomplished at multiple times during new construction, at “Rough-in” before the drywall is installed, and at “Trim-out” after the drywall is installed and painted.
“Rough-in” steps
NOTE
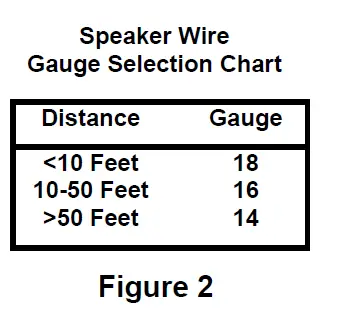
It is recommended that a minimum of 16 gauge, 2 conductor wire be used for most applications from the amplifier or volume control to the speaker. Different gauges can, and should, be used based upon the distance of the intended run or quality of installation (see Figure 2).
NOTE
All On-Q/Legrand lyriQ™ Audio components accommodate wire gauges from 18 to 14.
- Run x/2 conductor (x=gauge preference) stranded speaker wire from the distribution/volume control to the speaker location (pre-wiring).
- If an On-Q Speaker Pre-Construction Bracket is to be used, skip to Step “5” and refer to IS-0243 for detailed instructions.
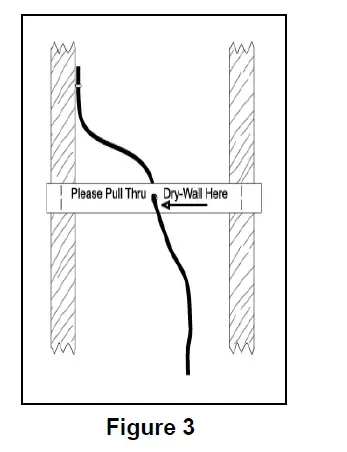
- If pre-wiring without using the On-Q Pre-Construction Speaker Brackets, leave 4 to 6 feet of wire at the speaker’s intended location. Use a strip of cardboard stapled to the joints/studs with a hole through it as a wire place holder for the drywall installers if the installation of the speakers is intended (see Figure 3).
- After drywall and/or painting is complete, push wire through the hole, center template over the hole, mark with a pencil and cut out with a dry-wall knife.
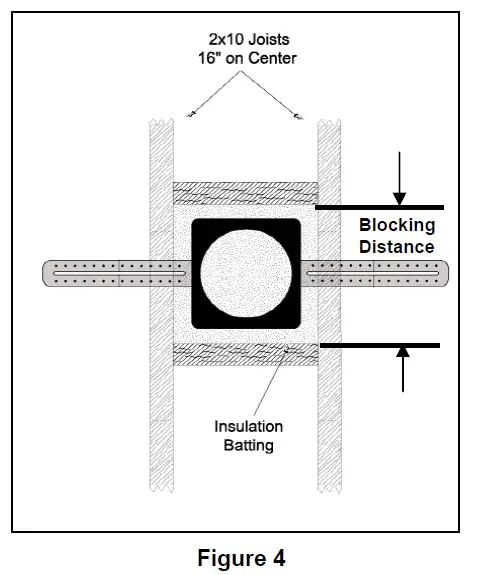
- When using the On-Q Pre-Construction Bracket (see Figure 4), leave a coil of speaker wire on top of the bracket coiled around the speaker mounting hole. There are clips on the corner of the bracket to secure the speaker wire. Leave enough speaker wire to be able to pull the wire through the bracket and comfortably connect the wire to the speaker after the drywall is installed. Strip off 3 inches or so of the speaker cable jacket to expose the positive and negative insulated wires. Strip 3/8-1/2 inch of insulation off of these conductors.
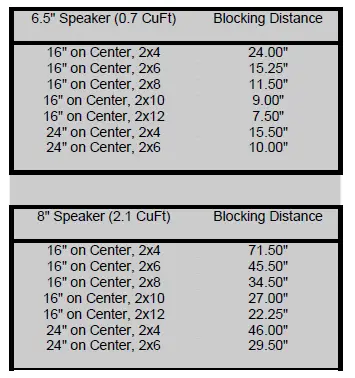
- It is recommended to place insulation behind the speaker to provide some damping for the woofer driver. This will yield the best possible sound. On-Q recommends using poly-encapsulated insulation such as Johns Manville Comfort Therm®. If a defined, consistent sound is desired from both speakers in space, blocking can be installed to yield the ideal cubic footage for each driver. Insulation would then be put in this space during speaker installation. Refer to the blocking chart for details.
- If installing speakers in a space with an attic above it is recommended that the speakers be boxed in with 1/2 inch MDF (medium density fiber board) or plywood with insulation installed. This will provide a defined acoustic space and protect the speaker. The best possible sound will be achieved by doing this. Refer to the blocking chart for details.
Note
Make sure you are in compliance with local building codes before installing this speaker in an attic space.
“Trim-out” steps
- After drywall and/or painting is complete, push the speaker wire through hole, center template over hole, mark with a pencil and cut out with a dry-wall knife.
- Hold the speaker with one hand, (if the speaker grill is off, pay careful attention not to push on the woofer’s cone, this can cause permanent contortion of the voice coil, thus producing a mechanical rubbing sound or speaker failure), and push in the speaker terminal connectors and insert wires; remove speaker grill. Be sure to have the positive wire in the RED terminal and the negative wire in the BLACK terminal.
NOTE
Wiring both speakers identically as the above instruction states will yield speakers that are “in phase”. If one speaker is wired opposite of the other, the speakers will be “out of phase” with one another. If the speakers are “out of phase” the sound might appear smeared (canned) and a significant loss of bass might be noticeable due to phase cancellation. Make sure every installed speaker is correctly phased.
Use one hand to push the speaker into the cut out (again, pay careful attention not to push on the woofer’s cone, this can cause permanent contortion of the voice coil, thus producing mechanical rubbing sound or speaker failure) and the other to turn the screws that engage the installation tabs (see Figure 5). Tighten the tabs in a cross or X-pattern until “snug”. Be careful not to over tighten the tabs or damage could result. The speaker should appear flush to the surface.

NOTE
If using a cordless drill/screwdriver, it is suggested that the screws be turned until almost tight, then finish tightening via a hand screwdriver.
NOTE
A strip of grill adhesive is provided to more securely attach the speaker grills on final installation. Simply insert several short strips evenly around the grill slot prior to installing the grill cover.
Frequently Asked Questions
Speakers installed in walls and ceilings are typically passive speakers. They are thus not required to be connected to a power source. They just require a connection to a receiver or amplifier that can also serve as a power supply.
On-wall speakers perform just as well as their in-wall counterparts since they are frequently tilted to provide a realistic sound. Therefore, depending on your preferences, installing one or two speakers of various sizes is all that is required to create a home theatre experience.
In-wall speakers are tuned while they are installed in a wall. This is taken into consideration during the design of the enclosure and the drivers, ensuring that once you install them at home, the system sounds identical to one from a speaker located farther away from the listening area.
Numerous in-wall speakers produce superb sound. The only thing you give up with a stereo configuration is that the sound quality might not be nearly as high if you install them properly and use a good
If the speakers are too far apart, the music will play in some areas of the room too loudly and in others too softly. In larger rooms, use two speaker pairs for balanced sound. We advise keeping in-wall and ceiling speakers at least 18 to 24 inches away from one another.
In most cases, in-ceiling speakers may easily be mounted in a wall, and vice versa, and they will sound the same.
You really need an amplifier if your in-ceiling speakers are passive, especially if you plan to utilise them to play music. A receiver is also required if you want to send multi-channel surround sound to the speakers.
Can You Directly Connect Speakers To A TV. No, you can’t connect the TV’s speakers directly. Speaker outputs that can drive speakers are not available on TVs. To utilise them, you might require an amplifier.
A speaker wire should be connected to each speaker’s positive terminal. The positive wires for both speakers should be connected to the same positive terminal. A speaker wire should be connected to each speaker’s negative terminal. Both ought to be connected to the same negative terminal on the amp’s output.


 Instruction Manual")


