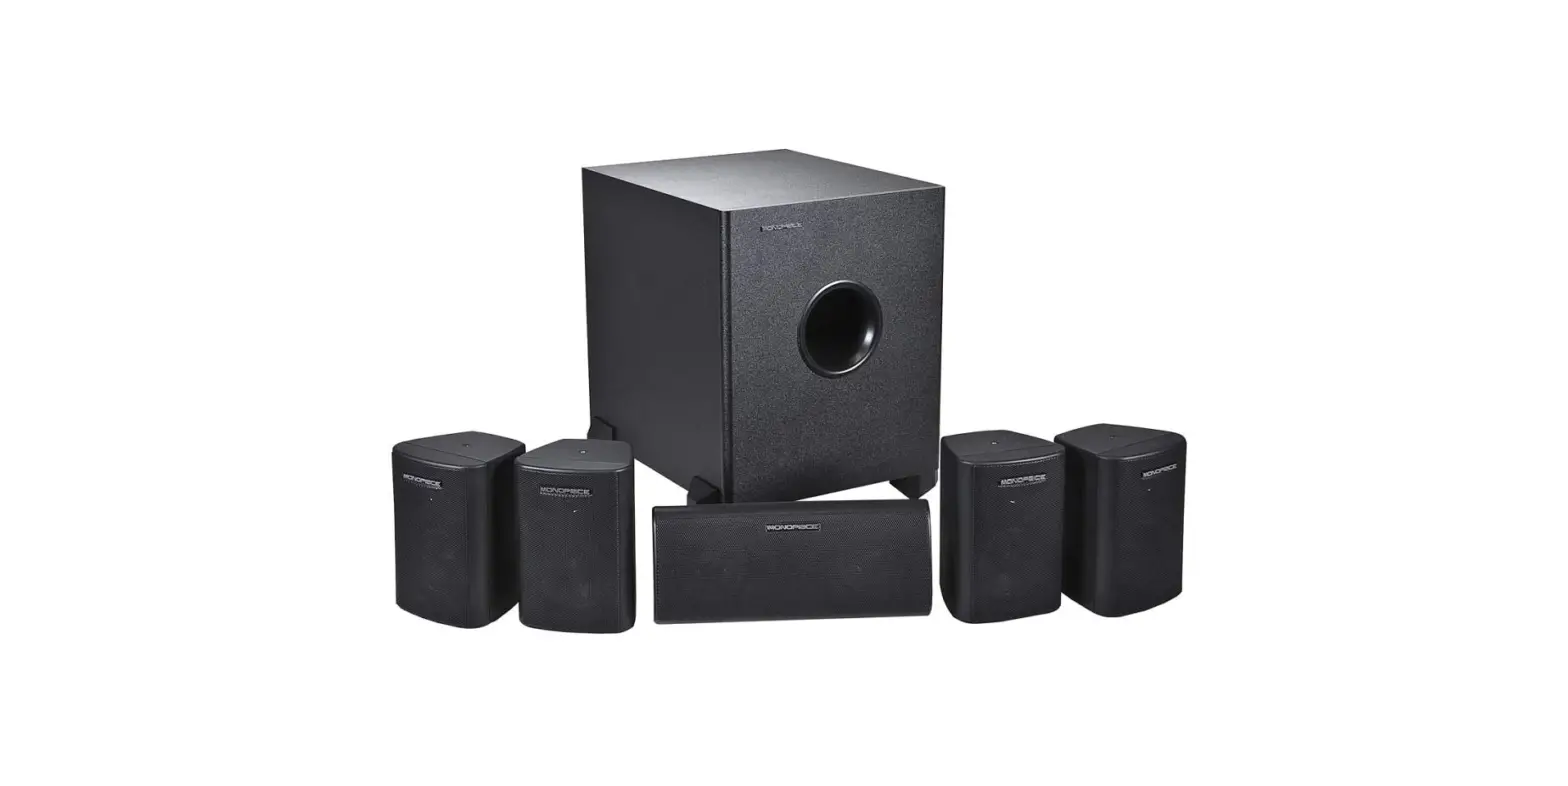
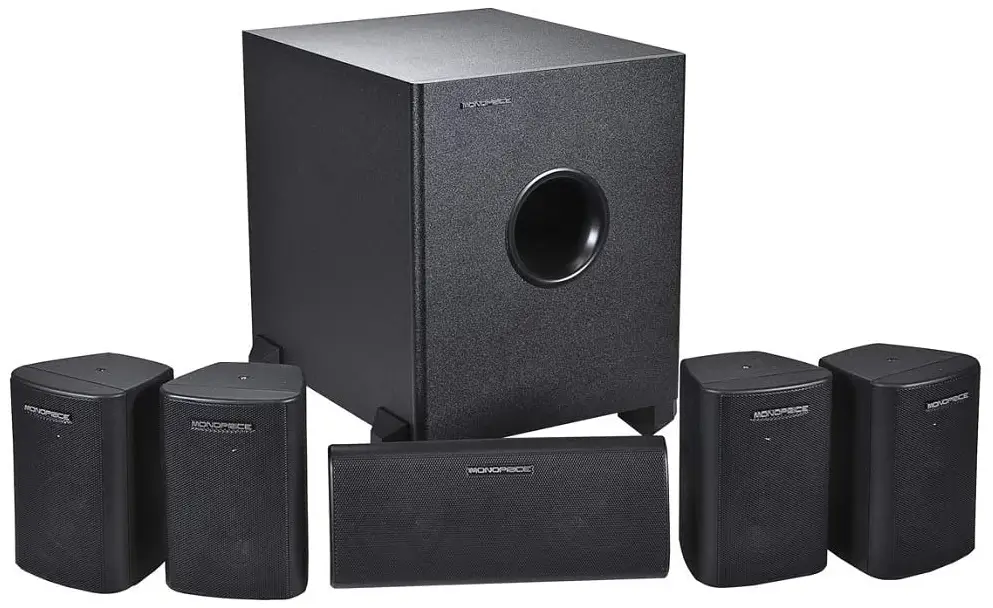
Monoprice MSYS-P Home Theater Satellite Speakers
Specifications
- Speaker Type: 3″ Shielded with Paper Cone, Foam Surround
- Tweeter: ½” Balanced Dome Tweeter
- Frequency Response: 150Hz – 20 kHz
- Impedance: 8 Ohms
- Power Handling: 125 Watts
- Sensitivity: 85dB
- Satellite weight:8 lbs.
- Center Channels weight:0 lbs.
- Dimensions Satellite: H 6″ X W 4 ¼” x D 4 1/a”
- Dimensions Center channel: H 4 Ya” x W 9 1l’1″ x D 3 %”
MSYS-PS. l Subwoofer
- Speaker Type: 8″ High Performance Powered Subwoofer
- Driver: 8″ Down Firing Driver
- Amplifier Power Output: 60 Watts (RMS)
- Frequency Response: 50Hz – 250 Hz
- Low pass Crossover: Adjustable from 50Hz • 250 Hz
- Functions: Power (On, Off)
- Inputs: Hi Level (Speaker), Line (RCA)
- Dimensions: H 1 3 ‘/4” x W 1 0″ x D I 3 -½o
- Unit Weight:5 lbs.
Congratulations on your purchase of a MSYS-P5.1 home theatre in a box system. Your new home theatre in a box is one of the most exciting home entertainment electronic products available, adding impact and realism to recorded music and the wide variety of movies. Once set-up and properly adjusted, it should give you movie theatre experience at the comfort of your home.
Explanation of Features and Controls
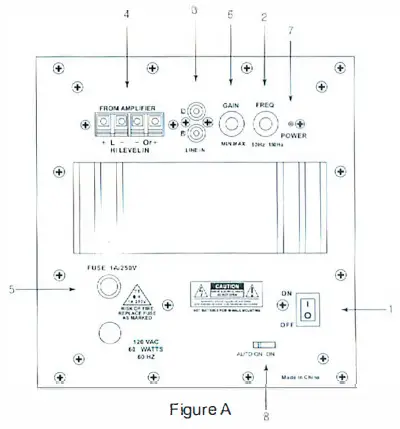
- Power Switch: This two position switch controls the power status of the subwoofer.
- Off – Turns the unit off.
- On – Turns the unit on regardless of whether a signal is present or not.
- Subwoofer crossover: This rotary control adjusts a variable low pass filter to set the upper frequency at which the output of the subwoofer begins to roll-off. Continuously variable from 50Hz, it matches the upper frequency characteristics of the subwoofer to the low frequency response of the main stereo speakers.
- Line level input – These RCA phono jacks accept a line level full range signal from the pre-amplifier output of a receiver or pre-amplifier. This full range signal processed and amplified to power the subwoofer.
- Speaker level input – this spring loaded terminals for speaker wire accept a stereo. Speaker level. Full range signal from a receiver or power amplifier. This signal is processed and amplified to power the subwoofer.
- Fuse – For continued protection replace fuse with type and size listed.
- Level control – This rotary control adjusts the level of the subwoofer and is used to balance its volume with that of the main stereo speakers.
- Status LED – This light emitting diode shows the status of the subwoofer electronics. “Red” indicates that the amplifier is plugged in and the power switch is on.
- Auto ON switch – In order to function, the Power switch must be tum on, indicated by the red color of the LED. The Auto ON should be in the ON position. The subwoofer is on at all times and ready to play program material. If the Auto ON switch is in the on position and no audio signal is received, the subwoofer is in Standby mode to conserve power.
When an audio signal is sensed, the subwoofer will switch itself into the fully on mode and begin playing the program material. When a period of about 2 minutes goes by during which no signal is sensed, the subwoofer will return to standby mode. If you plan to be away for an extended time, or if the subwoofer will not be used, you may wish to tum off the Power switch.
Placement or Positioning
Your new subwoofer will work well in a variety of locations. However, placement in your listening room will affect its performance. Since the wavelengths of sound reproduced by your subwoofer are large compared to its size, those sounds is Omni-directional in nature. This means that locating your subwoofer in Relation to your left and right main speakers will not affect the directional cues which they provide. Because the sound you hear is combination of direct sound from the speaker and reflected sound from the wall, ceiling and floor of your listening room, placement of the subwoofer in relation to room boundaries changes the balance or what you hear at low frequencies. In that low frequency range, the dimensions of most rooms are comparable to the wavelengths or those sounds.
As sound propagates and reflects in the room, “standing waves” are created at frequencies where the wave length of sound or multiples of the wave length are equal to one of the dimensions or the room. At your listening position, these standing wave patterns of reflected sound add together in and out or phase causing large variations in the response that you hear. As a general rule, locating your subwoofer near the corner of the room will increase its overall output, but will excite more standing waves in the room and may result in a more uneven response.
Locating your subwoofer along a wall will usually mean less acoustic output but a somewhat smoother response. A middle of the room location would suggest the smoothest response with the least output capability. Of course, any location will be a compromise between acoustic performance and the aesthetic blend of the subwoofer enclosure with the decor and furnishings of your room. Don’t be afraid to experiment with the location or your subwoofer in your room for the best results at your listening position. As with any other listening test, use program material that you are familiar with that has substantial bass content.
Sample (1) illustrates the most generally accepted speaker locations for a home theater system.

Although there are an infinite number of set up options using Sample (1) as a template will certainly provide a great starting point. Experimentation with slightly different speaker locations may provide improved performance in your specific listening environment.
The front left and right speakers should form a 45 degree triangle using the center seating position as the apex. The surround speakers should be placed beside the listening area, and pointed towards each other. It is also recommended that the speakers be 2-3 feet above the listeners head.
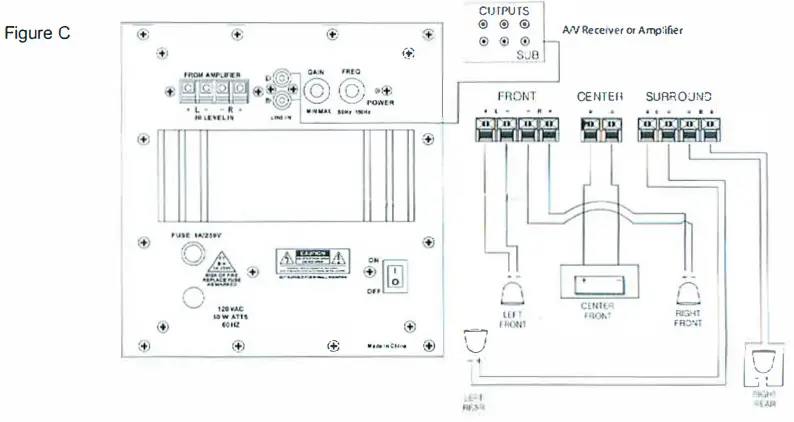
WIRING AND CONNECTIONS
Turn off all power to your subwoofer and other equipment before making any connections. Installation using speaker level inputs.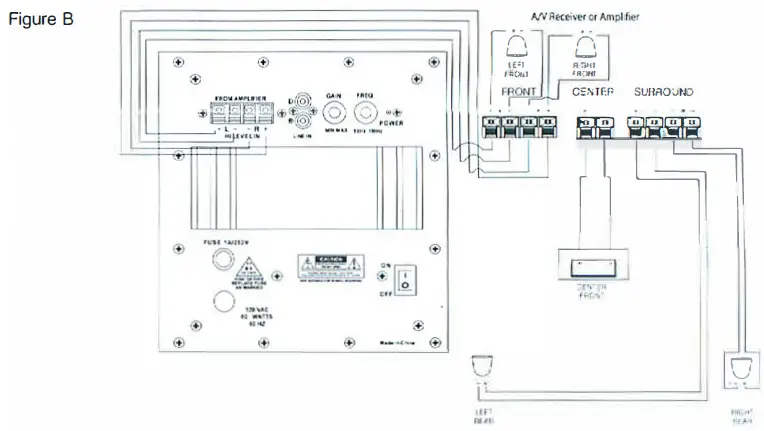
Installation with NV amplifiers and receivers that have 5.1 channel line level outputs. Use and RCA “Y” adaptor to connect both line level inputs
Frequently Asked Questions
Height, breadth, and depth measurements for the middle channel are 4 x 9.5 x 4. 12 x 10 x 12 inches, these satellites measure 6x4x4.
Any receiver with 80–100 w/channel will work with it. Connect with 14 gauge speaker wire and banana plugs. Get a woofer speaker wire with a Y splitter, please. All the wires you require are inexpensively available on the Monoprice website.
Any position will do. I ordered surround speaker wall mounts.
One RCA wire can be run to the Red and one to the White for the two sub outputs if your receiver is 5.2 or 7.2 inches. I took that action.
Simple positive and negative speaker wire. I have a dedicated subwoofer positive and negative terminal on my setup.
Yes, a 1/4″ will be used in these “the back has a threaded hole.
The satellite speakers weigh 1.8 lbs, while the centre weighs 3 lbs.
Yes, the spring clip connections and pin plugs can be attached.
Since these employ speaker wire, a receiver would be required.
Yes. They are compatible with practically any receiver that supports speaker wire connection of 8 ohm speakers. Currently, they work perfectly with an Onkyo TX-SR333.
Any normal mount will function. To fit the threads, I did need to go acquire new screws.
Weight of a satellite speaker: 1.8 lbs. Dimensions of a satellite speaker are H 6″, W 4 1/8″, and D 4 1/8″.
Separate plugs are used to connect the subwoofer and speakers to the receiver. They arrive with cords and wiring.
I think they can withstand up to 125 watts.
The subwoofer is 60 Watts, and the speakers are 125 Watts (RMS)


 Compact Form Factor User Manual")


