
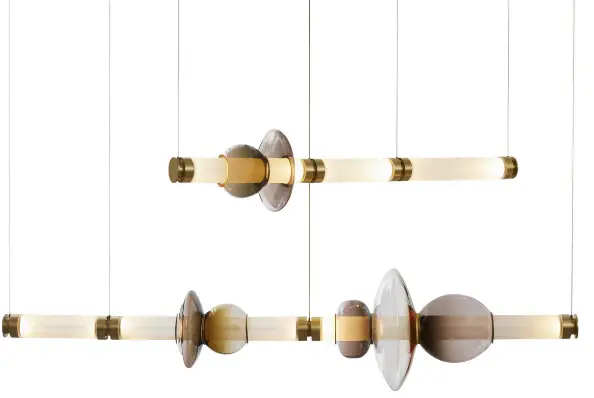
GABRIEL SCOTT Luna 2 Tier Contemporary Chandelier
- Suspended mount only.
- Certified electrician recommended for electrical installation.
- Minimum 2 people recommended for installation.
- Terminal Block not included. Installation may require advice from a qualified person.
- Junction box rated for minimum of 100lbs or structural blocking required to support fixture.
- Structural blocking required at monopoint locations, adequate drywall plugs may be substituted.
- Far all LED fixtures, use only with class 2 power unit.
- The light source contained in this luminaire shall only be replaced by the manufacturer or his service agent or a similar qualified person. Contact manufacturer for service.
- For controllable luminaires, the classification of insulation that has been maintained between LV supply and control conductors shall be provided…. basic insulation, reinforced insulation etc.
IMPORTANT: Please provide email confirmation that your order and its related components have been received in their entirety and in good condition. Failure to do so within 7 days of delivery will waive all product warranties.
Provided supplies
- 2 Tier Luna fixture
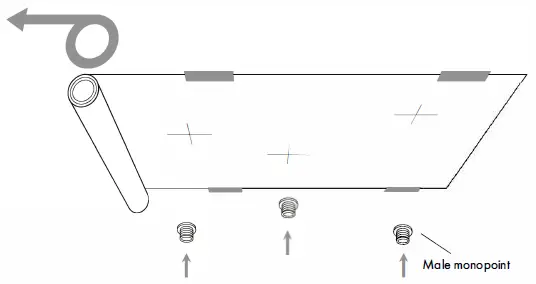
- Hanging template
- Male monopoints
- Unuiversal T-bar
- Installation screws
Required tools and hardware
- Screwdriver
- Drywall anchors suitable for 25Ibs for mono points
- 4x 2-pole wiring terminals, screws or screwless, 12- lBAWG ( l .0-2.5mm2) roted for 600V, 15A / ex: WAGO 222-412
- LED driver; Input: local line voltage, output 24Vdc SELV, 5A, max 60 watt class 2 LED driver
INSTALLATION INSTRUCTIONS
- Tape provided 1: 1 printed template to ceiling at desired location and install all male monopoints at the cross indicated on the template.
Note: Each anchor point should be capable of supporting 251bs and therefore adequate blocking or toggle bolts are required for proper support at the location of each male monopoint.
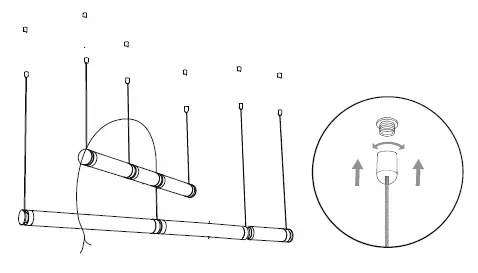
- Begin hanging the fixture by screwing the female monopoints of each tube section onto the corresponding male monopoints on the ceiling. Be sure to adequately support all elements during installation.

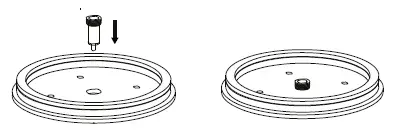
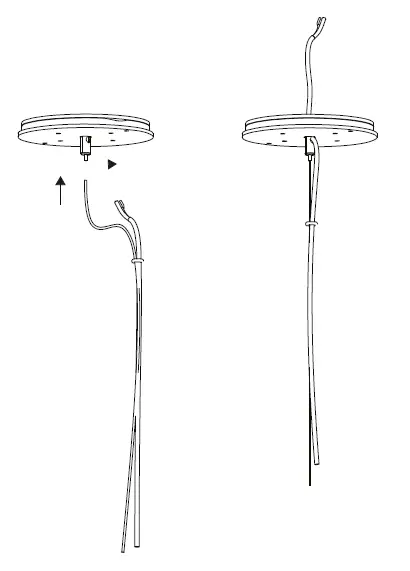
- Insert wireway in the canopy, as shown.

- Insert the aircraft cable in the griplock and the coaxial cable through the wireway

- Using wire terminals, connect the LED driver to the Luna Fixture (Maximum distance 1 oo; use 12-18AWG ( l .0-2.5mm )). The outer metallic casing of the coaxial cable is Negative(-) and the black wire is Positive2(+). Finally install the universal T-bar and then secure the canopy to the T-bar using the screws provided. The drop height should already be set to the correct height with a grip lock.

- Install the volumes by removing the aircraft cable from the plunger and then sliding the volume onto the tube, finish by re-inserting the aircraft cable to properly support the fixture. Be sure to properly support the fixture during the step especially when the aircraft cables are disconnected

Locknut
![]()
- Loosen locknut from the cable gripper
- Move the cable in or out to the desired height
- Secure the locknut back in place
Note:
If the cable feels blocked, cut excess as needed. If the wire is frayed, cut with sharp cutters.
e: [email protected]
t:(646) 783-3770


