
ROLLER SHADES
INSTALLATION GUIDE
LIFT SYSTEM: CONTINUOUS CORD LOOP
The difficulty level of this installation is ranked at Level 2. You got this!
If you have questions or get stuck, call our Customer Care Team at 888-685-1735, or email [email protected].
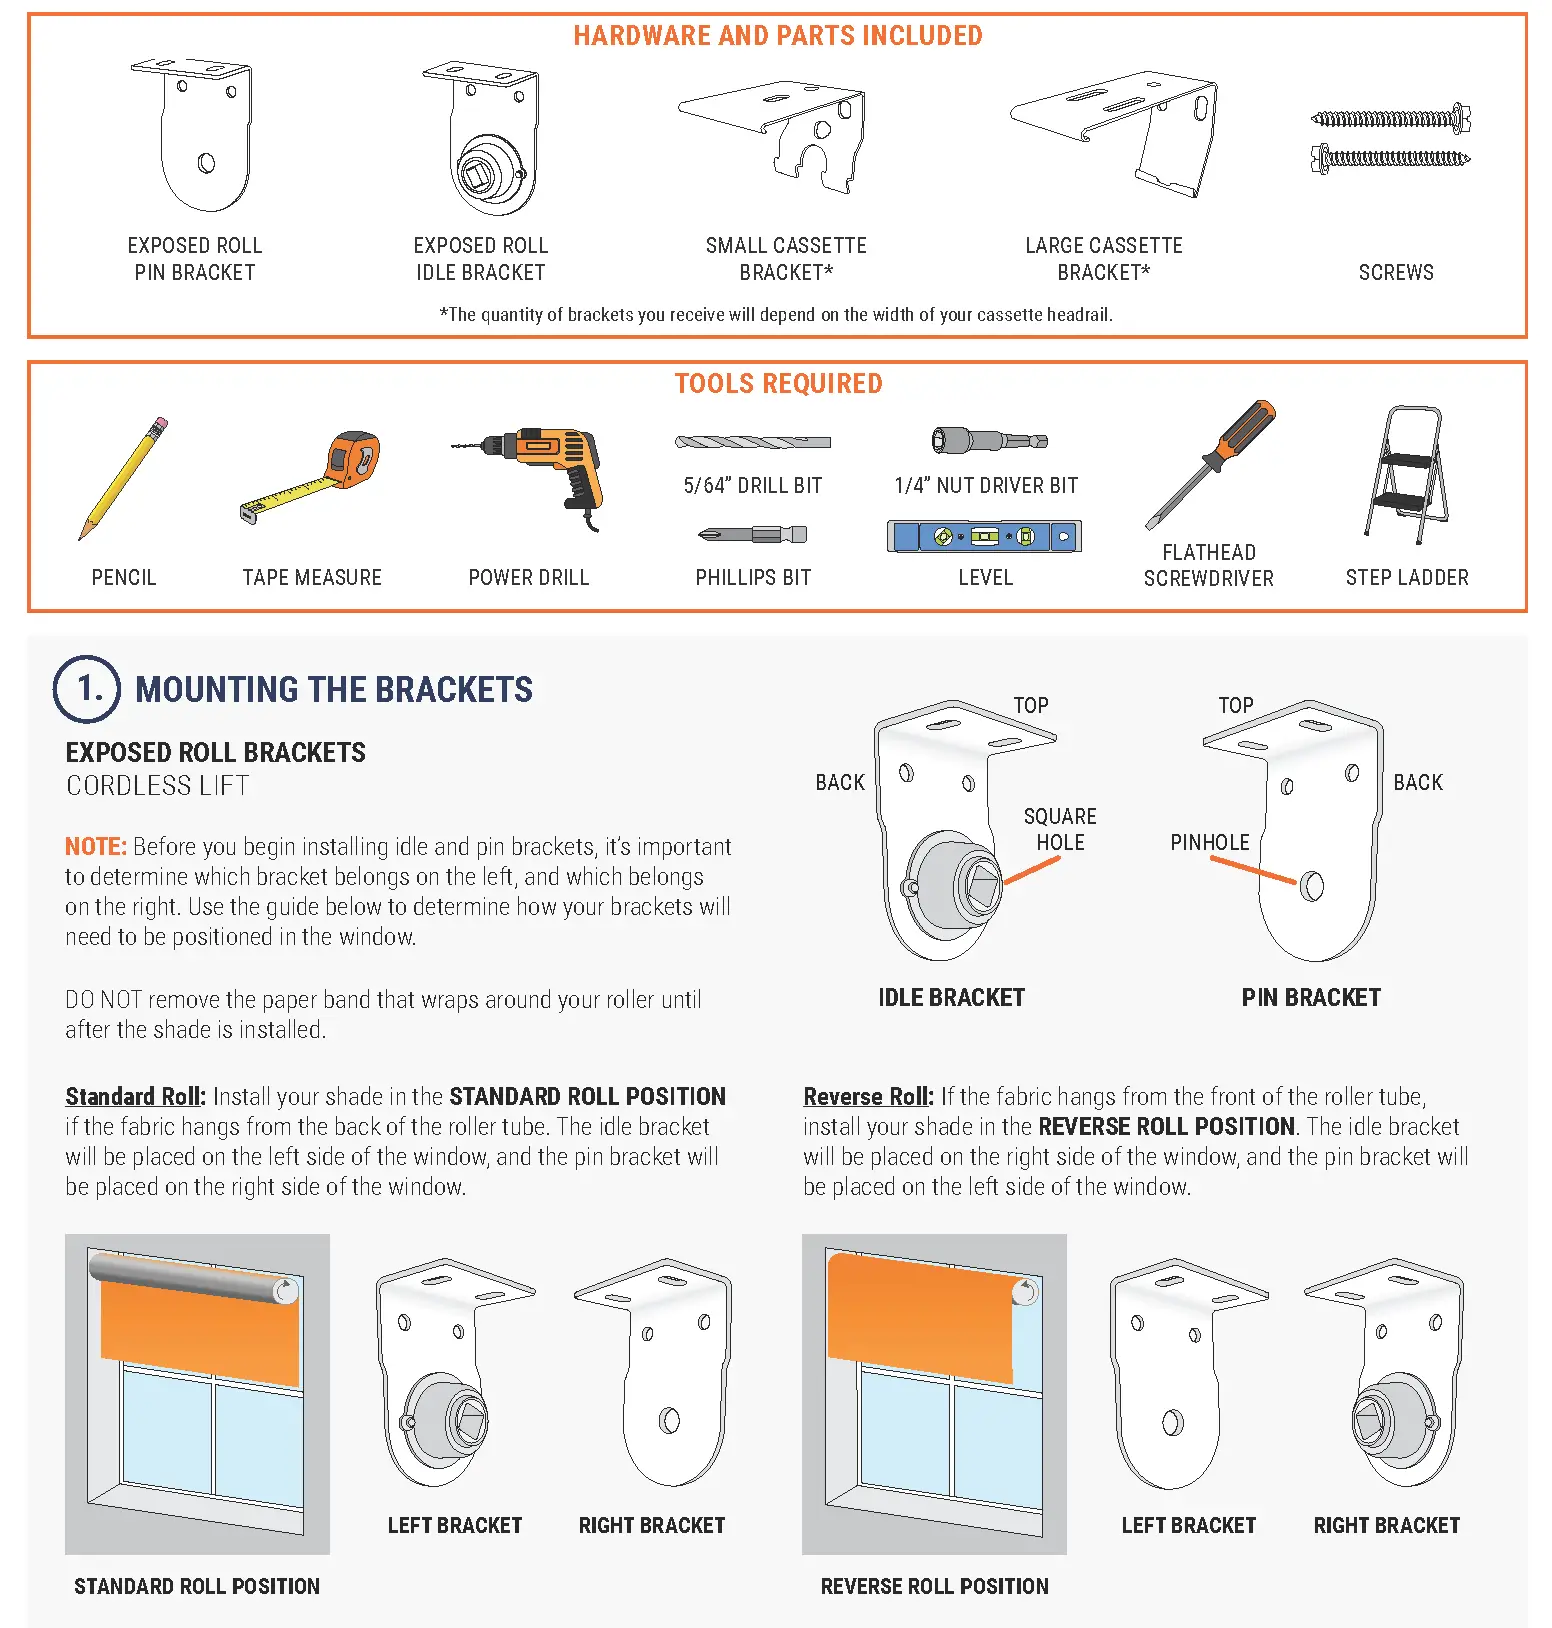
HARDWARE AND PARTS INCLUDED

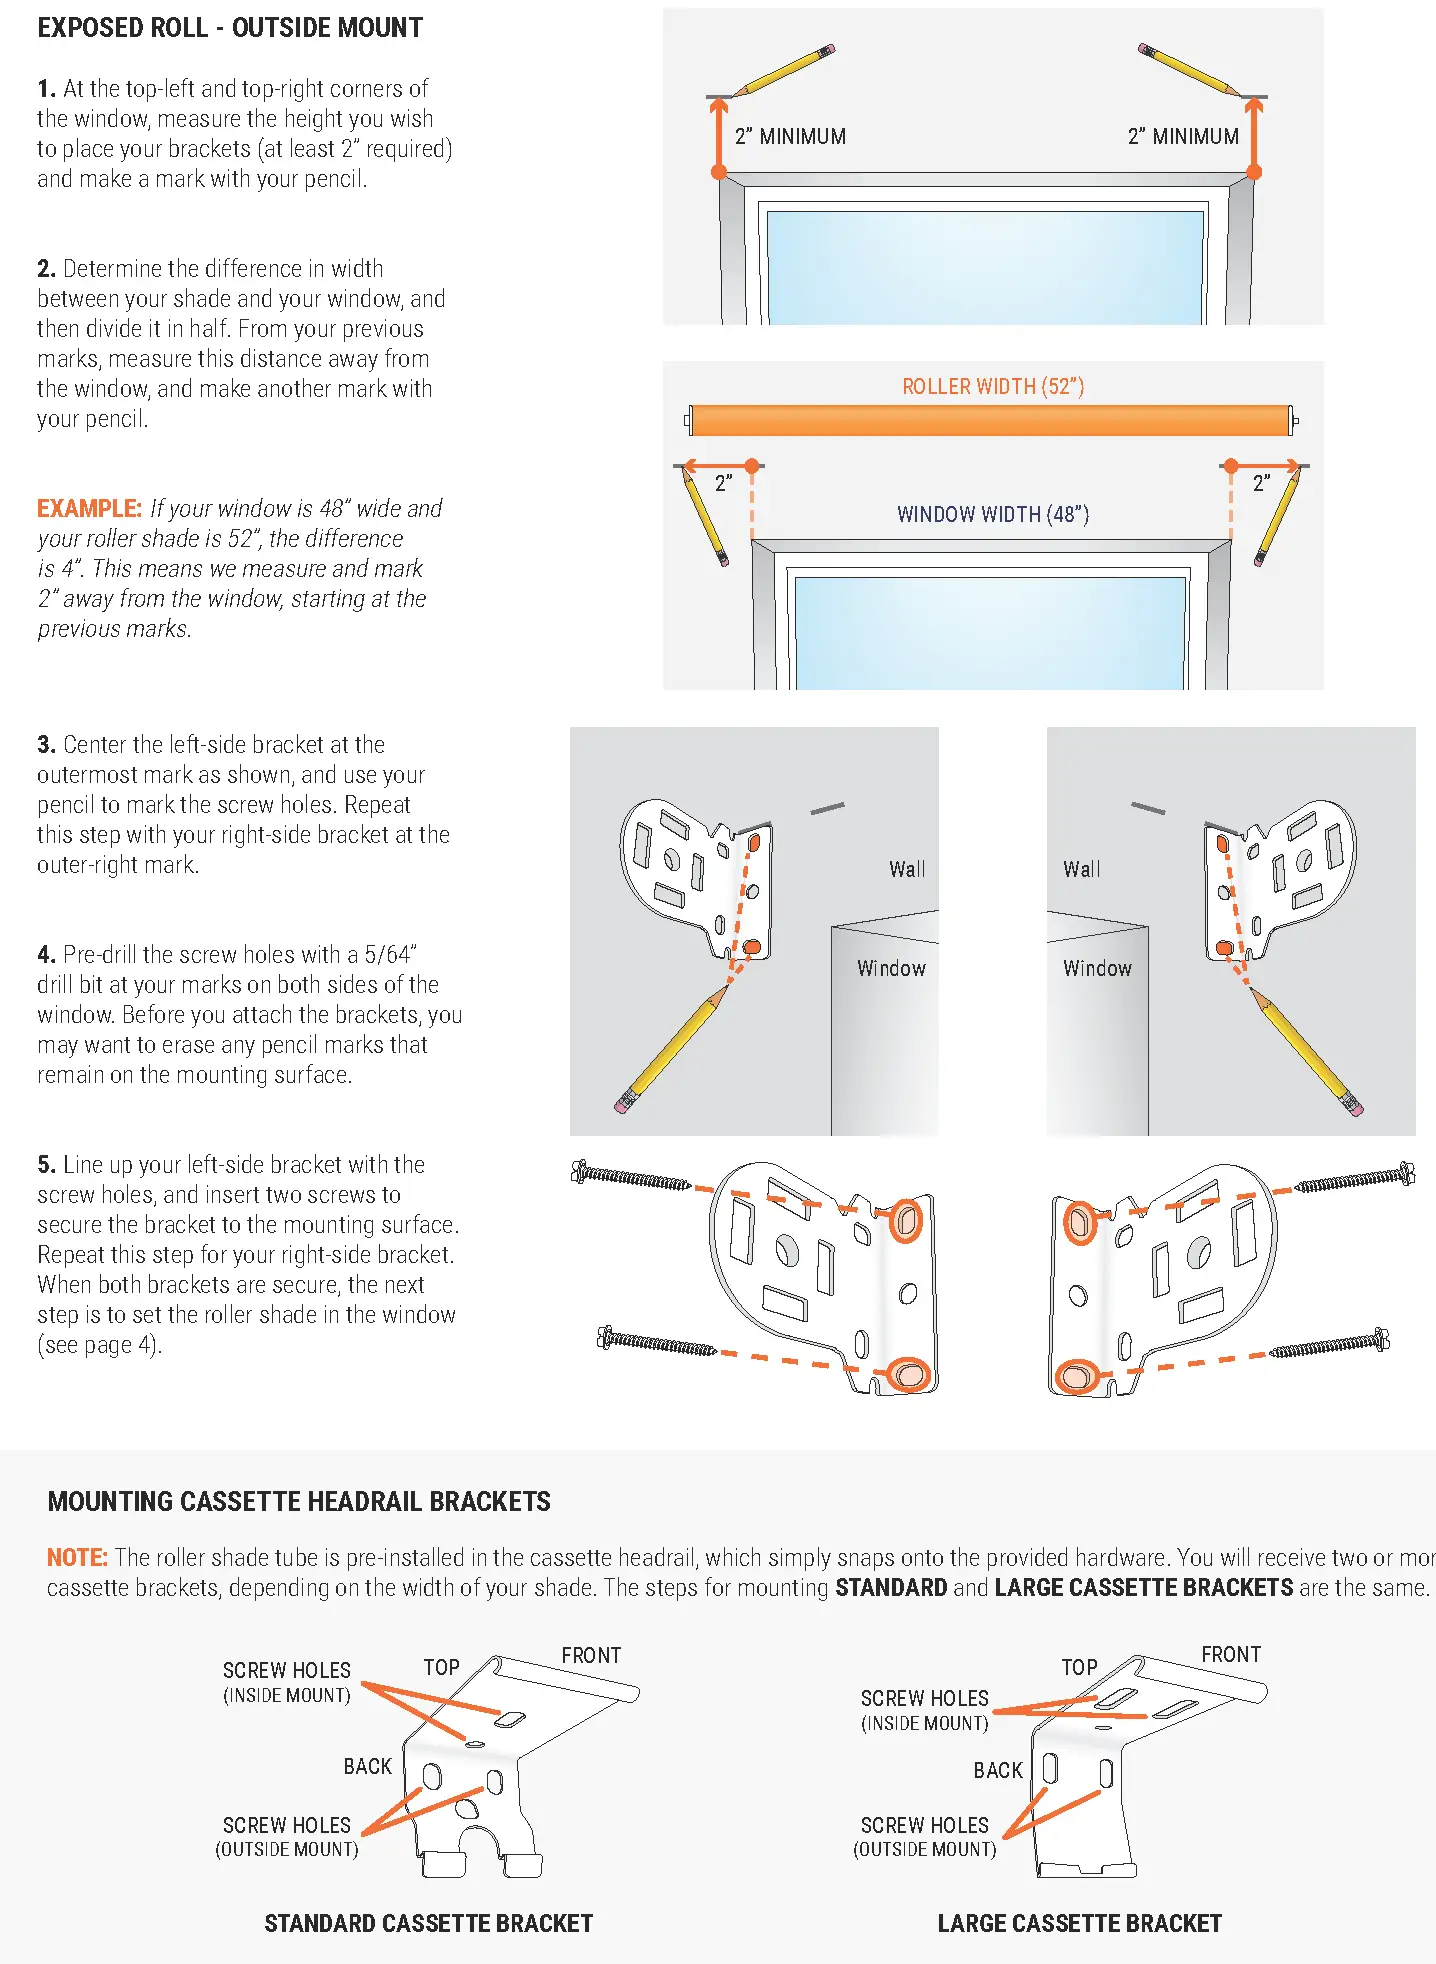
*The quantity of brackets you receive will depend on the width of your cassette headrail.
TOOLS REQUIRED
1. MOUNTING THE BRACKETS
EXPOSED ROLL BRACKETS
NOTE: Exposed roller shades with a chain loop have identical brackets, and are mounted in or above the top corners of your window. Simply decide which bracket will be on the left side of your window, and which will be on the right. DO NOT remove the paper band that wraps around your roller until after the shade is installed.
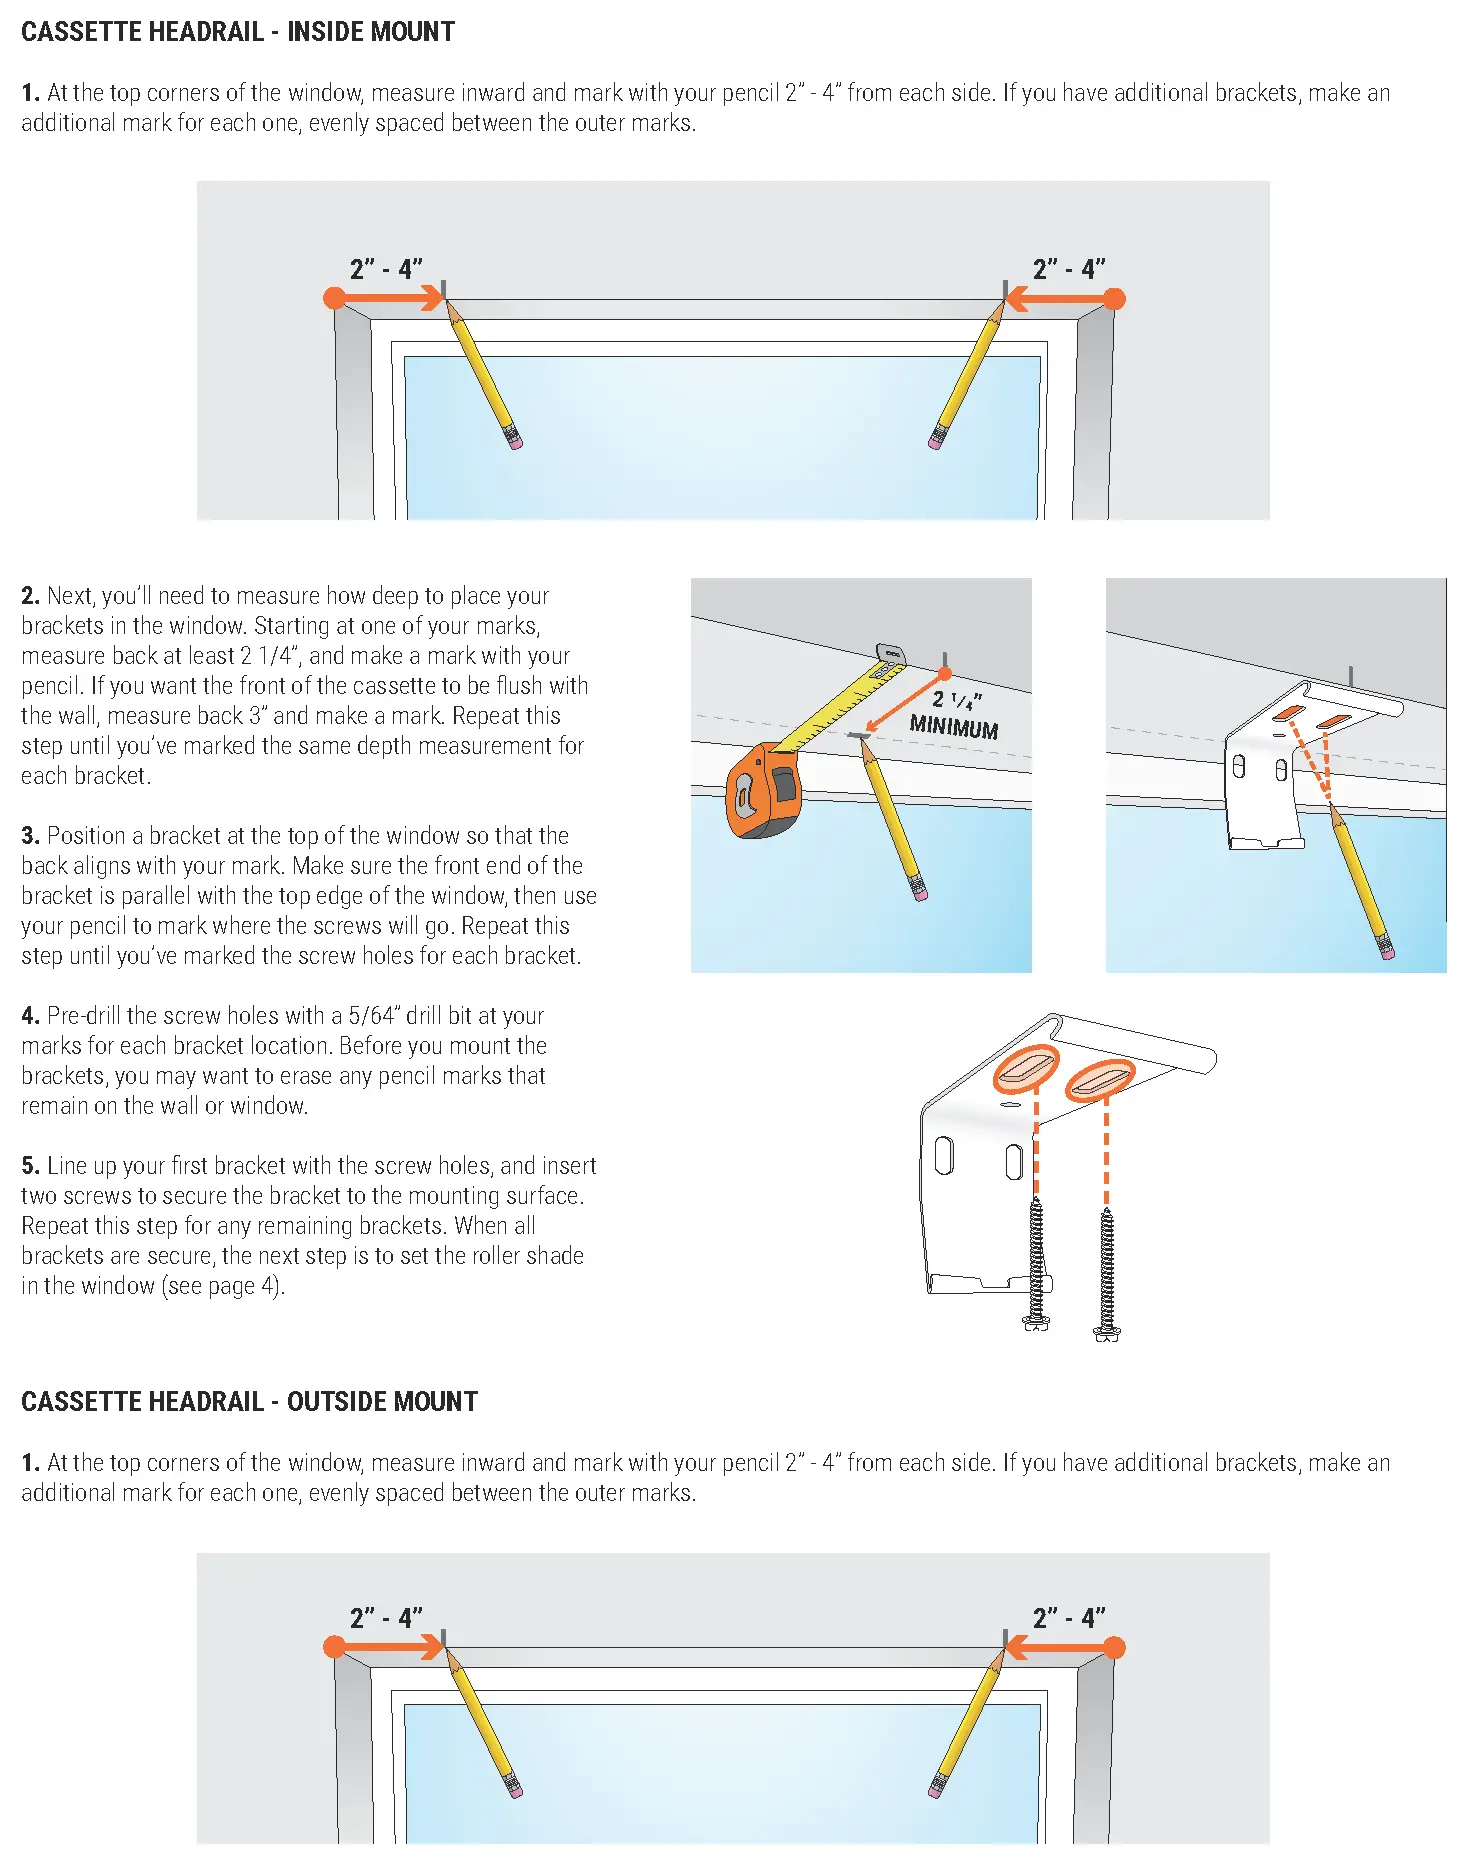
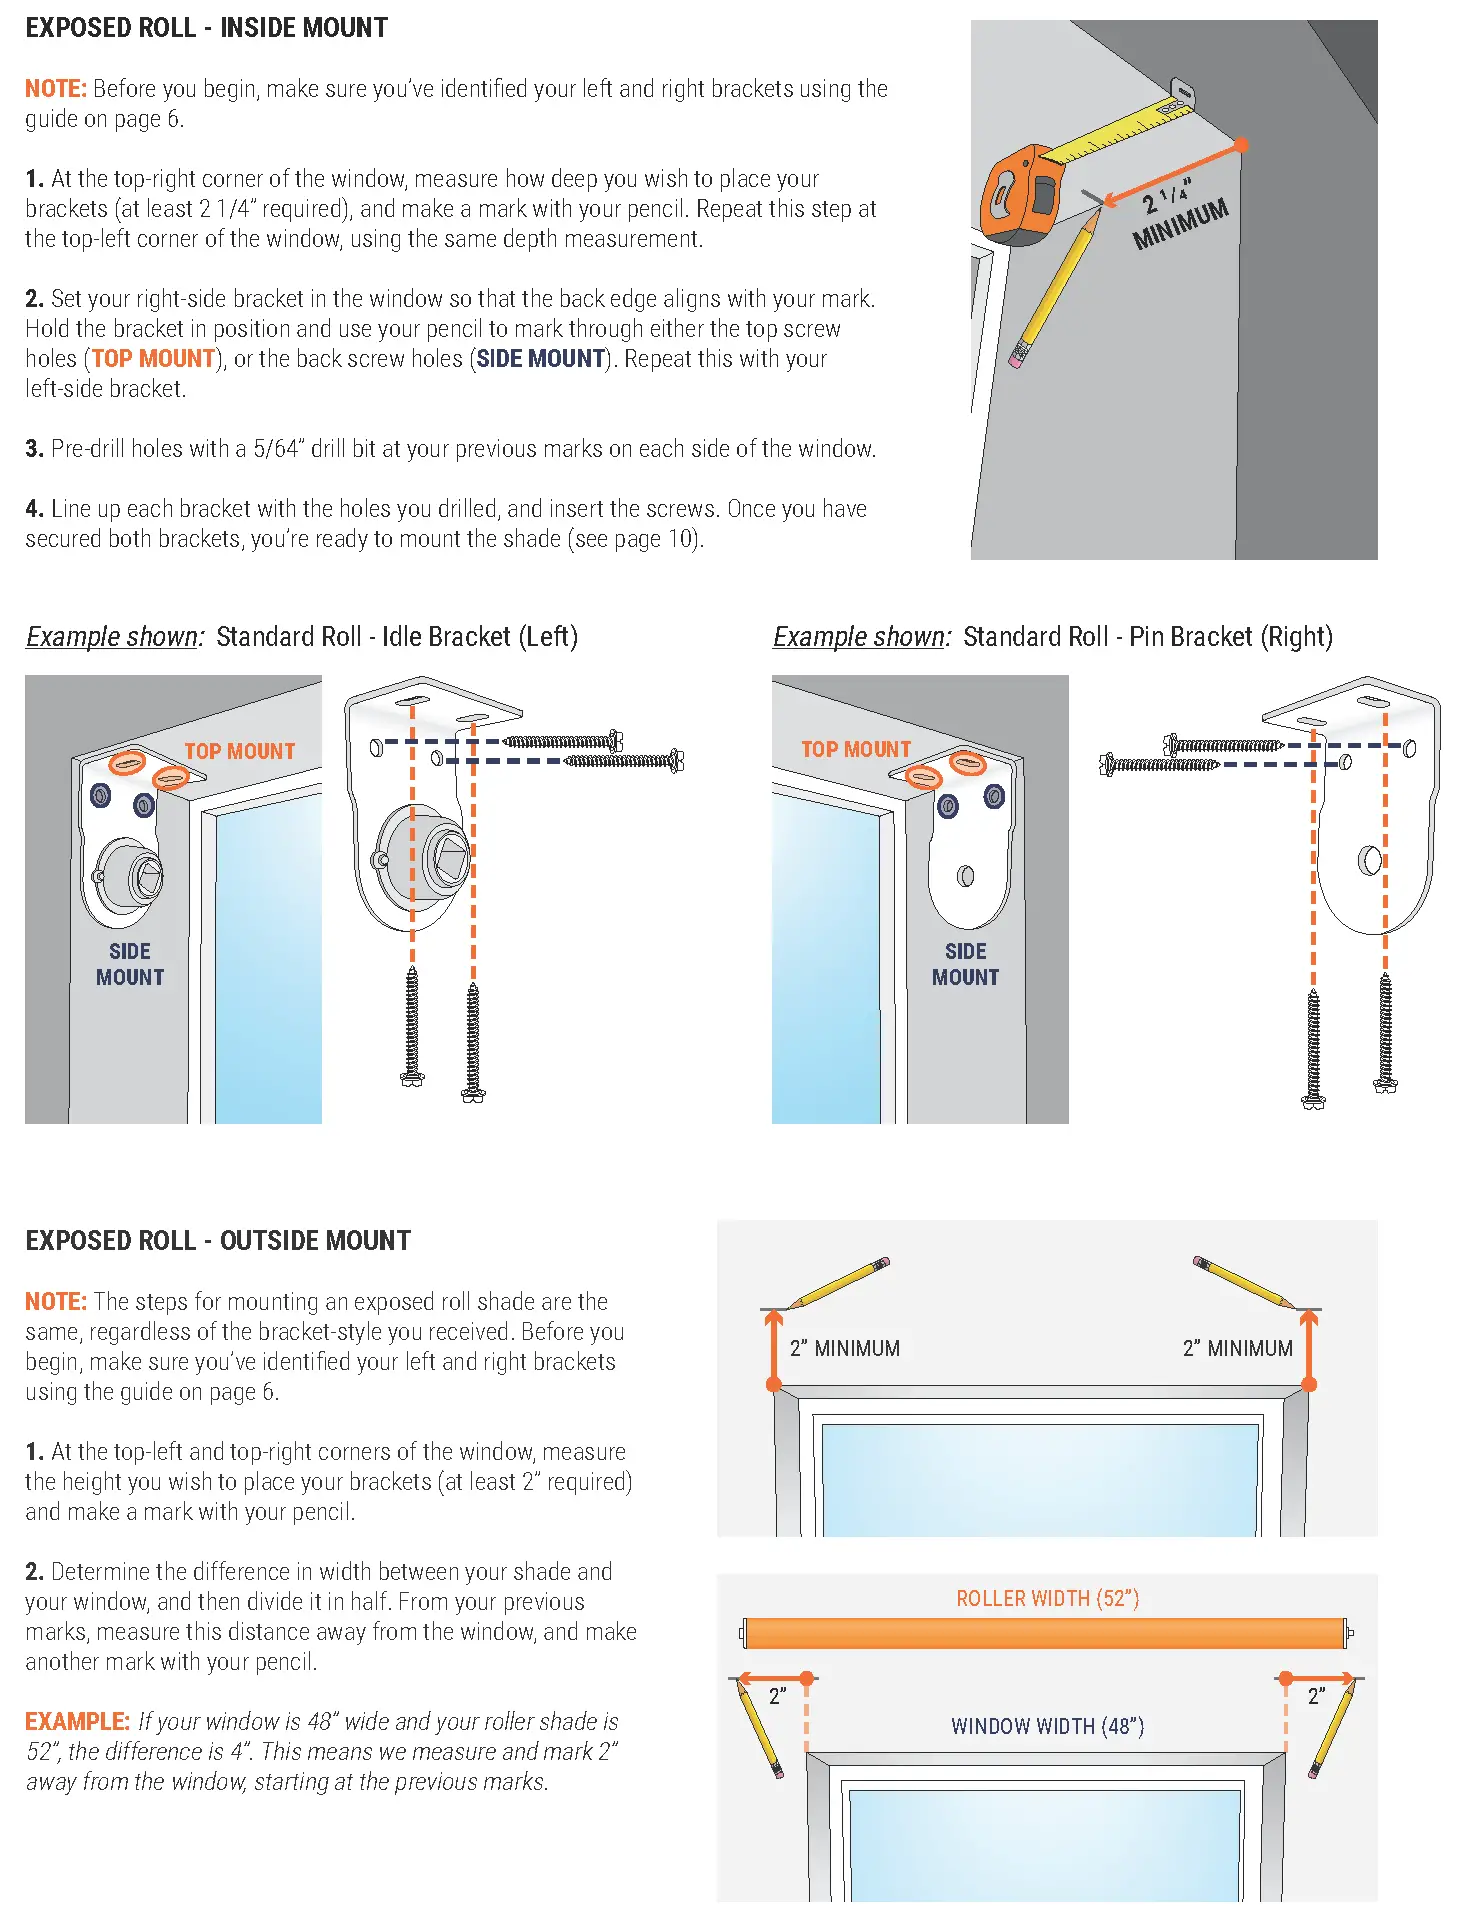
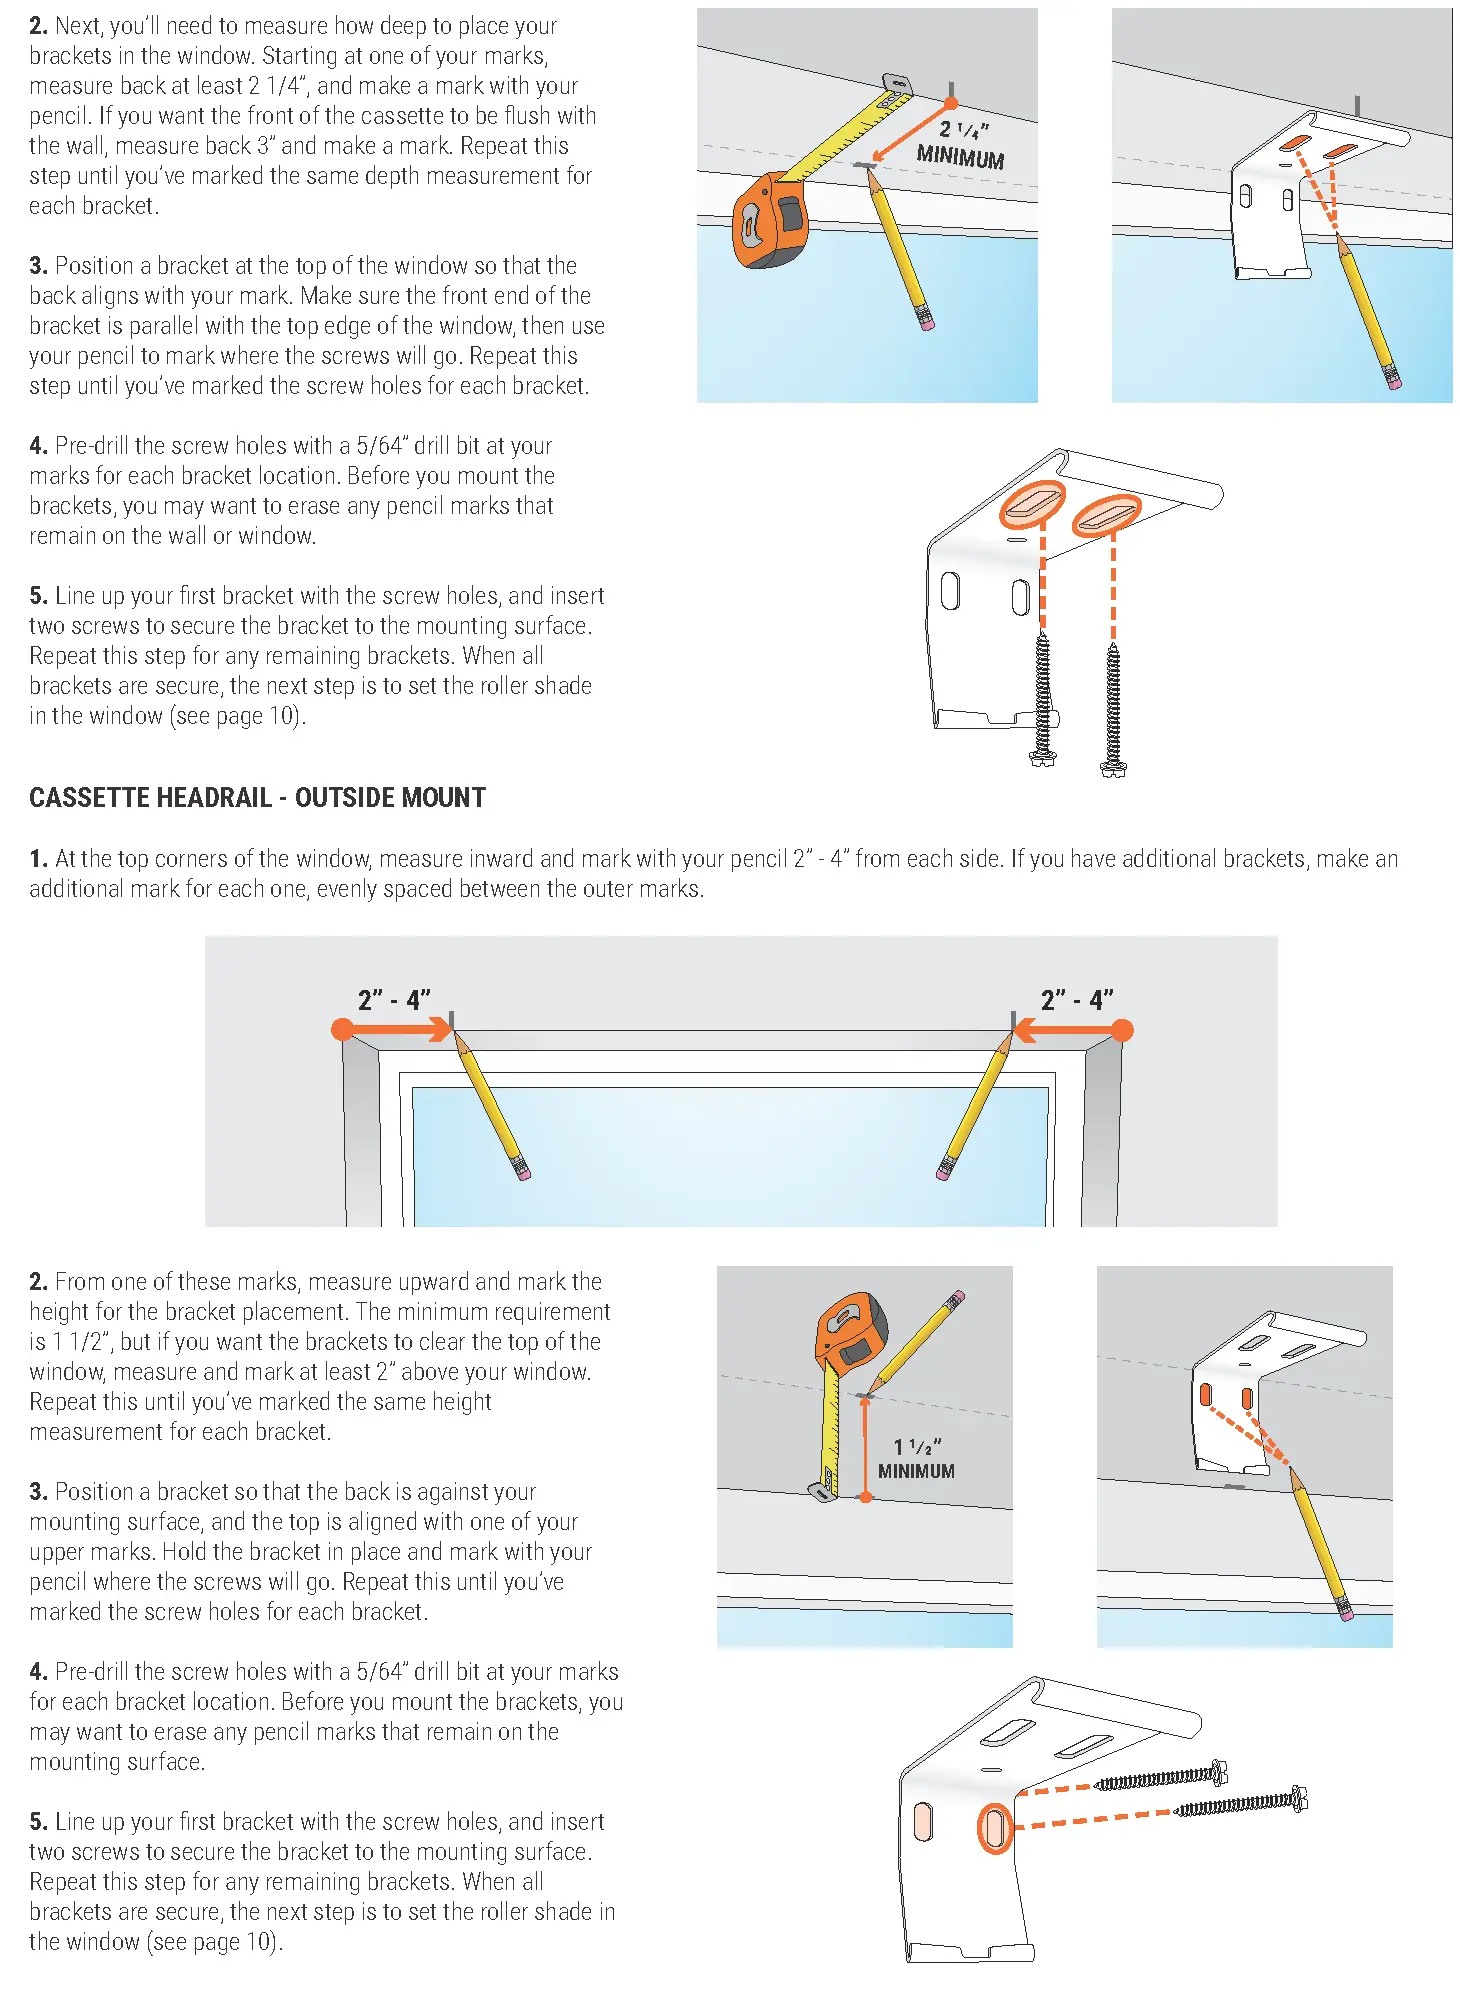
EXPOSED ROLL – INSIDE MOUNT

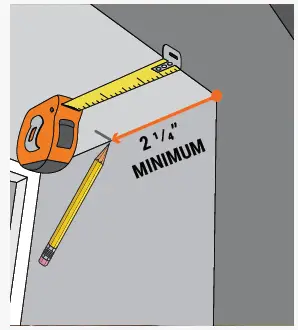
- At the top-right corner of the window, measure how deep you wish to place your brackets (at least 2 1/4″ required), and make a mark with your pencil. Repeat this step at the top-left corner of the window, using the same depth measurement.
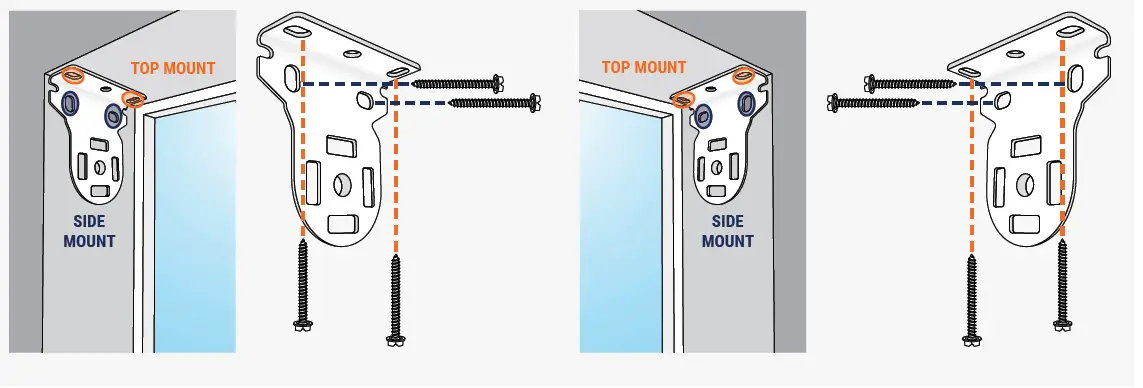
- Set your left-side bracket in the window so that the back edge aligns with your mark. Hold the bracket in position and use your pencil to mark through either the top screw holes (TOP MOUNT), or the back screw holes (SIDE MOUNT). Repeat this with your right-side bracket.
- Pre-drill holes with a 5/64″ drill bit at your previous marks on each side of the window.
- Line up each bracket with the holes you drilled, and insert the screws. Once you have secured both brackets, you’re ready to mount the shade (see page 4).

INSTALLATION GUIDE
ROLLER SHADES
LIFT SYSTEMS: CORDLESS LIFT | PREMIUM CORDLESS LIFT
The difficulty level of this installation is ranked at Level 2. You got this!
If you have questions or get stuck, call our Customer Care Team at 888-685-1735, or email [email protected]


Premium Cordless Lift – Inside and Outside Mount
NOTE: If your cassette is installed inside the window, remove it from the brackets before you proceed.
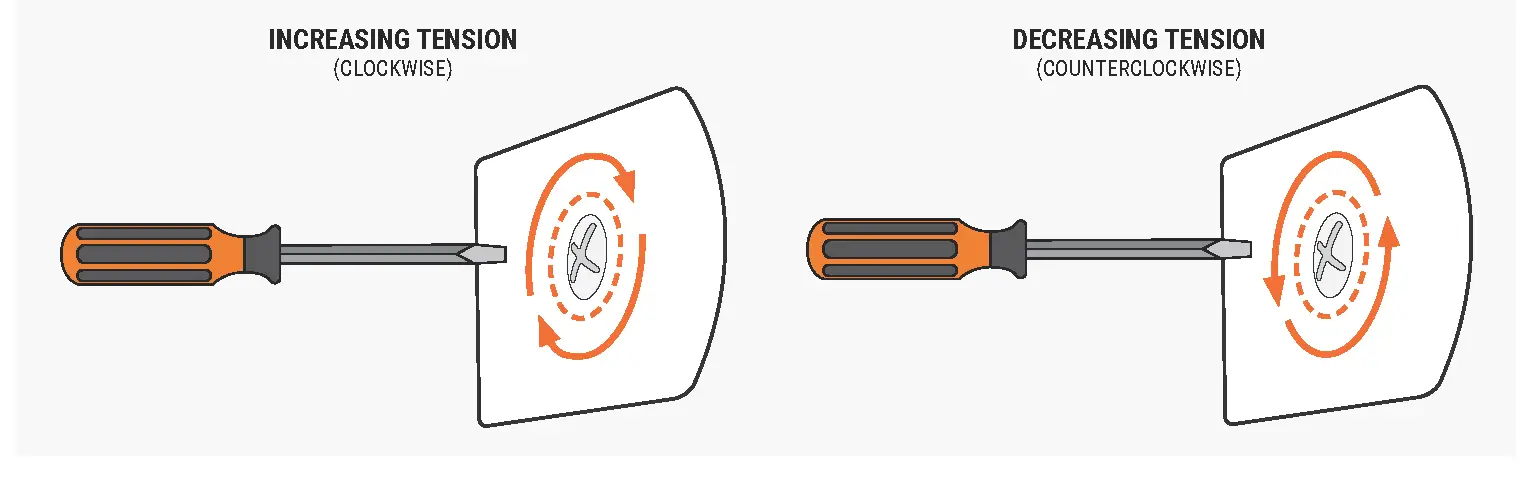
1. Remove the end cap from the left end of the cassette headrail. This will expose a plastic adjustment screw, which you can turn with a flathead
screwdriver to adjust the speed of your shade.
2. Turn the plastic adjustment screw clockwise to increase tension, or counter-clockwise to decrease tension. Use 1/4 and 1/2 turns until the
desired tension is reached.
ADJUSTING MISALIGNED FABRIC
TIP: If your shade doesn’t roll straight, first make sure the brackets are level. If it veers to the right, lower the shade completely and place a piece of tape or business card as close to the left edge of the roller as possible. This acts like a shim to align and straighten the shade. If it veers to the left, place the tape or card as close to the right edge as you can. Repeat this tip until the shade raises and lowers evenly.
CLEANING INSTRUCTIONS
NOTE: All fabrics are different and some may be easier to clean than others. We recommend cleaning your shades as often as once a month.
Here are some general guidelines on how to do so:
- For regular maintenance, use a duster or a vacuum with a brush attachment and run it over the front and back of the shade.
- To spot clean stains, use a damp rag with a very mild, gentle detergent or soap. Dab at the affected spots; do
NOT rub! Let the dampened area
air-dry and repeat as necessary.
WARRANTY AND REPLACEMENT
To learn more about our product warranties, please visit: https://www.selectblindscanada.ca/warranty
For replacement parts, and/or to file a warranty claim for a product that is damaged, defective, or missing parts, please call our Customer Care
Team at 888-685-1735, or email [email protected]
CHILD SAFETY WARNING
Corded window blinds and shades can be a strangulation risk or cause serious injury to young children and pets. When using corded window treatments, use the following tips to keep them safe:
WARNING
- Move furniture that children can climb on away from the window.
- NEVER place a crib by a window!
- Keep cords up and away from your child’s reach.
- Always use cord cleats with corded products.
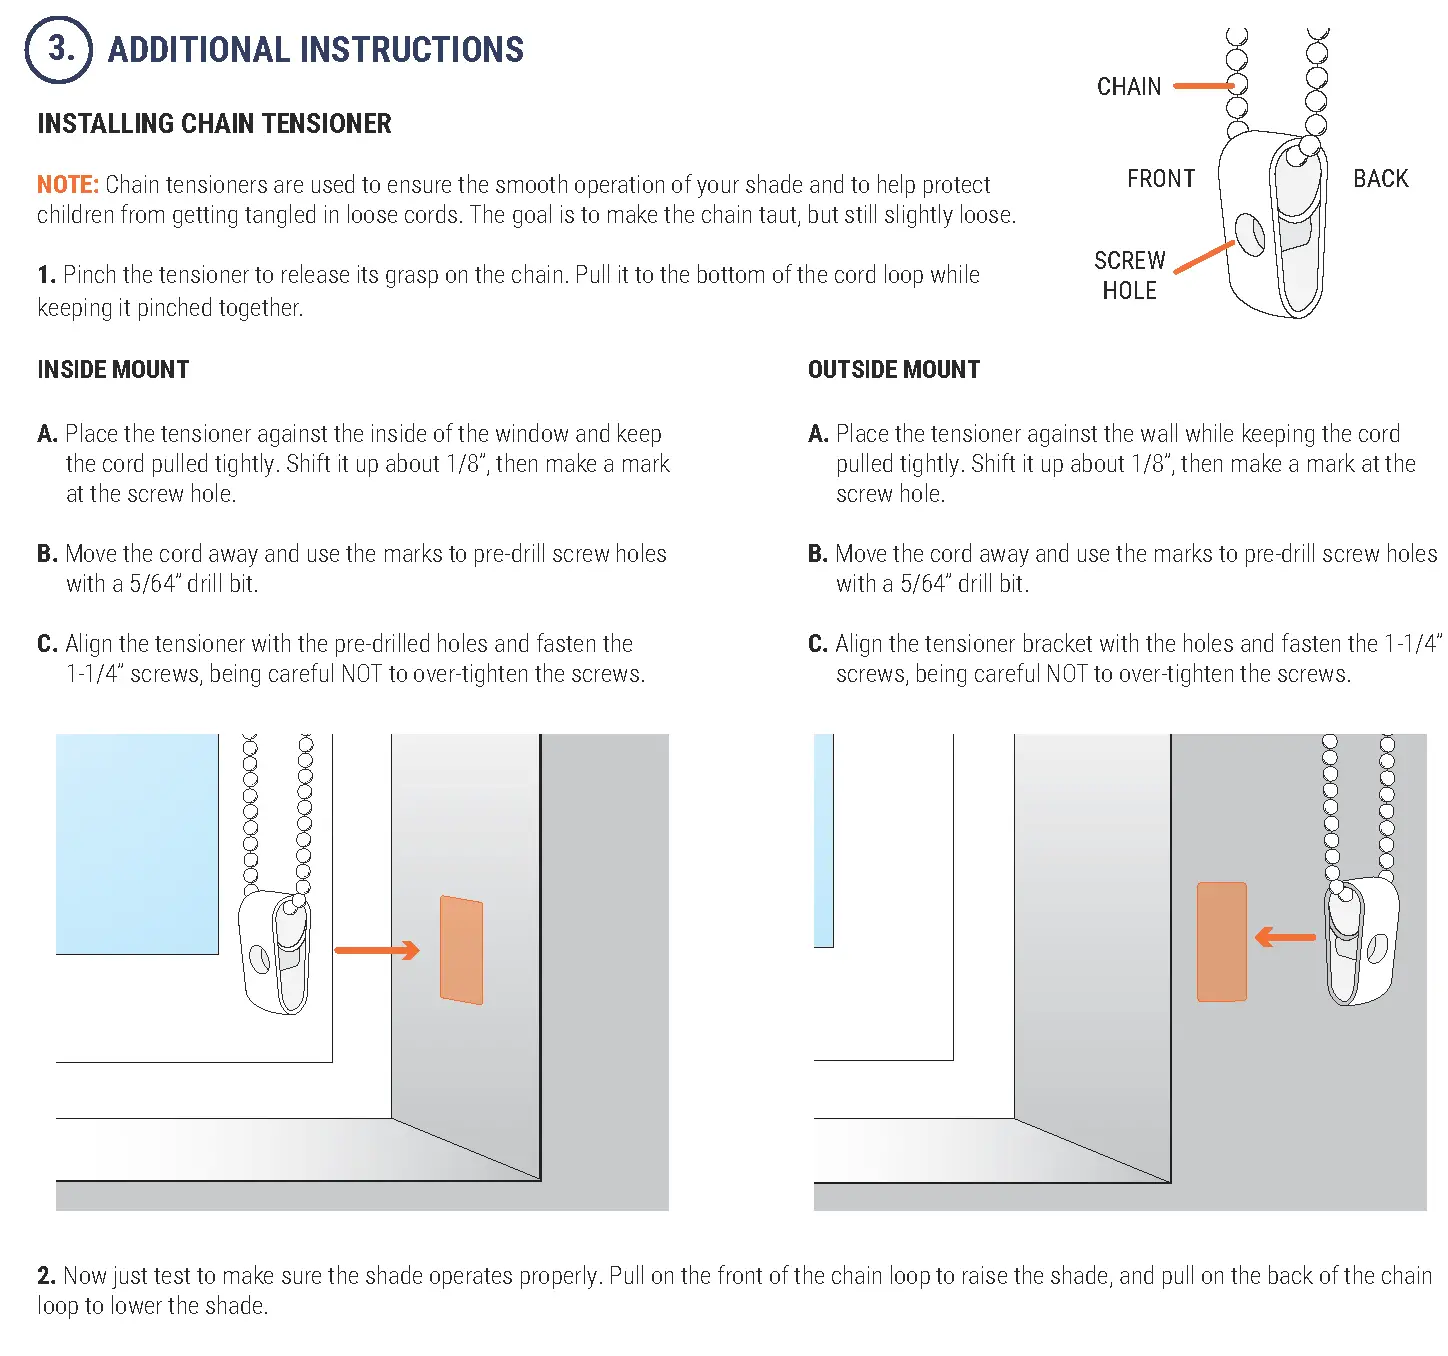
- Secure child-safe tensioners for continuous cord loop chains to the wall or window encasement.


