
LUMASCAPE LS9404LED Vedita Ceiling Cavity Mount Instruction
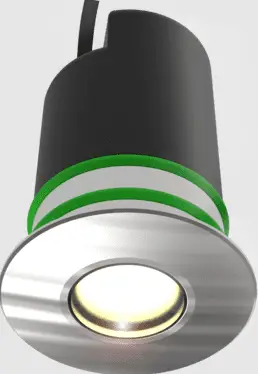
LS9404LED: Vedita Ceiling/Cavity Mount
Warranty void if not installed as per installation instructions
Note: Fixture uses intelligent driver. Always leave on for 20 seconds unless programing.
DOWNLIGHT
MODEL: LS9404LED Downlight
INSTRUCTIONS COVER: 12 V AC Megnetic Transformer 24 V DC Ripple Free Power Supply
INSTALLATION INSTRUCTIONS
DANGER ISOLATE LUMINAIRE FROM POWER
Failure to isolate power supply before installation or maintenance may result in fire, serious injury, electricshock, death and may damage the luminaire.
WARNING
It is strongly recommended to use Lu-mascape power supply or transformer Use of electronic transformer will per-manently damage luminaire All connections must be kept dry; failure to do so may result in product reliability issues Opening luminaire will void warranty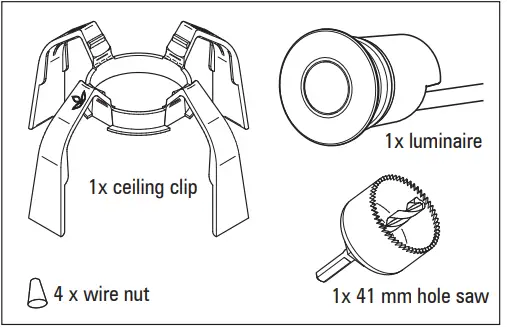
- Use a Lumascape supplied 24 V DC ripple free power supply or transformer, locate centrally in relation to the luminaires.
NOTE: Generally 24 V DC ripple free power supplies should be installed in a well ventilated fully under cover environment.
NOTE: DC Power supplies are more efficient than AC transformers. Under no circumstances can an ‘electronic’ transformer be used, this may damage the product. - Mark actual locations of luminaires to be installed. Using the charts overleaf calculate the cable size on each run including all luminaires to be connected to a run of cable. Use the same chart to select power supply.
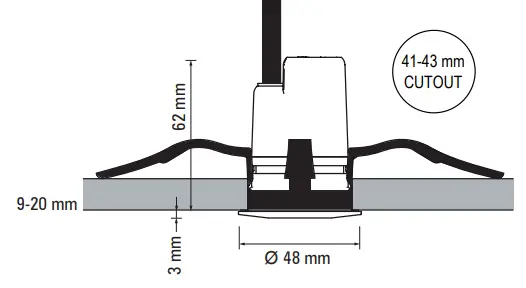
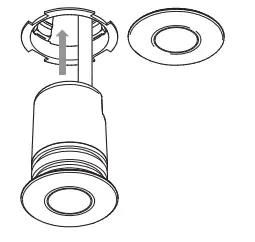
- Mark locations of luminaires and using 41 mm holesaw supplied, drill hole in ceiling or cavity wall.

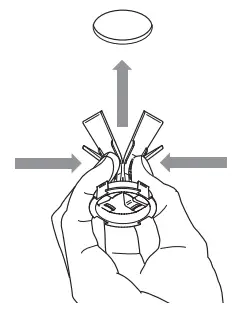
- Fold legs up on the ceiling clip and insert into hole and feed LS9404LED cable through mounting clip.

- Lay cable from power supply/transformer for each cable run. NOTE: If dimming is required then four conductors will be required. For non-dimmed (usual installation) only two conductors are required. Dimming circuit can use 1 mm cable.
- Connect the luminaire to the supply cable using the wire nuts supplied. Any joint must be dry and water tight or warranty will be void.
NOTE: The orange and grey wires are for optional PwM digital dimming using 0-10 V. Lumascape accessory LS6125 is required.
If dimming is not required, do not connect the orange and grey wires. In all cases they are to be sealed and kept dry. Failure to do so will result in the T5 smart driver dimming the lumi-naire due to a voltage differential between the two conductors. - Switch on and check each luminaire is operating.
- Press LS9404LED fully into mounting clip.

Wiring Diagram
 LS940LED Series
Power Supply/ Transformer & Maximum Cable Runs
| 24 V DC Power Supply | 12 V AC Magnetic Transformer | |||||||||||
| Wattage (Part Number) | 100 W (LS100DC) | 100 VA (LS100TX) | 50 VA (LS50TX) | 22 VA (LS22TX) | ||||||||
| Lumascape Cable | LS604 | LS604-6 | LS604-10 | LS604 | LS604-6 | LS604-10 | LS604 | LS604-6 | LS604-10 | LS604 | LS604-6 | LS604-10 |
| Cable size | 3.3 mm2 | 6 mm2 | 10 mm2 | 3.3 mm2 | 6 mm2 | 10 mm2 | 3.3 mm2 | 6 mm2 | 10 mm2 | 3.3 mm2 | 6 mm2 | 10 mm2 |
| No. of luminaires 100 metre run | 26 | • | • | 6 | 10 | 10 | 4 | 4 | 4 | 2 | 3 | 3 |
| No. of luminaires 75 metre run | 26 | • | • | 8 | 10 | 12 | 5 | 5 | 8 | 3 | 3 | 4 |
| No. of luminaires 50 metre run | 26 | • | • | 10 | 12 | 14 | 6 | 8 | 8 | 3 | 4 | 4 |
| No. of luminaires 25 metre run | 26 | • | • | 14 | 14 | 14 | 8 | 8 | 8 | 4 | 4 | 4 |
means the maximum number of luminaires can be accommodated on smaller cables.
NOTE: 24 V DC power supplies are far more efficient than AC transformers.
SAFETY INSTRUCTIONS
WARNING – To reduce the risk of FIRE or INJURY:
- Luminaires and transformers to be installed by licensed electrical contractors.
- Luminaires to be used for intended purpose only.
- Do not operate the luminaires with a missing or damaged parts.
- Use only genuine Lumascape parts to replace damaged or missing components.
- Refer to instructions for installation and operating requirements.
- Ensure installation complies with local regulations
Voltage insulation test (megger) will permanently damage product and will void warranty. SAVE THESE INSTRUCTIONS.
lumascape.com
18 Brandl Street, Eight Mile Plains, QLD 4113 Australia


