
BEOK BOT-R315 RF GasBolier Programmable Thermostat Instruction
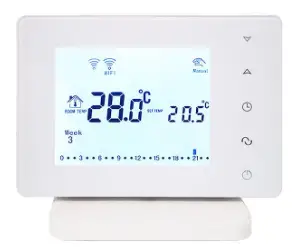
RF GasBolier Programmable Thermostat
Specification
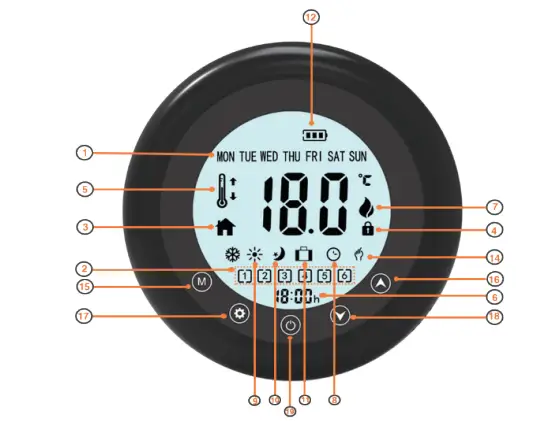
- LCD Size: Diameter 55mm
- Power Supply: R315 3V DC (2 x AAA 1.5 V)
RCV315 22V ac, 50/60Hz - Current Load: 10A (Resistive)
Ambient Temp. Range: 0~99.5 ℃ - Setpoint Range: 5~35 ℃
- Accuracy/Tolerance : +/ -0.5℃
- Timing Tolerance : <1%
- Thermistor : 10KΩ@25 ℃
- Storage Conditions Temp.: -10~60 ℃
- Humidity:< 90% r.h.
- Battery Life: 6 months
- RF Module: Single Way Module
- Frequency: 433 Hz(defaulted
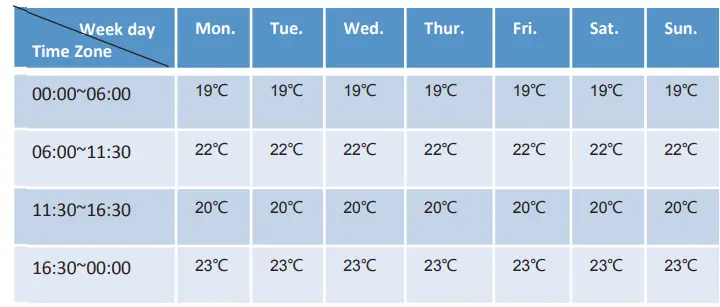
 Week day: from Monday to Sunday
- Programmable Time Zone
- Room Temperature
- Buttons Lock
- Setpoint,or Floor Temperature(It displays when external sensor activated)
- Time of day(00:00..23:59)
- Heating is on
- Automatic Programmable Mode: 7 days, 6 time zones
- Comfort Mode
- Energy Saving Mode
- Holiday Mode
- Batteries Comsumption Indicator
- Manual Mode(overriden)
 Week day: from Monday to Sunday
15 ![]() Working Modes selecting .
Working Modes selecting .
- Press
 shortly to select Comfort Mode, Energy Saving Mod, Holiday Mode, Automatic Mode, and Manual Mode(Overridden Mode)
 - Synchronizing Clock
Press button to switch off thermostat, and then press and hold M b utton fo r 3 s ecs, a djust c lock fr om M inute, Second and Weekday via
  .
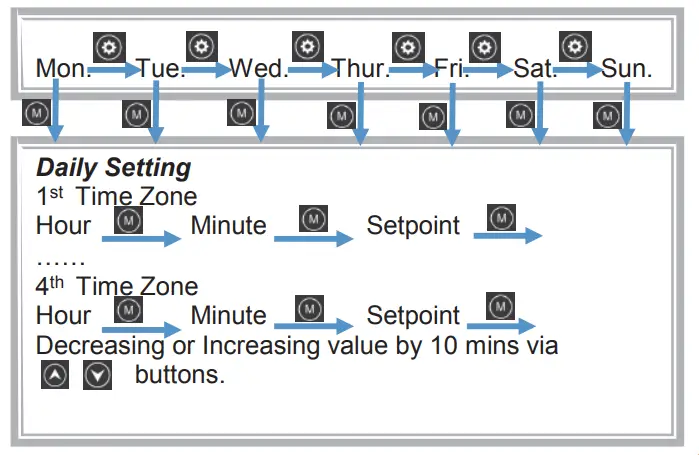
. - There are 4 Time Zones in total, user is able to customize Time Zones from 1 to 4 according to their demand. Press and hold
 button for 3 seconds , it will display 4 and Monday, adjust the numbers(1 to 4) of Time Zones via . Press shortly to enter into Automatic Mode Settings of each Time Period and relative Setpoint. Sequence is from Hour (1 st time zone), Minute(1st time zone) and Setpoint(1 st time zone) to Hour (4 thtime zone), Minute(4th time zone) and Setpoint(4 th time zone).
After Settings of Monday is done, press shortly and switchover from Tuesday to Sunday, follow the same setting steps as above.
Ex-factory Setting
- 16.
 Temperature up, or other parameters setting In case of internal and external sensors are selected,press button for 3 sec, Setpoint is displaying external sensor’s temperature; after 3 sec, it returns to setpoint.
 - 17. Menu
- 18.
 Temperature down, or other parameters setting
 - 19 On/off button
Parameters Setting
Press ![]() button to switch off the and then press and hold
button to switch off the and then press and hold ![]() button for 3 second.
button for 3 second.
- D1 Diff. Temp of Switch On/ Switch off :
- from 0.2 ℃ ~ 2.0℃ , select by buttons .
- D2 Temperature Calibrition:
- -4 ℃ to + 4 ℃, select by buttons .
- D3 Frost Protection:
- 5 ℃ to 15 ℃, select by buttons
Settings
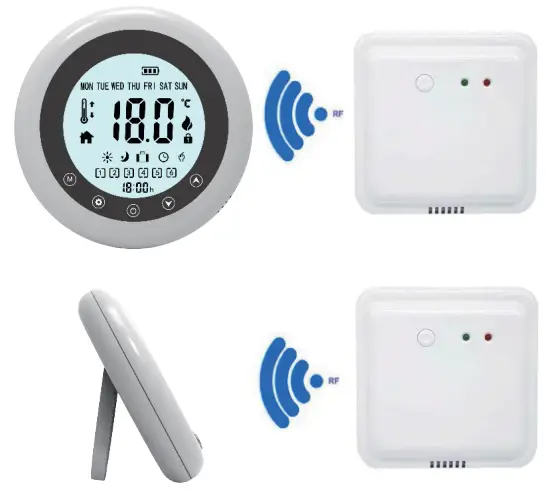
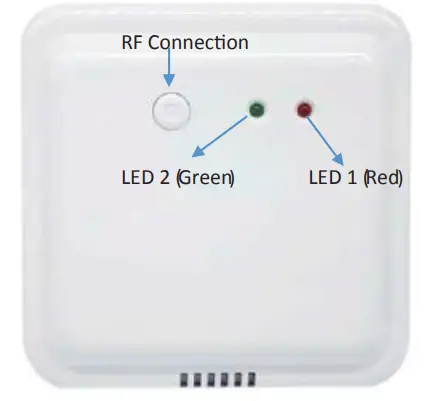
RF IP Learning: Transmitter and Receiver is well paired ex-factory. If newlearningis required. Pleasefollowthe stepsas below:
- Pressand holdthe RF Connectionbuttonon receiveruntilLED 2(referto belowphoto) is flashingin greenrapidly.
- Switch off the thermostat, and press and hold the thermostat’sON / OFF button for 3 secondsuntil the menu setting appears.
- Switchto the d6 settingsvia ON/OFFbutton , andthen press on thermostat to confirm the connection. Switch on the thermostat, and the green LED 2 (refer to below photo) on receiverwillturnoff completely.

Child Lock/Unlock
- Pushand hold and buttons simultaneously for 5 sec to LOCK all buttons
- Pushand hold and buttons simultaneously for 5sec to UNLOCK all buttons
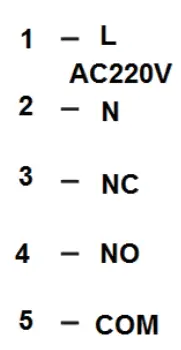
Wiring Diagram
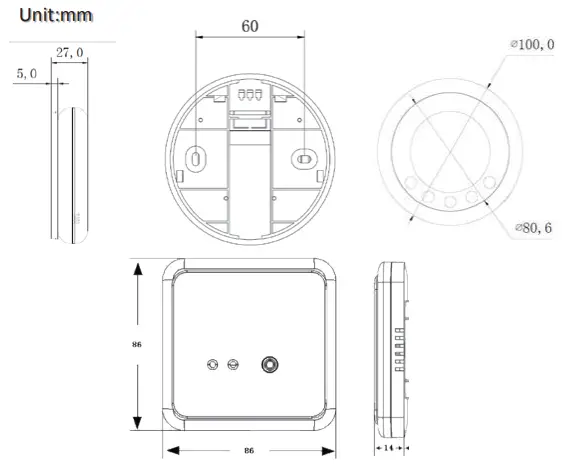
Dimension
Replacement of Batteries
If the battery ![]() symbol appears, the batteries are almost exhausted and must be replaced
symbol appears, the batteries are almost exhausted and must be replaced
Warranty
We offer warranty of 12 month, from the sales date. If it is not the quality problems, or beyond the warranty period, we will charge for the aft-ersales services


