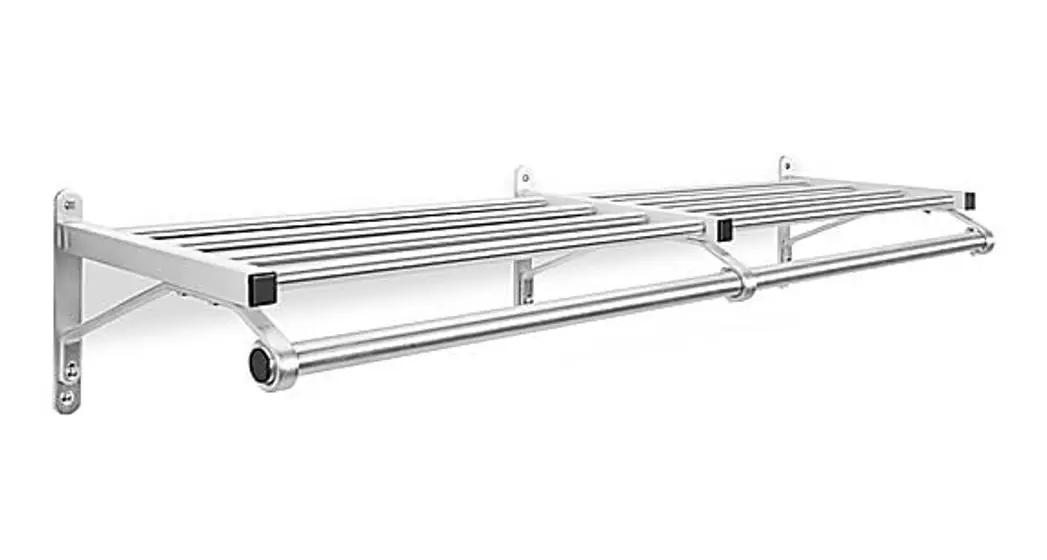
![]() H-2515 WALL MOUNTED COAT RACK
H-2515 WALL MOUNTED COAT RACK
1-800-295-5510
ulink.com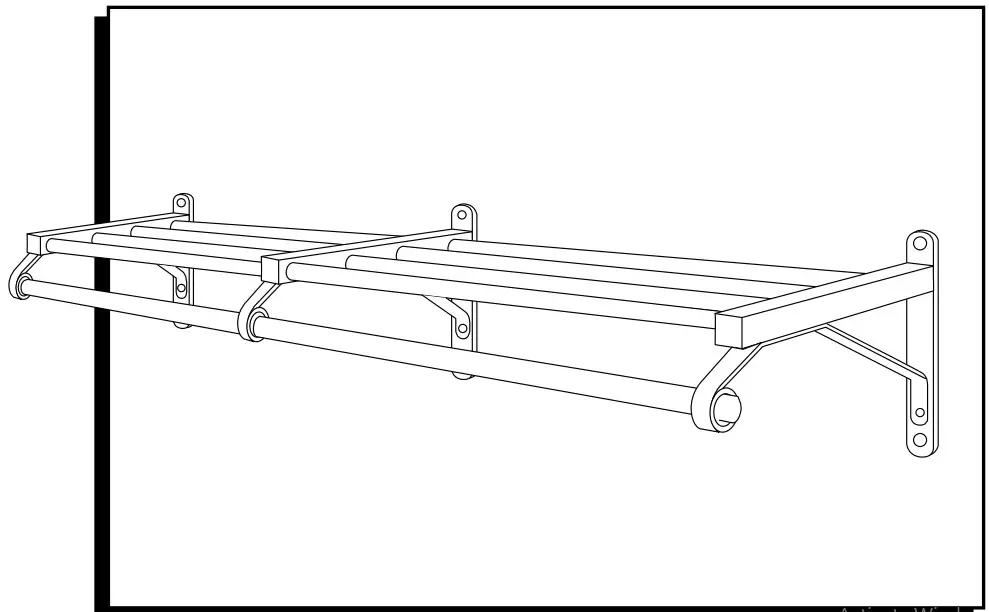
TOOL NEEDED

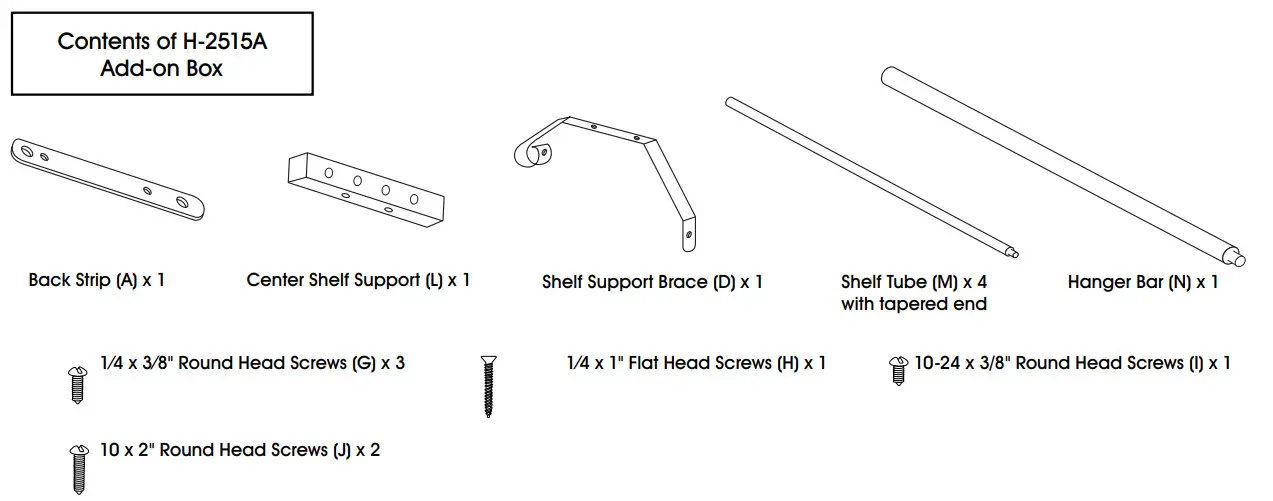
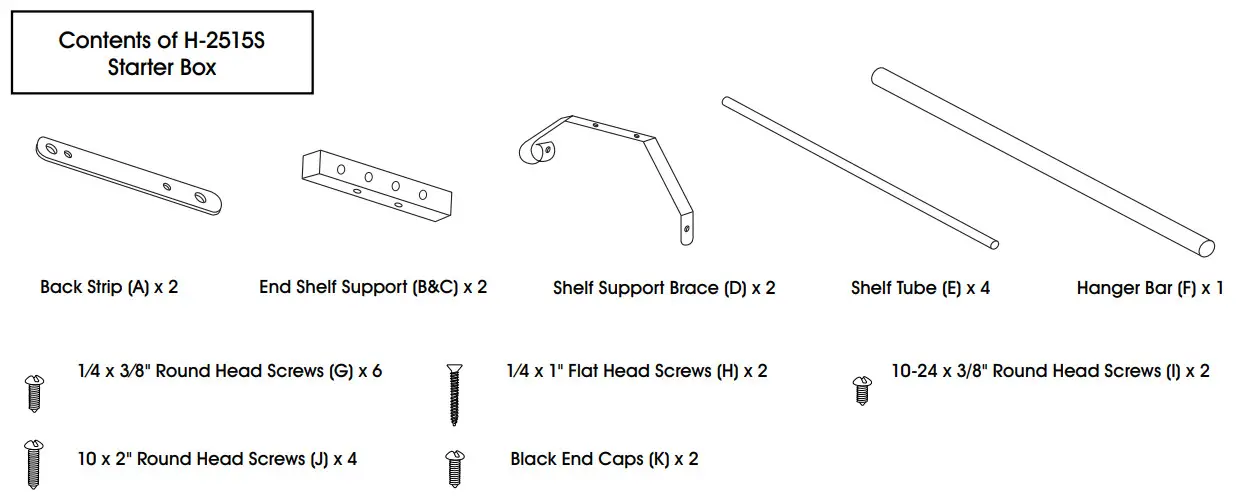
PARTS
ASSEMBLY
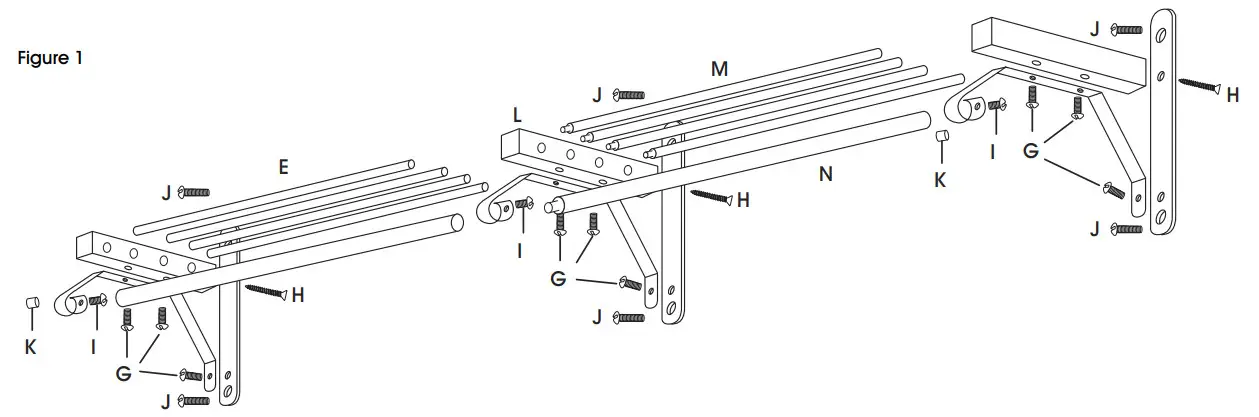
- Open both H-25158 and H-2515A boxes and arrange parts on a flat surface as shown in Figure 1.

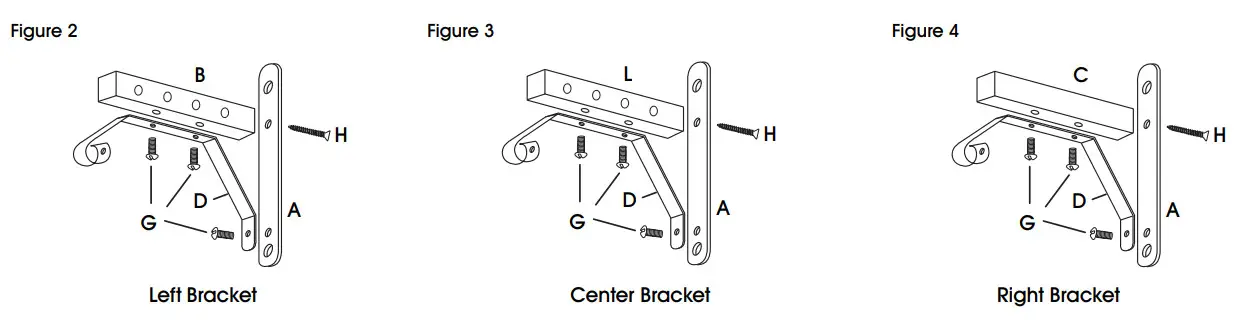
- Assemble left, center, and right brackets as shown in Figures 2-4. Tighten H screws first and then G screws.
- Mount the left Bracket to the wall using two J screws making sure that the large holes face to the right and that the bracket is level.
- Insert all E shelf tubes into the holes in the left
- Feed the other end of the E-shelf tubes through the holes in the center bracket.
- Position the center bracket so that it is as far right as possible while still supporting the E-shelf tubes. Mount the center bracket to the wall using two J screws making sure the bracket is level.
- Insert the tapered ends of M shelf tubes through the holes in the center bracket and into the ends of the E shelf tubes.
NOTE: The large 3/4″ diameter holes face to the right on the left end shelf support and to the left on the right end shelf support. - Insert the ends of the M shelf tubes into the holes on the right bracket.
- Mount the right bracket to the wall using two J crews making sure that the bracket is level.
- Feed F hanger bar through left and center brackets.
- Feed N hanger bar through the right and center brackets making sure the tapered end fits into the end of the F hanger bar.
- Center the hanger bar between brackets and tighten into place with the three I screws.
- Press one K black end cap into each end of the hanger bar.
![]()
1-800-295-5510
uline.com
0621 IH-2515


