HYPERX Pulsefire FPS Pro RGB Gaming Mouse
What’s included
- HyperX Pulsefire FPS Pro™ RGB Gaming Mouse

Mouse Overview
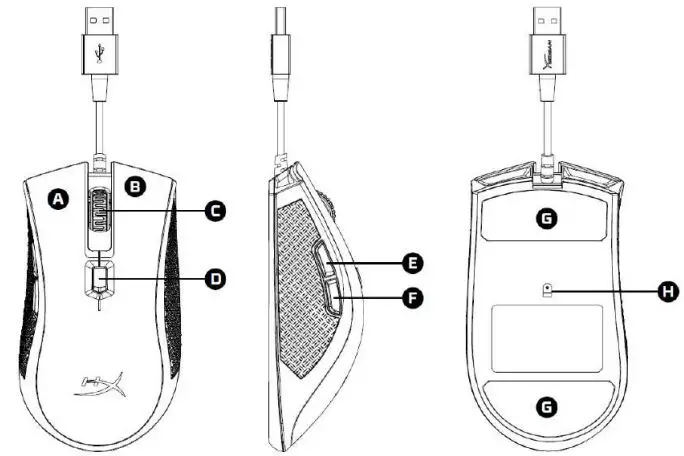
- A- Left click button
- B- Right click button
- C- Mouse wheel
- D- DPI button
- E- Forward click button
- F- Back click button
- G- Mouse skates
- H- Optical gaming sensor
Installation
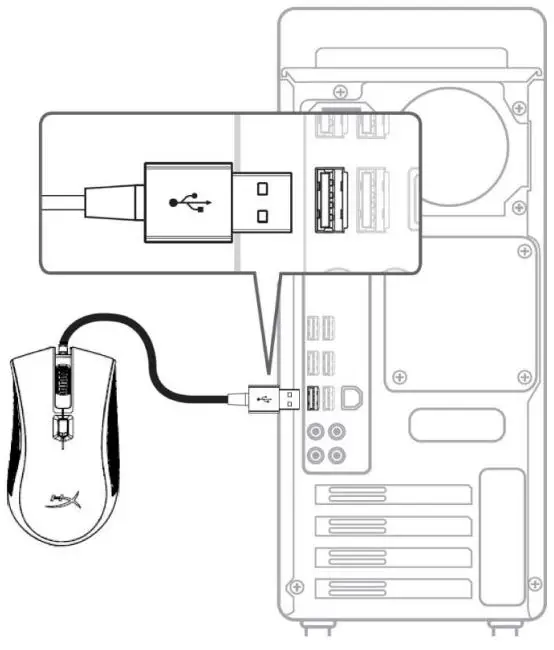
- Connect the USB connector to the computer.
Function Keys
| Function Keys | Secondary Feature |
| DPI button | Change between DPI presets. Default values are: – 800 DPI (blue). – 1600 DPI (yellow). – 3200 DPI (green). |
| DPI button + Mouse wheel click | Switch between the default on board memory profiles: – Profile 1: Color cycle – Profile 2: Solid red – Profile 3: LED off |
| DPI button + Back click button | Decrease LED brightness. There are 4 brightness levels: off, low, medium and high. |
| DPI button + Forward click button | Increase LED brightness. There are 4 brightness levels: off, low, medium and high. |
HyperX NGenuity Software
To customize lighting, DPI presets and macro settings, download the HyperX NGenuity software here: hyperxgaming.com/ngenuity.
Refer to the HyperX NGenuity Gaming Software manual for more information on functionalities.
Mouse factory reset
If you are experiencing any issue with the mouse you can perform a factory reset. You will lose your custom LED profile and DPI presets by doing this.
| Function Keys | Secondary Feature |
| DPI button + Mouse wheel click for 5 seconds | Factory reset of the mouse and all on board memory settings. |


