![]()
Electric Single Motor Standing Desk
Assembly Instructions – Please keep for future reference
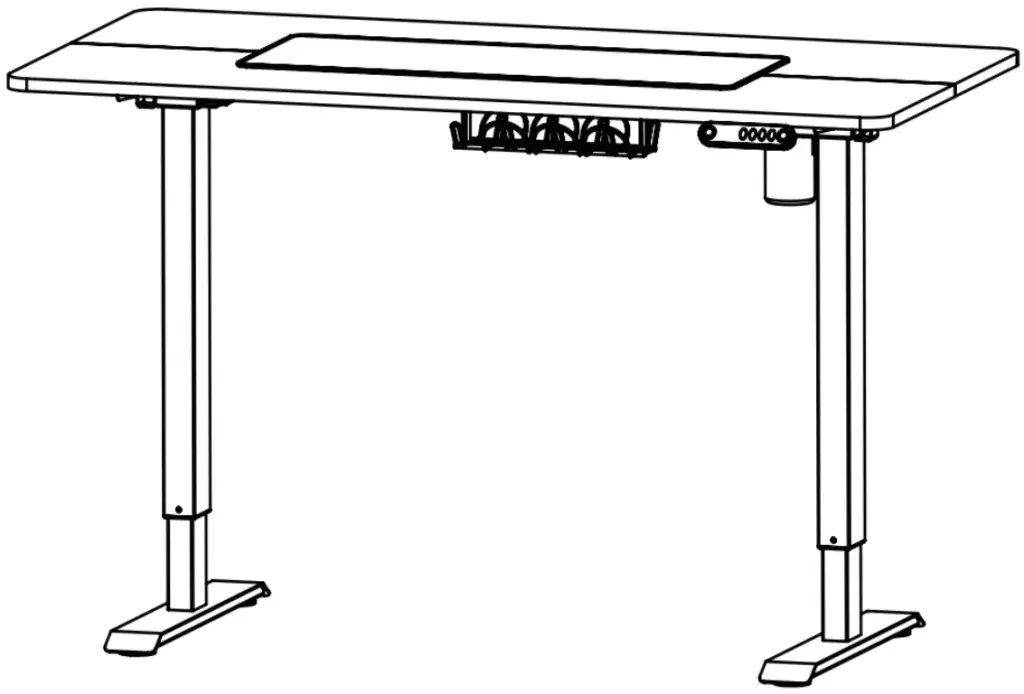
Dimensions
Length -55.12inch
Width -27.56inch
Height -27-45inch
 Saftey and CareAdvice
 Saftey and CareAdvice
Important — Please read these instructions fully before starting assembly
Check that if you have all the components and tools listed on the front cover and pages 3 -4. Remove all fittings from the plastic bags and separate them into their groups. Keep children and animals away while you are installing, small parts may result in choking if swallow. Make sure you have enough space to put the parts out on the ground before getting starting.
Do not stand or put weight on the product, this could cause damage. Assemble the item as close to its final position (in the same room) as possible. Do not place furniture directly in front of radiators, fires, or any other source of heat.
Parts of the assembly will be easier with 2 people.Assemble on a soft level surface to avoid damaging the unit or your floor.
We do not recommend using a power drill or drivers to insert screws, as it may damage the unit Only use the hand screwdrivers we provided. Dispose of all packaging carefully and responsibly.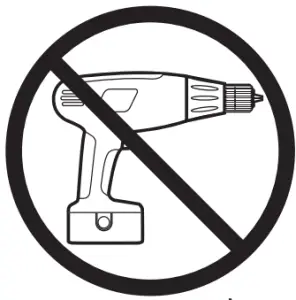 General care and maintenance
Only deaning with a damp cloth and mild detergent, do not use bleach or abrasive cleaners.
Please check if there is any screws loosed in the unit from time to time.
This product should not be discarded with household waste. Take it to the local authority waste disposal center if you want to dump it.
Cleaning and care of high gloss surfaces
you may use the dry cloth to dean the dust to keep it clean. Clean marks with a damp cloth. Do not allow spillages to stay on the surface for long. To remove stubborn stains, wipe over with a damp cloth and wash up liquid.
Do not use abrasive cleaners.
Do not clean it with a cleaner with the following chemicals: Acetone, (e.g nail varnish remover). Ammonia (e.g.bleach).orSodium hydroxide (e.g. Caustic soda,drain and oven cleaners).
In the event of accidental contact with aggressive cleaners, rinse thoroughly with water.
To remove stains and small scratches use car polish. Use placemats to protect the surface from moisture and heat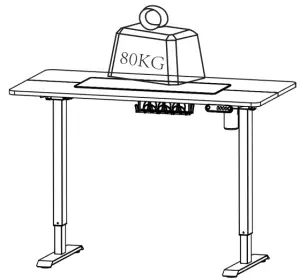 Components
Please check you have all the pieces listed below
| Part List | ||||
| Reference | Description | Part | Quantity | Material |
| 1 | Desktop-a | 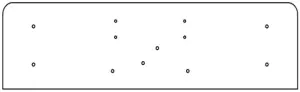 | 1 | Medium Density Fiberboard |
| 2 | Desktop-b |  | 1 | Medium Density Fiberboard |
| 3 | Left Leg |  | 1 | Steel |
| 4 | Right Leg | 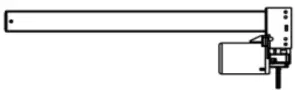 | 1 | Steel |
| 5 | Support Beam | 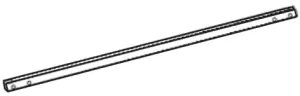 | 2 | Steel |
| 6 | Side Bracket | 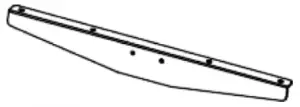 | 2 | Steel |
| 7 | Base | 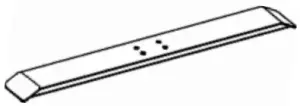 | 2 | Steel |
| 8 | Sync Rod | 1 | Aluminum | |
| power Cable x1 pc | |
| Wire Clips x 8 pcs | |
| 2.5 mm Allen key x 1pc | |
| Screws M6 x 30 x 8 pcs | |
| Wire Basket x 1 pc | |
| Spare Parts x 1 pc | |
| Controller x 1pc | |
| 4mm Allen Key x 1 pc | |
| Screws M6x 12 x 28 pcs | |
| Wooden x 2 pcs | |
| Hook x2 pcs | |
| Leaveings Studs x 4 pcs | |
| 3mm Allen Key x 1 pc | |
| Screws M4 x 16 x 4pcs | |
| AC Adapter x 1 pc | |
| Mouse-pad x 1 pc |
Assembly Instructions
Step 1
After connecting the two pieces of desktop with Wooden Rod, make sure that the gap between the two pieces of the desktop is not too large. 

Step 2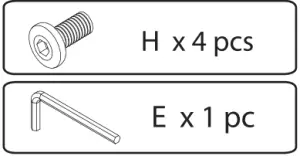
Note the orientation of the holes in the support beam 5.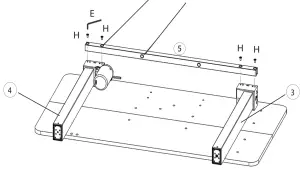
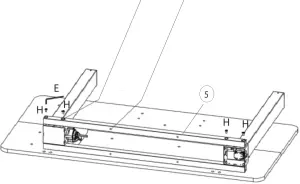
Step 3
Note the orientation of the holes in the support beam 5.
Step 4

The Leg and Side Bracket share the same holes with N (Hook). You can install it in any of the four holes as required. 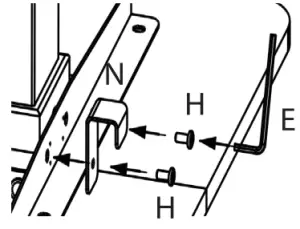
 Step 5

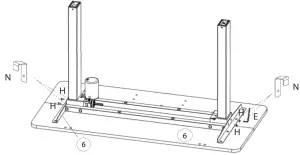
Step 6
First use J to attach the 7, to the Legs. Then place C (Leveling Studs) on the Base and tighten it by hand. 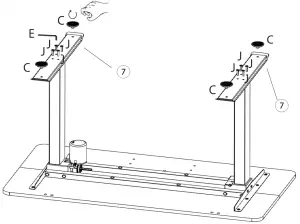
Step 7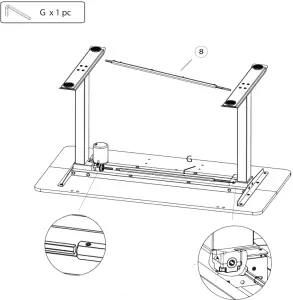
Secondly, you need to rotate the outer of the Sync Rod to get the Angle right and then connect it to the Right Leg.
Firstly, you need to install the Sync Rod on the Left Leg.
Last but not least, after Sync Rod is installed, tighten the 2 screws on both ends of the Sync Rod with G.
Step 8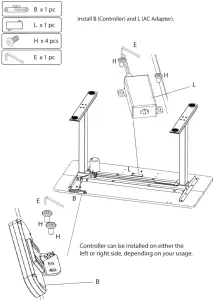
Step 9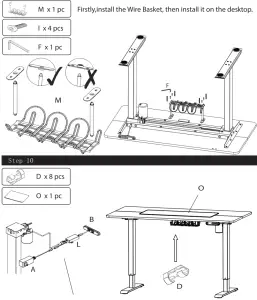
Firstly, turn the table over and connect the hand controller, control box, and power.
Then use D (Wire Clips) to organize the wires. And use the mouse pad according to your needs.
Display Instructions
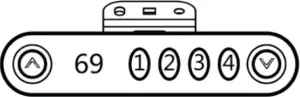
| RESET Setting | Method 1: Press and hold ” A “and” V “buttons on the handset at the same time for seconds until you hear the sound ‘beep’. Release the buttons. The desk will go automatically until it shows 69, and the reset is successful. Method 2: Unplug the power supply for 20s, then plug the power supply back in and the desk will reset automatically. After it shows 69, the reset is done. |
| Height Adjustment | Up: Press Up “A ” Down Press Down” V” |
| Switch Display | Press and hold” A “and Button 4 to switch cm to an inch or inch to cm. |
| Memory Height | Press and hold any of the memory buttons (1,2,3 or 4) until you hear the sound ‘beep: Release the button, and this position height will be stored in memory. When the working height of memory needs to be used, press the memory position button and the desk will automatically adjust to the memory height. Note: This standing desk has 4 different height memories. The memory positions stored are still valid after power off. You can use the up and down buttons to adjust the standing desk to the height you need to work. |
| Current protection | When the desktop is on the rise, encounters reverse resistance, the desk will rebound and stop running. |
| Automatic reset | As long as the power is oft the desk will automatically reset after reconnect-ed. Make sure the height of any item is under 69CM in case of bumps and scratches. |
Troubleshooting Guide:
If your standing desk does not work properly, you may need to reset it. If any error codes appear, you need to reset it. Unplug the power supply for the 20s, then plug the power supply back in and the desk will reset automatically. After it shows 69, the reset is done. If it still does not work after the reset, please contact us for more help.
Maintenance and Consideration:
1. During daily maintenance, use a clean soft cloth to remove surface dust. Do not use a wet cloth or hard material to wipe the surface of the table.
2. Avoid contacting the surface with acid-based chemicals.
3. For slight scratches, gently wipe with a soft cloth, you can smooth out scratches. Avoid attaching tape directly to the outer surface of the metal feet to prevent paint from peeling.


