![]() ONE TOUCH
ONE TOUCH
Changes everything
Ulra Smart
Meter and Electronic Logbook In One Quick
Quick
Reference Guide
See inside for instructions on using OneTouch ® UltraSmart .
Important: Before testing, read detailed instructions in your OneTouch ® UltraSmart ® Owner’s Booklet.
Coding the Meter
Code the meter before using it for the first time and every time you change to another vial of OneTouch ® Ultra ® Test Strips.
CAUTION: Matching the code on the meter and the code on the test strip vial is essential to obtain accurate results. Each time you test, check to make sure the code numbers match. 
STEP 1 Enter Code Mode.
Insert test strip to turn on meter. “OneTouch UltraSmart” will appear, followed by code number. STEP 2 See Code Number.
Code number will appear on display.
STEP 3 Match Code Numbers.
Compare code number on meter display with code number on test strip vial. If matching, begin testing. If not matching, see Step 4.
STEP 4 Code Meter.
Scroll up or down with Arrow button![]() . Meter is ready for testing.
. Meter is ready for testing.
Test Summary
Note: Before testing, wash hands with warm, soapy water. Rinse and dry thoroughly.
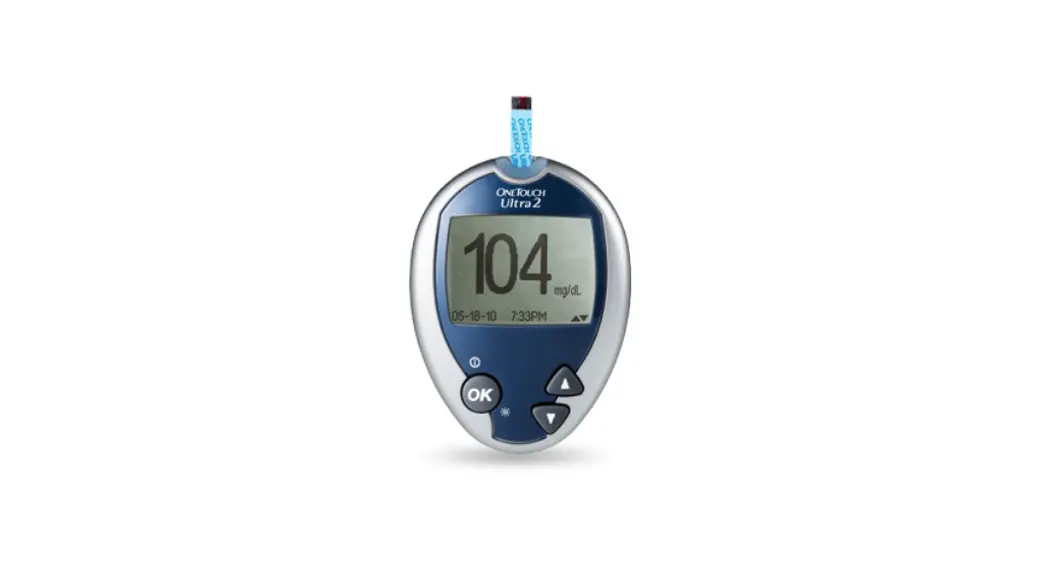
STEP 1 Insert Test Strip.
Push it all the way in until it will go no further. Meter turns on automatically.
STEP 2 Select Test Mode.
Use Arrow button ![]() to select “Apply Blood” for fingertip sample or “Alternate Site” for forearm and palm samples. Do Not select Control Solution mode when testing blood. Failure to select correct test mode ay cause blood glucose averages to be incorrect.
to select “Apply Blood” for fingertip sample or “Alternate Site” for forearm and palm samples. Do Not select Control Solution mode when testing blood. Failure to select correct test mode ay cause blood glucose averages to be incorrect.
STEP 3 Apply Sample.
Touch and hold drop of blood to the narrow channel in the top edge of the test strip.
STEP 4 Fill Confirmation Window.
Be sure confirmation window is full before meter counts down. If window is not full before meter begins countdown, repeat test with new test strip. Do Not add more blood to the test strip; discard the test strip and retest.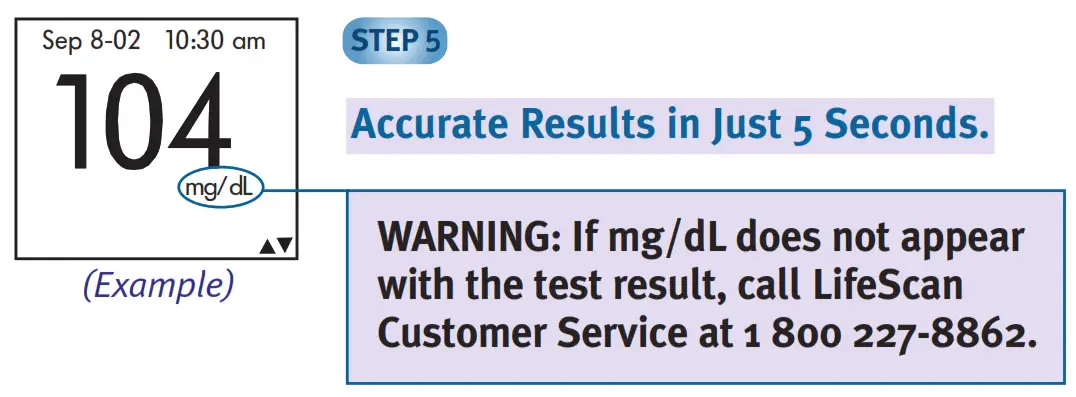
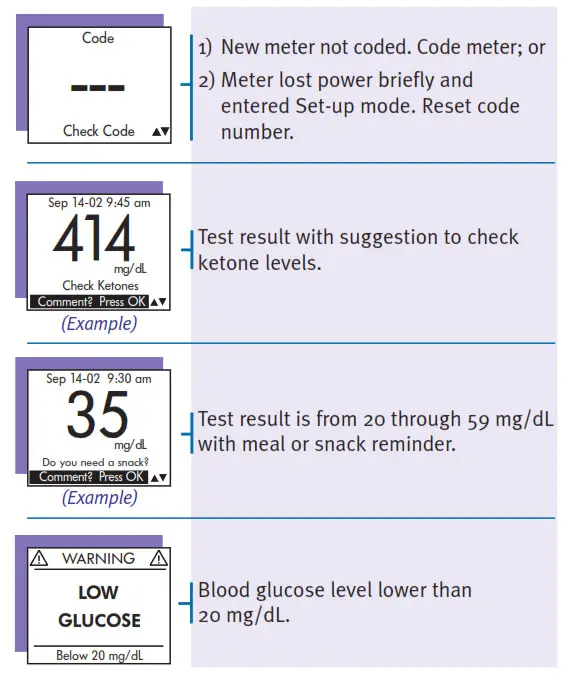
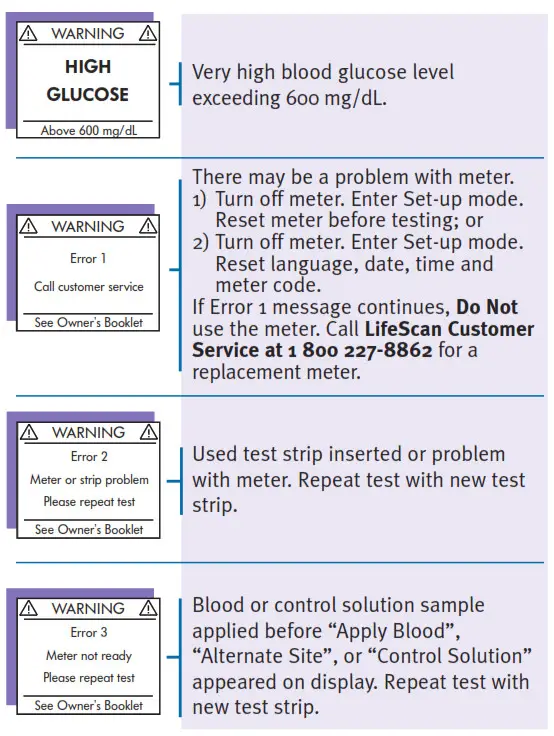
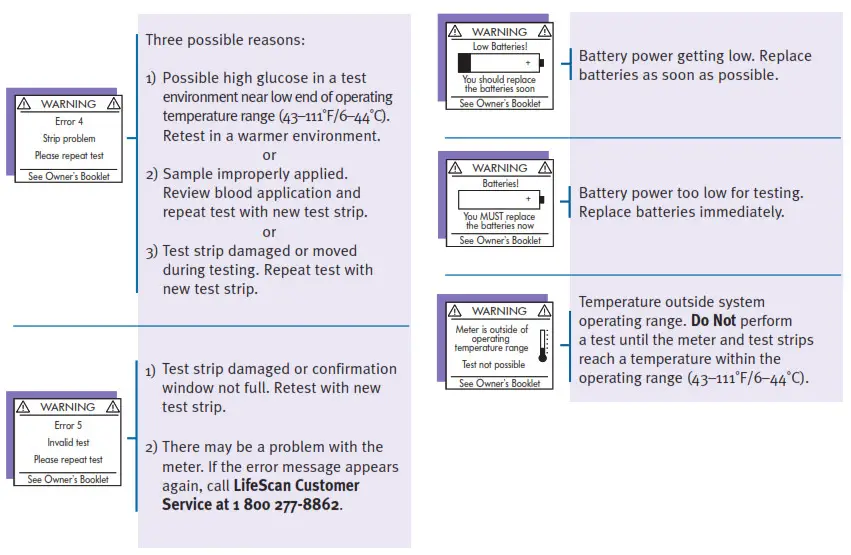
Display Symbols and Messages
Adding Comment to Test Result
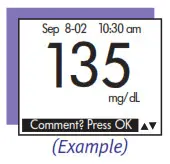
STEP 1 Complete Blood Test.
Start with test result on display.![]() STEP 2 Press OK Button.
STEP 2 Press OK Button.
You may add food, health, or exercise comment.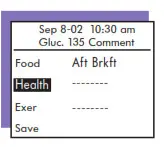
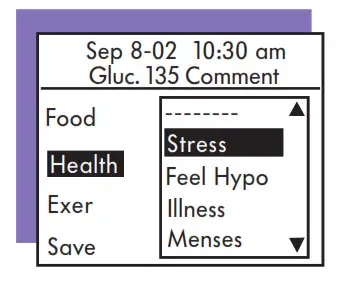
STEP 3 Select Comment Type.
Use![]() to highlight type and press
to highlight type and press ![]() .
.
STEP 4 Add Comment.
Select comment from menu. Press ![]() with comment highlighted.
with comment highlighted.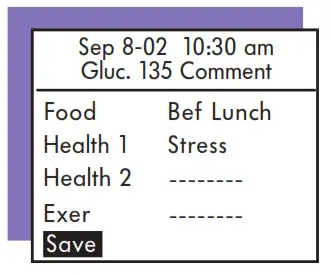
STEP 5 Save Comment.
Scroll to “Save”. Press ![]() .
.
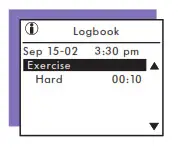
Making Logbook Entry
Press SmartButton for type of electronic logbook entry (exercise, health, medication, or food).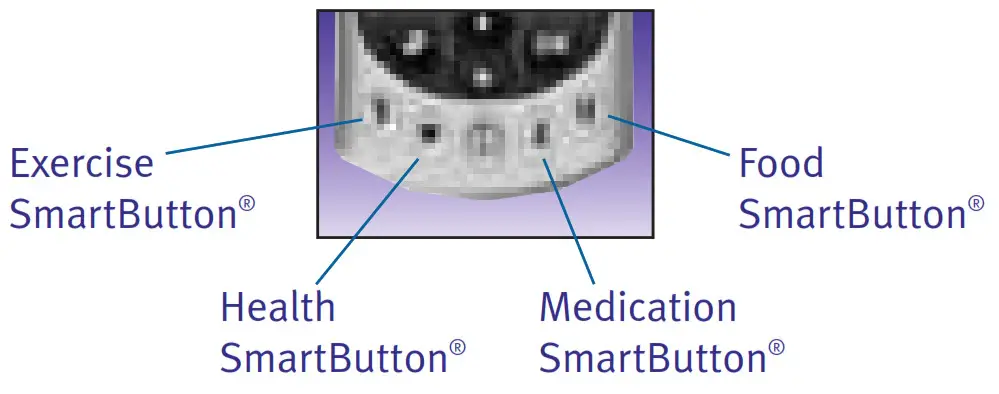
Basic Meter Set-Up

STEP 1 Enter Set-Up Mode.
Press and hold down BOTH ↵ and buttons![]() together for at least two seconds.
together for at least two seconds.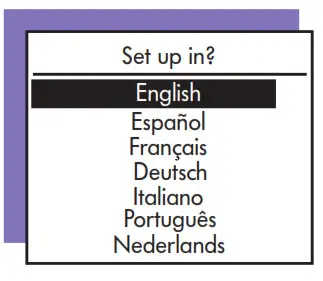
STEP 2 Select Display Language.
To use English, press ![]() . To use another language, scroll to it with
. To use another language, scroll to it with![]() . Press
. Press![]() .
.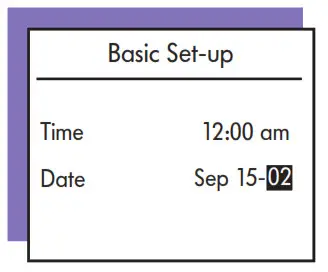
STEP 3 Set Date and Time.
Scroll with ![]() and press
and press![]() when each is correct.
when each is correct.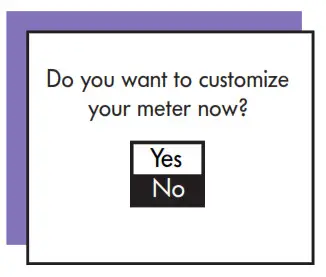
STEP 4 Complete Basic Meter Set-Up.
Select “No” and press ![]() . Basic meter Set-up is complete. Select “Yes” and press
. Basic meter Set-up is complete. Select “Yes” and press![]() to customize other meter settings. See Owner’s Booklet and nextpanel for details.*
to customize other meter settings. See Owner’s Booklet and nextpanel for details.*
Accessing Your Logbook
To review test results in logbook memory, use FastFacts ® .
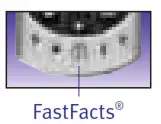
STEP 1 Enter FastFacts ® .
Press FastFacts ® SmartButton ® .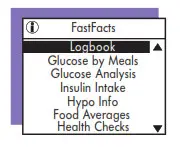
STEP 3 Scroll Back through Results.
Use![]() to scroll.
to scroll.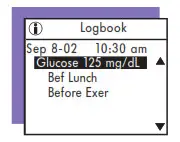
 *Note: It is important that the time of day is correct and that your medication set-up and mealtimes are set according to your personal daily schedule. Otherwise, some FastFacts ®information will not be correct.
LifeScan Customer Service toll-free numbers:
English 1 800 227-8862
Español 1 800 381-7226
Visit the LifeScan Web site at:
www.LifeScan.com
©2006 LifeScan,Inc. Milpitas,CA 95035
Rev. date: 4/2006 AW 060-789-02A
AW 06078902A


