![]()
Damper Kit
Attachment Manual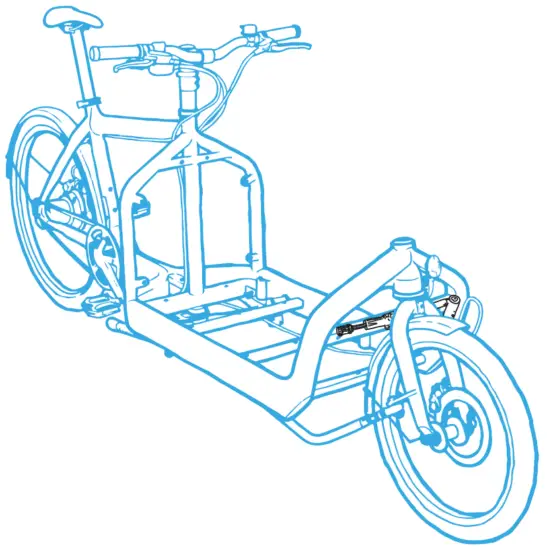
Before you start
Things you need before attaching the Damper Kit
The Damper Kit is maintenance-free!
Tools you need
Find your tools and get ready!

If you have the Honeycomb Board or Sidepanel Kit installed, you might also need: Icons that will appear throughout the guide:
![]() Grease.
Grease.
Remember to grease or else your mechanic will hate you later on. (“Much-off” has a Bio Grease that cares about the environment) Note!
Note!
Important message from Larry the King.
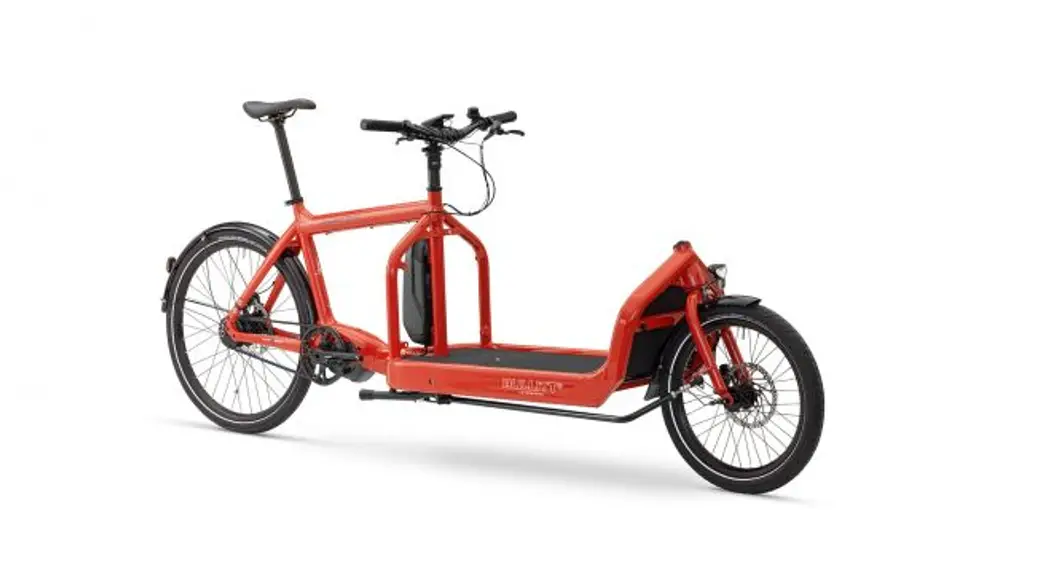
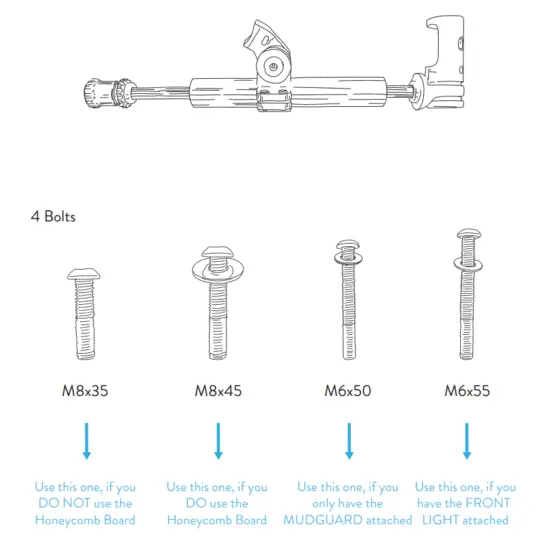
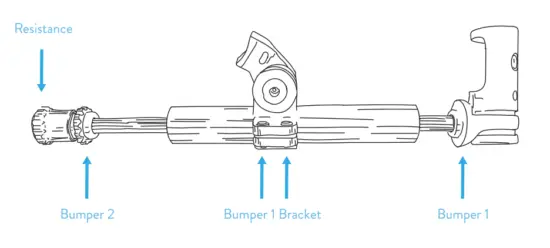
Components
What’s in the box?
The Damper
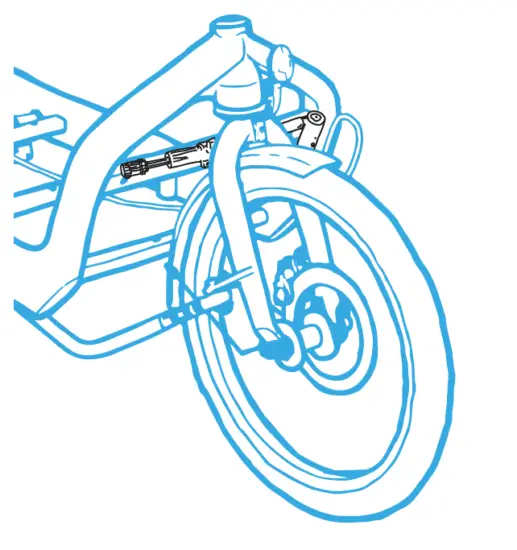
Step 1
A small tip before attaching the Damper Kit
If you have mounted any other accessories -other than the Honeycomb Board- these need to be dismounted first!
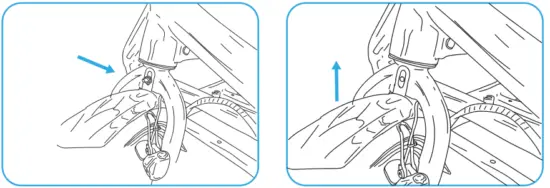 | |
| 1 First, remove the reflector and/ or front light. The Original Bullitt comes as standard with a reflectorthe eBullitt, a front light. | 2 Remove the bolts and lift up the mudguard a bit. |
 | |
| 3 NOTE! Are the fittings of the mudguard mounted on the backside, it needs to be mounted on the front side. | 4 Tighten the bolts on the Damper, if they are a bit lose |
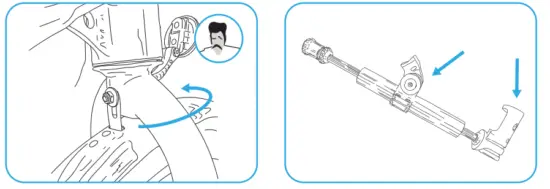
Step 2
Placing and attachment of the Damper Kit

NOTE:
We recommend removing the reflector (of the Original Bullitt) as it’s made of plastic and can break. Place it possibly somewhere else.
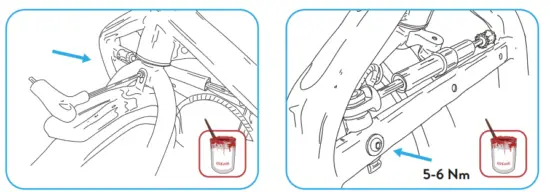 | |
| 1 Grease the bolt (C) or (D). Loosely tighten the bolt into the Damper bracket with the Allen Key. | 2 Grease the bolt (A) or (B). Mount it from the back (possibly through the Honeycomb Board) into the Damper bracket. |
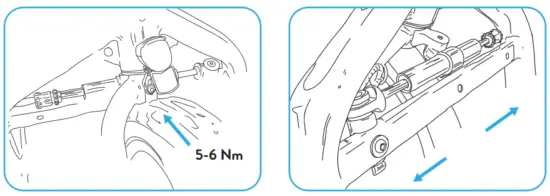 | |
| 3 Mount the front light back on and make sure to place the fittings of the mudguard on the front side. | 4 Now check that the Damper runs smoothly through it’s travel with some resistance. |
Step 3
Adjusting the Damper Kit
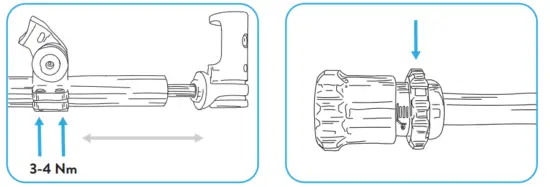 | |
| 1 Adjust Bumper 1. Turn the handlebar to the right: Make sure the Damper does not hit the front fork legs. Adjust the Bracket with 4mm Allen Key. | 2 Adjust Bumper 2. Turn the handlebar all the way to the left and fine tune the distance between the wheel and the front fork so they do not touch. |

3 Adjust the Resistance: Seven settings – The resistance level is a personal preference.
![]()
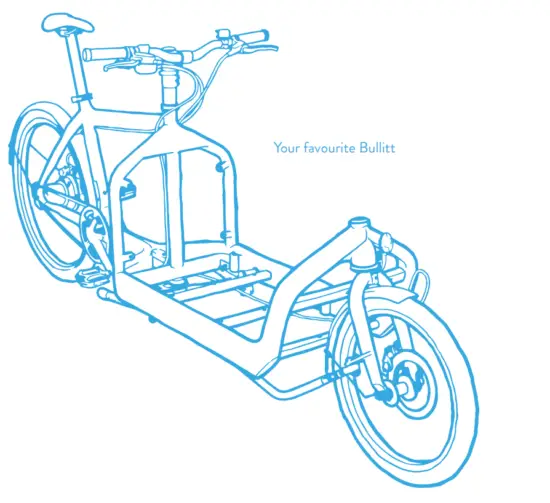
Bullitt Copenhagen
Frederiksborggade 43, DK–1371 Copenhagen, Denmark
www.larryvsharry.com
All rights reserved © 2022 Larry vs Harry
Ver.No.: 01, 12-2021


