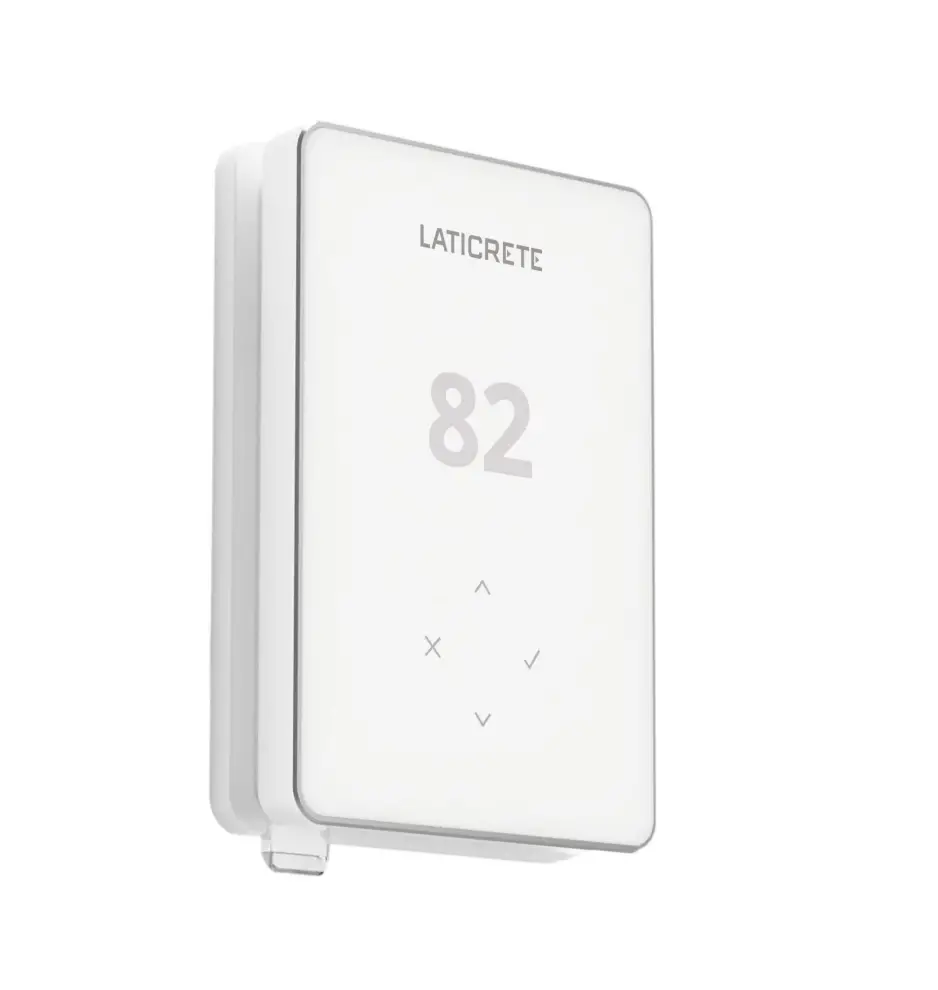
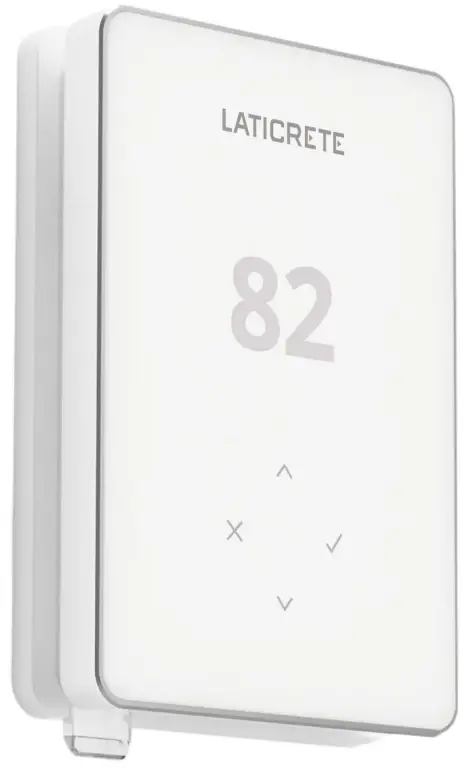
LATICRETE Strata Heat WiFi Thermostat
 |  |  |
 |  |  |
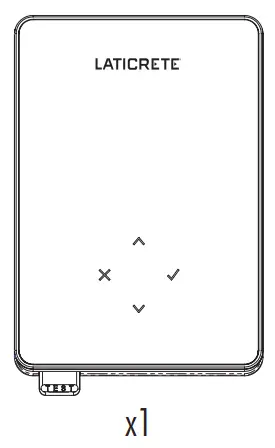
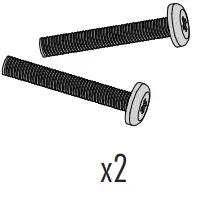
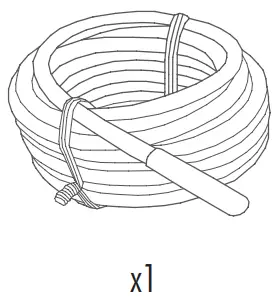
Pack Contents
 |  |  |  |
Safety Information
- The STRATA_HEAT™ Wi-Fi Thermostat must be installed by a qualified electrician. It requires a permanent 110V – 240V AC, 60Hz supply. The STRATA_HEAT Wi-Fi Thermostat contains a Class A GFCI with 5mA trip level and wiring must conform to local electrical code.
- Isolate the STRATA_HEAT Wi-Fi Thermostat from the mains supply throughout the installation process.
- Ensure the distance from your router to the STRATA_HEAT Wi-Fi Thermostat is not excessive. This will ensure the wireless connection is not subject to range or interference issues once installed.
- Conduits are only required where it is mandated by state or provincial code. Please refer to local electrical code for compliant applications.
- The STRATA_HEAT Wi-Fi Thermostat and its packaging are not toys; do not allow children to play with them. Small components and packaging present a risk of choking or suffocation.
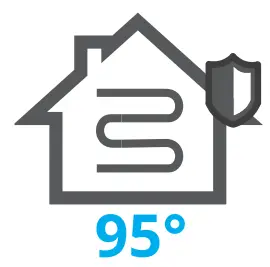
- The STRATA_HEAT Wi-Fi Thermostat is suitable for indoor use only. It must not be exposed to moisture, vibrations, mechanical loads or temperatures outside of its rated values.
- For safety and licensing reasons, unauthorized change and/or modification of the STRATA_HEAT Wi-Fi Thermostat is not permitted.
Step 1 – Installation
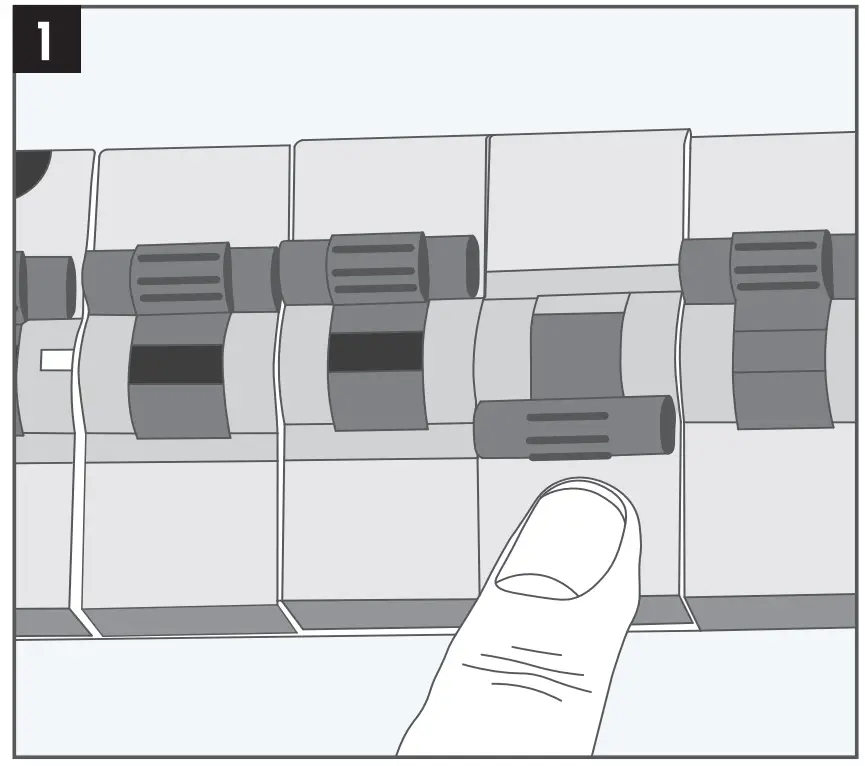
Isolate the STRATA_HEAT Wi-Fi Thermostat and supply from the mains supply
Unclip the display from the power base
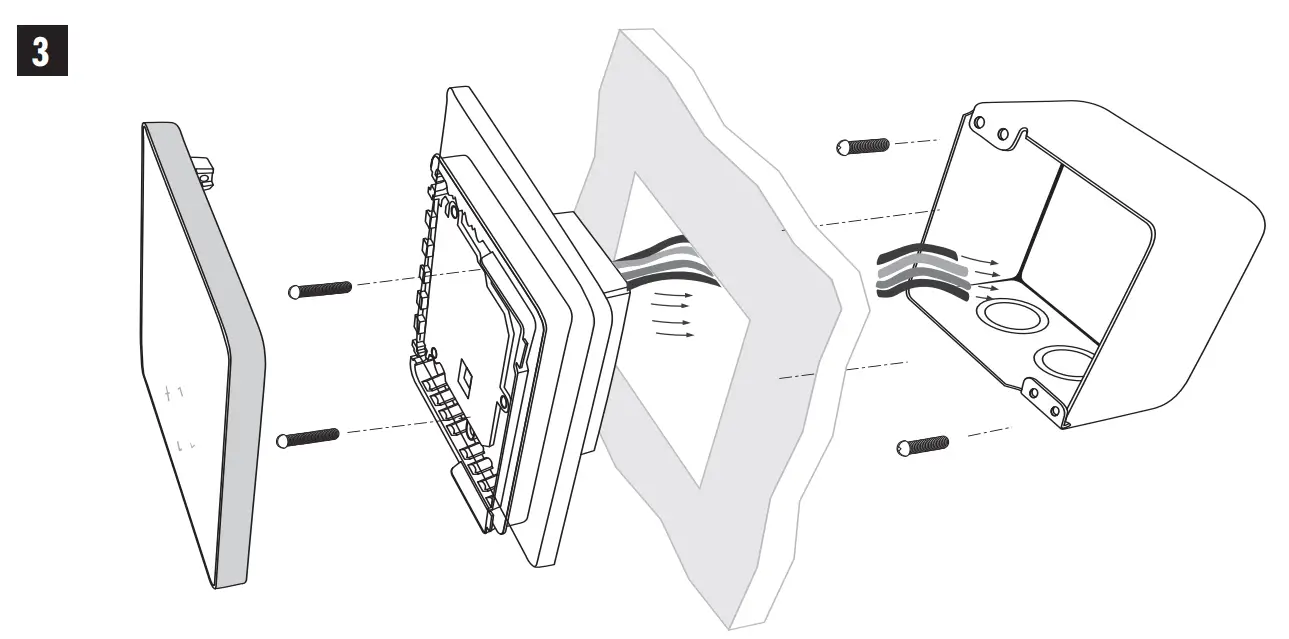
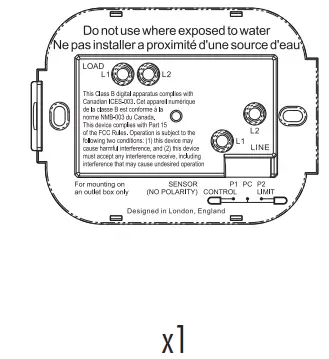
Install a 3-1/2″ (89 mm) deep single gang or 2-gang box with mud ring in your preferred thermostat location. Pull wires (heater, supply and sensor) through gang box and complete terminal wiring.
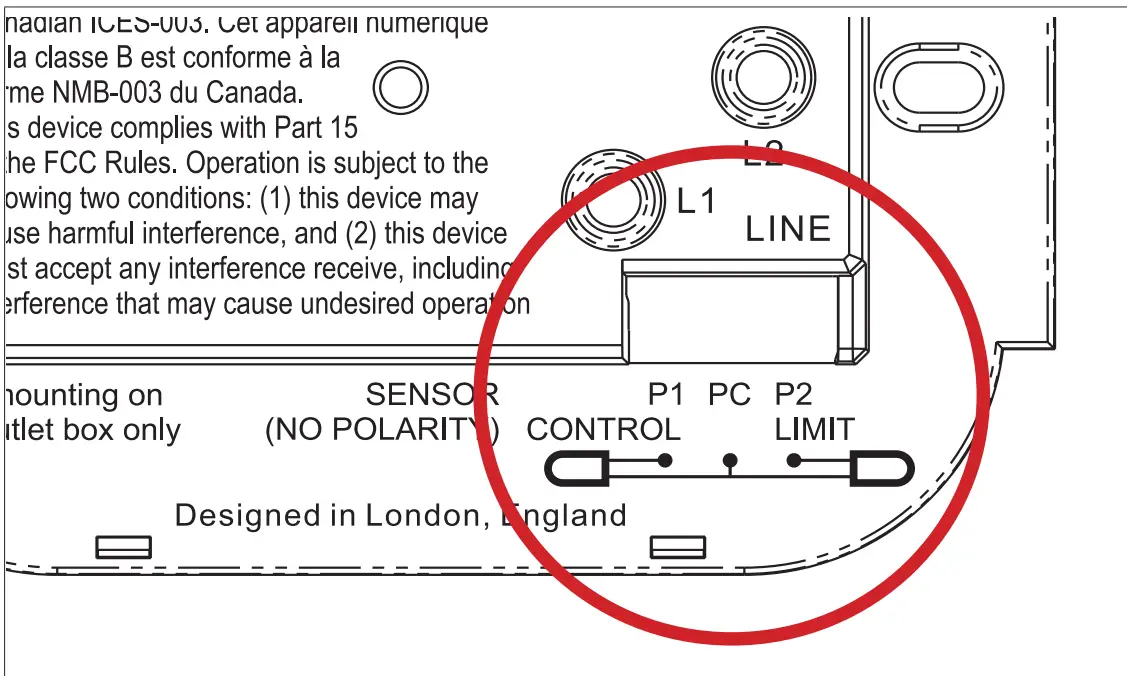
Step 2 – Wiring Connections
WARNING!
The STRATA_HEAT™ WiFi Thermostat must be installed by a qualified electrician in accordance with National Electrical Code.
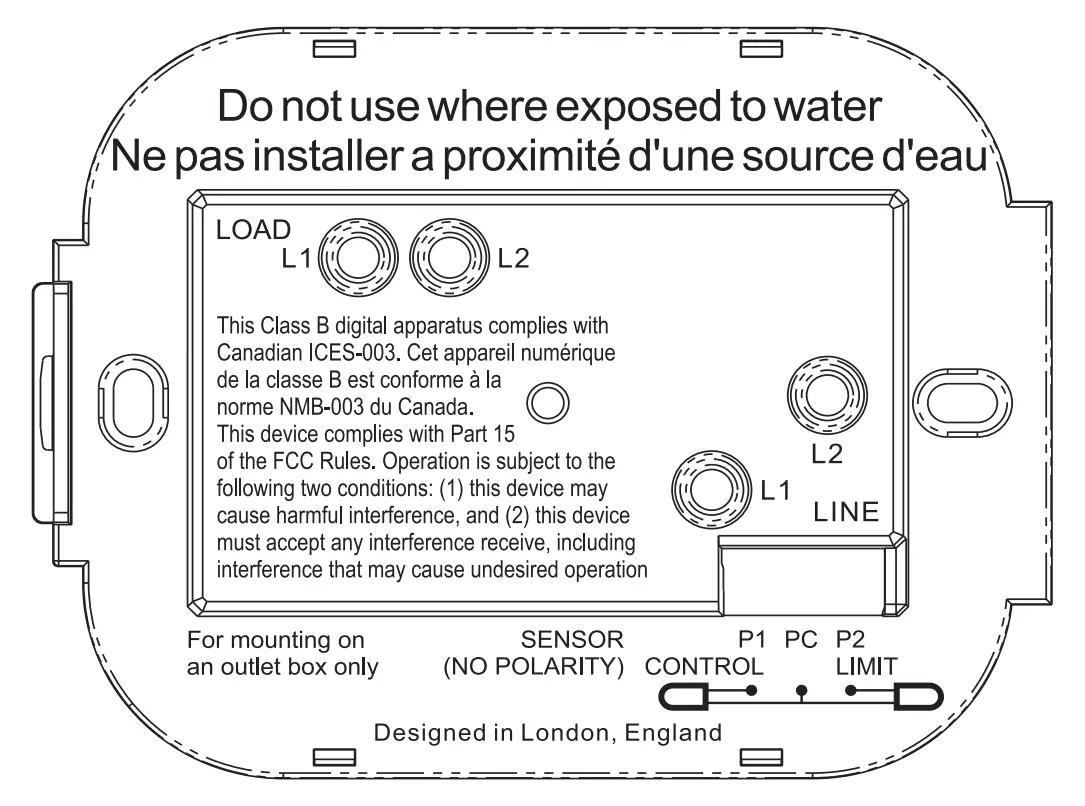
| Wiring Connections | |
| LOAD L1 & L2 | Heater Load Max.15A (1800W/120V, 3600W/240V) |
| LINE L1 | Supply Live (120 V) |
| LINE L2 | Supply Neutral (120 V) / Supply Live (240 V) |
| P1 & PC | Probe 1 – Floor/Air Control Sensor (No Polarity) Floor or air temperature reading for scheduled control |
| P2 & PC | Probe 2 – Limit Sensor (No Polarity) |
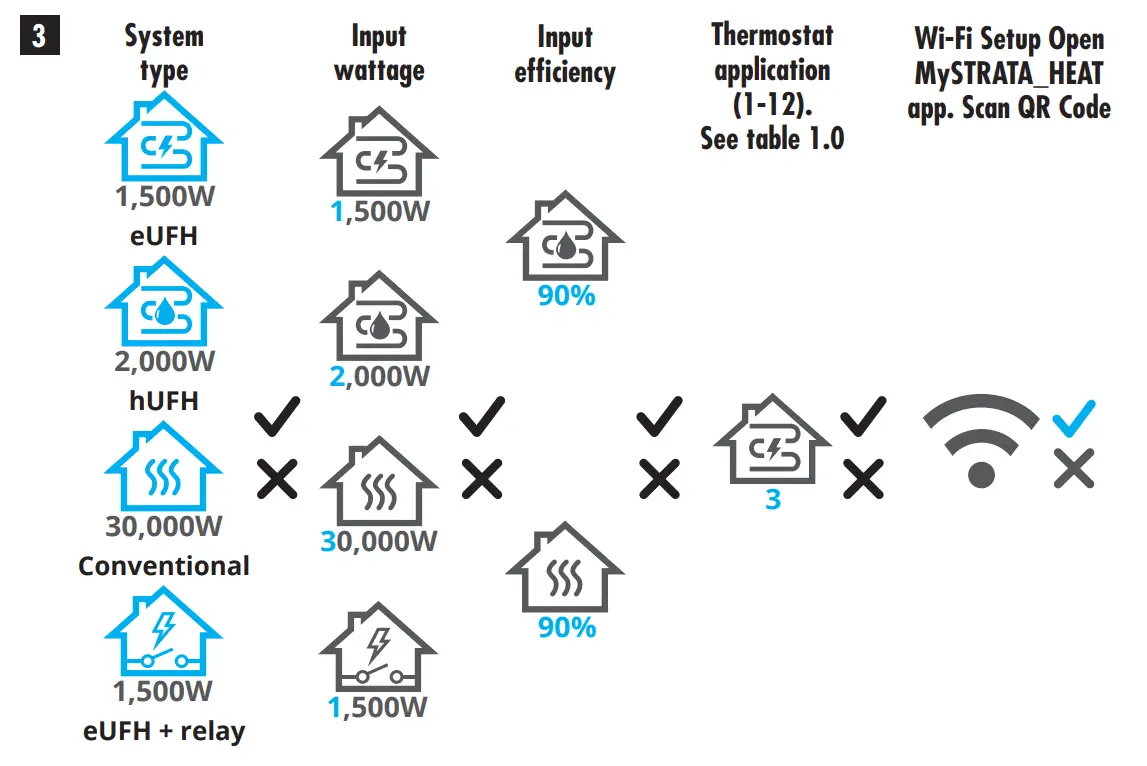
| See Table 1.0 for thermostat use cases | |
NOTE: The function of Probe 1, Probe 2 from Control/Limit Sensor can be swapped in Advanced Settings; Sensors & Application.
Table 1.0 – Thermostat use cases
| # | Use Case | Control | Limit Sensor |
| 1 | Thermostat IN room Air temperature schedule No floor limit | Internal Air Sensor | None |
| 2* | Thermostat IN/OUT of room Floor temperature schedule Floor limit | P1 & PC Floor Sensor | None |
| 3 | Thermostat IN room Floor temperature schedule Air limit | P1 & PC Floor Sensor | Internal Air Sensor |
| 4 | Thermostat OUT of room Air temperature schedule No floor limit | P1 & PC Air Sensor | None |
| 5** | Thermostat IN room Air temperature schedule Floor limit | Internal Air Sensor | P2 & PC Floor Limit |
| 6 | Thermostat IN/OUT of room Floor temperature schedule Floor limit | P1 & PC Floor Sensor | P2 & PC Floor Limit |
| 7 | Thermostat OUT of room Air temperature schedule Floor limit | P1 & PC Air Sensor | P2 & PC Floor Limit |
| 8 | Thermostat IN/OUT of room Regulator schedule No limit | Reg. | None |
| 9 | Thermostat IN room Regulator schedule Air limit | Reg. | Internal Air Sensor |
| 10 | Thermostat IN/OUT of room Regulator schedule No limit | Reg. | None |
| 11 | Thermostat IN/OUT of room Regulator schedule Floor limit | Reg. | P2 & PC Floor Limit |
| 12 | Thermostat IN/OUT of room Regulator schedule Floor limit | Reg. | P2 & PC Floor Limit |
2* Recommended when thermostat is OUT of the heated room
5** Recommended when thermostat is IN the heated room
NOTE: For thermostat use cases 6 & 7 an additional sensor will be required.
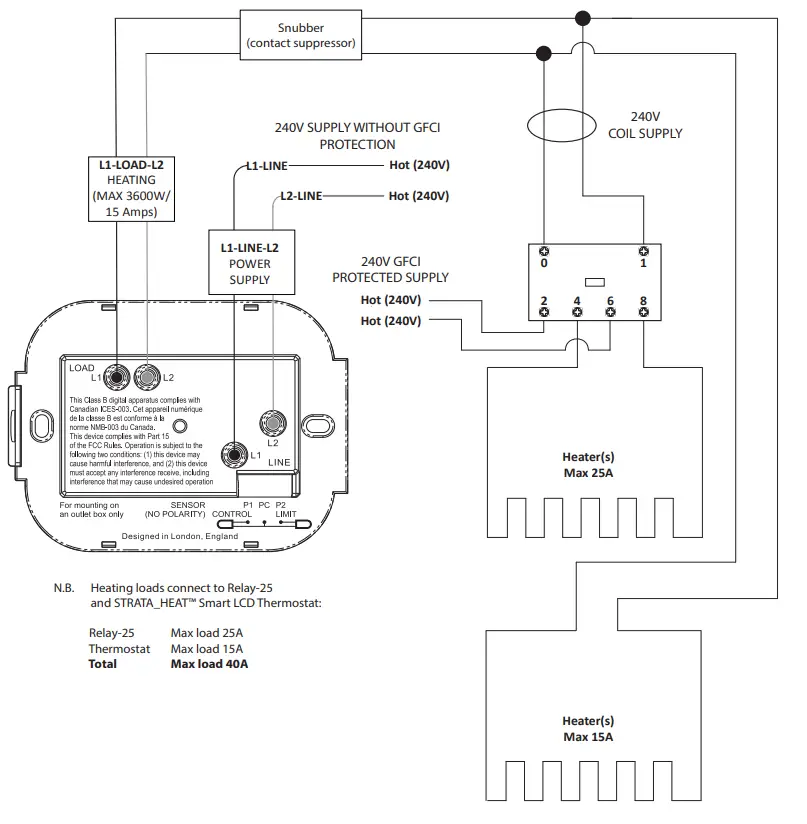
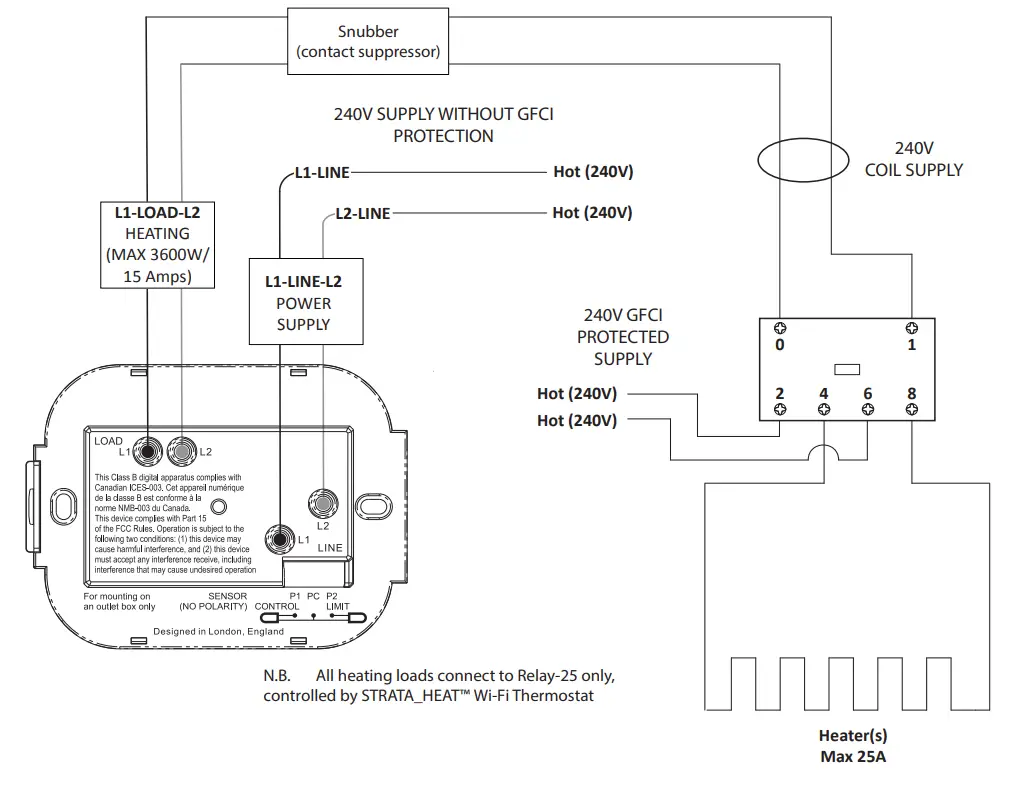
Wiring Diagrams
Heating Load connected to STRATA_HEAT™ Wi-Fi Thermostat and Relay 25 – Max. 40 Amps
Heating Load connected to Relay 25 – Max. 25 Amps
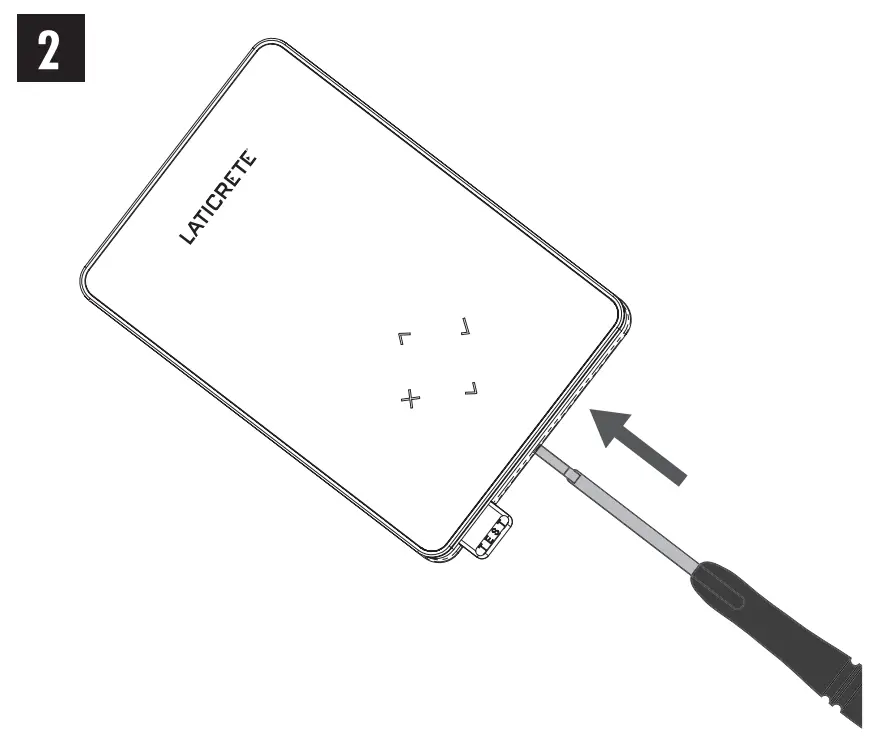
Step 3 – Thermostat Mounting
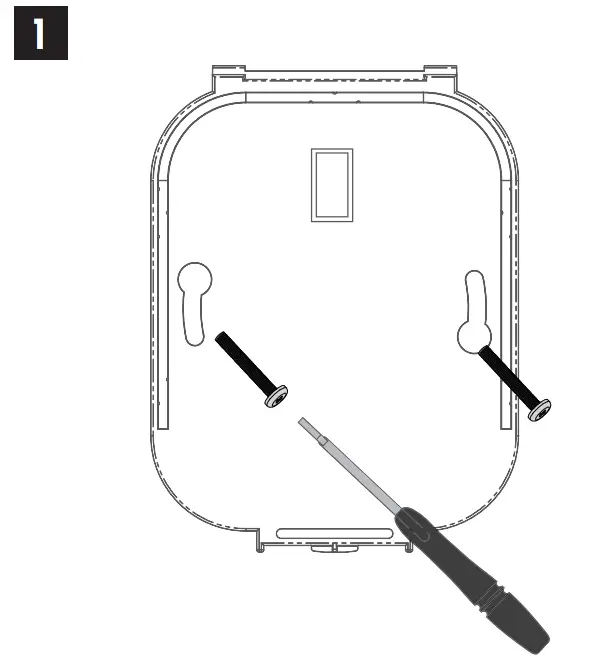
Insert fixing screws through mounting holes of the power base and tighten.
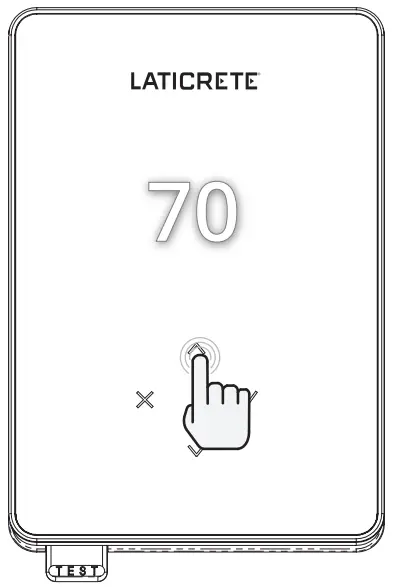
Re-attach the display to the power base. You can now restore power to the circuit and power up the STRATA_HEAT™ Wi-Fi Thermostat.
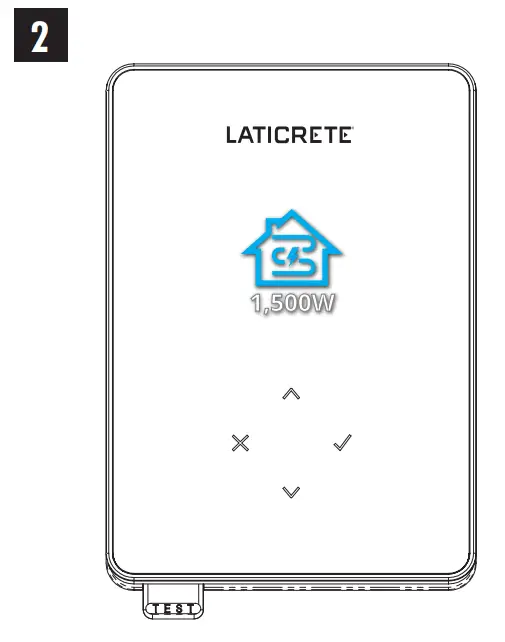
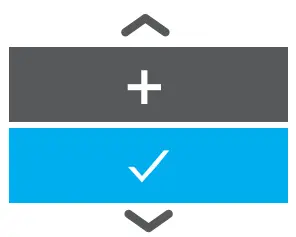
Follow the on screen icons to set up your system
 | Accept |
 | Back/Cancel |
 | Up/Down Change value/setting |
Step 4 – Initial Setup
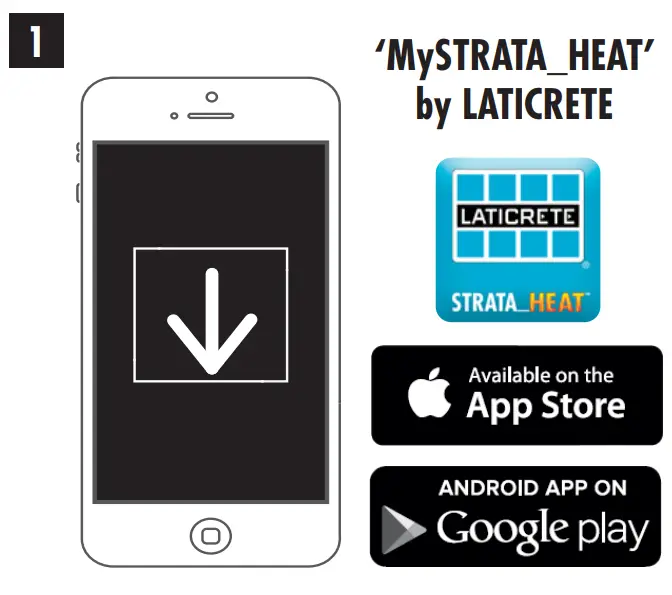
Download the My STRATA_HEAT App.
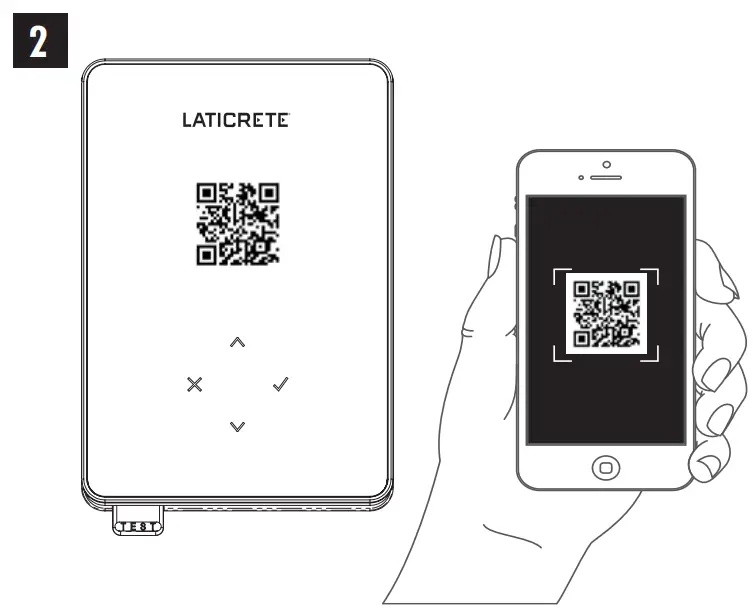
Open the My STRATA_HEAT App and scan the QR Code on the STRATA_HEAT Wi-Fi Thermostat screen protector or on reverse of the display. Follow the instructions in the App to complete setup.
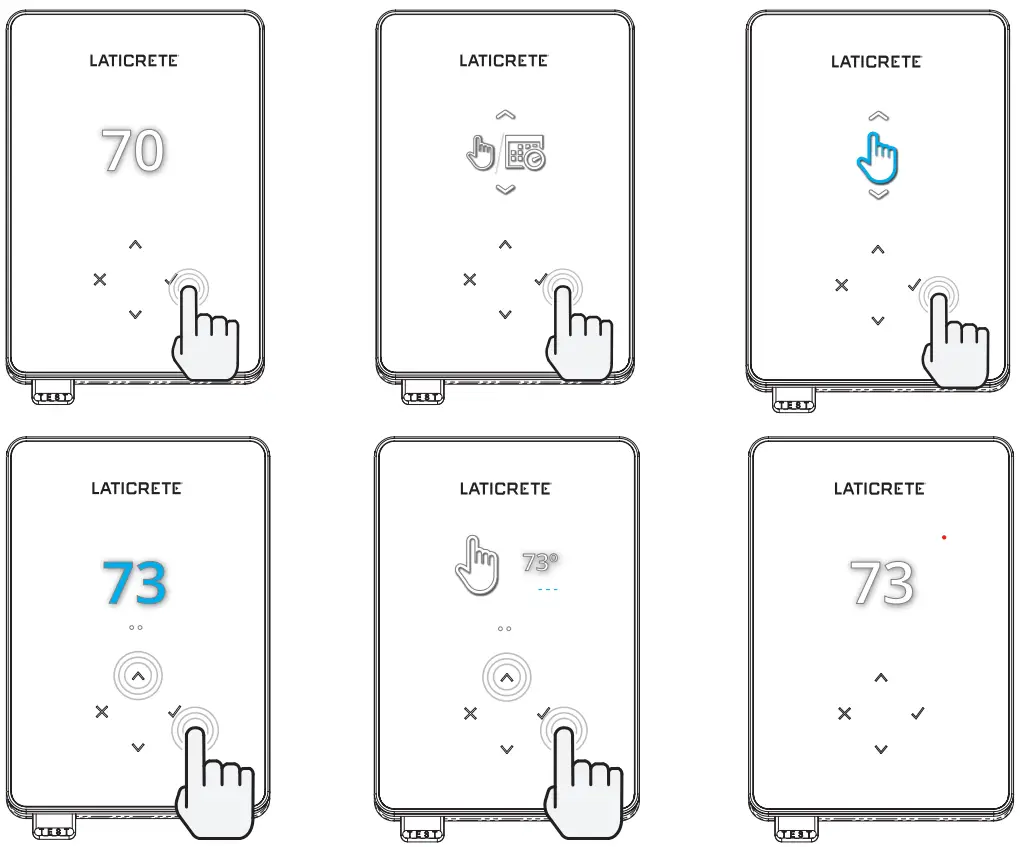
Welcome to the STRATA_HEAT™ Wi-Fi Thermostat
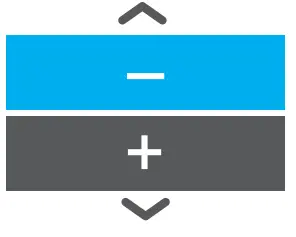
| Accept |
| Back/Cancel |
| Up/Down Change value/setting |
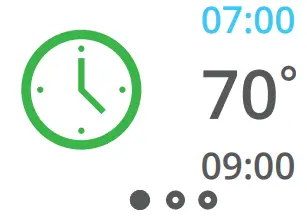
How to quickly change the temperature
Press ![]() /
/![]() to change your target temperature.
to change your target temperature.
If in program mode this will set a temporary override until your next heating period. See “How to set a temporary override”.
If in manual mode this will set a fixed target temperature. See “How to set into Manual Mode”
Once the target temperature is set above current floor/air temperature the heating indicator ( ![]() ) will appear in the top right hand corner.
) will appear in the top right hand corner.
How to quickly change mode
Mode select allows you to quickly change from manual mode, program mode or simply switch the heating off.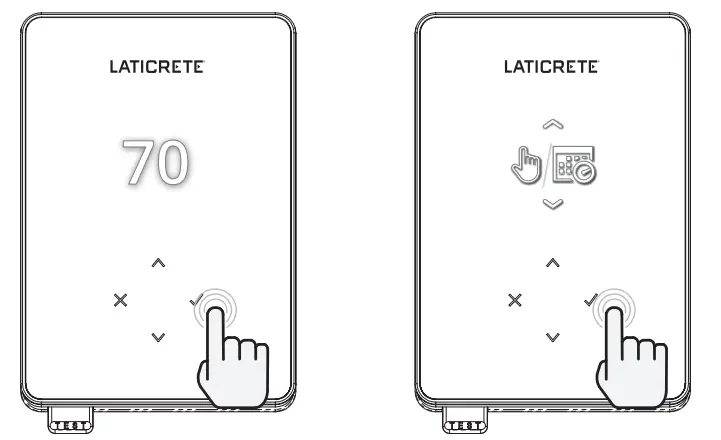
 | Manual Mode |
 | Program Mode |
 | Heating OFF |
Heating
How to set a program
Setting a “Program” allows you to set comfort temperatures at set times throughout the day. Days can programmed individually, all days the same or weekdays as a block and weekends as a block, the choice is yours.
 | Edit Program |
 | To select the days you wish to program press |
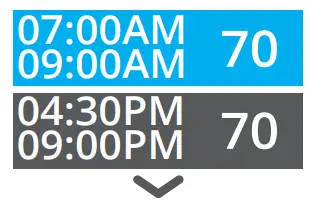 | Press |
 | Set the start time, followed by target temperature and finally the end time for that period. Press |
 | To add/remove heating period, Press |
 | Scroll to the tick and Press |
 | Setback temperature |
 | Set setback temperature. The setback temperature is a lower energy efficient temperature when outside of a heating period. |
How to set into Manual Mode
Setting into “Manual” mode allows you to set a fixed target temperature for the thermostat to achieve. The thermostat will continue to maintain this temperature until another operating mode or temperature is selected.
| Sets the target temperature indefinitely | |
 | Set the duration of the manual mode. |
How to set a Temporary Override
Setting a temporary override allows you to set a target temperature which will override your current heating program until your next heating period or for a set duration.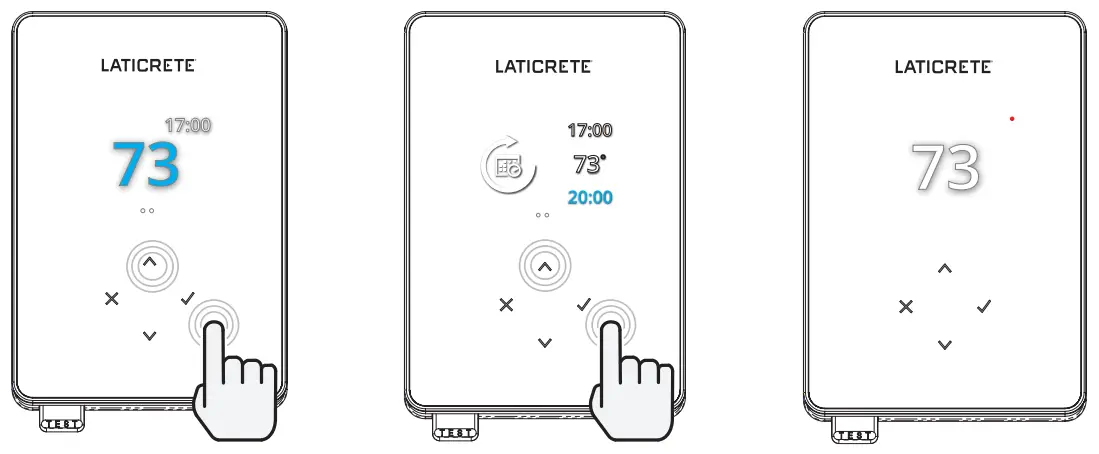
| Sets the override until next scheduled heating period. |
| Sets the duration of the override. |
Energy Monitor
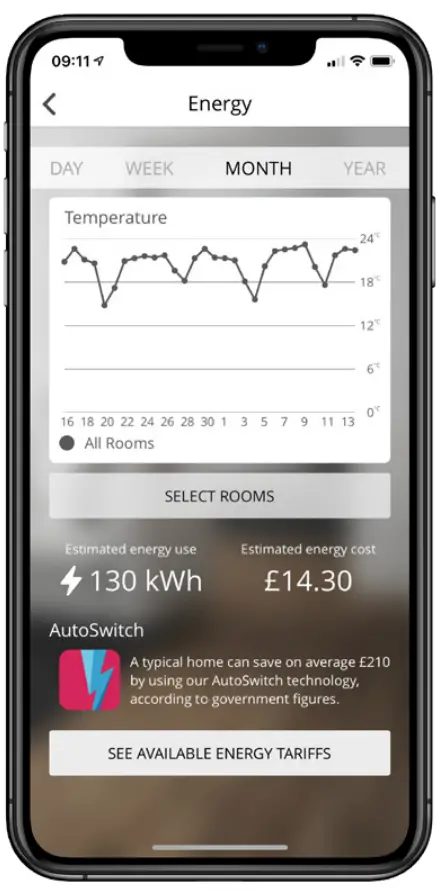
How Energy Monitor works
The STRATA_HEAT™ Wi-Fi Thermostat learns how you use your system and how your house reacts to heating and weather. Using the My STRATA_HEAT App, energy monitoring will show the amount of energy consumed over a certain time period. This will be calculated through system power multiplied by efficiency and run time.
You will need to enter the power of your system, and in some cases, the efficiency. If you do not know these, speak to your installer or system manufacturer
Geo Location Settings
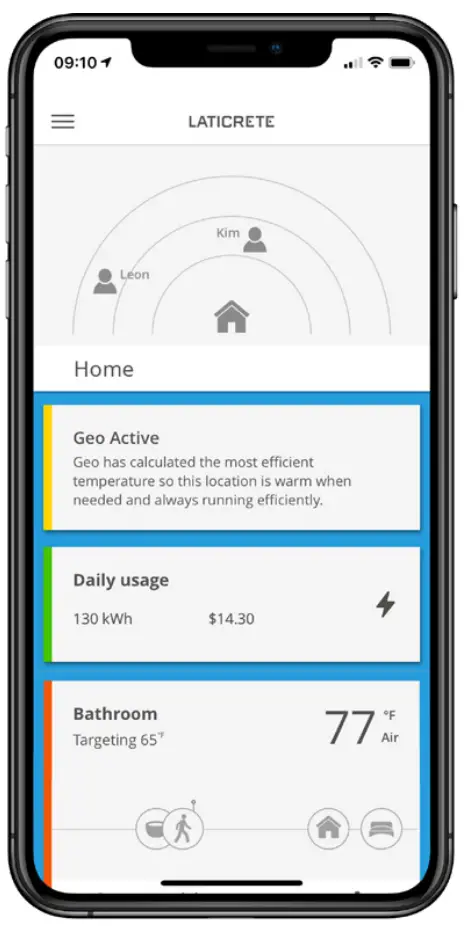
How Geo Location works
Geo is a unique technology developed by LATICRETE and built into the My STRATA_HEAT App that uses an advanced algorithm to understand the most efficient heat settings for your home.
Working automatically; it learns your routines and location through background communication with your smartphone and lowers temperatures when you are away, only rising them up to your ideal comfort temperature in time for your arrival home.
Geo will operate when the thermostat is in the program or manual run modes. It is turned off by default. Use the My STRATA_HEAT App to switch Geo on.
Settings
 | Date and time |
6-5-2021 | Set the current date and time. Press |
 | Thermostat application |
 | Swaps probe usage, 1 being the Control Sensor Probe and 2 being the Limit Sensor Probe. Press |
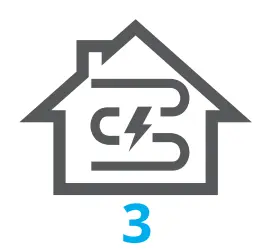 | See Table 1.0 Thermostat Application. Press |
 | Change Control Sensor Probe 1 (5 & 6) type. Set between 5, 10, 12, 15, 100K sensor settings. |
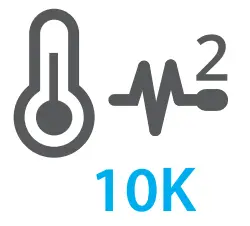 | Change Limit Sensor Probe 2 (6 & 7) type. Set between 5, 10, 12, 15, 100K sensor settings. |
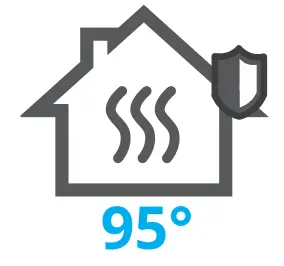 | Set Air limit |
 | Set Floor limit |
 | Set display brightness |
 | Set active brightness |
 | Day standby brightness |
 | Night standby brightness |
 | Change home screen override color |
 | Select the override color |
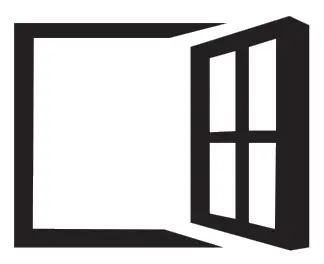 | Open window function |
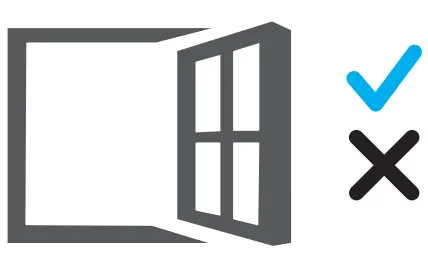 | The windows open detection feature is designed to switch off heating to save energy when the thermostat detects that a window or door has been opened. |
 | Display lock |
 | Switch display lock on |
| Set display lock code | |
 | Switch display lock off |
 | Wi-Fi |
 | Wi-Fi Setup |
 | Open My STRATA_HEAT App and scan the QR code on the back of the STRATA_HEAT™ WiFi Thermostat display to complete Wi-Fi setup. |
 | Factory reset |
 | Factory reset will erase all of your settings and restore the STRATA_HEAT Wi-Fi Thermostat to factory defaults. |
Notifications & Error codes
| Date and time needs to be set | | Heating switched OFF |
| Open window function triggered | | Display locked |
| Temporary override enabled |  | Sensor P2 (6 & 7) error |
 | Holiday mode enabled. (Configured in My STRATA_HEAT App) | Sensor P1 (5 & 6) not connected / damaged or Internal air sensor fault | |
 | Frost protect enabled. (Configured in My STRATA_HEAT App) |  | Wi-Fi not setup |
 | GFCI tripped |  | Relay failure |
Troubleshooting
| Display is blank | Power | (Electrician Required) Electrician required to verify power is going to the STRATA_HEAT™ Wi-Fi Thermostat and that it is correctly wired. |
| Control (5 & 6) / Internal Air sensor error |
If the electrician finds a fault, and the thermostat is in the room to be heated then it can be set into “Air Mode”. To set into “Air Mode”, see Table 1.0 Thermostat application. If “” still remains when set into air mode the thermostat will have to be replaced. | |
| Limit Sensor Error (6 & 7) | |
| Heating is coming on earlier than programmed times | Adaptive learning (Early start) On | Adaptive learning (Early start) will use the historic heating/cooling rates for the time of day, historic external temperatures and the forecast external temperatures, to work out the heating start time in order to reach the comfort time at the start of the comfort period. It will only work in Program Mode. |
| Wi-Fi Error Symbol | Wi-Fi not setup |
|
| Wi-Fi disconnected | Follow the step above to try and to re-connect to the Wi-Fi Network. If the thermostat still fails to connect, see Wi-Fi Troubleshooting. | |
| Clock Icon | Time and Date not set | Connect the STRATA_HEAT™ W-iFi Thermostat to a Wi-Fi network or alternatively set the time and date from the settings menu. |
| GFCI Icon | GFCI test button | The GFCI feature is used to detect any leakage of current from your heating system. During a ground fault the two lines of the load will be cut off. Once your thermostat is installed and connected to a power supply you can test the GFCI function by increasing the set temperature until heating is on – the heat up icon ( ● ) will be illuminated – and pressing the “TEST” button. If your test is successful you will see the GFCI error icon and you will need to hold “X” for 3 seconds in order to restore heating operation. |
| Heater error | The GFCI has tripped due to a fault in the heater. (Electrician Required) Electrician required to verify that the heater has been wired correctly. If correctly wired please conduct a resistance test and insulation resistance test on the heater to see if damage has occurred. | |
| Relay icon
| Relay error | The STRATA_HEAT W-Fi Thermostat has detected that one of the relays has FAILED. Please contact LATICRETE |
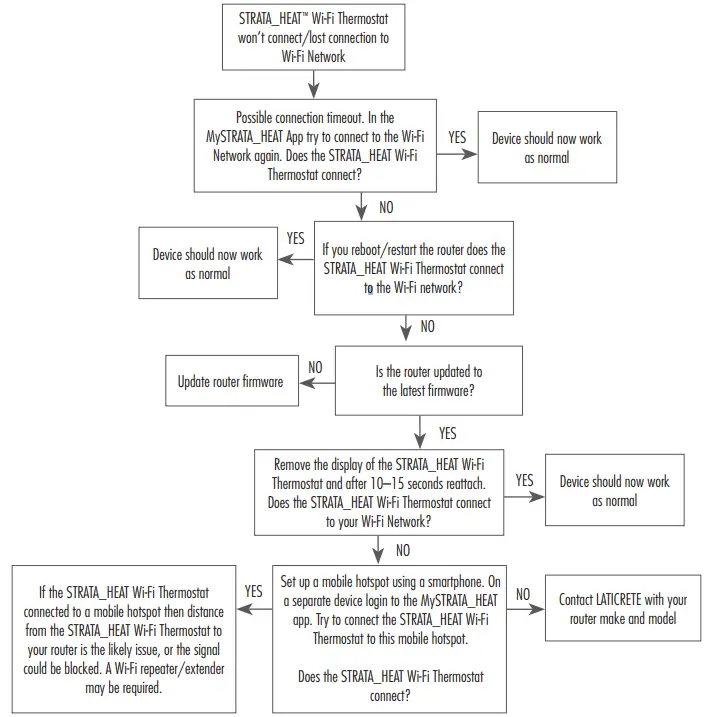
Wi-Fi Troubleshooting
Before following the troubleshooting guide below please check the following:
- The password is WPA2 protected.
- The router is set to a 2.4 GHz band. (802.11 b, g, n, b/g mixed, b/g/n mixed)
NOTE: If you need to change any of the items listed above, please refer to your router manual.
Technical Specifications
| Model | RSW-XX-YY-ZZ |
| Operating Voltage | 110V – 240V AC +/–15% 50Hz/60Hz |
| Protection Class | II  |
| Max. Load | 15A resistive (120 V – 1800W, 240 V – 3600W) |
| GFCI | Class A GFCI with 5mA trip level |
| Rated impulse voltage | 4000V |
| Automatic action | 100,000 |
| Disconnection means | 1B |
| Pollution degree | 2 |
| Max. Ambient Temperature | 40°C / 104°F (T40) |
| Relative Humidity | 80% |
| IP Rating | IP30 |
| Sensors | Floor/Air |
| Sensor Type | NTC10K @ 25°C |
| Operating Frequency | 2401 – 2484MHz |
| Max. Radio-Frequency Power Transmitted | 20dBm |
| Compatibility | Electric Floor Heating and Baseboard Heating |
| Standards | UL-60730-1 |
| Warranty | 1 Year |
| Approvals | ETL Intertek |
Warranty
LATICRETE warrants this product, to be free from defects in the workmanship or materials, under normal use and service, for 1 year from the date of purchase by the consumer.
If at any time during the warranty period the product is determined to be defective, LATICRETE shall repair or replace it, at LATICRETE’s option. If the product is defective, please either;
Return it, with a bill of sale or other dated proof of purchase, to the place from which you purchased it, or Contact LATICRETE. LATICRETE will determine whether the product should be returned or replaced.
The 1 year warranty only applies if the product is registered with LATICRETE within 30 days after purchase. Registration can be completed online at www.laticrete.com This warranty does not cover removal or re-installation costs and shall not apply if it is shown by LATICRETE that the defect or malfunction was caused by failure to follow the instruction manuals, incorrect installation or damage which occurred while the product was in the possession of a consumer. The sole responsibility of LATICRETE shall be to repair or replace the product within the terms stated above. This warranty does not extend to any associated software such as apps or portals.
LATICRETE SHALL NOT BE LIABLE FOR ANY LOSS OR DAMAGE OF ANY KIND, INCLUDING ANY INCIDENTAL OR CONSEQUENTIAL DAMAGES RESULTING, DIRECTLY OR INDIRECTLY, FROM ANY BREACH OF ANY WARRANTY, EXPRESS OR IMPLIED, OR ANY OTHER FAILURE OF THIS PRODUCT. THIS WARRANTY IS THE ONLY EXPRESS WARRANTY LATICRETE MAKES ON THIS PRODUCT. THE DURATION OF ANY IMPLIED WARRANTIES, INCLUDING THE WARRANTIES OF MERCHANTABILITY AND FITNESS FOR A PARTICULAR PURPOSE, IS HEREBY LIMITED TO THE ONE-YEAR DURATION OF THIS WARRANTY.
This Warranty does not affect your statutory rights.
LATICRETE International, Inc. ■ One LATICRETE Park North, Bethany, CT 06524-3423 USA 1.800.243.4788 ■ +1.203.393.0010 ■ www.laticrete.com
DS-10048-0122 ©2022 LATICRETE International, Inc. All trademarks shown are the intellectual properties of their respective owners.