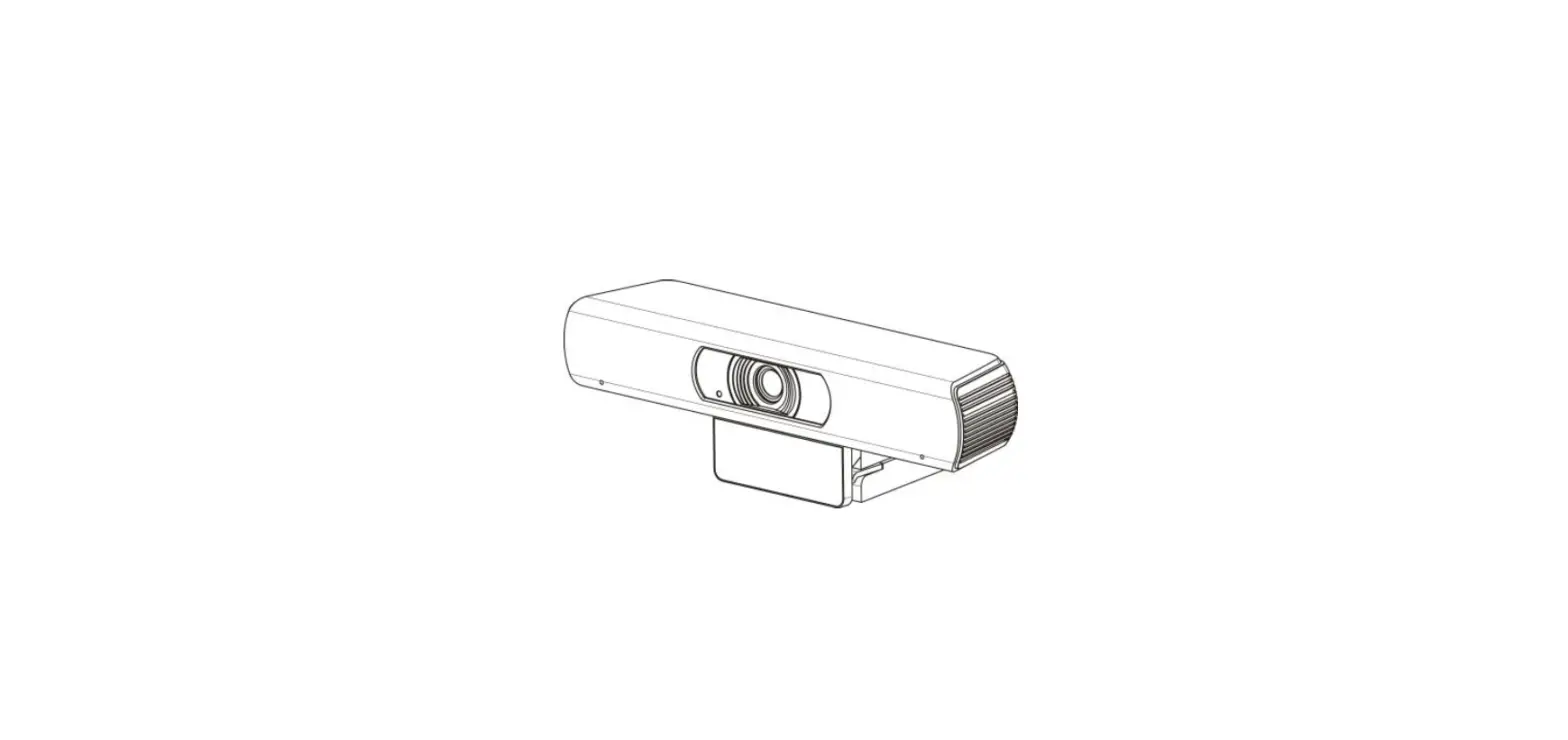
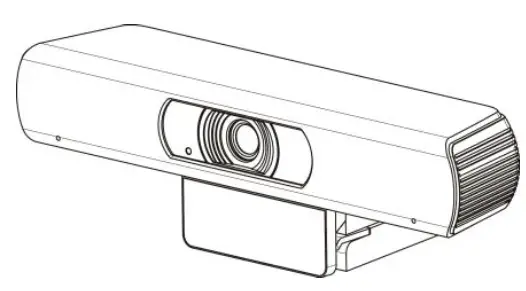
infobit iCam 200H 4K Ultra HD Camera with Auto Framing
Copyright Notice
All contents of this manual, whose copyright belongs to INFOBIT AV cannot be cloned, copied or translated without the permission of the company. Product specifications and information which were referred to in this document are for reference only. We may change, delete, or update any content at any time and without prior notice.
Note
- Electric Safety
Installation and operation must accord with electric safety standard. - Use Caution to Transport
Avoid stress, vibration or soakage in transport, storage and installation. - Careful Installation
The product should be placed on smooth desktop. The shell of product is an organic material and is strictly prohibited from contact with any liquid, gas or solid material that may cause corrosion to the shell. - Do not Unauthorized Disassemble
This product has no parts which can be repaired by the user. The damage caused by the user’s own disassembly is not covered by warranty.
Specific frequencies of electromagnetic field may affect the image of the camera!
Supplied Accessories
When you unpack, check that all the supplied accessories are included:
| Name | Quantity |
| Camera | 1 |
| USB Cable | 1 |
| Remote Control | 1 |
| User Manual | 1 |
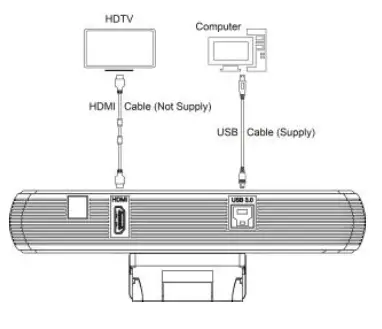
Quick Start
Please check connections are correct before starting.
About Product
- 4K Ultra High Definition
Support 4K ultra high definition, ultra high definition with ultra high resolution, the maximum can provide 4K@30fps/25fps image output, while down compatible with 1080p, 720p and other resolutions. - USB 3.0
Full function USB 3.0 interface, power supply, video, audio in one, it also can support two channels of USB video signal source and one channel audio source. - Wide Angle without Distortion
Lens Wide angle field of view up to 120 degrees, small lens, wide vision. At the same time support EPTZ, with unmovable brake, more larger, more clear. - WDR
It supports WDR, easy to cope with different lighting environments, no matter how harsh the environment can restore the most real you. - Built-in Microphone
With a built-in microphone array, you can pick up a full range of sounds, and pick up the sound distance up to 12 meters. The unique noise suppression algorithm makes your voice perfect. - Low Light
The application of 2D and 3D noise reduction algorithm greatly reduces the image noise. Even under the condition of ultra-low illumination, it still keeps the picture clean and clear, and the SNR of image is as high as 55dB. - Easy Installation
Standard damping rotary shaft support, suitable for market 100% monitor, easy installation, stable and reliable.
Product Specification
| Model | iCam 200H |
| Name | 4K Ultra HD Camera |
| Camera | |
| Sensor | 1/2.5”, CMOS, Effective Pixel: 8.0M |
| Scanning Mode | Progressive |
| Lens Mount | M12 |
| Lens 1 (optional) | NA |
| Lens 2 | Lens Focus: f=2.8mm, Wide Angle: 120° |
| Minimal Illumination | 0.05 Lux @ (F1.8, AGC ON) |
| Shutter | 1/30s ~ 1/10000s |
| White Balance | Auto, Indoor, Outdoor, One Push, Manual, VAR |
| Digital Noise Reduction | 2D, 3D digital noise reduction |
| Backlight Compensation | Support |
| USB Features | |
| Operate System | Windows XP / 2003 / VISTA/7/8/10, Linux, Mac OS |
| Color / Compression | YUY2/MJPEG/H.264/ NV12 |
|
Resolution | YUY2: 640×480 (default), 640×360, 960×540, 1280×720, 1920×1080 MJPEG: 3840×2160 (default), 160×120, 176×144, 320×240, 352×288, 640×480, 720×576, 1600×896, 1280×720, |
|
Resolution | 1024×768, 1024×576, 960×540, 848×480, 800×600, 800×448, 640×360, 480×272, 424×240, 320×180, 1920×1080 H.264: 1920×1080 (default), 320×240, 352×288, 640×480, 720×576, 1600×896, 1280×720, 1024×768, 1024×576, 960×540, 848×480, 800×600, 800×448, 640×360, 480×270, 424×240, 320×180, 3840×2160 NV12: 1920×1080 (default), 640×480, 1280×720, 640×360 |
| USB Protocol | UVC 1.0 ~ UVC 1.5 |
| UVC PTZ | Support (EPTZ) |
| Input/Output Interface | |
| HDMI Interface (optional) |
1 x HDMI: Version 1.3 |
| USB Interface | 1 x USB 3.0: Type B, female |
| Physical Parameter | |
| Input Voltage | 5V (USB Power Supply) |
| Current Consumption | 0.5A (Max) |
| Operating Temperature | -10°C ~ 40°C (14°F ~ 104°F) |
| Storage Temperature | -40°C ~ 60°C (-40°F ~ 140°F) |
| Power Consumption | 3W |
| Size | 194 x 34 x 42mm (without bracket) |
| Net Weight | 0.34 Kg |
| MTBF | >30000h |
Interface and Button
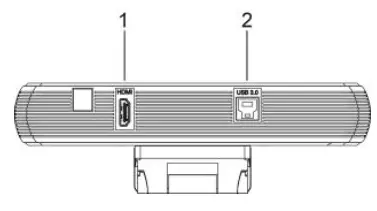
| Item | Name |
| 1 | HDMI Interface (optional) |
| 2 | USB 3.0 Interface |
Remote Control
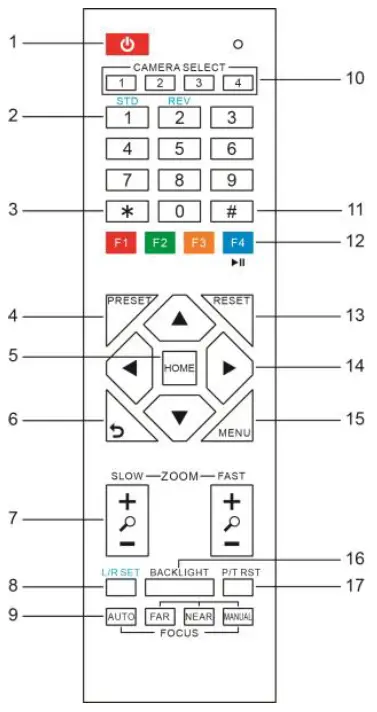
| Key Description |
| 1. Standby Key |
| Press this button to enter standby mode. Press it again to enter normal mode. Note: Power consumption in standby mode is approximately half of the normal mode. |
| 2. Number Key |
| To set preset or call preset. |
| 3. *Key |
| Used with other buttons. |
| on near object). |
| 10. Selection Key |
| Press the button corresponding to camera you want to operate with the remote control. |
| 11. # Key |
| Used with other buttons. |
| 12. IR Remote Control Key |
| [*]+[#]+[F1]: Address 1 [*]+[#]+[F2]: Address 2 [*]+[#]+[F3]: Address 3 [*]+[#]+[F4]: Address 4 |
| 13. Reset Key |
| Clear preset: Erase a preset position. [CLEAR PRESET] + Numeric button (0- 9) |
| 14. Direction Control Key |
| After zoom, the lens moves in the direction indicated by the arrow. Press [HOME] button to face the camera back to front. |
| 15. Menu Key |
| MENU: enter or exit OSD MENU. |
| 16. BLC (Backlight Compensation) Key |
| BLC ON/OFF: Press this button to enable the backlight compensation. Press it again to disable the backlight compensation. NOTE: Effective only in auto exposure mode. If a light behind the subject, the subject will become dark. In this case, press the backlight ON/OFF button. |
| To cancel this function, press backlight ON/OFF button. |
| 17. PTZ Reset Key |
| This function is only applicable to the PTZ cameras. |
MENU
Press [MENU] button to display the main menu on the normal screen, using arrow button to move the cursor to the item to be set. Press the [HOME] button to enter the corresponding sub-menu.
- MENU
- Exposure
- Color
- Image
- Focus
- Noise Reduction
- Setting
- Information
- Restore Default
- Exit
EXPOSURE
Move the main menu cursor to [EXPOSURE], and press [HOME] key enter the exposure page, as shown in the following figure
- EXPOSURE
- Mode Full Auto
- ExpCompMode Off
- Gain Limit 6
- Backlight Off
- DRC Strength 1
- Anti Flickerb50Hz
- Return
Mode: Optional items: Full Auto, Shutter Priority, Bright. Shutter: Optional items: 1/30s, 1/60s, 1/90s, 1/100s, 1/125s, 1/200s, 1/250s, 1/350s, 1/500s, 1/725s, 1/1000s, 1/1500s, 1/2000s, 1/3000s, 1/4000s, 1/6000s, 1/10000s (Effective only in Shutter Priority mode). ExpCompMode: Optional items: On, Off (Effective only in Full Auto mode). ExpComp: Exposure compensation value, optional items: -7 ~ 7 (Effective only in ExpCompMode item to On). Gain Limit: Maximum gain limit, optional items: 0 ~ 15 (Effective only in Full Auto, Bright mode). Backlight: Optional items: On, Off (Effective only in Full Auto, Bright mode). Bright: Optional items: 0 ~ 17 (Effective only in Bright mode). DRC Strength: Optional items: 0 ~ 8. Anti Flicker: Optional items: Off, 50Hz, 60Hz (Effective only in Full Auto, Bright mode).
COLOR
Move the main menu cursor to [COLOR], and press [HOME] key enter the color page, as shown in the following figure.
- COLOR
- WB Mode
- Auto AWB Sens
- High Saturation
- 100% Hue
- 7 Return
WB-Mode: White balance mode, optional items: Auto, Indoor, Outdoor, One Push, Manual, VAR. AWB Sens: The white balance sensitivity, optional items: Low, Normal, High. R Gain: Red gain, optional items: 0 ~ 255 (Effective only in Manual mode). B Gain: Blue gain, optional items: 0 ~ 255 (Effective only in Manual mode). colortemp: Optional items: 2500K ~ 8000K (Effective only in VAR mode). RG Tuning: Red gain fine-tuning, optional items: -10 ~ +10 (Effective only in Auto, One Push, VAR mode). BG Tuning: Blue gain fine-tuning, optional items: -10 ~ +10 (Effective only in Auto, One Push, VAR mode). Saturation: Optional items: 60% ~ 200%. Hue: Optional items: 0 ~ 14.
IMAGE
Move the main menu cursor to [IMAGE], and press [HOME] key enter the image page, as shown in the following figure.
- IMAGE Luminance
- 7 Contrast
- 9 Sharpness
- 3 Flip-H
- Off Flip-V
- Off Gamma
- 0.45 Style
- Clarity LDC
- 10 Return
Luminance: Brightness adjustment, optional items: 0 ~ 14. Contrast: Contrast adjustment, optional items: 0 ~ 14. Sharpness: Sharpness adjustment, optional items: Auto, 0 ~ 14. Flip-H: Image flipped horizontally, optional items: On, Off. Flip-V: Image Flip Vertical, optional items: On, Off. Gamma: Optional items: Default, 0.45, 0.5, 0.56, 0.63. Style: Optional items: Norm, Clarity, Bright, PC, Clarity (LED), Face. LDC: Optional items: Off, -10 ~ 10.
FOCUS
Move the main menu cursor to [FOCUS], and press [HOME] key enter the focus page, as shown in the following figure
- AF Sense: Optional items: Low, Medium, High.
- Focus Area: Optional items: Bottom Half,
- Middle Area, Upper Half, All.
NOISE REDUCTION
Move the main menu cursor to [NOISE REDUCTION], and press [HOME] key enter the noise reduction page, as shown in the following figure.
SETTING
Move the main menu cursor to [SETTING], and press [HOME] key enter the setting page, as shown in the following figure
- SETTING Language
- English EPTZ
- On Zoom Limit
- 3x DVI Mode
- DVI HDMI Format
- 1080P30 Tracking
- Off Return
INFORMATION
Move the main menu cursor to [INFORMATION], and press [HOME] key enter the information page, as shown in the following figure
Maintenance and Troubleshooting
Camera Maintains Use soft cloth or tissue to clean the camera cover. Please use the soft dry cloth to clean the lens. If the camera is very dirty, clean it with diluted neuter detergent. Do not use any type of solvents, which may damages the surface. Unqualified Application No shooting extreme bright object for a long period of time, such as sunlight, light sources, etc. No operating in unstable lighting conditions, otherwise image will be flickering. No operating close to powerful electromagnetic radiation, such as TV or radio transmitters, etc
Troubleshooting
- Check whether the camera installed position be stabled.
- Check whether have vibrating machinery or object near the camera.
Control
Remote control cannot control the camera
- Check and replace the new battery for the remote control.
- Check whether the working mode of the camera is correct.
- Check whether the address of remote control can match the camera
Contact Us
INFOBIT AV PTE. LTD
www.infobitav.com
[email protected]


