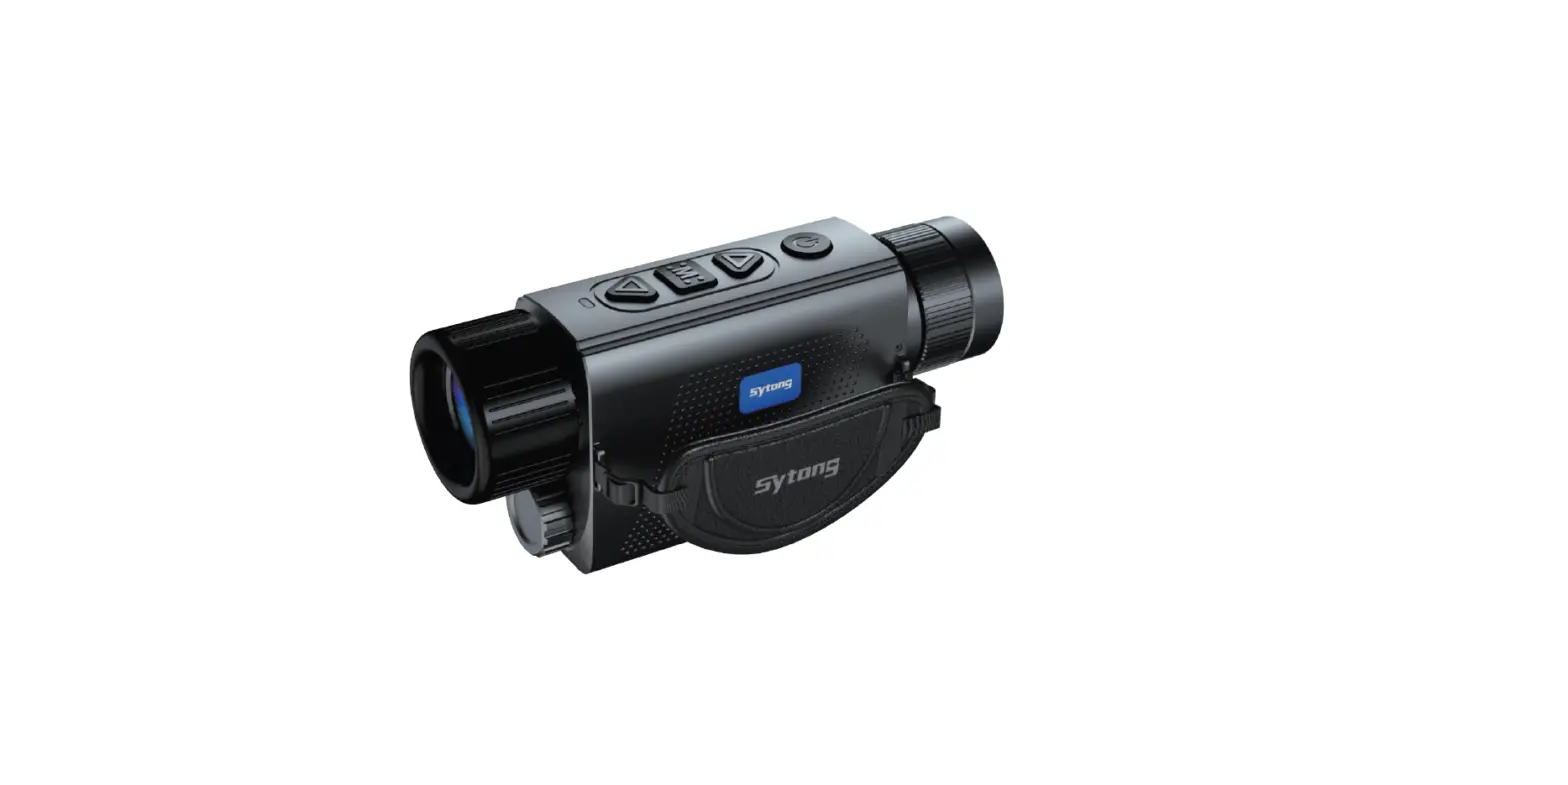
Sytong XS Series Handheld Thermal Imaging
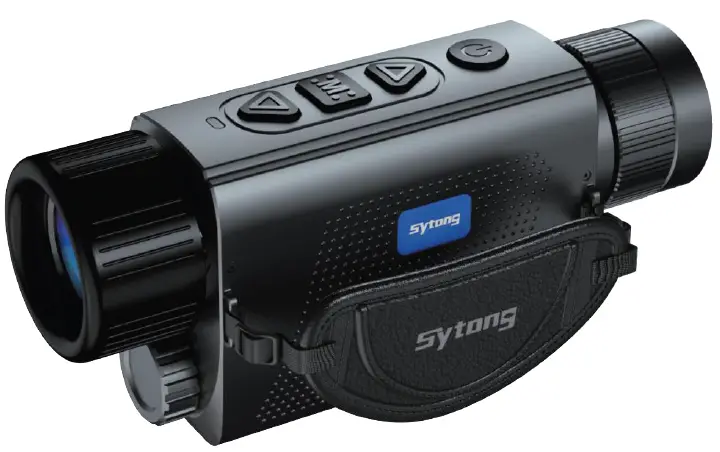
Product Information
The device is designed to operate without causing harmful interference to radio or television reception. The device complies with Part 15 of the FCC Rules and has been evaluated to meet general RF exposure requirements.
Product Usage Instructions
To refresh the device, press the power button. If the device does cause interference to radio or television reception, you can try the following measures:
- Reorient or relocate the receiving antenna.
- Increase the separation between the equipment and receiver.
- Connect the equipment into an outlet on a circuit different from that to which the receiver is connected.
- Consult the dealer or an experienced radio/TV technician for help.
The device can be used in portable exposure condition without restriction. If you have any questions or concerns about the device’s usage, please consult the dealer or an experienced radio/TV technician for help.
Overview
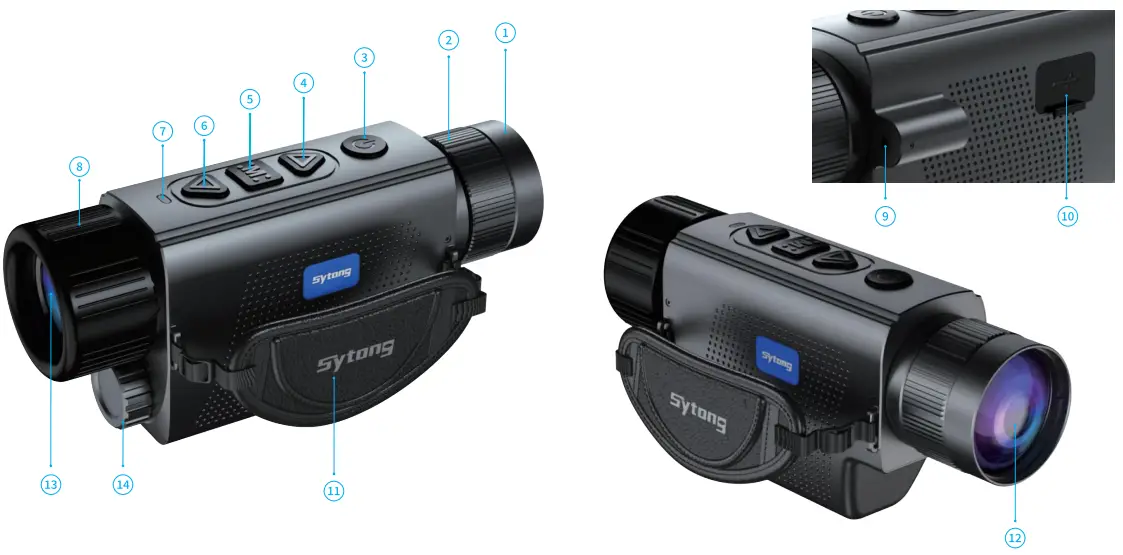
| 1, Lens Cover | 2, Objective Focusing Ring | 3, Power on/Standby Button |
| 4, Navigation UP Button | 5, MENU Button | 6, Navigation DOWN Button |
| 7,LED Indicator (GREEN= POWEROn, RED= Charging) | 8, Eyepiece Focusing Ring | 9, Red Laser Pointer |
| 10, Storage Card Compartment | 11, Hand Strap | 12, Objective Lens |
| 13, Eyepiece Lens | 14, Battery Cap |
ln The Box
- XS HAN DH ELD THERMAL IMAGING
- 18650 Lithium Battery
- Type-C Cable
- Manual
- 5V2A Adapter
- Hand Strap
Quick Start
Power On and Image Settings
- Hold the power (ON/OFF) button (3) for 3 seconds to power on.
- Rotate the eyepiece focusing ring (8) to get a clear image of the icons on the display.
- Rotate the lens focusing ring (2) to get a clear image of the observed object.
- Press the navigation UP button (4) to select the operating modes (White Hot, Sky Mode, Black Hot,Red Hot, Fusion).
- Press the navigation DOWN button (6) to select digital magnification (lx, 2x, 4x, 8x).
- Press the MENU button (5) to enter the menu to select the appropriate parameter.
- Hold the power (ON/OFF) button (3) for 3 seconds to power off. The LED indicator will be turned off after the device is powered off.
Button
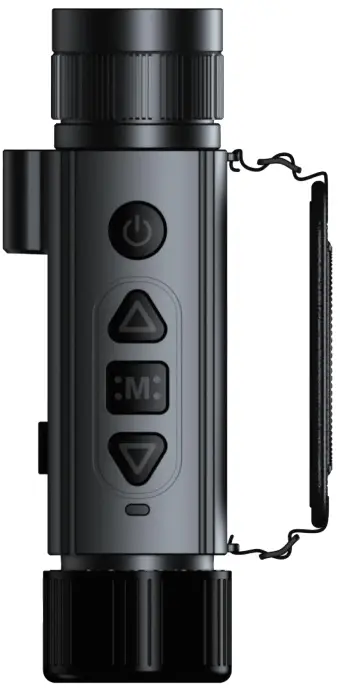
Power (ON/OFF) Button
Hold the power (ON/OFF) button (3) for 3 seconds to power off. The LED indicator will be turned off after power off.
Hold the power (ON/OFF) button (3) for 1-2 seconds to go into sleep mode. The LED indicator will be green when the device is in sleep mode. Wake the device by pressing the power (ON/OFF) button.
Press the power button to refresh the device.
1 Navigation UP button
In menu mode:
Press to switch menu items upwards.
When not in menu mode:
Press to change the operating modes.
Hold to take a picture
MENU Button
In menu mode:
Press to confirm selection.
Hold to exit main menu or submenu.
When not in menu mode:
Press to enter menu mode.
Hold to turn on or off the red laser pointer.
Navigation DOWN Button
In menu mode:
Press to switch menu items downwards.
When not in menu mode:
Press to change set-up zoom 1x,2x,4x,8x
Hold to take a video.
XS Detailed Functions
- Operating Mode
Options: “White Hot”/”Sky Mode”/”Black Hot”/”Red Hot”/”Fusion” Default mode is “White Hot”
- Video Output
The video output function of the CVBS is enabled or disabled - WiFi
Options: “On”/”Off”
Turn on WiFi on both the device’s Menu and user’s phone.
On user’s phone, find and connect to “APPshow-XS-XXX” WiFi network with password 12345678. Live image will be displayed on the App after the phone is connected to the device’s WiFi. - LED Brightness
Select “OLED Brightness” in the main menu, press MENU button to set the screen brightness from”Super Dark”/”Dark”/”Normal”/”Bright”/”Super Bright”. The default mode is “Normal”. - Target Brightness
Find the “Target Brightness” in the main menu. Press MENU button to choose from the 5 brightness levels (1-5). - Contrast Ratio
Press the MENU button to enter the main menu and select “Contrast Ratio”. There are 10 options (1-10). - lmage Detail Boost
Press the MENU button to enter the main menu and select the “Image Detail Boost” function. Image resolution will vary according to each option. Press MENU button to choose your option - Date/Time
Move the options by pressing the MENU button. Change the value using the UP/DOWN button. Confirm the values by pressing the MENU button. Quit by holding the MENU button. - Language
Enter the language menu setting. Save the settings by pressing the MENU button. - Record Audio
Select “Record Audio” and press MENU button. Select “On”/”Off”. - Format
Select “Format” under main menu, press the MENU button to format the memory storage in the device.
Attention! Data cannot be recovered after formatting! - Auto Power-Off
Select “Auto Power Off” under main menu, short press MENU button to set the mode between “3 Min”, “5 Min” and “Off”. The defualt mode is “Off”. - Default Setting
Find default settings under main menu, short press MENU button to enter the submenu.
Select “Confirm” to save the default settings. Attention ! Factory default settings will be saved after confirmation. - Pixel Fix
Select “Pixel Fix” and press MENU button to get to the sub menu. The lens should be covered with lens cover before performing the pixel fix. Press the MENU button and follow the prompts to fix the bad pixels. After repair, please remember to save it.
Navigation key up/down move cursor, power button to switch options, short press M key to save. - Image Correction
Enter the menu of image correction. If image correction is required, select and confirm, close the lens cover, and press “M” to correct the background image uniformity. After correction, it will automatically save and exit. - Version
Select “Version” to view the device’s software version.

APP Connection

Download APP by Scanning the QR code according to the mobile phone system. 
IXS03
XS03 Data Sheet
Sensor (Military Grade)
| Type | Uncooled | Resolution | 384×288 Super Sensitive |
| Frame Rate | 50 Hz | Pixel Size | 12µm |
| NETD | <25mk |
Optical Characteristics
| Objective Lens | fl5/19/25/35mm, F/1.0 | Magnification | l.2x/l.5x/2.0x/2.8x |
| Digital Zoom | lx / 2x / 4 x/ Bx | Eye Relief | 30mm |
| Dioptre Adjustment | +5/-5 D | Close-up Range | 5m-= |
| FOV | 17.5°Xl3.1° / 13.S”Xl0.4° / 10.S0X7.9° / 7.S”XS.7° |
Display
| Operating Mode | White Hot, Black Hot, Sky Mode, Red Hot, Fusion | Type/ Resolution | 0.39 inch/ OLED / 1024X768 |
Operational Characteristics
| Power Supply | 3-4.2 V | Waterproof Rating | IP66 |
| External Power Supply | SV (USB) | Battery | 18650 /3200mAh |
| Operating Temperature | – 20°C to + S0°C | Dimensions | 156X54X75mm |
| Weight(Without Battery /Mount) | 308g | Operating Time (At Temperature Of 22°() | 5 hours |
Video Recorder
| Video/ Photo Resolution | 1024×768 | Video/ Photo Format | .mp4/ .jpg |
| Supported Memory Type | Built-in 32G Memory Card |
Wifi Channel
| Frequency | 2.4GHz | Standard | 802.11 b/g |
| WiFi Signal Range | 15m | Detection Distance (Targt Size: 1.7m x 0.Sm) | 750m/955m/1250m/1750m |
Sensor (Military Grade)
| Type | Uncooled | Resolution | 640×512 Super Sensitive |
| Frame Rate | 50 Hz | Pixel Size | 12µm |
| NETD | <25mk |
Optical Characteristics
| Objective Lens | fl9/25/35mm, F/1.0 | Magnification | 0.9x/l.2x/l.7x |
| Digital Zoom | lx / 2x / 4 x/ Bx | Eye Relief | 30mm |
| Dioptre Adjustment | +5/-5 D | Close-up Range | Sm-= |
| FOV | 22.9’Xl8.4′ / 17.S’Xl3.l’ / 12.5’X9.4′ |
Display
| Operating Mode | White Hot, Black Hot, Sky Mode, Red Hot, Fusion | Type/ Resolution | 0.39 inch/ OLED / 1024X768 |
Operational Characteristics
| Power Supply | 3-4.2 V | Waterproof Rating | IP66 |
| External Power Supply | SV (USB) | Battery | 18650 /3200mAh |
| Operating Temperature | – 20°C to + S0°C | Dimensions | 156X54X75mm |
| Weight(Without Battery /Mount) | 308g | Operating Time (At Temperature Of 22°() | 5 hours |
Video Recorder
| Video/ Photo Resolution | 1024×768 | Video/ Photo Format | .mp4/ .jpg |
| Supported Memory Type | Built-in 32G Memory Card |
Wifi Channel
| Frequency | 2.4GHz | Standard | 802.11 b/g |
| WiFi Signal Range | 15m | Detection Distance (Targt Size: 1.7m x 0.Sm) | 955m/1250m/1750m |
Notice
Operating Instructions For Accessories
Power Adapter
Used only to charge batteries equal to or below 5V/2A.
Red Laser Pointer Adjustment
Hold the MENU button to turn on/off the red laser pointer. Adjust the position of the red laser pointer by using an inner hexagon wrench.
Follow Sytong official account to learn more Website: https://www.sytong2013.com
FCC
FCC Warning Statement: Changes or modifications to this unit not expressly approved by the party responsible for compliance could void the user’s authority to operate the equipment. This equipment has been tested and found to comply with the limits for a Class B digital device, pursuant to Part 15 of the FCC Rules. These limits are designed to provide reasonable protection against harmful interference in a residential installation. This equipment generates, uses and can radiate radio frequency energy and, if not installed and used in accordance with the instructions, may cause harmful interference to radio communications.
However, there is no guarantee that interference will not occur in a particular installation. If this equipment does cause harmful interference to radio or television reception, which can be determined by turning the equipment off and on, the user is encouraged to try to correct the interference by one or more of the following measures:
- Reorient or relocate the receiving antenna.
- Increase the separation between the equipment and receiver.
- Connect the equipment into an outlet on a circuit different from that to which the receiver is connected.
- Consult the dealer or an experienced radio/TV technician for help.
This device complies with Part 15 of the FCC Rules.
Operation is subject to the following two conditions:
- this device may not cause harmful interference, and
- this device must accept any interference received, including interference that may cause undesired operation.
FCC Radiation Exposure Statement
The device has been evaluated to meet general RF exposure requirement. The device can be used in portable exposure condition without restriction.


