
Sytong NM Series Thermal Imaging Sights User Guide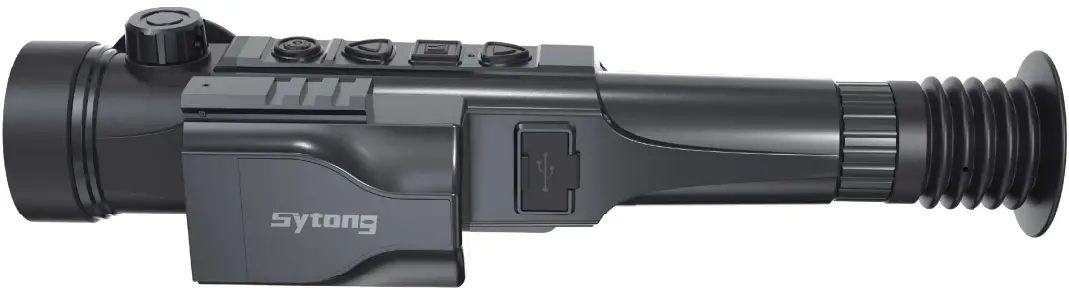
Product Overview
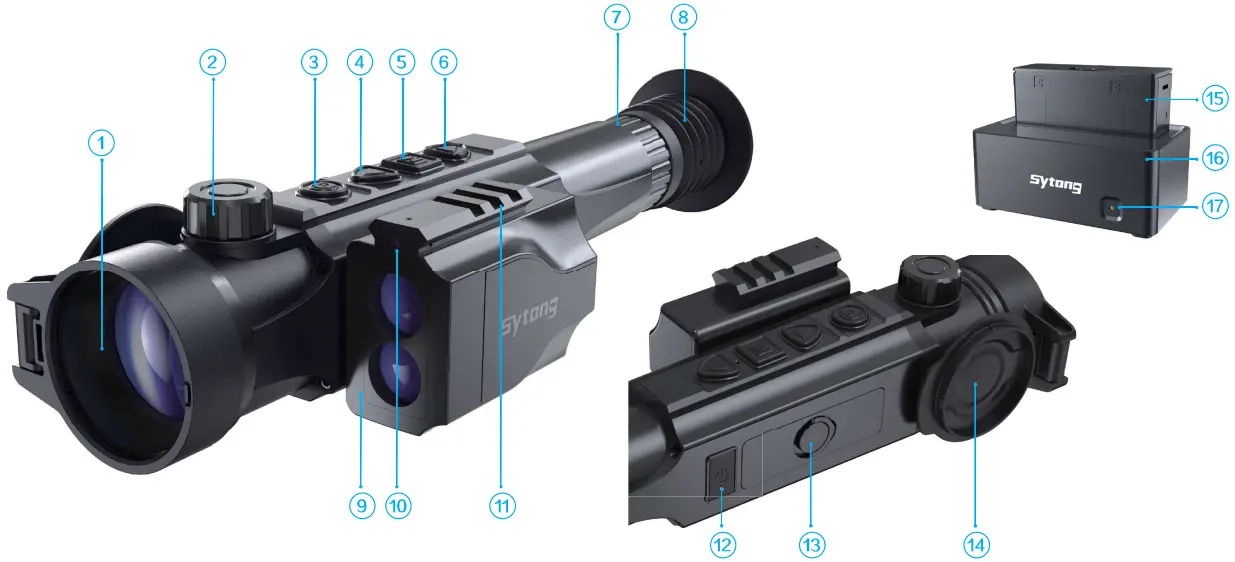
| 1, Objective lens | 2, Lens focusing ring | 3, Recording button REC |
| 4, Navigation button UP | 5, Button MENU M | 6, Navigation button DOWN |
| 7, Dioptre adjustment ring | 8, Eyeshade | 9, Laser rangefinder |
| 10, Laser red dot | 11, External rail | 12, Power On/Off button |
| 13, Battery pack ring | 14, Lens cover | 15, battery pack |
| 16, Charging base | 17, LED indicator |
Package Contents
- Thermal Imaging Sight
- Battery Charger
- 5V2A adapter
- Type-c USB cable
- Manual
- Mount(with screws and hex-nut wreches)
- Battery Pack
- Handbag
Getting Started
TRUNING ON AND IMAGE SETUP
- Open the lens cover (14) Turn the device on with a short press of the ON/OFF (12) button.
- Rotate the dioptre adjustment ring (7) to see crisp image of the icons on the display.
- Rotate the lens focusing ring (2) to see a crisp image of the object observed.
- Select the required operating mode in the main menu(WHITE HOT,TARGET HIGHLIGHT,RED-HOT,FUSION) with a short press of the (4) button.
- Select the required magnification (lx,2x,4x,6x,8x) with a short press of the (6) button.
- Select the required menu items with a short press of (5) button.
- Turn the device off with 3 seconds press of the ON/OFF (12) button.
Buttons Legend
 Power ON/OFF button
Turn the device on with a brief press. Turn the device off with 3 seconds press. With power on, press the power button for 1-3 seconds, the screen will appear sleep icon and the device will go into sleep. Wake up the device with a short press.
Short press switch the shutter.
 Recording button REC
Brief press: Take a picture
Long press: Recording
Remark: Please turn the camera on before 7a4 ng pictures or recording.
 ↑ Navigation button UP
Brief press: Switch menu items upward / Change display mode without menu
Long press: ON/OFF picture in picture
 Menu button
Brief press: Quick menu access/Confirm selection
Long press: ON/OFF laser pointer/Back to previous menu With LRF ON: lock/unlock range finding values with a brief press of MENU button.
 ↓ Navigation button DOWN
Brief press: Switch menu items downward/change set-up zoom without menu lx,2x,4x,6x,8x
Long press: ON/OFF laser rangefinder
| Number | Main menu description | Sub menu description |
| 1 | Operating modes | Options: WHITE HOT,BLACK HOT,TARGET HIGH LIGHT, RED HOT, FUSION. Default mode is WHITE HOT. |
| 2 | Taking photos/ Video Recording | Options: ON/OFF |
| 3 | WIFI connection |
|
| 4 | Picture in picture | Options: OFF, set-up zoom 2x,4x |
| 5 | Reticle type | Options: OFF, select a type from 8 choices |
| 6 | Zeroing Profile | Select one of the saved profiles.(Max.10 profiles) |
| 7 | Zeroing setup | Freeze the image with brief press of M (5) button. Then move the reticle horizontally or vertically with UP (4) / DOWN (6) buttons until the reticle matches the point of impact. Switch between movement directions of the reticle from horizontal to vertical with a brief press of REC (3) button. Select the target distance and units (yd/m).Save the new position of the reticle with SAVE. The reticle will now move to the point of impact.(The saved zeroing will be named as distance in each profile.) |
| 8 | Gyroscope | Options: ON/OFF |
| 9 | Distance units | Options: m/yd |
| 10 | Range finding | Modes: single measure, continuous measure |
| 11 | Display brightness | Options: super dark, dark, normal, bright, super bright |
| 12 | Target Brightness | Options: 1-5 |
| 13 | Contrast Ratio | Options: 1-10 |
| 14 | Image Detail Boost | Options: 1-4 |
| 15 | Date/Time | Move the options with short press of REC button. Change the option values with UP/DOWN button. Confirm the values with short press of MENU button. Quit with long press of MENU button. |
| 16 | Formatting | Enter into sub menu of Format, confirm or cancel with a brief press of MENU button. |
| 17 | Languages | Options: Chinese, English, other languages |
| 18 | Record Audio | Options: ON,OFF |
| 19 | Auto turn off | Options: 3MIN,5MIN,OFF |
| 20 | Default | Options: confirm, cancel |
| 21 | Pixel Cure | Select “pixel cure”and press Menu button to get the sub menu. The lens should be covered by lens cover to cure the bad pixels. Follow the prompts to cure the bad pixels.After repaired , please member to save it. Select BC and briefly press MENU button to get the sub menu: Open/Close/Parameter. Select “open” and briefly press MENU button to turn on the automatic BC. |
| 22 | BC | Select “close” and briefly press MENU button to turn off the automatic BC. Select “parameter” and the parameter dialog will pop out. Fill the parameter values and select OK to save. Long press MENU button to quit. |
| 23 | Version |
Installing The Battery Pack
- Lift the ring(13). Remove the Battery Pack (15)from the charging base.
- Insert the Battery Pack (15) into the thermal Imager. • Fix the battery by rotating the ring(13)
Charging the Battery Pack
- Insert the battery pack (15) into the supplied charging base (16).Close the ring (13).
- Connect the USB cable to the supplied adaptor then connect to power supply 100V-240V. Red LED (17) means charging. Green LED means full charged.
‘Using the intergrated laser rangefinder
- Turn the device on with brief press of the button ON/OFF (12). Activate the rangefinder with long press of Button DOWN (6). A rangefinding indicator (a small box) will appear in the center of the display. Point the range finding indicator (a small box) at an object to mesure. Distance value will automatically appear in the top right corner of the display.
Installation of mount
- Attach the mount to the base of the scope using a hex-nut wrech and screws.
- The mounting holes in the base of the scope enable the mount to be installed in one of the multiple positions. The choice of the mounting position helps the user to ensure the correct eye relief dependingon the device type.
- The scope is ready to be installed on a device and to be zeroed.
- Before going to legal hunt, please follow instructions in the section ‘Zeroing’.
APP Connection
Download APP by Scanning the QR code according to the mobile phone system.
Download APP by Scanning the QR code according to the mobile phone system.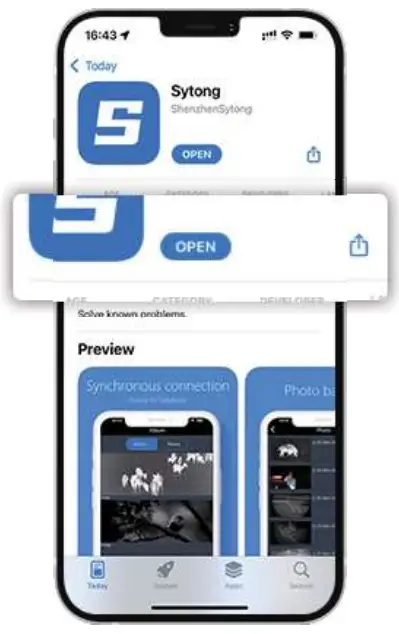
Enter into the menu and turn on WIFI.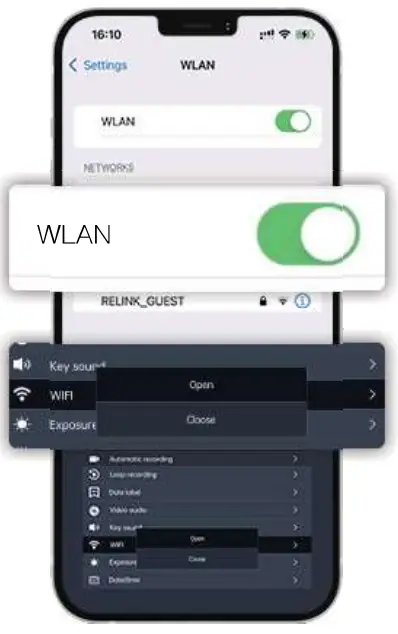
Enter into APP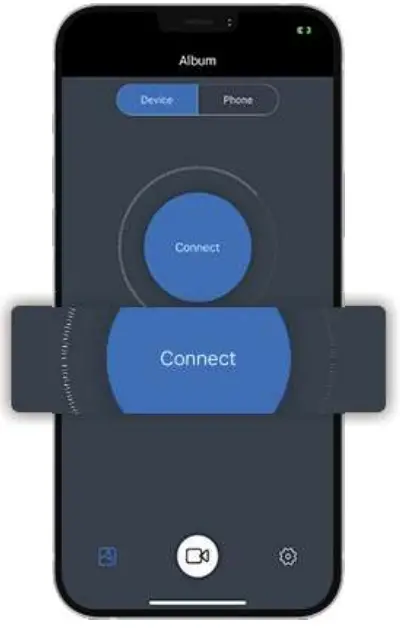
choose wifi “Sytong …” to connect WIFI
(password: 12345678)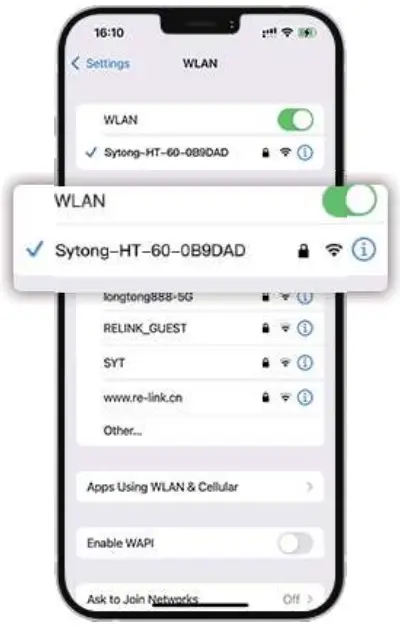
NM03
Sensor (military grade)
| Type | non refroidi | Resolution, pixels | 384×288 super sensitive |
| Frame rate | 50 Hz | Taille pixels | 12pm |
| NETD | <30mK |
Optical characteristics
| Objective lens | 135/150 mm, F1.2 | Magnification | 2 8x/4x |
| Continuous digital zoom | 1x/ 2x / 4x /6x/8x | Eye relief | 50 mm |
| Dioptre adjustment | +5/-5 D | Close-up range | 5m |
Display
| Colour Palettes | Black Hot, White Hot, Red Hot, Fusion, Target Highlight | Type / Resolution | 0.39 inch / AMOLED / 1024X768 |
Operational characteristics
| 3D Gyroscope | yes | Waterproof rating | IP65 |
| Power supply | 3-4.2 V | Battery | Li-Ion Battery Pack /6000mAh / DC 3.7V |
| External power supply | 5V (USB) | Operating time (at t=22°C) | 9 hours |
| Max. recoil power, Joules | 10000 | Operating temperature | – 20°C…50°C |
| Dimensions | 305X94X75 mm | Weight (without battery/ mount) | 1030g |
Video recorder
| Video / photo resolution | 1024×768 | Video / photo format | .mp4 /.jpg |
| Memory type | TF card (FAT32), max.128G |
Wifi channel
| Frequency | 2.4GHz | Standard | 802.11 b/g |
| Line-of-sight reception range | 15m |
Rangefinder
| Wavelength | 905nm | Max. measuring range | 1800m |
| Measuring accuracy | +1- lm |
NM06
Sensor (military grade)
| Type | non refroidi | Resolution, pixels | 640×480 super sensitive |
| Frame rate | 50 Hz | Taille pixels | 12pm |
| NETD | <30mK |
Optical characteristics
| Objective lens | f35/f50 mm, F1.2 | Magnification | 1.7x/2.5x |
| Continuous digital zoom | l x/ 2x /4x / 6x/ 8x | Eye relief | 50 mm |
| Dioptre adjustment | +5/-5 D | Close-up range | 5m |
Display
| Colour Palettes | Black Hot, White Hot, Red Hot, Fusion, Target Highlight | Type / Resolution | 0.39 inch / AMOLED / 1024X768 |
Operational characteristics
| 3D Gyroscope | yes | Waterproof rating | IP65 |
| Power supply | 3-4.2 V | Battery | Li-Ion Battery Pack /6000mAh / DC 3.7V |
| External power supply | SV (USB) | Operating time (at t=22°C) | 9 hours |
| Max. recoil power, Joules | 10000 | Operating temperature | – 20°C…50°C |
| Dimensions | 340X94X75 mm | Weight (without battery/ mount) | 1030g |
Video recorder
| Video / photo resolution | 1024×786 | Video / photo format | mp4/.jpg |
| Memory type | TF card(FAT32),max 128G |
Wifi channel
| Frequency | 2.4GHZ | Standard | 802.11 b/g |
| Line-of-sight reception range | 15m |
Rangefinder
| Wavelength | 905mm | Max. measuring | 1800m |
| Measuring accuracy | +/- 1m |
Attention!
Remind of using accessories
Power adaptor
Only applicable to charging voltage below 5v/2A.
Adjust the laser red dot
ON/OFF laser red dot with a long press of MENU button. The position of the laser red dot can be adjusted by hex wrenches.
Note: Our products are fixed on the equipment and controlled by WiFi connected app. They can’t be close to human eyes and will be damaged. They can only be used fixedly, with a distance of more than 20cm from human body.
This product can only be used in legal fields such as scientific research, observation, emergency search and it is strictly prohibited to be used on illegal purposes. Our company reserves the right to pursue legal liability of illegal users.
Follow Sytong Official account to learn more 
FCC Statements
This device complies with part 15 of the FCC Rules. Operation is subject to the following two conditions:
- this device may not cause harmful interference, and
- this device must accept any interference received, including interference that may cause undesired operation.
Any changes or modifications not expressly approved by the party responsible for compliance could void the user’s authority to operate the equipment.
NOTE: This equipment has been tested and found to comply with the limits for a Class B digital device, pursuant to Part 15 of the FCC Rules. These limits are designed to provide reasonable protection against harmful interference in a residential installation.
This equipment generates, uses and can radiate radio frequency energy and, if not installed and used in accordance with the instructions, may cause harmful interference to radio communications.
However, there is no guarantee that interference will not occur in a particular installation.
If this equipment does cause harmful interference to radio or television reception, which can be determined by turning the equipment off and on, the user is encouraged to try to correct the interference by one or more of the following measures:
- Reorient or relocate the receiving antenna.
- Increase the separation between the equipment and receiver.
- Connect the equipment into an outlet on a circuit different from that to which the receiver is connected.
- Consult the dealer or an experienced radio/TV technician for help.
The device has been evaluated to meet general RF exposure requirement. The device can be used in portable exposure condition without restriction.
![]()


