![]() M124 Controlling Network Master
M124 Controlling Network Master
Bettis XTE3000 Integration Procedure
Installation Instructions
VCIOM-17028 Rev. 0
January 2022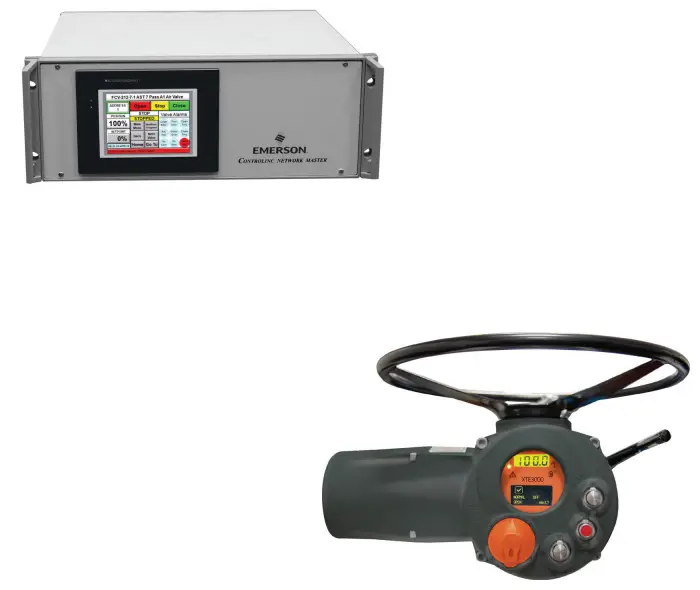
![]() WARNING
WARNING
Failure to follow instructions for proper installation may result in errant information being displayed.
Section 1: Adding XTE3000 Actuators to Existing Network
1.1 Update Firmware in Slot 1 Coprocessor Module
- Obtain firmware files “M124N500.abm” and “Controlling Network Master Firmware Download Procedure” from Emerson’s website, link: www.Emerson.com/Controlinc.
- Use the procedure to download M124N500.abm firmware to Slot 1 Coprocessor module.
1.2 Configure Controlling Network Master to Communicate with XTE3000 Actuators
- Update the number of actuators in the loop.
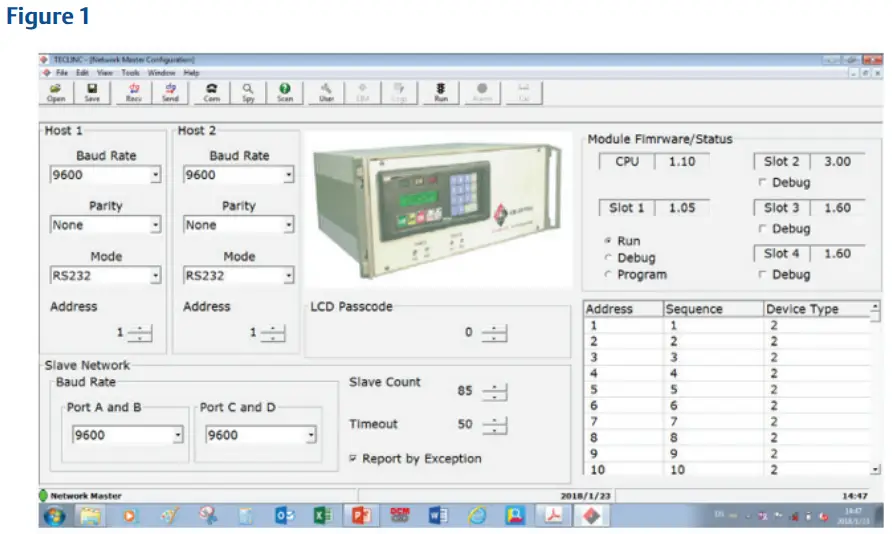
— Open up TECLINC and established communication, Figure 1. — Change the “Slave Count” number to match the number of devices on the loop, Figure 2.
 — Click “Send” and wait for 5 seconds then “Read” to make sure it is written, Figure 3.
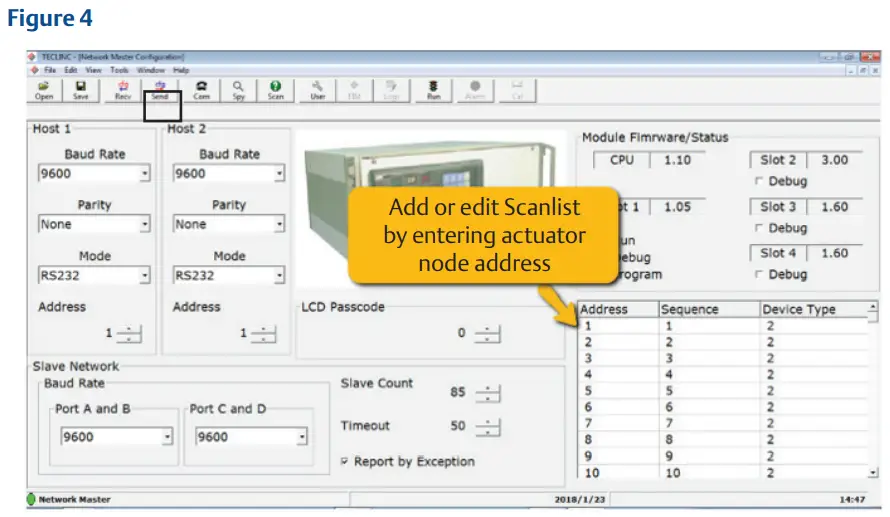
- Edit Scan list
— On the TECLINC master Main Page, refer to Figure 1.
— Select “Address” to edit or to add more actuators to the network, Figure 4. — Click “Send” and wait for 5 seconds then “Read” to verify it is written.
 - Enter Device Type
In order for Controlling to recognize XTE3000 actuators, set “Device Type” to 7.
— On the TECLINC master Main Page, refer to Figure 1.
— Select “Device Type” then enter “7” for the XTE3000 actuator, Figure 5. — Click “Send” and wait for 5 seconds then “Read” to make sure it is written.
— Cycle Network Master power.
 — Change the “Slave Count” number to match the number of devices on the loop, Figure 2.
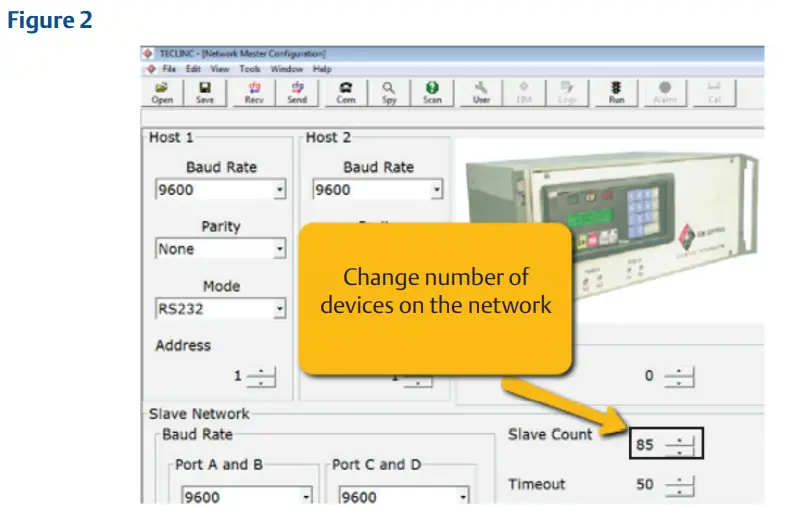 — Click “Send” and wait for 5 seconds then “Read” to make sure it is written, Figure 3.
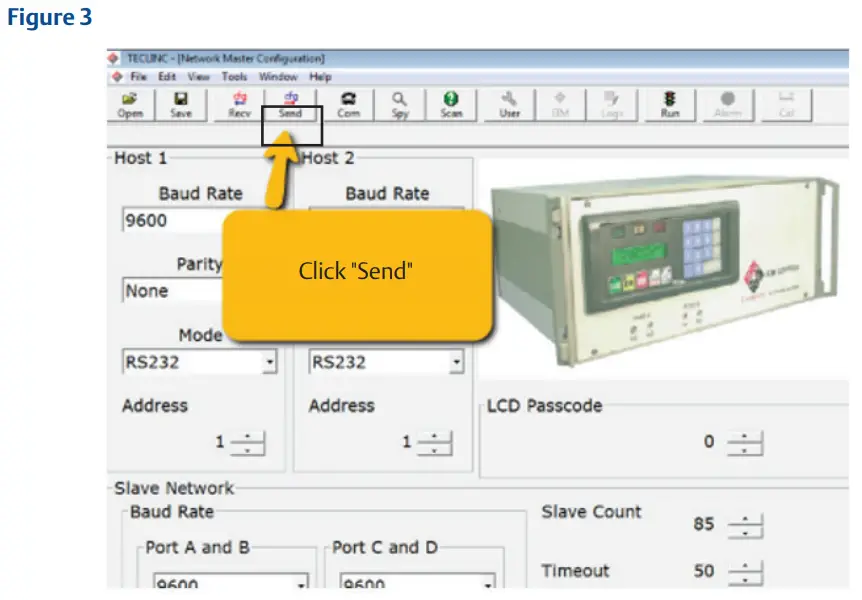
 — Click “Send” and wait for 5 seconds then “Read” to verify it is written.
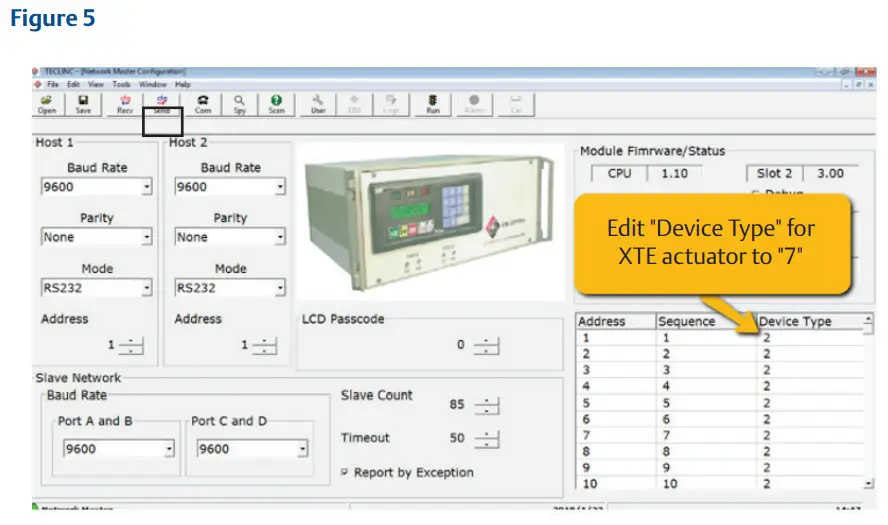 — Click “Send” and wait for 5 seconds then “Read” to make sure it is written.
Section 2: Replacing Actuators with XTE3000 in Existing Network
2.1 Update Firmware in Slot 1 Coprocessor Module
- Obtain firmware file “M124N500.abm” and “Controlling Network Master Firmware
Download Procedure” from Emerson website, link: www.Emerson.com/Controlinc. - Use the procedure to download M124N500.abm firmware to Slot 1 Coprocessor module.
2.2 Configure Controlling Network Master to Communicate with XTE3000 Actuators
- No change to the number of actuators in the loop.
- No change to the Scientist.
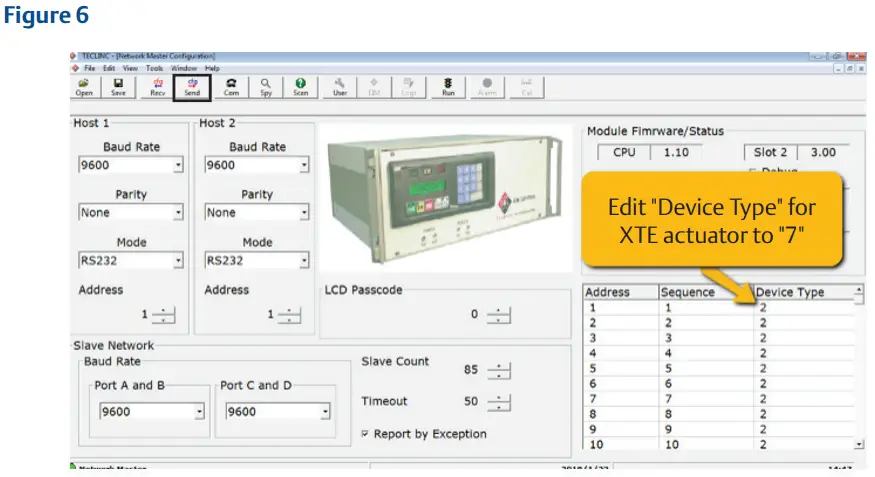
- Edit “Device Type”.
In order for Controlling to recognize XTE3000 actuators, change “Device Type” to 7.
— On Touch Panel go to Main Menu, Figure 1.
— Select “Device Type” then enter “7” for the XTE3000 actuator, Figure 6. — Click “Send” and wait for 5 seconds then “Read” to verify it is written.
— Cycle Network Master power.
 — Click “Send” and wait for 5 seconds then “Read” to verify it is written.
World Area Configuration Centers (WACC) offer sales support, service, inventory, and commissioning to our global customers.
Choose the WACC or sales office nearest you:
| NORTH & SOUTH AMERICA 19200 Northwest Freeway Houston TX 77065 USA T +1 281 477 4100 Av. Hollingsworth 325 Iporanga Sorocaba SP 18087-105 Brazil T +55 15 3413 8888 | ASIA PACIFIC No. 9 Gul Road #01-02 Singapore 629361 T +65 6777 8211 No. 1 Lai Yuan Road Wuqing Development Area Tianjin 301700 P. R. China T +86 22 8212 3300 |
| MIDDLE EAST & AFRICA P. O. Box 17033 Jebel Ali Free Zone Dubai T +971 4 811 8100 P. O. Box 10305 Jubail 31961 Saudi Arabia T +966 3 340 8650 24 Angus Crescent Longmeadow Business Estate East P.O. Box 6908 Greenstone 1616 Modderfontein Extension 5 South Africa T +27 11 451 3700 | EUROPE Holland Fasor 6 Székesfehérvár 8000 Hungary T +36 22 53 09 50 Strada Biffi 165 29017 Fiorenzuola d’Arda (PC) Italy T +39 0523 944 411 |
For a complete list of sales and manufacturing sites, please visit www.emerson.com/actuationtechnologieslocations or contact us at [email protected]
www.emerson.com/bettis
VCIOM-17028 ©2022 Emerson. All rights reserved.
The Emerson logo is a trademark and service mark of Emerson Electric Co.
All other marks are property of their respective owners.
The contents of this publication are presented for information purposes only, and while effort has been made to ensure their accuracy, they are not to be construed as warranties or guarantees, express or implied, regarding the products or services described herein or their use or applicability.
All sales are governed by our terms and conditions, which are available on request. We reserve the right to modify or improve the designs or specifications of our products at any time without notice.
![]()


