
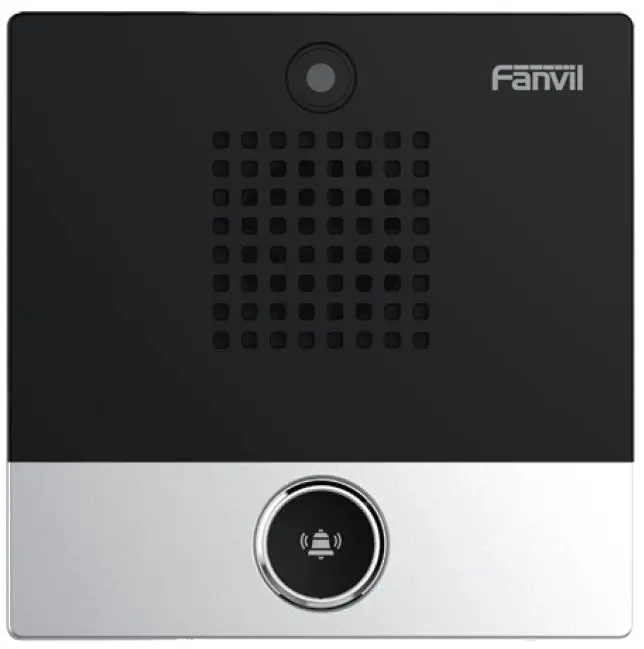
Fanvil i10S SIP Mini Intercom 
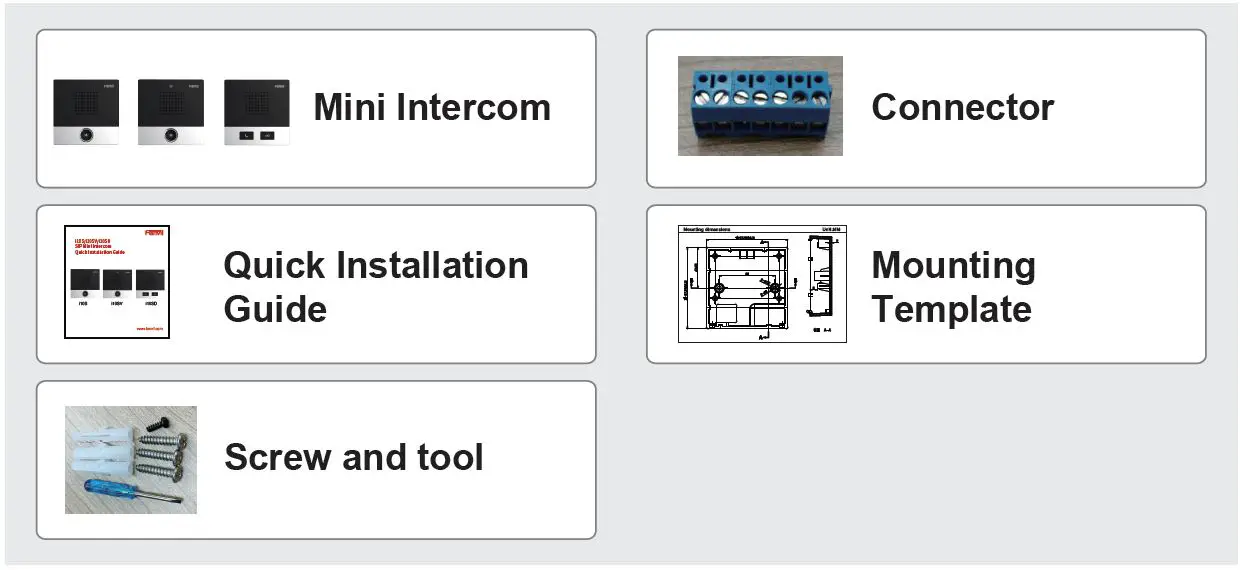
Package Contents
Physical specification
| Device size | 88 x 88 x 32 mm |
| i10S | No camera, 1 button |
| i10SV | With camera, 1 button |
| i10SD | No camera, 2 button |
Panel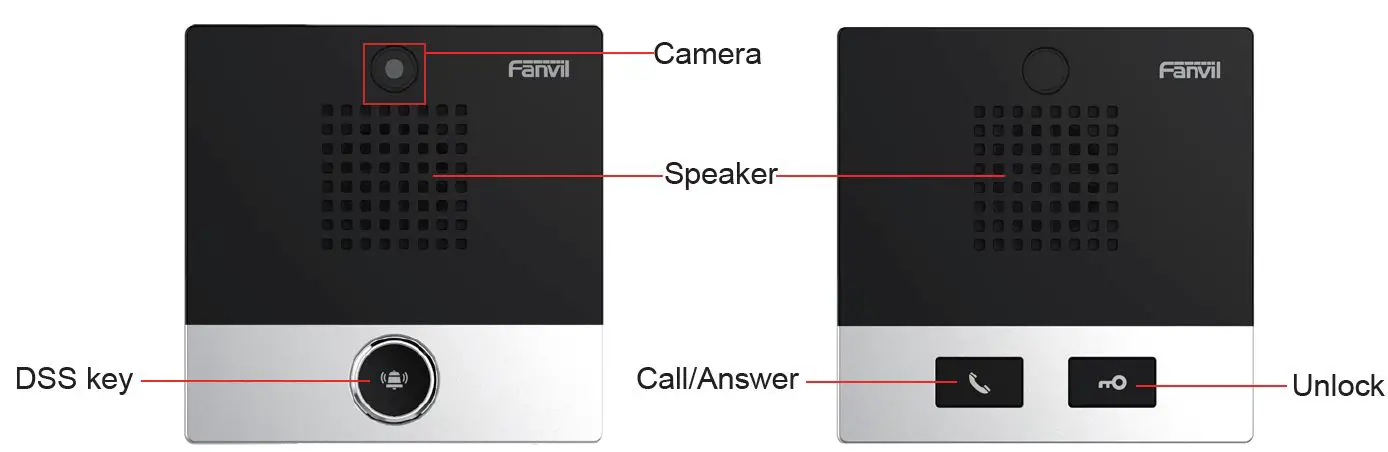
Interface description
Open the rear case of the device, there is a row of terminal blocks for connecting the power supply, indoor switch. The connection is as follows: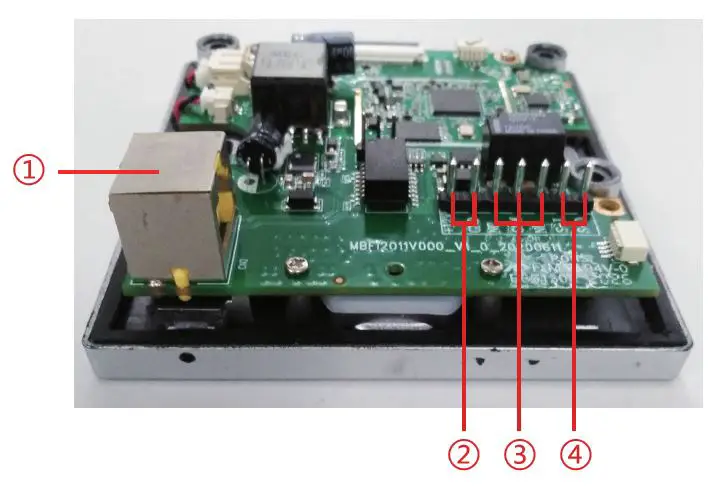
| Serial number | Description |
| ① | Ethernet interface: standard RJ45 interface, 10/100M adaptive, it is recommended to use five or five types of network cable |
| ② | Power interface: 12V/1A input |
| ③ | A set of short-circuit output interfaces |
| ④ | A set of short-circuit input interfaces |
Installation Diagram

Installation of rubber plug:
- Wall mount: Attach the installation dimension drawing to the position to be installed, use the electric drill to punch the hole in the 2 screw holes marked, and use the hammer to drive the rubber plug into the drilled hole.
- Built-in: Attach the installation dimension drawing to the position to be installed, open a groove of the same size according to the size, use the electric drill to punch the hole in the 2 screw holes marked, and use the hammer to drive the rubber plug into the drilled hole.
- Remove the cover;
- Use a screwdriver to remove the 4 screws on the main body to separate the main body from the rear case;
- Pass all the wires through the hole in the lower right corner of the bottom case. All lines must be reserved for a length of 15~20CM;
- Fix the housing
- Wall Mount: Align the bottom case with the position of the screw hole that was previously punched on the wall, and screw in the two screws with a screwdriver to fix the bottom case to the wall;
- Built-in: Place the bottom case into the previously opened groove and screw in the two screws with a screwdriver to secure the bottom case to the wall;
- Connect power, network and control cables, and the test whether there is electricity by doing the following:
- Long press DSS key for 3 seconds(after power-on for 30 seconds), and when the speaker beeps rapidly, press DSS key again quickly, the beeps stop ,the intercom will report the IP address by itself.
- If the work is normal, continue with the next steps.
- Lock the 4 screws removed in step 3;
- Cover the cover removed in step 2;
Searching device
Methods 1:
Download address: http://download.fanvil.com/tool/iDoorPhoneNetworkScanner.exe Open the door phone Network Scanner. Press the Refresh button to search the device and find the IP address.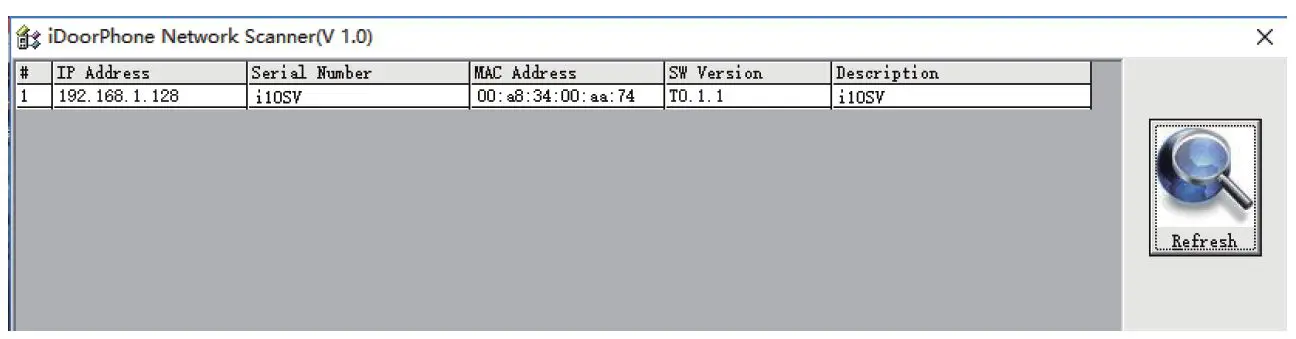
Method 2:
Long press DSS key for 3 seconds(after power-on for 30 seconds), and when the speaker beeps rapidly, press DSS key again quickly, the beeps stop ,the intercom will report the IP address by itself.
Method 3:
In addition, device provides the device surface DSS key operation to switch IP address acquisition mode: In the standby mode, long-press the DSS key for 3 seconds and the beep will last for 5 seconds. Within 5 seconds, press the DSS key three times quickly to switch to the network mode.
- If it is in the mode of DHCP and doesn’t receive the IP address, switch it to the mode of static IP (192.168.1.128), broadcast the IP address after the successful switch.
- If it is in the mode of static IP address (192.168.1.128), switch it to the DHCP mode, broadcast the IP address after the successful switch.
- If it is in the mode of DHCP and obtain the IP address, the mode will not be switched and directly broadcast the IP.
| Default Setting | |||
| Default DHCP Client | Enabled by default | Static IP address | 192.168.1.128 |
| Default DHCP Client | Hold the DSS key for 3 seconds, then press the DSS key again. | Default Web port | 80 |
Fast settings
Step 1: Log in to the device page
Use the web browser input IP (for example http://192.168.1.128) access. The default user and password are admin.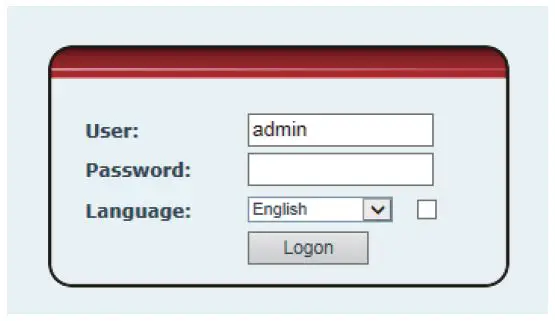
Step 2: Set SIP account
Set SIP server address, port, user name, password and SIP user with assigned SIP account parameters. Select “Activate”, and then click [Apply] to save this setting.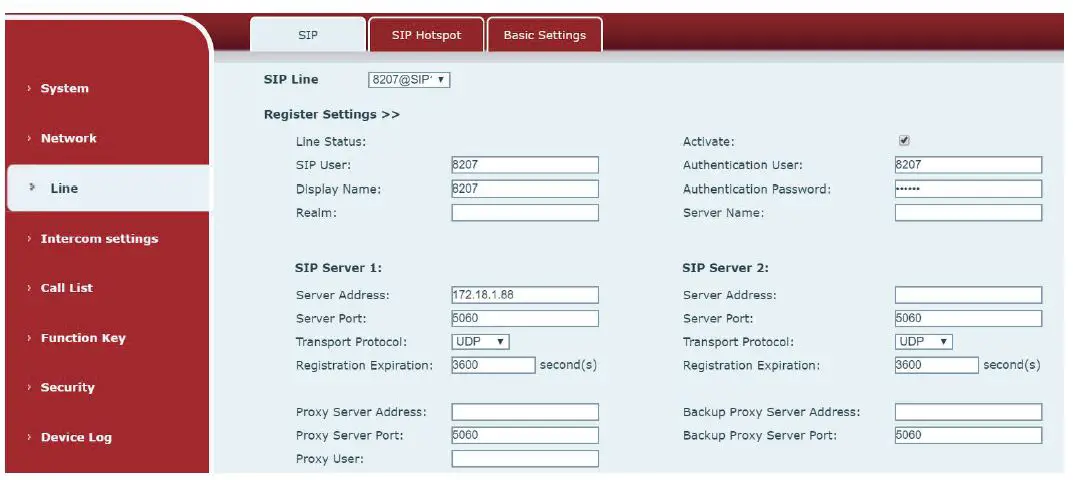
Step 3: Set the volume (if not connected can skip) Intercom settings => Media Settings => Media Settings Set the device volume size, as shown below, click [Apply].
Speakerphone volume setting: set the speaker volume of normal calls.
Handsfree Mic Gain: set the microphone volume of call.
Step 4: Set function key (if not connected can skip)
Set the function key as shown below for a quick start, click [Apply] to save this setting.
Type: Memory key
Number 1 (Value): the function key will dial to this number 1
Number 2 (Value 2): if number 1 is unavailable, it will be forwarded to number 2.
Subtype: speed dial
Line: working line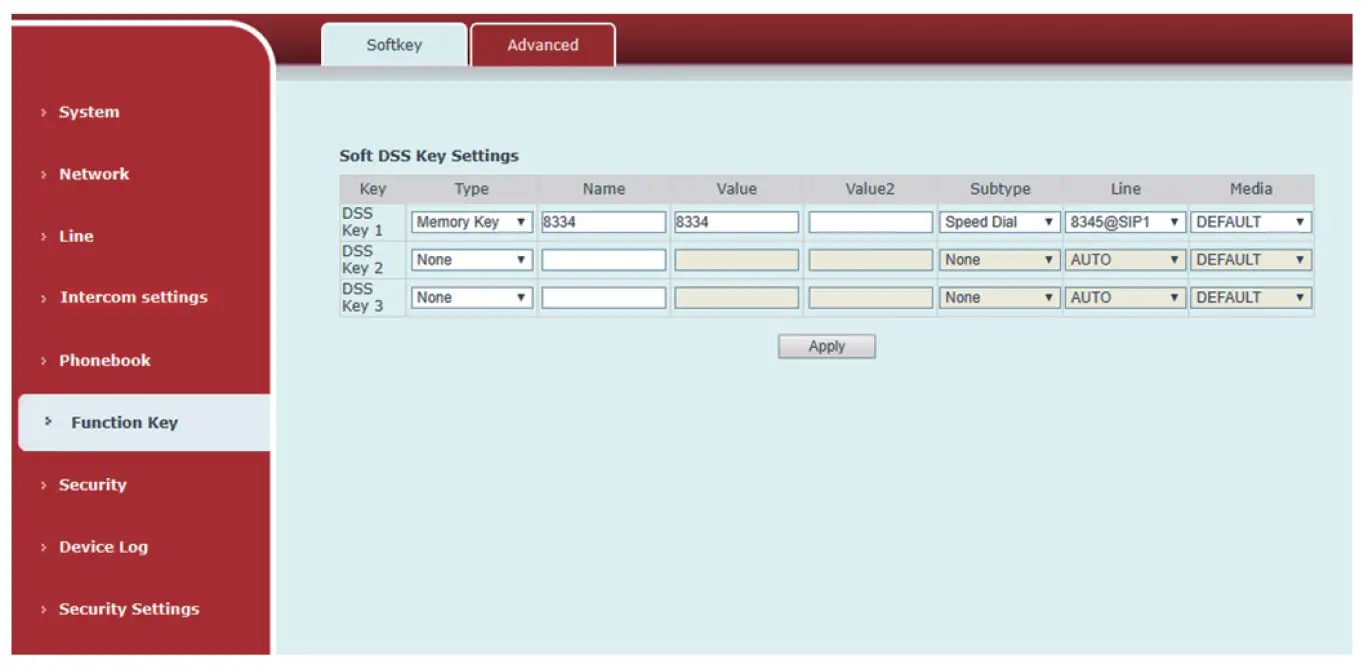
Step 5: Set the security function
1 set of short-circuit input and output settings, tamper alarm server settings.


