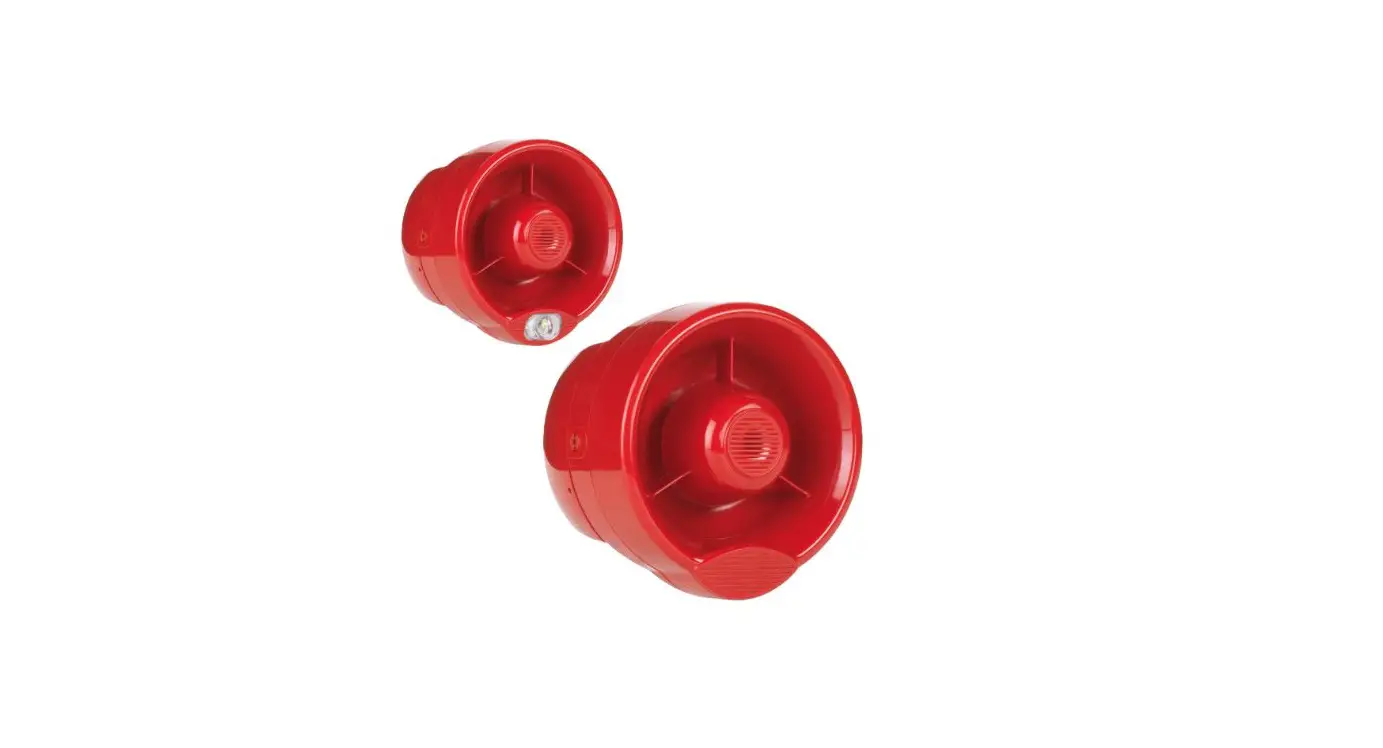
Hyfire TAU-MWSO-01 Taurus Wall Sounder Wireless Module
 OVERVIEW
 OVERVIEW
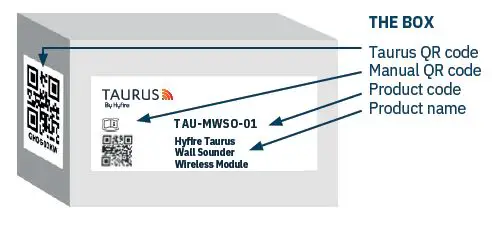
INSIDE THE BOX
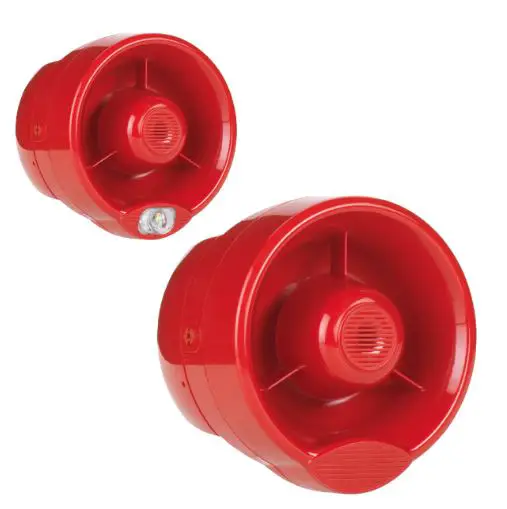
- Wall Sounder
- Wireless Module
- 2 x CR123A batteries
- 1 x Quick start guide
- × QR code
IMPORTANT TO CONSIDER
When mounting a wireless device a comprehensive radio survey should have been carried out to establish the location that provides the best coverage and optimum reach, Taking into consideration the building structure and materials, the survey identities the wireless infrastructure required and product locations for optimum performance, identifying any factor that could prevent radio integrity.
Avoid fixing or mounting the unit close to the following:
- Equipment that utilises large electrical currents
- Large metal objects or structures
- Fluorescent lighting fittings
- Metal ceiling structures
- IT cabling.
Keep 2 meters minimum spacing between other wireless equipment in the area to avoid signal interference. EN54 approved environmental temperature range is -10°C to +55°C The Wall Sounder Wireless Module is designed for use with the Conventional Wall Sounder (HFC-WSR-03) and the Conventional Wall Sounder VAD (HFC-SBR-23-03).
- When unboxing the sounder you will find the unit, its mounting base, a gasket and a security key.
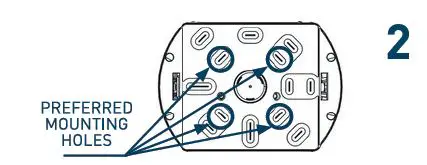
- The device comes with pre formed mounting mould to ensure ease of drilling.
- Security key prongs are fitted to protect againts unwanted removal of the attached device.
- Dip switches are found inside the sounder to select your desired tone and volume.
For more information, please refer to the complete product manual.
MOUNTING STEPS
Proceed as follows to complete the device installation.
Remove the mounting from the sounder by inserting the security key and turning to the unlocked position on both sides. Pull apart the two pieces.
- Using a screwdriver, break out the pre-cuts of the base following your preferred directions for the wireless configuration.
- Using a pencil, mark the holes on the desired surface you are drilling.
- Use an appropriately sized drill bit (6 mm) to drill the marked screw locations on the chosen surface.
- Be sure to use the correct fasteners for the type of surface you are mounting to.
- Screw the base to the wall using all the fixing holes and countersunk head screws of suitable size. Use the FOAM gasket to ensure IPX5 seal.

Install the sounder interface module into the base locate the bottom tags and push back in.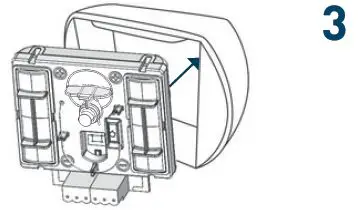
Use the DIP switch on the back of the sounder body to select the tone and volume required (see next page).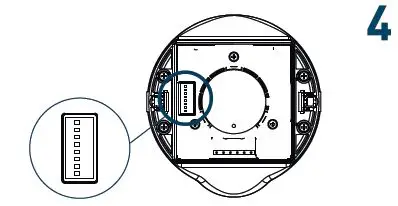
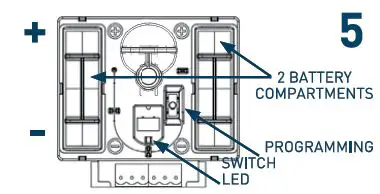
- Remove the battery compartment covers on the sounder interface module.
- Ensure the switch in the base of the module is in position ON.
- Fit the 2xCR123A batteries ensuring you have checked they are the correct way round observing the polarity indications on the base of the detector.
- The LED’s will signal once green then 4 times red. Move the switch to position 1.

- Ensure you replace the battery cover as this forms part of the sounder anti-tamper protection.
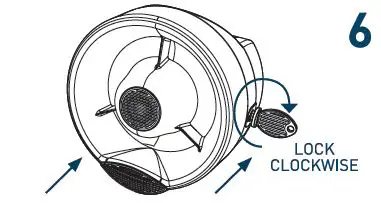
- Refit the sounder unit by pushing it back onto the base, push the key all the way in, and turn both security fixings back to the locked position on both sides.
- Put the QR code available in the box either on the system map or on the dedicated pages at the end of a translator or expander manual.

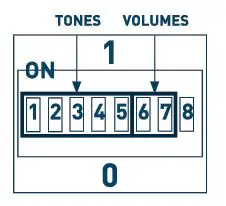
TONE AND VOLUME SELECTION
Use the DIP switch on the back of the sounder body to select tone and volume. Primary and secondary tones are selected according to the panel setting.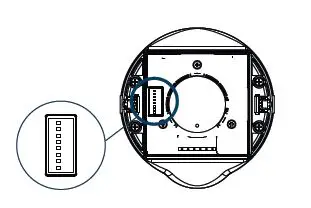
| DIP SWITCH NUMBER | DIP SWITCH GROUP FUNCTION | NOTES |
|
TONE SELECTION |
CHECK TONE SET TABLES | |
| 2 | ||
| 3 | ||
| 4 | ||
| 5 | ||
| 6 | VOLUME SELECTION | CHECK VOLUME TABLE |
| 7 | ||
| 8 | NOT USED |
| VOLUME | DIP CONFIGURATION |
| HIGH | 11 |
| MEDIUM-HIGH | 01 |
| MEDIUM LOW | 10 |
| LOW | 00 |
| Tone number | DIP switch configuration: 1, 2, 3, 4 and 5 | Primary Tone Designation | Primary Tone Description | Secondary Tone Description |
| 1′ | 11101 | Warble Tone | 800Hz for 500ms, then 1000Hz for 500ms | 800Hz continuous |
| 2. | 01011 | Continuous tone | 970Hz continuous tone | 1ODOHz continuous tone |
| 3. | 10101 | Slow Whoop!Dutch! | 500-1200Hz for 3500ms, then off for 500ms | 500-1200Hz for 3500ms, then off for 500ms |
| 4. | 00111 | German DIN tone | 1200-500Hz swept every 1□□Oms 11 Hzl | B0DHz continuous |
| 10010 | Alternate HF slow sweep | 2350-2900Hz swept every 333ms l3Hzl | 2400Hz continuous | |
| 6 | 11110 | Alternative warble | 800Hz for 250ms, then 960Hz for 250ms | 800Hz continuous |
| 7 | 11100 | Alternative warble | 500Hz for 250ms, then 600Hz for 250ms | 500Hz continuous |
| 8 | 10100 | Analog sweep tone | 500-600Hz swept every 500ms (2Hzl | 500Hz continuous |
| 9 | 10001 | Australian Alert (intermittent | 970Hz for 625ms, then OFF for 625ms | 240GHz continuous |
| 10 | 10110 | tone! Australian Evac (slow | 500-1200Hz sweep for 3750ms, then OFF for 250ms | 500-1200Hz sweep for 3750ms, then OFF for |
| 11 | 00001 | whoop! Alternative warble | 990Hz for 250ms, then 665Hz for 250ms | 250ms 990Hz continuous |
| 12 | 00101 | French tone AFNOR | 554Hz for 100ms, then 440Hz for 400ms | BD□Hz continuous |
| 13 | 11011 | HF Back up interrupted tone | 2800Hz for 1s, then OFF for 1s | 2800Hz continuous |
| 14 | 11001 | HF Back up interrupted tone – fast | 2800Hz for 150ms, then OFF for 150ms | 800Hz continuous |
| 15 | 01001 | HF Continuous | 2800Hz continuous | 2800Hz continuous |
| 16 | 01111 | Interrupted tone | 800Hz for 500ms,then OFF for 500ms | 800Hz continuous |
| 17 | 01101 | Interrupted tone medium | 1ODOHz for 250ms, then OFF for 250ms | 800Hz continuous |
| 18 | 01110 | ISO 8201 LF BS5839 Pt 1 1988 | 970Hz for 500ms, then OFF for 500ms | 970Hz for 500ms, then OFF for 500ms |
| 19 | 01100 | ISO 8201 HF | 2850Hz for 500ms, then OFF for 500ms | 2850Hz for 500ms, then OFF for 500ms |
| 20 | 11010 | LF Back up Alarm | 800Hz for 150ms, then OFF for 150ms | 800Hz continuous |
| 21 | 01010 | LF Buzz | 800-950Hz swept every 9ms | 800Hz continuous |
| 22 | 11000 | LF Continuous tone BS5839 | B00Hz continuous | BDDHz continuous |
| 23 | 11111 | Silent | No sound | 970Hz continuous |
| 24 | 00000 | Siren 2-way ramp long | 500-1200Hz rising for 3000ms, then falling for 3000ms | B00Hz continuous |
| 25 | 00010 | Siren 2-way ramp shortly | 500-1200Hz rising for 250ms, then falling for 250ms | 800Hz continuous |
| 26 | 00100 | Swedish all-clear signal | 660Hz continuous | 660Hz continuous |
| 27 | 00110 | Swedish Fire signal | 660Hz for 150ms, then OFF for 150ms | 660Hz for 150ms, then OFF for 150ms |
| 28 | 10111 | Sweep tone I1 Hzl | 800-900Hz swept every 1□□Oms | 800Hz continuous |
| 29 | 10011 | Sweep tone 13 Hzl | 800-970Hz swept every 333ms (3Hzl | 800Hz continuous |
| 30 | 01000 | Sweep tone (9 Hzl | 800-970Hz swept every 111ms (9Hzl | B00Hz continuous |
| 31 | 00011 | US Temporal Pattern HF | l2900Hz for 500ms ON, 500ms OFFI x3, then 1500ms OFF | 2900Hz continuous |
| 32 | 10000 | LF Sweep!Cranford tone! | 800-1ODOHz swept every 500ms (2Hzl | 800Hz continuous |
- Unit B12a, Holly Farm Business Park,
- Honiley, Warwickshire, CV8 1NP
- T: +44 (0)1926 485282,
- E: infordhyfirewireless.co.uk,
- W: www.hyfirewireless.com.


