infobit Icam VB60 All in one Video Conference Bar User Guide
Package Contents
- iCam VB60

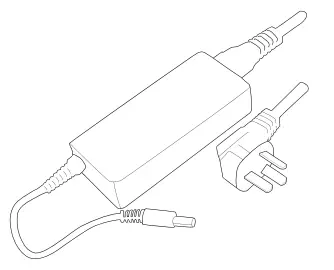
- Power Adapter

- USB-C to USB-A Cable (5m/16.4ft)

- Remote control

- User Guide


Optional Accessories
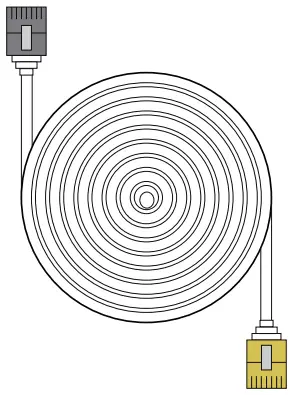
- Ethernet Cable(8m/26.2ft)

- Screen Mount

- Wall Mount

- Torx Key


*Optional accessories are not included in this package, they are sold separately.
Functions
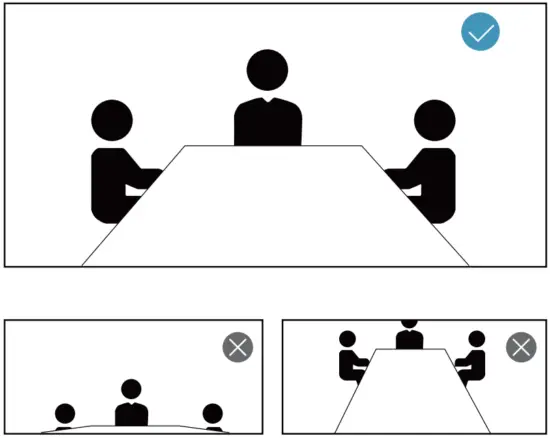
 118 ° diagonal field of view, so that any participants can be clearly visible
- 4K@30fps UHD video call
 Speaker tracking and closeup group
- High acoustic clarity, thanks to our generous 5-element omnidirectional microphone
- Outstanding speaker quality tuned for both phone calls and music
- Effective pickup distance up to 5 meters, full duplex technology brings clear and uninterrupted calls
- Absolutely echo-free and fine-tuned for various acoustic environments
- Daisy chain iSpeaker M500 Speaker Mic to adapt to all kinds of conference rooms
- Plug & Play, connect to PC via USB
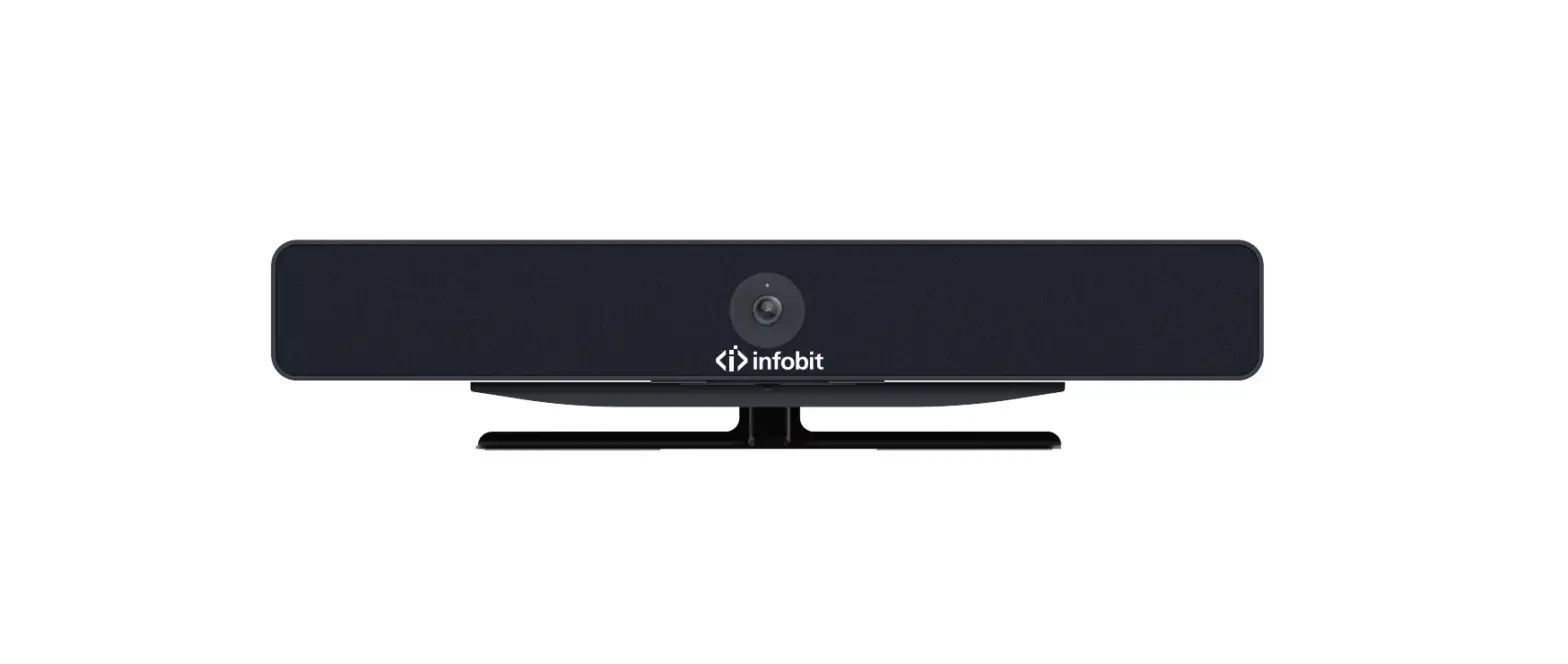
Product Overview

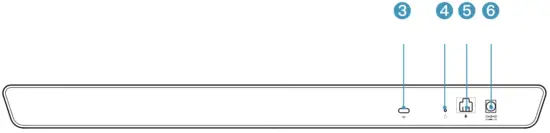
- Camera LED
- Status LED

- USB Type-C Port
- Factory Reset Pinhole
- Ethernet Port For Daisy Chain
- DC Power Input Jack
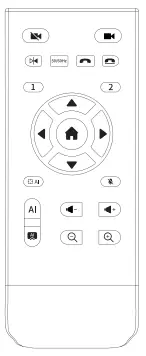
RC Guide
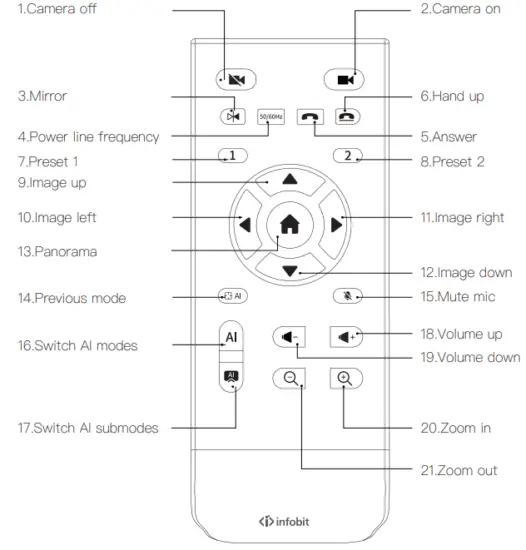
NO. | Button | Description |
| 1 | Camera off | Turn off the camera |
| 2 | Camera on | Turn on the camera |
| 3 | Mirror | Activate or deactivate mirror function |
| 4 | Power line frequency | Switch between 50Hz and 60 Hz |
| 5 | Answer | Compatible with UC software |
| 6 | Hand up | Compatible with UC software |
| 7 | Preset 1 | Short press to preset 1, long press to current position |
| 8 | Preset 2 | Short press to preset 2, long press to current position |
| 9 | Image up | Image up |
| 10 | Image left | Image left |
| 11 | Image right | Image right |
| 12 | Image down | Image down |
| 13 | Panorama | Switch to panoramic view |
| 14 | Previous mode | Back to previous saved AI mode |
| 15 | Mute mic | Mute or unmute microphone |
| 16 | Switch AI modes | Auto framing, speaker tracking, closeup group mode switch, Panoramic view switch |
| 17 | Switch AI submodes |
|
| 18 | Volume up | Voice + |
| 19 | Volume down | Voice – |
| 20 | Zoom in | Image + |
| 21 | Zoom out | Image – |
Installations
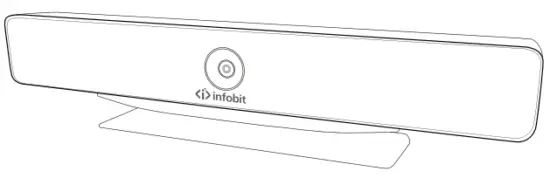
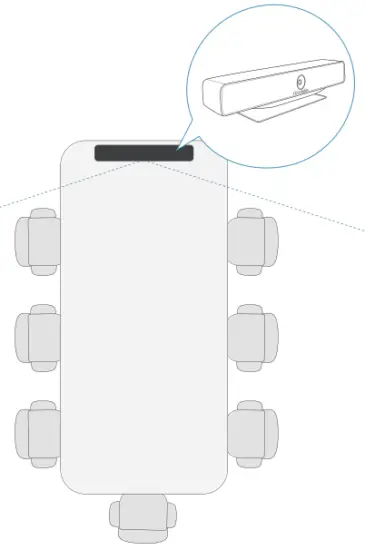
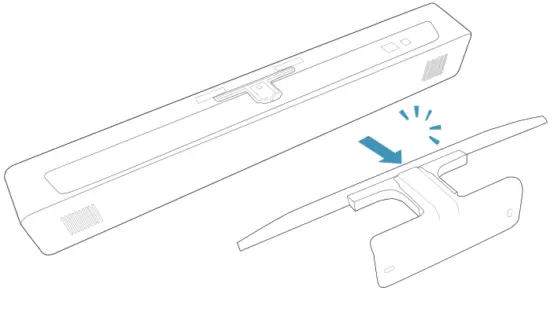
- Put on a Flat Surface

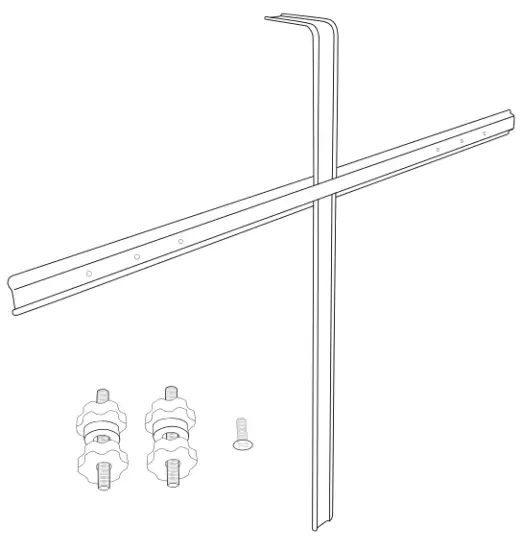
- Mount on a Screen

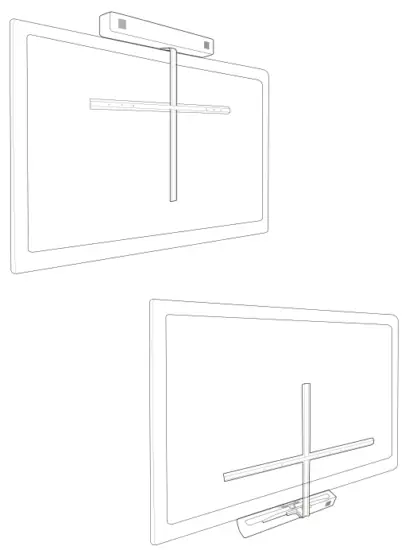
*Using the screen mount may change central gravity of the screen. Check the stability after mounting the iCam VB60
If not stable, the screen should be wall mounted.
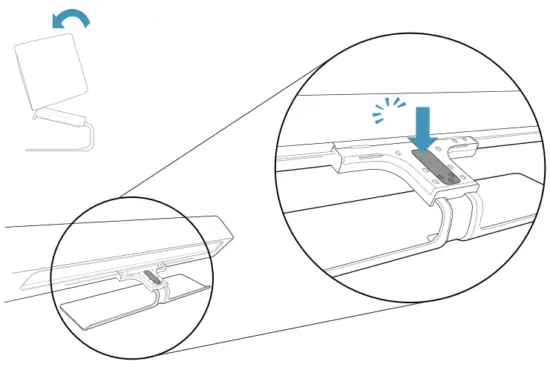
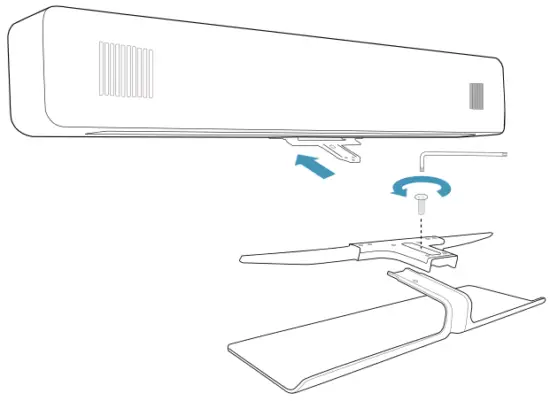
- Attach the horizontal part to your screen and tighten the bolts.

- Release the iCam VB60


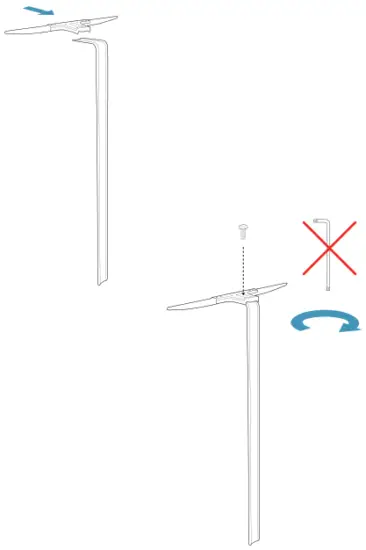
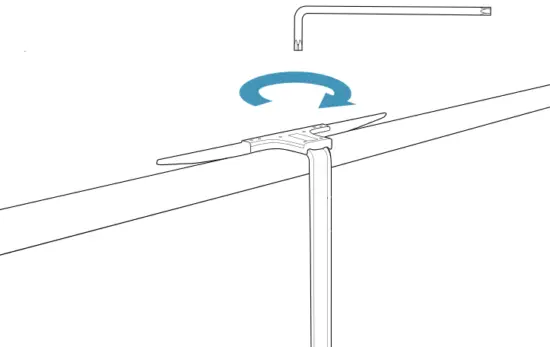
- Attach top part to vertical part. Finger tighten the screw so that you can adjust the mounting position.

- Place the vertical part on the screen and adjust the position.

- Fasten the screen mount.

- Tighten the screw on the top.

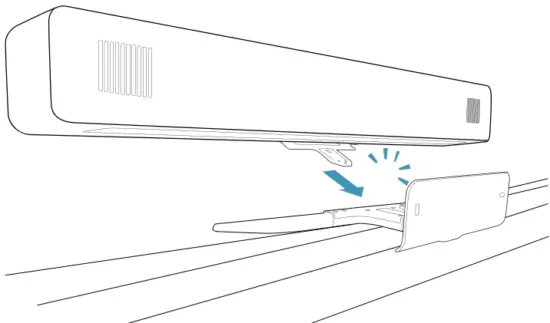
- Place the iCam VB60

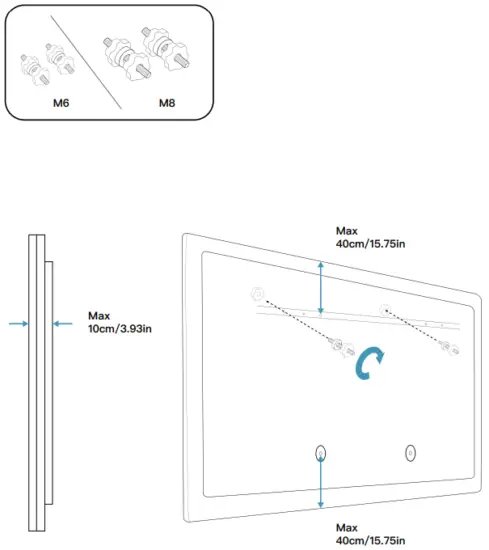
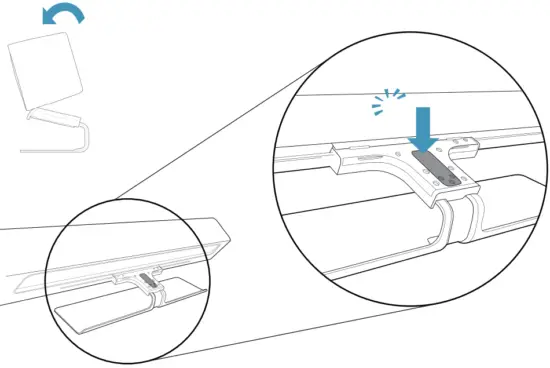
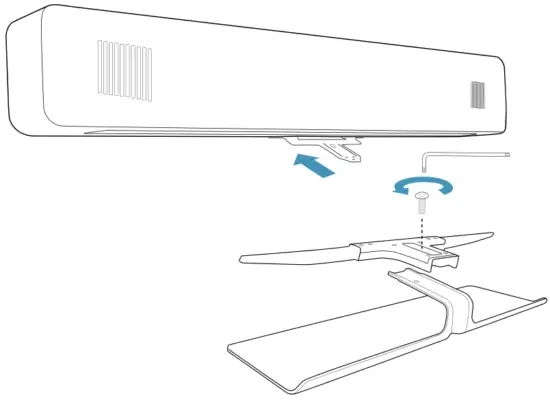
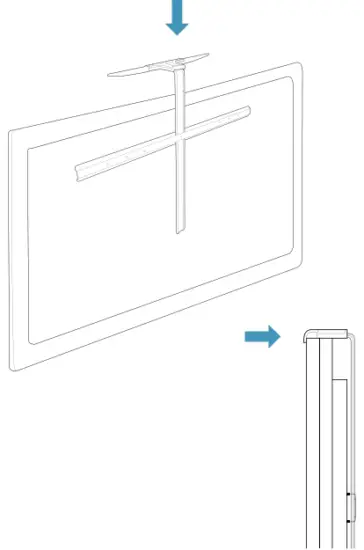
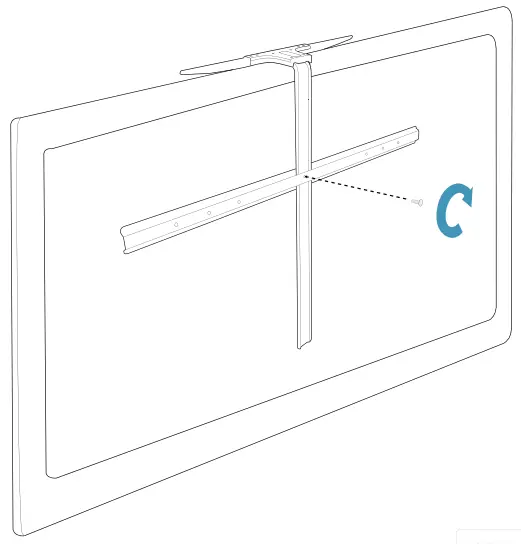
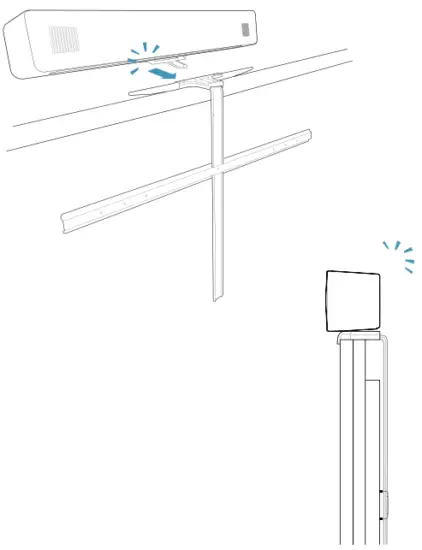
*Flip to place below the screen.
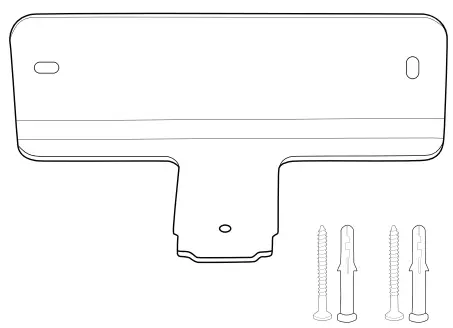
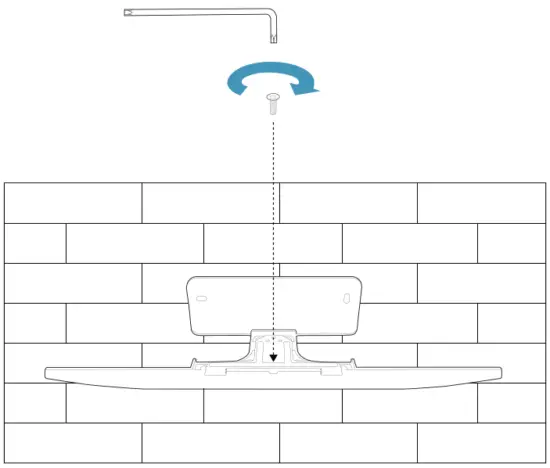
Mount on a Wall
*Due to the size and mass of this product, it is important that the wall-mounted system is safely installed according to these installation instructions.
- The wall and mounting hardware must be able to safely support the product.
- The wall-mounted system must be installed by qualified personnel, in accordance with state and local building regulations.
- Fasten the wall mount.

- Release the iCam VB60

- Adjust the position and tighten the screw on the


- Place the iCam VB60

*Flip to place below the screen.

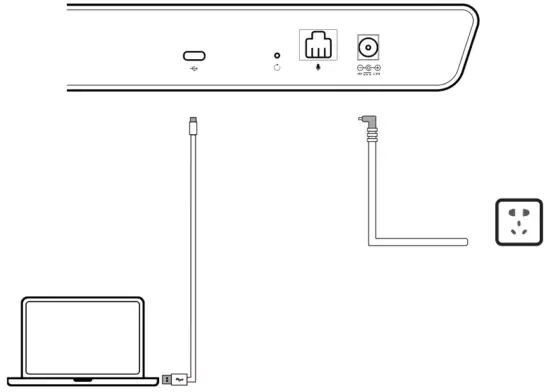
Connecting
- Connection of iCam VB60
- Plug the power cord into the corresponding port of iCam VB60 and connect the external power supply;
- The Status LED light will show yellow when iCam VB60 is powered on;

Adjusting the Camera Tilt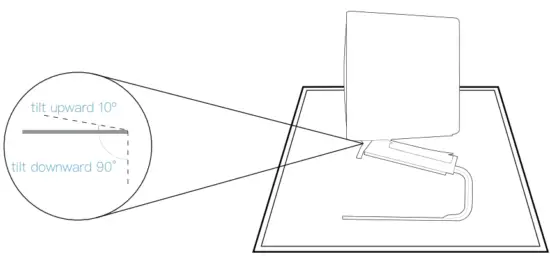
LED Indicators
- Camera LED
 When the camera is not turned on, the Camera LED light is off. When the camera is working, the Camera LED light shows white.
 - Status LED
- To be connected When the adapter is powered on, the Status LED light shows yellow. When the USB connection is established, the Status LED light turns white.
- Mute Mode When the microphone is muted, the Status LED light turns red.
- Update Mode When a firmware update is in progress, the Status LED light flashes blue.
- To be connected
Notes & Warnings
Please read and follow all the safety instructions carefully.
- Use the provided cable to charge the device.
- Unauthorized dismantlement and strong impact may damage the device.
- Keep the device away from high-temperature environments, heat sources, strong magnetic, or electric fields.
- Do not immerse the device in water or any other liquid. Store it in a dry and cool place.
- Constant high volume sounds can harm human hearing.
- Dispose of the packaging materials, device, battery, and other electronic components properly.
- Do not dismantle, crush, or throw the battery into fire.
- The packaging and the device contain small components that can be dangerous to children. Please keep them out of children’s reach.
- The device can be an interference source for other electronic devices and medical equipment.
Product Information
Size
- 570mm * 81mm * 77mm
Camera Spec
- F/1.8 aperture
- 4K Video Output
- Diagonal FOV 118°
- Horizontal FOV 107°
- Vertical FOV 70°
- Automatic White Balance and Exposure
- 2.26mm Fixed Focus
Video Spec
- 4K@30fps
- 16:9 Aspect Ratio
- Digital PTZ
Speaker Spec
- Rated Power: 5W
- Speaker Frequency Response: 130Hz ~20kHz
- Speaker Volume: 96±3dB SPL @0dB 1kHz at 0.1m
Audio Specs
- 5-element Omnidirectional Microphone Array
- Voice Pickup Range≥5m
Connection Mode
- USB Type-C
USB Version
- USB 2.0
Input
- 48V
 1.35A
1.35A
*The above specifications are subject to change without notice.
www.infobitav.com
[email protected]


