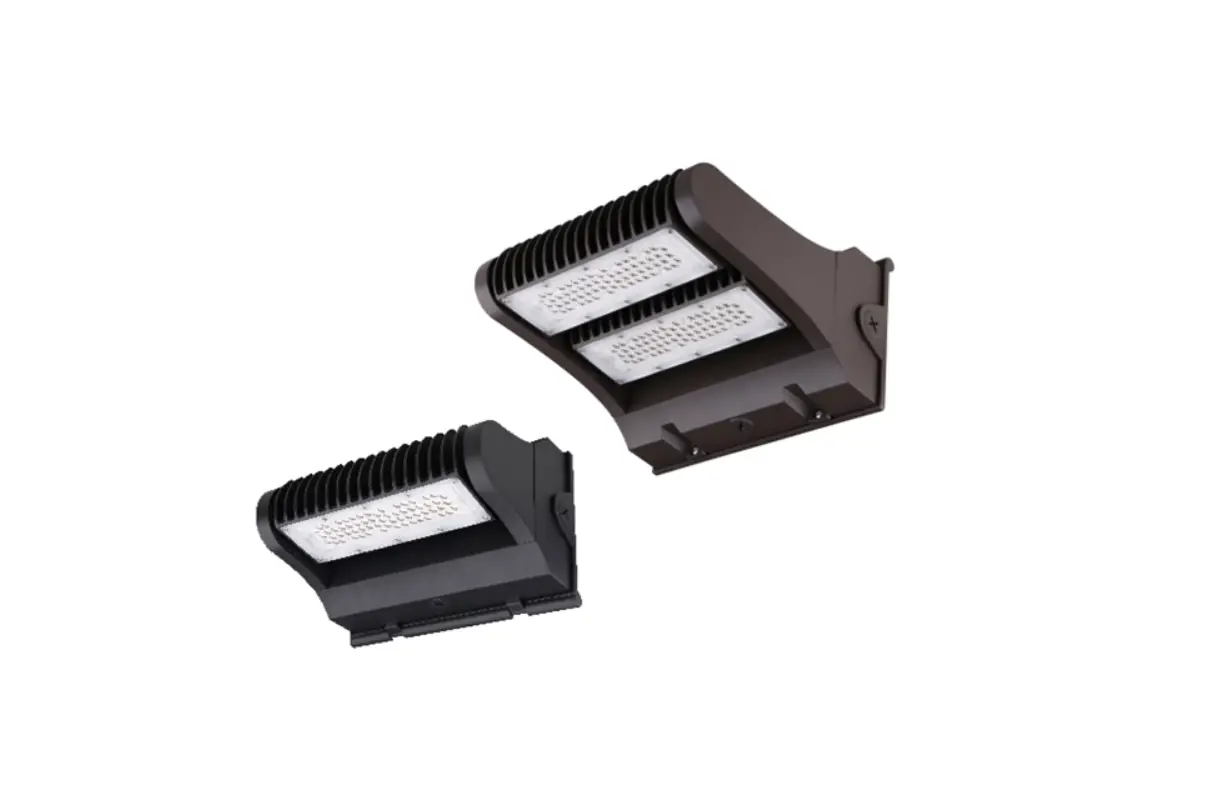
JADEMAR LIGHTING JWP-R Rotating Wall Pack Light
INSTALLATION REQUIREMENTS
 WARNING: Risk of electric shock and serious injury. SHUT OFF BREAKER AT PANEL BEFORE INSTALLING.
Warning:
- Can not use the electric generator to test the LED lamp.
- This luminaire must be installed in accordance with your local electrical codes and requirements;
- Do not install the luminaire in the rain, to avoid lightning stroke and damage to luminaire.
Installation Notice: 1. This luminaire must be installed by qualified electrician to avoid electric shock and fire accident; - Wear gloves before installation in order to avoid injury;
- Turn off the power immediately when there is smoke and fire during installation; inform professionals to overhaul;
- This luminaire is suited for outdoor use.
Standard wire:
L/live wire: N/null wire: Black\Brown; White\Blue;
Ground wire: Green\ Yellow-green
Warning: MIN 75 °C SUPPLY CONDUCTOR THIS PRODUCT MUST BE INSTALLED IN ACCORDANCE WITHTHE AFPLICABLE INSTALLATION CODE BY A PERSON FAMILIAR WITH THE CONSTRUCTION AND OPERATION OFTHE PRODUCT AND THE HAZARDS INVOLVED.
INSTALLATION STEPS – WIRING FROM THE BOTTOM OF THE LUMINAIRE
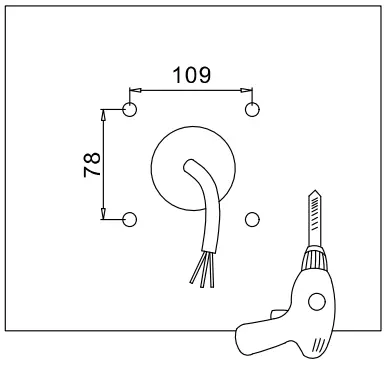
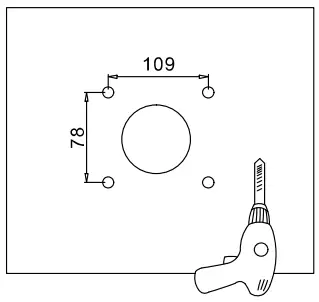
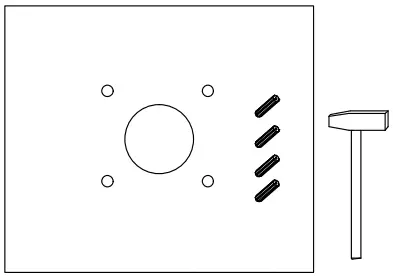
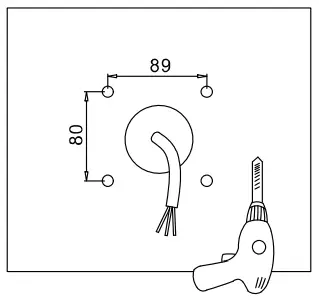
- Cut the holes on the wall according to locating plate. Figure 1-1

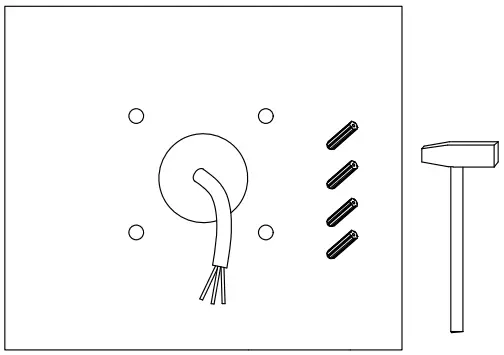
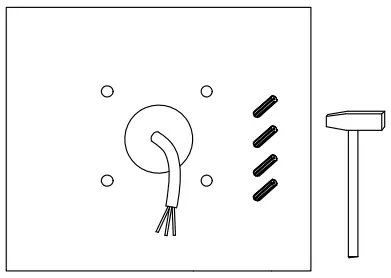
- Fix rubber plugs into holes Figure 1-2

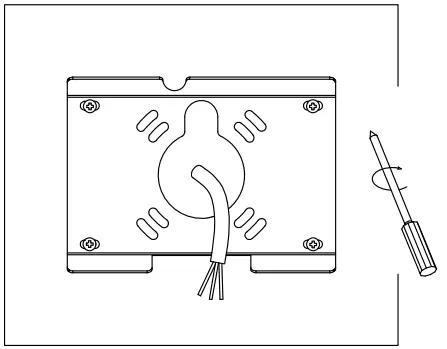
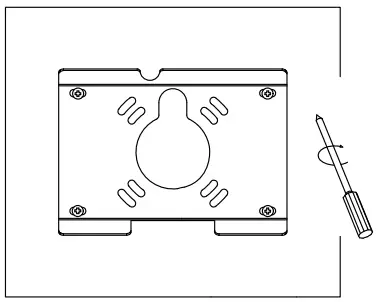
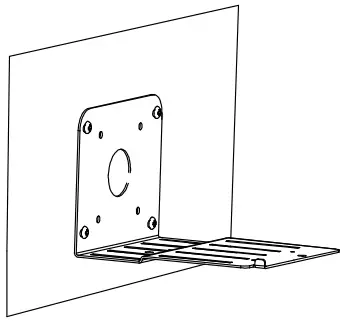
- Align mounting bracket with hole; tighten screws. Figure 1-3

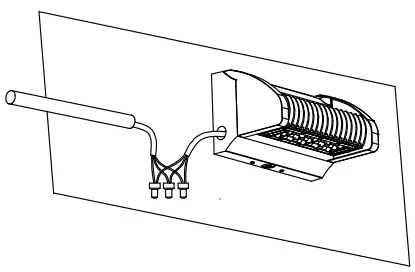
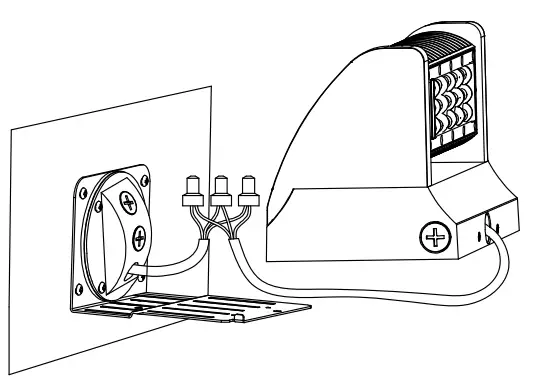
- Make wiring connection and go through isolation treatment Figure 1-4

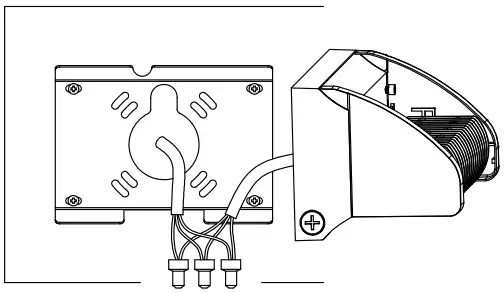
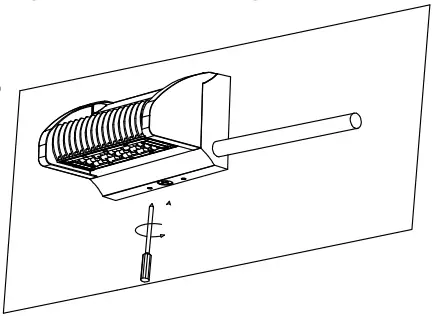
- Fix the luminaire on the bracket and tighten screws on the bottom. Figure 1-5

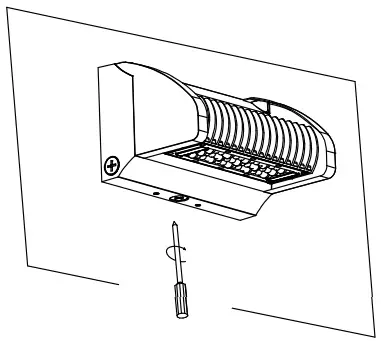
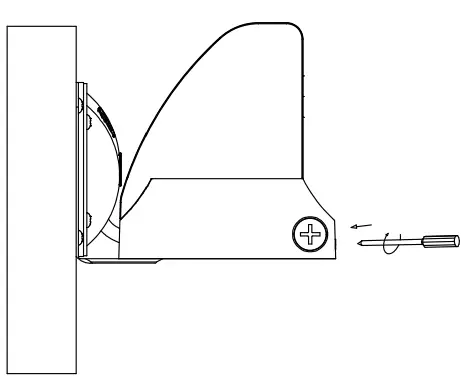
- After Installation, tighten the screws. Figure 1-6


INSTALLATION STEPS – WIRING FROM THE SIDE OF LUMINAIRE
- Cut the holes on the wall according to locating plate. Figure 2-1

- Fix rubber plugs into holes Figure 2-2

- Align mounting bracket with hole; tighten screws. Figure 2-3

- Fix the luminaire on the bracket; make wiring connection from side and go through isolation treatment. Figure 2-4

- Tighten the pipe on the luminaire; after installation, tighten the screws. Figure 2-5

INSTALLATION STEPS – BRACKET INSTALLATION
- Cut holes on the wall according to locating plate. Figure 3-1

- Fix rubber plugs into holes. Figure 3-2

- Align mounting bracket with hole; tighten screws. Figure 3-3

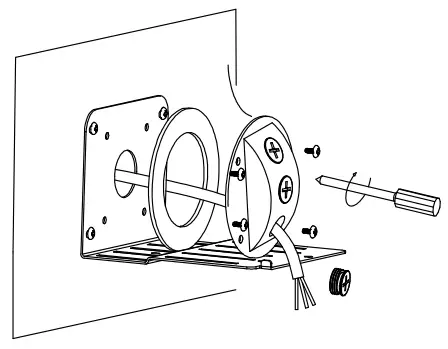
- Pass wires through rubber ring and junction box, align with holes and lock junction box. Figure 3-4

- Make wiring connection and go through isolation treatment Figure 3-5

- Push the wires into junction box; after installation, tighten the screws. Figure 3-6

CUSTOMER SERVICE

Miami, FL USA – [email protected]
T: 305.640.0465 – F: 305.640.0468
WWW.JADEMAR.COM
Revised 04/2023


