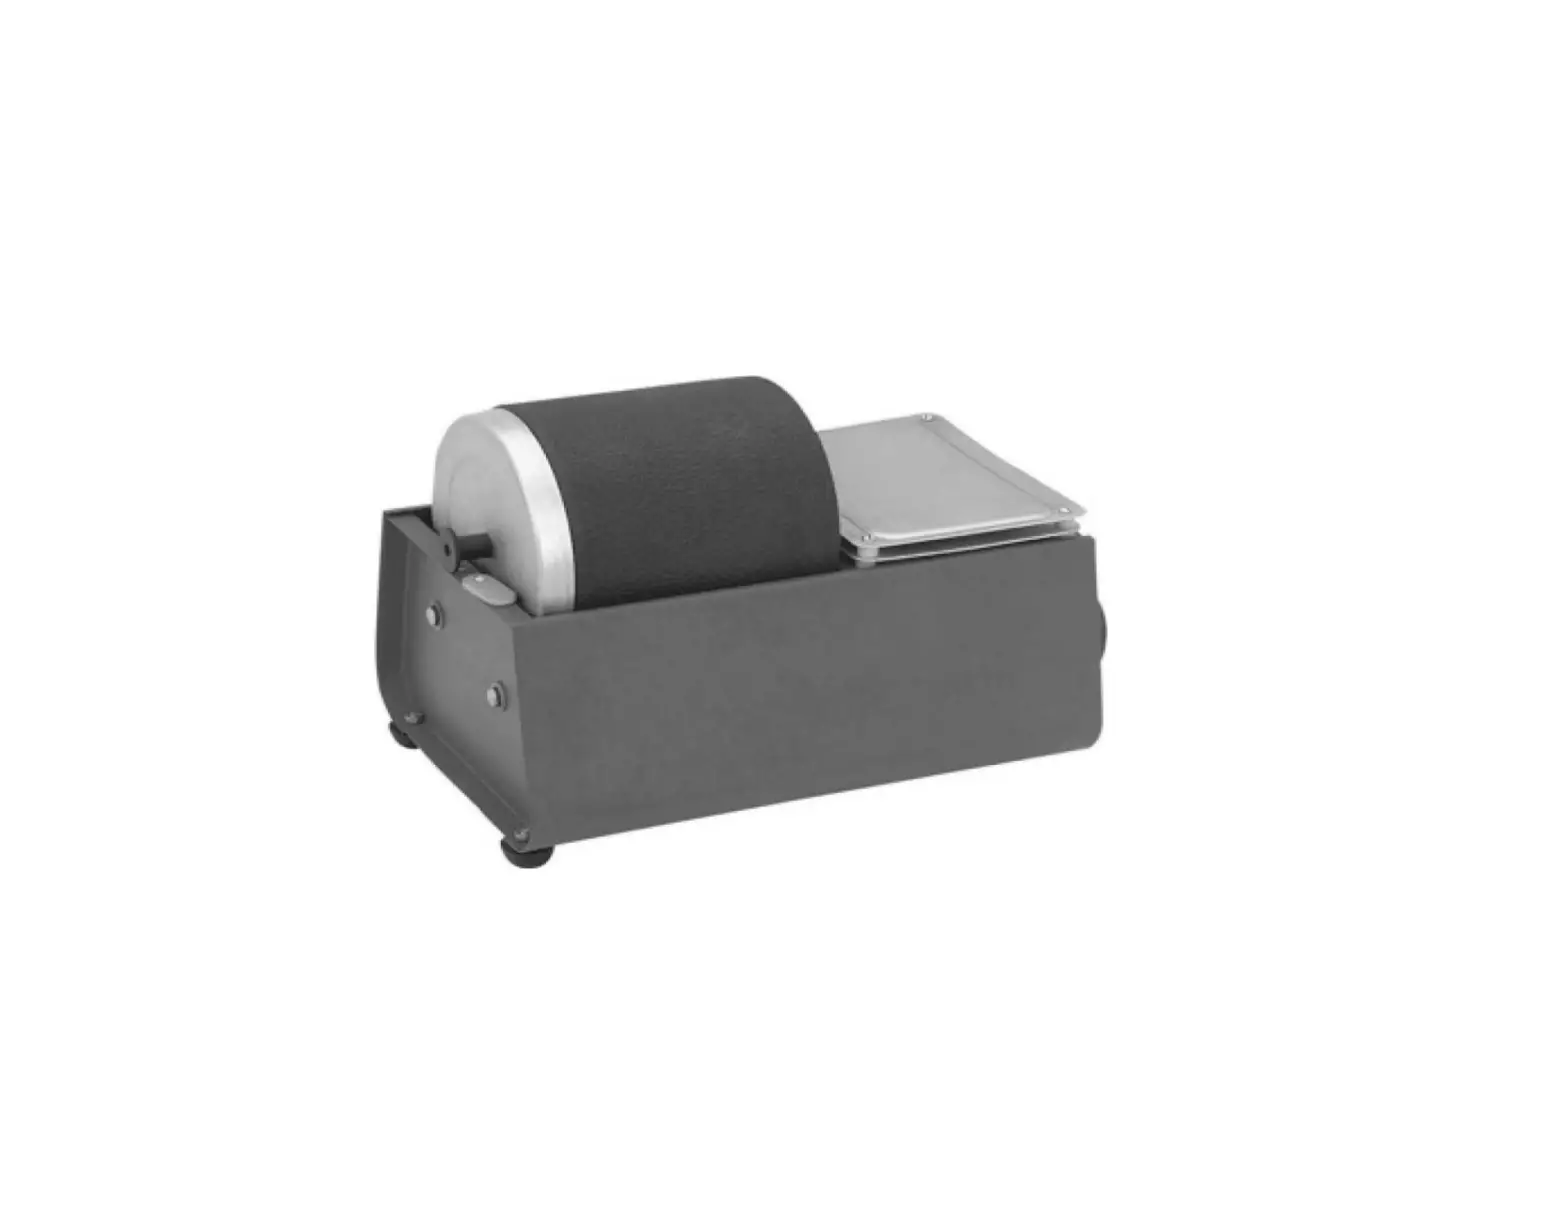
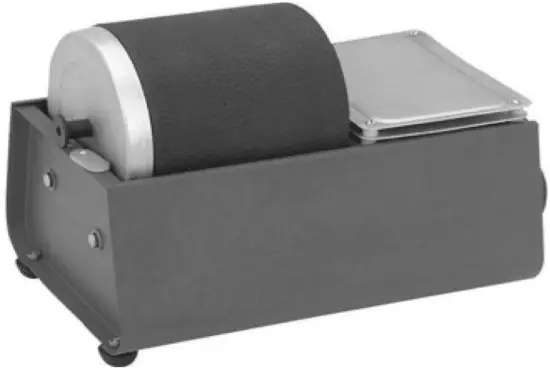
POWER FIST 8980765 3 lb Rotary Rock Tumbler
SPECIFICATIONS
| Motor | 120V AC |
| Capacity | 3 lb per drum |
| Frequency Rating | 60 Hz |
| Amperage Rating | 0.2A |
| Wattage Rating | 26W |
| Dimensions | 9.4L x 6.4W x 7.1H in. |
| Bowl size | 4.2 (dia.) x 4.7 (deep) in. |
| Barrel Type | Rubber |
| Standards | CSA 221387 |
| Includes | 1/2 lb of walnut shell media |
INTRODUCTION
This vibratory tumbler simulates the natural action of flowing water or ocean waves to deburr, clean and polish metal, metal jewelry without gemstones, small metal parts and a variety of rocks.
SAFETY
WARNING! Read and understand all instructions before using this tool. The operator must follow basic precautions to reduce the risk of personal injury and/or damage to the equipment.
Keep this manual for safety warnings, precautions, operating or inspection and maintenance instructions.
HAZARD DEFINITIONS
Please familiarize yourself with the hazard notices found in this manual. A notice is an alert that th re is a possibility of property damage, injury or death if certain instructions are not followed.
DANGER!
This notice indicates an immediate and specific hazard that will result in severe personal injury or death if the proper precautions are not taken.
WARNING!
This notice indicates a specific hazard or unsafe practice that could result in severe personal injury or death if the proper precautions are not taken.
CAUTION!
This notice indicates a potentially hazardous situation that may result in minor or moderate injury if proper practices are not taken.
NOTICE!
This notice indicates that a specific hazard or unsafe practice will result in equipment or property damage, but not personal injury.
WORK AREA
- Operate in a safe work environment. Keep your work area clean, well-lit and free of any distractions.
- Do not operate in damp or wet location and do not expose to rain.
- Store properly in a safe, dry location to prevent rust or damage.
- Keep out of reach of children.
- Make sure that conditions remain unchanged before operation.
PERSONAL SAFETY
WARNING! Wear personal protective equipment approved by the Canadian Standards Association (CSA) or American National Standards Institute (ANSI).
PERSONAL PROTECTIVE EQUIPMENT
- Always wear impact safety goggles that provide front and side protection for the eyes. Eye protection equipment should comply with CSA Z94.3-07 or ANSI Z87.1 standards based on the type of work performed.
- Wear gloves that provide protection based on the work materials.
- Wear protective clothing designed for the work environment and materials.
PERSONAL PRECAUTIONS
- Do not operate when under the influence of drugs, alcohol or medications.
- This tool was designed for a specific function. Do not modify or alter this tool.
- Do not use it for an unintended purpose.
- Do not force tool.
SPECIFIC SAFETY PRECAUTIONS
WARNING! DO NOT let comfort or familiarity with product (gained from repeated use) replace strict adherence to the tool safety rules. If you use this tool unsafely or incorrectly, you can suffer serious personal injury.
- Use the correct tool for the job. This tool was designed for a specific function. Do not modify or alter this tool and do not use it for an unintended purpose.
- Do not use the tool if any parts are damage broken or misplaced. Repair or replace the parts.
UNPACKING
WARNING! Do not operate the tool if any part is missing. Replace the missing part before operating. Failure to do so could result in a malfunction and personal injury.
Remove the parts and accessories from the packaging and inspect for damage. Make sure that all items in the parts list are included.
OPERATION
- Remove the barrel (#12) from the unit and then remove the knurled nuts (#7) along with the washers (#8).
- Remove the barrel lid (#9).
- Load the barrel (#12) to 1/2 capacity for polishing and to 3/4 for more pointed, abrasive rocks.
- Ensure all materials are similar in nature.
- Add enough water to reach the bottom of the top layer of rocks. Plastic pellets (not included) can also be used.
NOTICE! It is imperative to always load the barrel with the proper amounts of materials. Failure to do so may result in unsuccessful performance or motor damage. - Seal the rubber barrel (#12) and replace the barrel lid (#9) along with knurled nuts (#7) and washers (#8).
NOTICE! Make sure to check the lid seal during the first ten minutes to ensure that it is not leaking. - Set the rubber barrel (#12) on the roller shafts (#4, 42).
- Make sure the stops (#6) are lightly touching the barrel lid (#9). This will prevent them from rubbing and will reduce friction.
- Turn on the power switch (#27).
- For best results, use a five-step process: first grind, second grind, pre polish, polish and burnish.
a. Check for and release gas build up after 12 hours. Check every 24 hours, releasing gas and adding water as needed.
b. First grind, where initial sharp edges are rounded, typically takes 7 to 10 days.
c. To initiate second grind, when more smoothing occurs, remove and clean contents and then replace and run for 2 to 3 days continuously.
d. To initiate pre-polish, remove and clean contents and then replace and run for week, checking every other day.
e. Remove materials and rub with towel, dampened leather or polish to test their shine. If not satisfactory, replace and run for another 24 hours.
f. To initiate polish, remove and clean contents and then replace and run with polishing compound (not included) for 5 to 7 days.
g. Once complete, remove contents and clean. If materials have a film, replace and add mixture of powdered soap (not included) and water and run for 4 days.
h. If satisfied, remove materials and clean. - Hard materials may require more than a single process.
CARE & MAINTENANCE
CAUTION! Check tumbler regularly to ensure unit is running properly and not overheating.
- Before the first use, and a once month thereafter, place a few drops of oil on the driving shaft bearings (#1, 2, 3).
- Check the V-belt (#40) for tension before each use. It must be kept as loose as possible without allowing it to slip on the pulley (#36).
- Make sure the exteriors of the rubber barrel (#12) are clean so that they do not slip on the roller shafts (#4, 42). Wipe with a soapy cloth and then wipe clean with a damp cloth and let dry thoroughly.
- Maintain the tool’s labels and name plates. These carry important information. If any are unreadable or missing, contact Princess Auto Ltd. for replacements.
CLEANING
CAUTION! Do not use liquid cleaners or solvents.
- Clean the rubber barrels after every step in the process.
- Never pour the slurry into your home plumbing system.
- Clean the contents after every step in the process.
- Wipe external surfaces with a clean cloth after every use.
- Do not use bleach-based products.
STORAGE
- Store properly in safe, dry location to prevent rust or damage.
- Keep out of reach of children.
TROUBLESHOOTING
Visit a Princess Auto Ltd. location for a solution if the tool does not function properly or parts are missing. If unable to do so, have a qualified technician service the tool.
PARTS BREAKDOWN

PARTS LIST
| # | DESCRIPTION | QTY |
| 1 | Screw (M3 x 5) | 5 |
| 2 | Shaft Cover | 2 |
| 3 | Bushing Set | 4 |
| 4 | Shaft A | 1 |
| 5 | Idler Shaft Set | 2 |
| 6 | Stop | 1 |
| 7 | Knurled Nut | 1 |
| 8 | Washer | 1 |
| 9 | Barrel Lid | 1 |
| 10 | Boot Gasket | 1 |
| 11 | Inner Lid | 1 |
| 12 | Rubber Barrel | 1 |
| 13 | Top Cover | 1 |
| 14 | Screws (M3 x 16) | 4 |
| 15 | Middle Plate | 1 |
| 16 | Spacers (B) | 4 |
| 17 | Fan | 1 |
| 18 | Square Nuts | 2 |
| 19 | Motor | 1 |
| 20 | Motor Connectors | 2 |
| 21 | Spacers | 4 |
| 22 | Inner Nut | 1 |
| 23 | Adjusting Plate | 1 |
| 24 | Washers (04) | 4 |
| 25 | Spring Washers (04) | 4 |
| 26 | Screws (M4 x 50) | 4 |
| 27 | Power Switch | 1 |
| 28 | Power Plug/Cord | 1 |
| 29 | Plug | 1 |
| 30 | Outer Nut | 1 |
| 31 | Small Set | 1 |
| 32 | Nuts Connector | 1 |
| 33 | Foot A | 4 |
| 34 | Screen | 1 |
| 35 | Screws (M4 x 8) | 6 |
| 36 | Pulley | 1 |
| 37 | O-Ring (08) | 6 |
| 38 | Washer (08) | 1 |
| 39 | Foot B | 2 |
| 40 | V-Belt | 1 |
| 41 | Base | 1 |
| 42 | Driving Shaft Bearing | 1 |