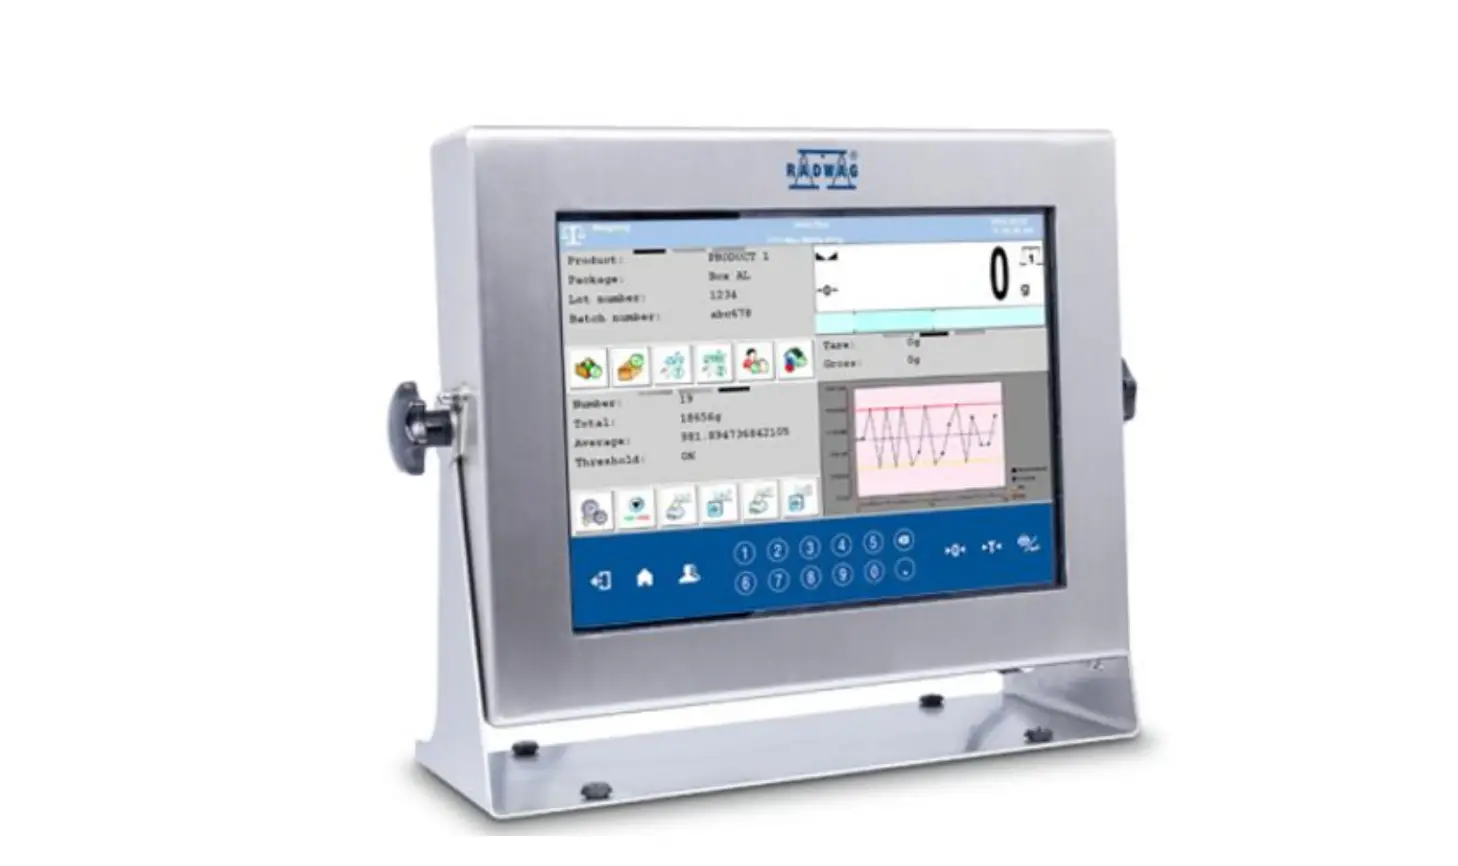
RADWAG PUE HY10 Stainless Steel Full-Featured Weighing Indicator

CONTENT
NOTES AND WARNINGS
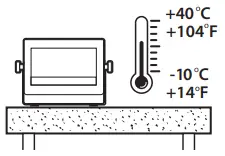
- Operate the indicator in a room where the temperature ranges between -10–40 °C (14–104 °F) and where the relative humidity is below 80%. Potential temperature change shall occur gradually and slowly.
- Place the scale away from heat sources. Avoid exposing the scale to the sunlight.

- Avoid exposing the scale to the influence of a magnetic field. Do not weigh magnetic substances.
- Not intended for use within EX zones. Not intended for weighing explosive or flammable substances.
- Place the indicator on the workstation and leave it until it reaches ambient temperature.

Indicator Temperature Stabilization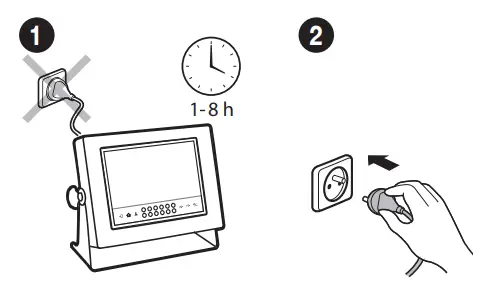
Prior to switching the device on the let, it reaches room temperature (estimated stabilization time: 8 hours).
Indicator Start-Up
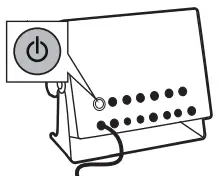
- Connect the indicator to the mains.
- Press the ON/OFF key to start the indicator.
PANEL AND SCREEN
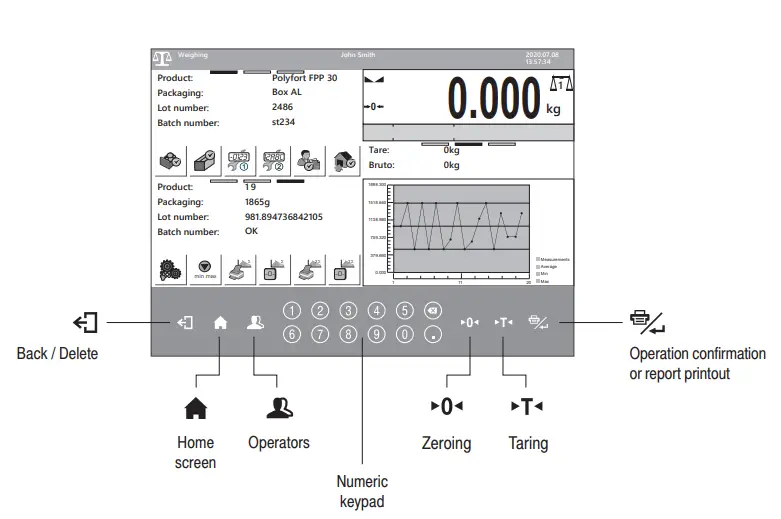
Keypad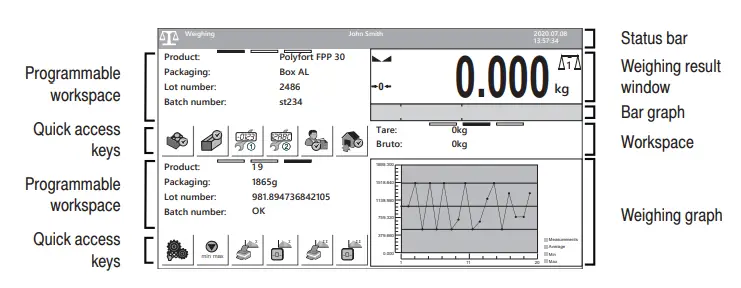
Home Screen
SETTINGS
Working Modes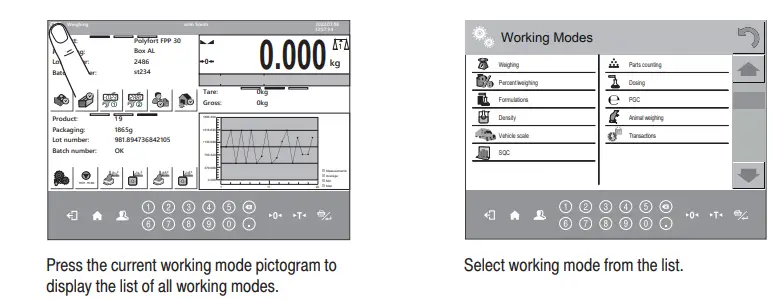
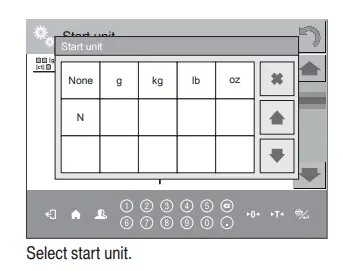
Unit Selection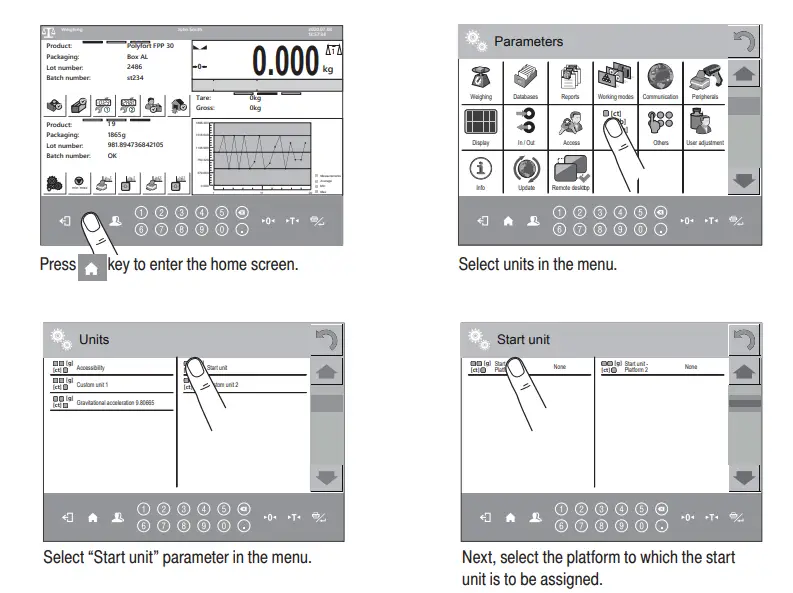
CONNECTING PERIPHERALS
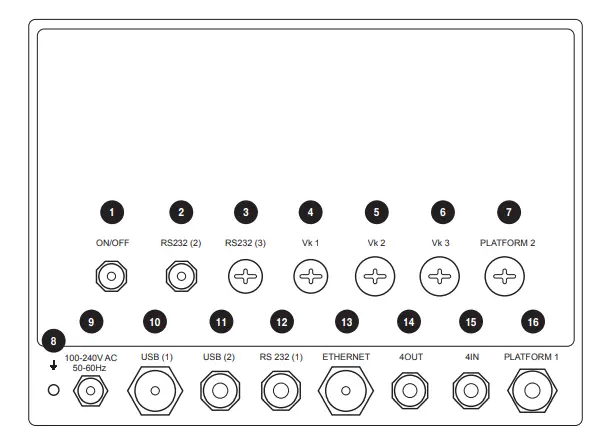
| 1 | Power supply switch. |
| 2 | RS232 (2) connector. |
| 3 | RS232(3) M12 8P connector – optional. |
| 4 | Spot intended for cable gland / additional equipment connector (Vk1, RS485, Analog OUT) – mounted depending on indicator type, by default plugged. |
| 5 | Spot intended for cable gland / additional equipment connector (Vk1, 12OUT, PROFIBUS OUT) – mounted depending on indicator type, by default plugged. |
| 6 | Spot intended for cable gland / additional equipment connector (Vk1, 12IN, PROFIBUS IN) – mounted depending on indicator type, by default plugged. |
| 7 | Platform 2 cable gland. |
| 8 | Grounding terminal. |
| 9 | Power cord cable gland. |
| 10 | USB A connector. |
| 11 | USB M12 4P connector. |
| 12 | RS232(1) M12 8P connector. |
| 13 | Ethernet RJ45 connector. |
| 14 | 4OUT M12 8P connector. |
| 15 | 4IN M12 8P connector. |
| 16 | Platform 1 cable gland. |
CLEANING AND MAINTENANCE
Notes and Warnings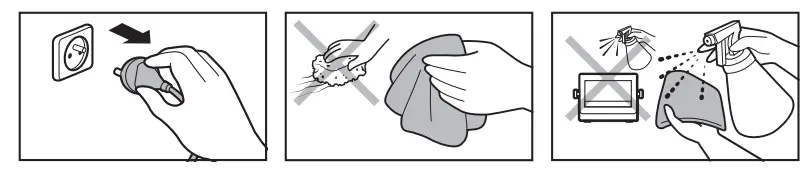
- Prior to cleaning it is necessary to disconnect the indicator from the mains. Unplug the connector from the electrical socket. Unused communication interfaces must be covered with hole plugs.
- For cleaning use only soft cloths made of microfiber. Do not use any abrasive cloths or any material that may scratch the surface!
- Apply the cleanser onto the cloth first. Avoid applying the cleaner directly onto the device!
- Avoid using aggressive cleaning agents (e.g. solvents, cleansers containing chlorine, corrosive substances, and bleach).
- Avoid using cleansers containing abrasive substances or scouring preparations.
- Avoid using an intense water jet for cleaning.
Cleaning Tips
- STAINLESS STEEL ELEMENTS, ALUMINUM can be cleaned with a soft cloth slightly moistened with a solution of water and a mild detergent (e.g. soap or dishwashing liquid)
- Plastic elements can be cleaned with a soft cloth slightly moistened with a solution of water and a mild detergent (e.g. soap or dishwashing liquid).
- Dry cleaned elements using a soft and dry cloth or use a dust-free paper towel to absorb the remaining moisture.
- Do not install the components until they are completely dry.


