![]() USER MANUAL
USER MANUAL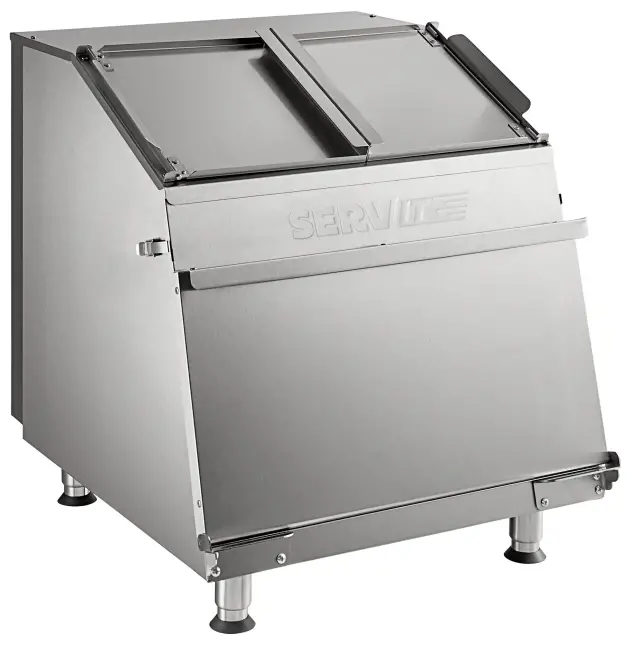 Tortilla Chip Warmer
Models: 423TCW26, 423TCW46
Owner’s Information
Please complete this information and retain this manual for the life of the equipment. For warranty purposes, please fill out and retain this information. An example of the serial plate(s) for these units are included below for reference.
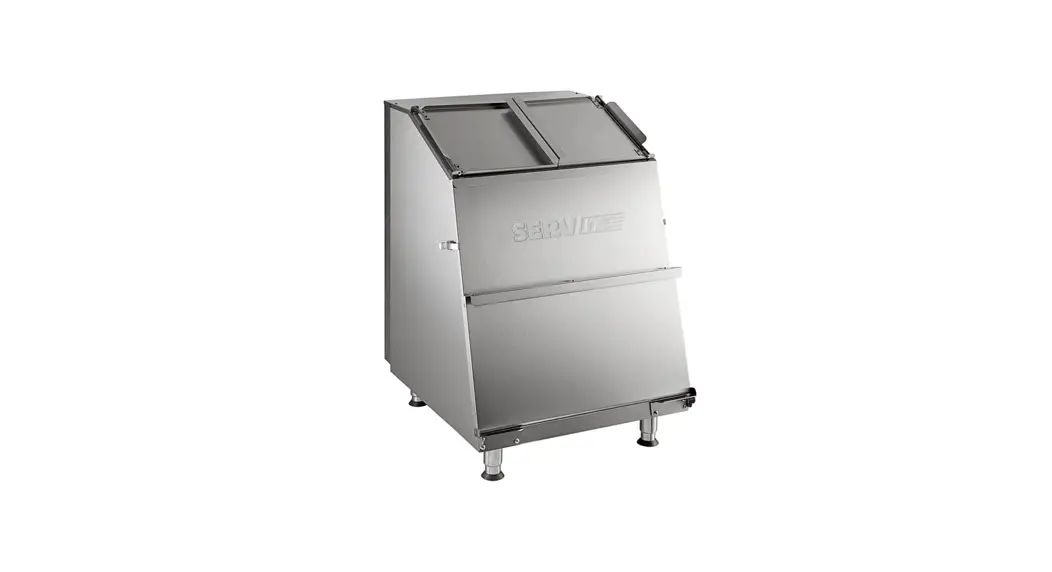
ServIt Chip Warmers are designed to keep tortilla chips at optimum serving temperatures without affecting quality. They are built for tough kitchen duty with rugged stainless steel construction, heavy-duty hardware, and a fully insulated cabinet.
Chip Warmers keep tortilla chips hot and flavor-fresh until served and give the user control to dial in their preferred temperature. The heat allows the aroma of the chips to permeate your establishment and leaves customers hungry and salivating.
This manual provides the installation, safety, and operating instructions for Chip Warmers. ServIt recommends all installation, operating, and safety instructions appearing in this manual be read prior to installation or operation of the unit.
SAFETY WARNINGS
ServIt Chip Warmers are designed, built and sold for commercial use and should be operated by trained personnel only. Clearly post all CAUTIONS, WARNINGS and OPERATING INSTRUCTIONS near each unit to ensure proper operation and to reduce the chance of personal injury and/or equipment damage.
WARNING: Do not store or use gasoline or other flammable vapors and liquids in the vicinity of this or any other appliance. Keep the area free and clear of combustible materials.
WARNING: Improper installation, adjustment, alteration, service or maintenance can cause property damage, injury or death. Read the Installation, Operating and Maintenance Instructions thoroughly before installing or servicing this equipment.
CAUTION: These models are designed, built, and sold for commercial use only. If these models are positioned so the general public can use the equipment, make sure all cautions, warnings, and operating instructions are clearly posted near each unit so that anyone using the equipment can use it correctly and not injure themselves or the equipment.
CAUTION: Locate unit in an area that is convenient for use. The location should be level and strong enough to support the weight of the unit and contents.
ELECTRIC SHOCK HAZARD:
- Plug unit into a properly grounded electrical receptacle of the correct voltage, size, and plug configuration. If plug and receptacle do not match, contact a qualified electrician to determine and install proper voltage and size electrical receptacle.
- Built-in units must be installed by a qualified electrician. Installation must conform to all local electrical codes. Installation by unqualified personnel will void unit warranty and may lead to electric shock or burn, as well as damage to unit and/or its surroundings.
- Turn OFF power switch, unplug power cord/turn off power at circuit breaker, and allow unit to cool before performing any cleaning, adjustments, or maintenance.
- DO NOT submerge or saturate with water. Unit is not waterproof. Do not operate if unit has been submerged or saturated with water.
- Unit is not weatherproof. Locate unit indoors where ambient air temperature is a minimum of 70°F (21°C).
- Do not clean unit when it is energized or hot.
- Do not steam clean or use excessive water on the unit.
- This unit is not “jet-proof” construction. Do not use jetclean spray to clean this unit.
- Do not pull unit by power cord.
- Discontinue use if power cord is frayed or worn.
- Do not allow liquids to spill into the unit.
- This unit must be serviced by qualified personnel only. Service by unqualified personnel may lead to electric shock or burn.
FIRE HAZARD:
- Locate unit a minimum of 1″ (25 mm) from combustible walls and materials. If safe distances are not maintained, discoloration or combustion could occur.
- Do not use harsh chemicals such as bleach (or cleaners containing bleach), oven cleaners, or flammable cleaning solutions to clean this unit.
BURN HAZARD:
- Some exterior surfaces on unit will get hot. Use caution when touching these areas.
- Use caution when opening doors. Hot air escapes when doors are open.
SPECIFICATIONS
- Cordset Configuration: 120V: NEMA5-15P plug, 3 wire grounded cord.
- If the supply cord is damaged, the manufacturer or an authorized service agent or a similarly qualified person must replace it to avoid a hazard or voiding the warranty.
| Item # | Size | Voltage | Wattage | Plug Configuration | Shipping Weight |
| 423TCW26 | 26 Gallon | 120V | 1500W | NEMA 5-15P | 140 LB |
| 423TCW46 | 46 Gallon | 120V | 1500W | NEMA 5-15P | 160 LB |
OPERATING INSTRUCTIONS
General Information:
- Always clean equipment thoroughly before first use. (See general cleaning instructions).
- Check rating label for your model designation and electrical rating.
- For best results, use stainless steel countertops.
WARNING: ELECTRICAL SHOCK HAZARD. FAILURE TO FOLLOW THE INSTRUCTIONS IN THIS MANUAL COULD RESULT IN SERIOUS INJURY OR DEATH. Electrical Ground is required on this appliance. Do not modify the power supply cord plug. If it does not fit into the outlet, have the proper outlet installed by a qualified electrician Do not use an extension cord with this appliance. Check with a qualified electrician if you are unsure as to whether the appliance is properly grounded.
General Operating Instructions:
- All foodservice equipment should be operated by trained personnel.
- Do not allow your customers to come in contact with any surface labeled CAUTION HOT.
Installation and First Use Instructions:
CAUTION: Chip warmer units are heavy and require two people to install.
- Remove unit from carton and all packaging materials from the unit.
- Remove the manual/information packet from the unit.
- Place the unit in desired location
NOTE: Place where the ambient air temperature is constant and a minimum of 70°F. Avoid areas that are subject to active air movements or currents. Make sure the unit is located on a solid, level area and at a proper height for convenient use and also following health standards. - Locate an outlet of the correct plug and voltage type for the unit and plug in
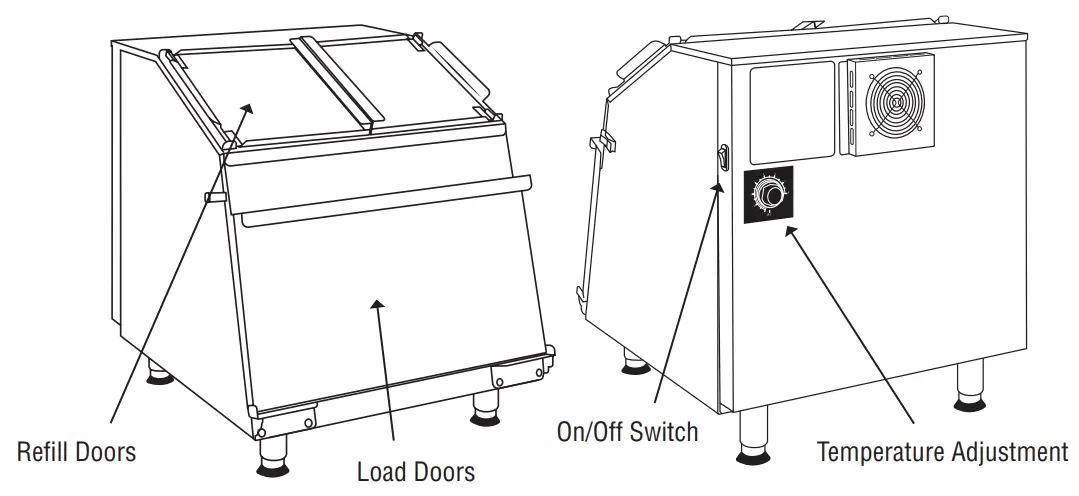
- Turn on the light power switch and adjust the temperature control knob to the desired setting.
CAUTION: Initial heating of unit may generate smoke or fumes and must be done in a well ventilated area.
This is standard and may last up to 60 minutes during initial startup. Operate unit without food until smoke and fumes have dissipated. - Place food product directly in the top of the unit using the refill doors.
- Allow product to preheat up to 60 minutes to the desired temperature.
- Open bottom loading door to serve warmed food product, and close once done.
- When the unit is no longer needed during the day, or needs to be cleaned, turn the temperature knob to the “OFF” position and allow up to 1 hour to cool down. Fully opening the refill and load doors will accelerate the cooldown process.
GENERAL CLEANING
Notes:
- NEVER clean any electrical unit by immersing it in water. Turn off before surface cleaning.
- Always clean equipment thoroughly before first use. Clean unit daily. Except where noted on charts: Use warm, soapy water. Mild cleansers and PLASTIC scouring pads may be used to remove any baked-on crumbs or food product.
- Turn off electrical units before cleaning or servicing. All service should be performed by an authorized service agency.
Instructions:
- Follow General Cleaning instructions (above).
- Open the refill and load doors, and remove the interior crumb tray.
- Above the load door, there is a panel attached by a latch on either side, open the latches and remove the panel.
- Use a soft clean cloth with a solution of mild detergent and warm water, clean the inside of the warmer, doors, interior crumb tray, load door, and any other surfaces that may come in contact with food product.
- Rinse all surfaces with warm water and wipe dry.
CAUTION: Do not use a hose or pressurized water to spray the unit - Once all surfaces are dry, replace the interior crumb tray and front panel using the side latches. Close all doors and turn on the unit and let run for 15-20 minutes to ensure all moisture has dissipated.
- Once the unit has cooled down, wipe down all exterior surfaces with a cleaner or degreaser for stainless steel.
TROUBLESHOOTING
| Issue | Potential Cause | Solution |
| Unit is too hot | Temperature control is set too high | Change the temperature to a lower setting |
| Unit is connected to incorrect power supply | Contact an authorized electrician | |
| Defective internal thermostat | Contact an authorized electrician | |
| Unit is not hot enough | Unit has not had enough time to preheat | Allow unit 60 minutes to reach operating temperature. |
| Temperature control is set too low | Change the temperature to a higher setting | |
| Door(s) are not closed completely | Make sure all doors are completely closed | |
| Defective internal thermostat | Contact an authorized electrician | |
| Unit is not working at all | Unit not plugged in | Plug unit into proper power supply |
| Unit not turned on | Turn control knob away from “OFF” | |
| Circuit breaker tripped | Reset circuit breaker | |
| Control knob is defective | Contact an authorized electrician | |
| Defective internal thermostat | Contact an authorized electrician | |
| Heating element is burned out | Contact an authorized electrician |
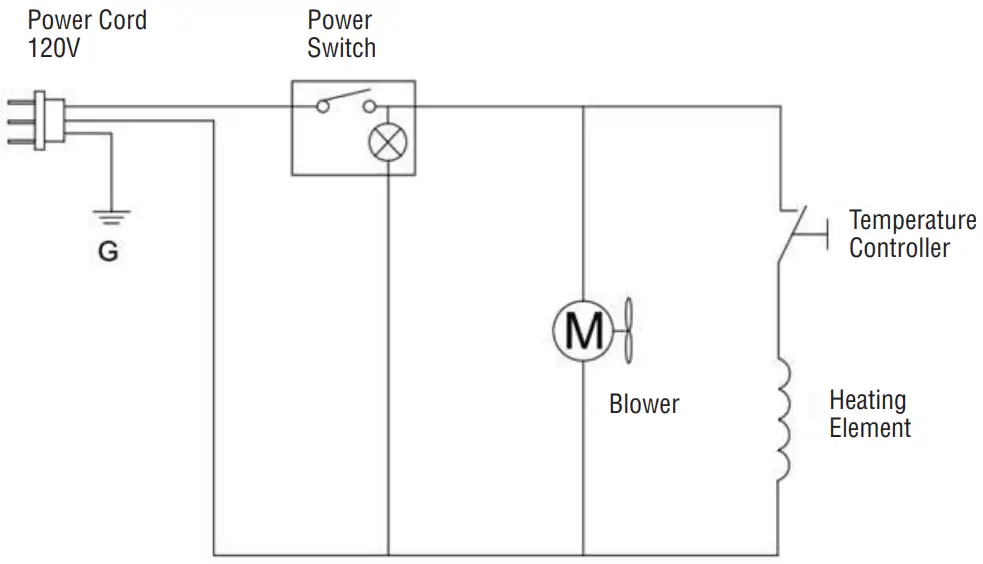
CHIP WARMER WIRING DIAGRAM
CHIP WARMER EXPLODED VIEW
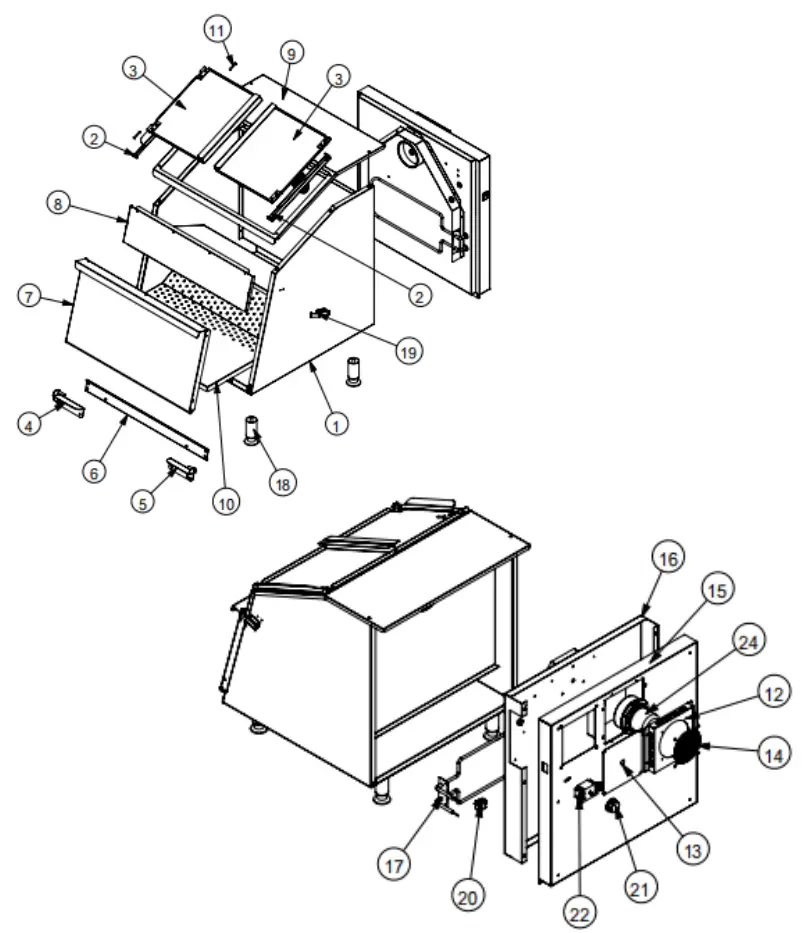
CHIP WARMER PARTS LIST
| Item | Part # | Description |
| 1 | BWG26-010001 | Chip Warmer Body |
| BWG46-010001 | ||
| 2 | BWG26-020001 | Upper Door Fixing Plate |
| 3 | BWG26-030001 | Upper Door |
| 4 | BWG26-040001 | Lower Door Fixing Plate-Left |
| 5 | BWG26-050001 | Lower Door Fixing Plate-Right |
| 6 | BWG26-060001 | Lower Baffle |
| 7 | BWG26-070001 | Lower Door |
| 8 | BWG26-080001 | Front Panel |
| BWG46-020001 | ||
| 9 | BWG26-090001 | Top Panel |
| BWG46-030001 | ||
| 10 | BWG26-100001 | Inner Grid Plate |
| 11 | BWG26-110001 | Spring Pin |
| 12 | BWG26-120001 | Exhaust Hood |
| 13 | BWG26-130001 | Power Cord Fixed Board |
| 14 | BWG26-150001 | Fan Wire Cover |
| 15 | BWG26-170001 | Electrically Controlled Rear Panel |
| BWG46-040001 | ||
| 16 | BWG26-180001 | Electrically Controlled Rear Panel |
| BWG46-050001 | ||
| 17 | BWG26-190001 | Heating Element |
| 18 | N/S | Adjust Foot 1/2-13 |
| 19 | N/S | Stainless Steel Buckle |
| 20 | N/S | Power Switch |
| 21 | N/S | Knob |
| 22 | N/S | Thermostat |
| 23 | N/S | Power Cord |
| 24 | N/S | Blower |
| 25 | N/S | Philip Head Screw 1/4-20*0.75 |
| 26 | N/S | Philip Head Semi-Cylindrical Screw #10-24*.05 |
Model No……………………………………………………
Serial No…………………………………………………….
Date of Purchase:…………………………………….
Serial Plate Example:…………………………….
ITEM #: 423TCW26
MANUFACTURER MODEL #: ECW26
DESCRIPTION: CHIP WARMER, 26 GALLON,
FIFO TOP LOAD
VOLTAGE: 120V
WATTAGE: 1500W
SERIAL #:
MADE IN CHINA


